NetScaler MAS (Management and Analytics System) is the successor of Citrix Command Center and NetScaler Insight Center. MAS provides automation, monitoring, reporting, and deep analytics of networking products such as NetScaler and SD-WAN.
Citrix Command Center – https://jgspiers.com/citrix-command-center-setup-configure-monitor/
NetScaler Insight Center – https://jgspiers.com/netscaler-insight-center/
The first release of NetScaler MAS was version 11.1 build 47.14 followed by 48.10.
NetScaler MAS is also available as a service from Citrix Cloud. See – https://jgspiers.com/netscaler-management-analytics-service/
If you are already familiar with NSIC and CCC, you will find that MAS can do just about everything, but with the benefit of using only one, unified console. NetScaler MAS brings the following abilities to the table:
- Manage NetScaler ADC (VPX, MPX, SDX), NetScaler CPX, NetScaler Gateway and NetScaler SD-WAN (only WAN Optimization edition at present) appliances.
- Certificate Management allowing you to install new certificates and receive alerts when certificates are near the expiry date.
- Configure appliances remotely allowing you to perform actions such as upgrading the device firmware, running configuration command across single or multiple devices with the use of Configuration Jobs.
- Web, HDX, Gateway and Security Insight which was a big part of NetScaler Insight Center. These features allow you to get an insight in to HDX and Web sessions, authentication failrues and statistics, and reports on the security of your NetScaler appliances.
Analytics data collection based on NetScaler appliance license:
HDX Insight: Standard = No HDX Insight. Enterprise = 1 hour (real time), Platinum = Historical.
Web Insight: Standard/Enterprise & Platinum ADC.
Gateway Insight: Platinum.
Security Inight: Platinum or Enterprise with AppFirewall license.
Video Insight: NetScaler-T 1000 or VPX-T (telco).
WAN Insight – WANOP SD-WAN or above.
NMAS Hardware and Software Requirements
8GB RAM.
4vCPU (8vCPU recommended for better performance).
120GB disk space (500GB recommended for better performance).
1 vNIC.
100Mbps or 1Gbps network throughput.
ESXi – version 4.1 or later
XenServer – version 5.6 or later
Hyper-V – 2012 or later
NetScaler v11 build 65.x and above for Gateway Insight to work.
♣ Migrate NSIC to MAS
♣ Install MAS (ESXi)
♣ Configure MAS Network Settings
♣ Add NetScaler Instance
♣ Change Network Settings, Password & Hostname
♣ Enable MAS GUI HTTPS
♣ Shutdown and reboot MAS via CLI
♣ Upgrade MAS
♣ Configure MAS Backups and transfer to external location (v12.0.51.24)
♣ Replicate MAS configuration to backup MAS server
♣ Configure NetScaler Instance Backups
♣ External LDAP Authentication
♣ MAS User Account Lockout
♣ MAS User Password Complexity
♣ Create Tenants
♣ NTP Configuration
♣ Configuring Cipher Groups
♣ Email Notifications
♣ Generate Tech Support File
♣ Upload Geo Database File
♣ Create Site (Datacentre)
♣ Configure NMAS for High Availability including change to active/passive (v12.0.51.24)
♣ Viewing Web Insight
♣ Viewing HDX Insight
♣ Viewing Gateway Insight
♣ Analytics Network Reporting
♣ SSL Certificates Dashboard
♣ NetScaler Configuration Auditing
♣ Configuration Audit Templates
♣ NetScaler Configuration Advice
♣ NetScaler Severity Based Events
♣ NetScaler Instance Actions
♣ Upload MAS License (Virtual Server Packs)
♣ Choose Virtual Servers to manage (v11.1.49.16) including manual selection (v12.0.51.24)
♣ Create Rules Based On Events
♣ Change Event Severity
♣ Install SSL Certificate On Remote Instance
♣ Create Configuration Jobs
♣ NetScaler VPX check-in/check-out licenses on MAS 12.0.41.16+
♣ Upgrade Remote NetScaler
♣ Create Thresholds
♣ Integrate MAS with Citrix Director
♣ Clear MAS Configuration
♣ Troubleshoot MAS
You can migrate NSIC (NetScaler Insight Center) to MAS allowing you to retain all configurations previously made without having to start from scratch again. This is currently only supported for standalone deployements. To migrate NSIC to MAS you must be running NSIC 11.1 build 47.14 or later and have downloaded at a minimum the NetScaler MAS 11.1.49.16.tgz image file.
To initiate a migration, move the downloaded image file to the /var/mps/mps_images directory on NSIC using SCP.
Note: This is the directory you place a new image on, if updating the appliance via CLI.
Log on to NSIC shell using a program such as PuTTy and extract the image file using commands cd /var/mps/mps_images/ and tar -zxvf build-mas-11.1-49.16.tgz.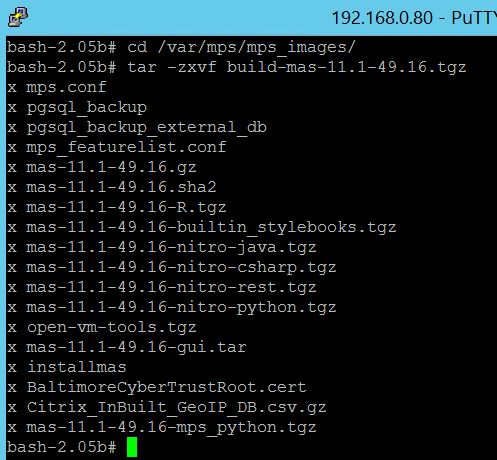
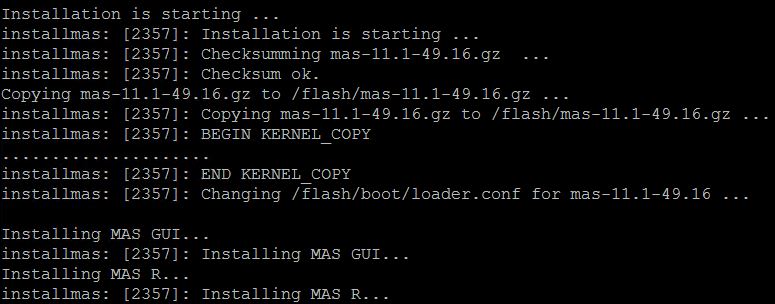
Finally run command ./installmas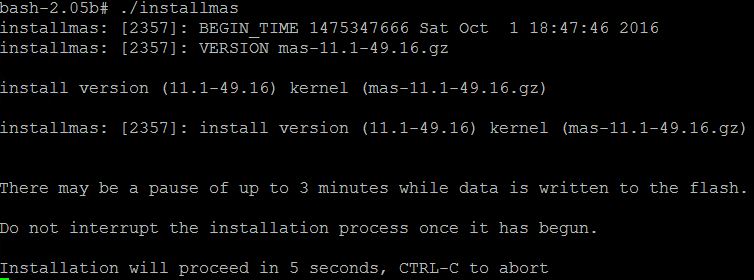
You should make sure that you reconfigure the Virtual Machine CPU, RAM and disk size as recommended for MAS by Citrix. The system requirements for MAS can be found towards the top of this page.
You can download and install MAS for Hyper-V, ESX and XenServer platforms as a virtual appliance. The average MAS image file size if 335MB for Hyper-V and ESX, and 1.3GB for XenServer.
Once downloaded, within vSphere Client click File -> Deploy OVF Template…

Browse for the downloaded NMAS OVF image and click Next.
Click Next. Note the disk will be thin provisioned.
Choose a name and location for the virtual machine. Click Next. Follow through the remaing steps until the virtual machine creation is complete.
Once NMAS is powered on for the first time you will be asked to perform some initial network configurations. Enter 1, 2, 3, 4, 5 sequentially inserting the host name, IP address, Gateway address etc. as you go along.
The end result should look like below.
Press 7 and then press enter to save and quit.
Note: To reconfigure networking at a later stage for example changing the MAS IP Address, log on to the console of MAS and enter commands shell -> networkconfig.
Select option 1 to deploy the NetScaler MAS Server. Type yes to confirm this is a standalone deployment. You can type no if you want to configure HA. You can configure a multi-server deployment later down the line.![]()
Type yes and press enter to restart NMAS.
Once NMAS is back online, you can browse to the NMAS GUI using the IP you specified during the initial network configuration step. The default credentials are:
Username – nsroot
Password – nsroot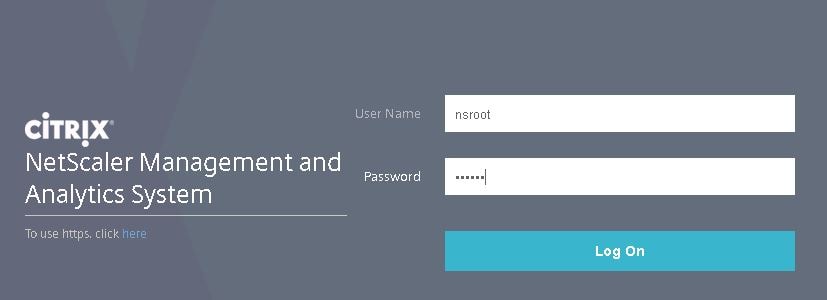
Click Enable or Skip on the CUEIP. This can be enabled or disabled at a later stage.
Click Get Started.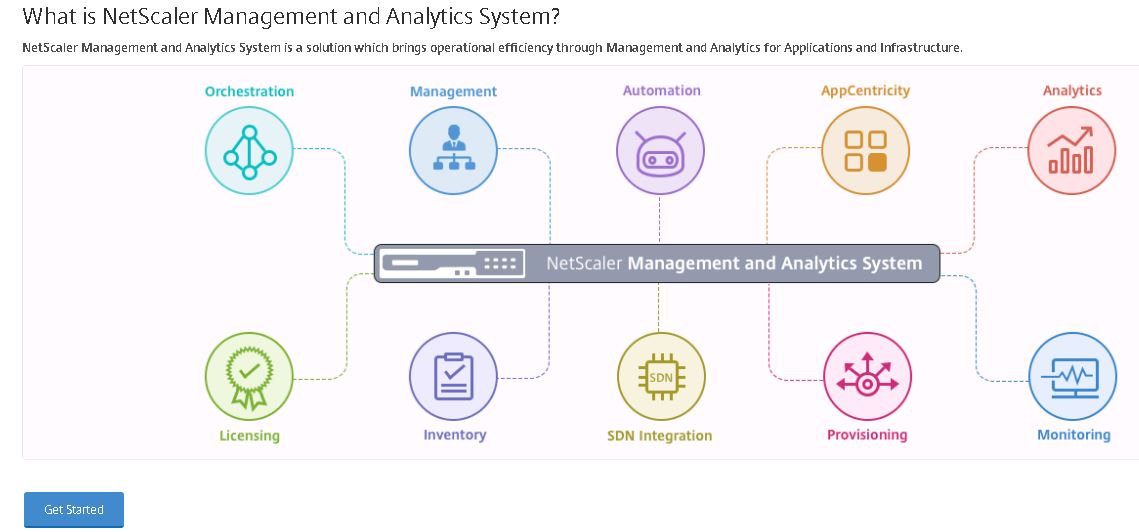
Select Single Server Deployment and click Next.
Click New.
Using the Instance Type dropdown box, select to add a NetScaler or SD-WAN appliance. I am going to show adding a NetScaler.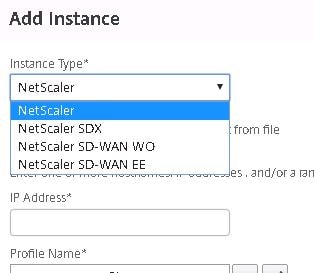
Enter an IP address and choose the NetScaler Profile. Click OK.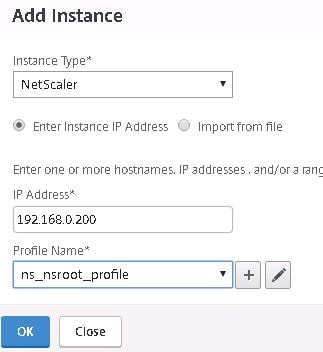
You can edit and create new NetScaler Profiles. The default ns_nsroot_profile contains the username of nsroot and password of nsroot. You need to change the password and/or username to match an account with superadmin permissions on your NetScaler. Also you can change the SNMP community string here too if you want to use specific ones on NetScaler.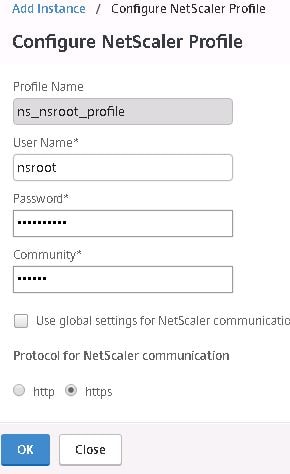
After completing the Add Instance wizard your NetScaler will show as below. Click Finish.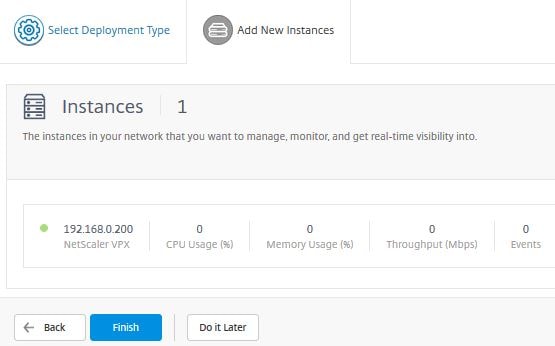
Click on the System tab and click Setup Wizard Settings.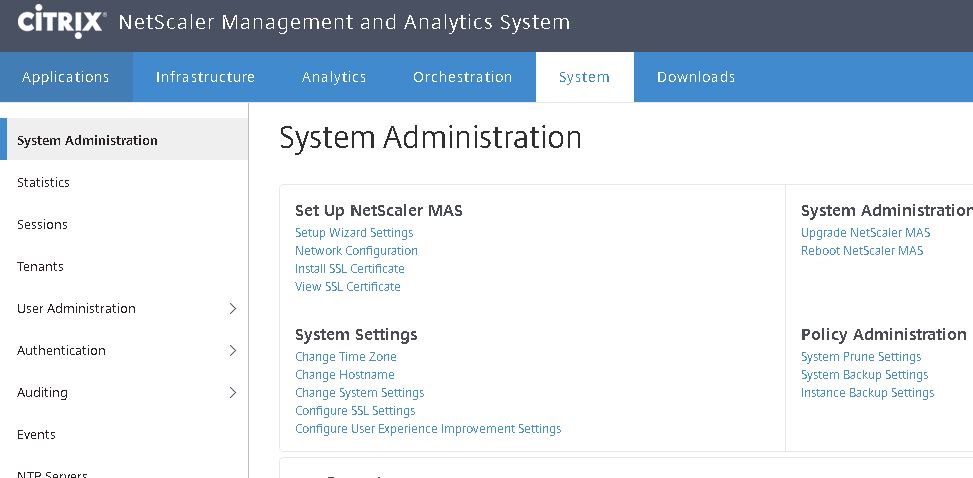
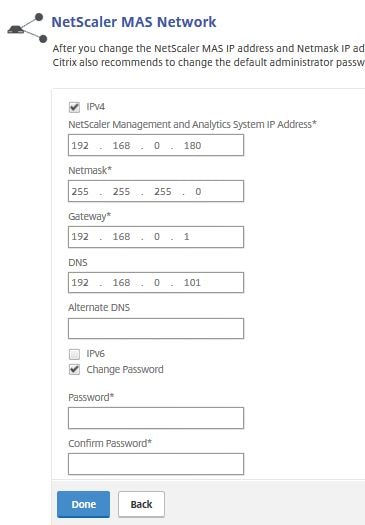
This section allows you to re-configure any IP address settings, the Time Zone and Host Name. Click on NetScaler MAS Network. You can enter an Alternative DNS IP address and change the default NMAS nsroot password by selecting Change Password. Click Done.
 After clicking System Settings you can specify the Host Name, specify whether communication with instance(s) is over HTTPS or HTTP and change the Time Zone. Notice a check box for Secure Access Only, this means you will only be able to access the NMAS GUI over HTTPS. By default this is unchecked. Check this box and click Done.
Note: If using Director to integrate HDX Insight from MAS, using Secure Access Only means Director can only speak to MAS also using HTTPS. Make sure that certificate’s are correct for communication to work.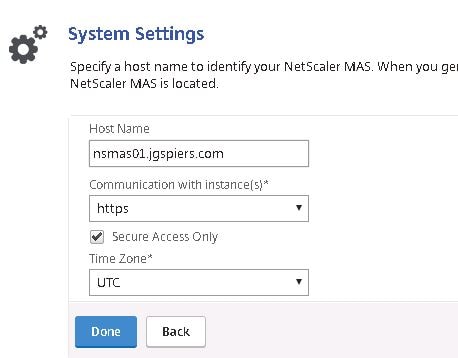
You’ll get a warning saying you can not enable Secure Access Only unless you are already connected with HTTPS.![]()
Enter the HTTPS URL for NMAS and log on, click System -> Setup Wizard Settings -> System Settings -> tick Secure Access Only -> Done.
Secure Access Only will now show as Enabled. After enabling HTTPS (Secure Access Only) any HTTP requests will automatically be redirected to HTTPS. Click Done.
Click Install SSL Certificate.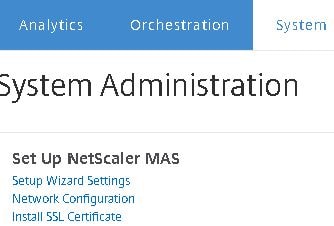
Locate and insert the NetScaler MAS certificate which you can generate using an internal Certificate Services environment. Click OK.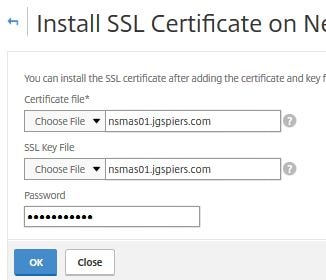
Click Yes to restart NMAS.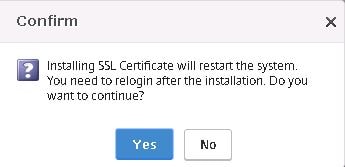
Now the new certificate is presented when navigating to NMAS.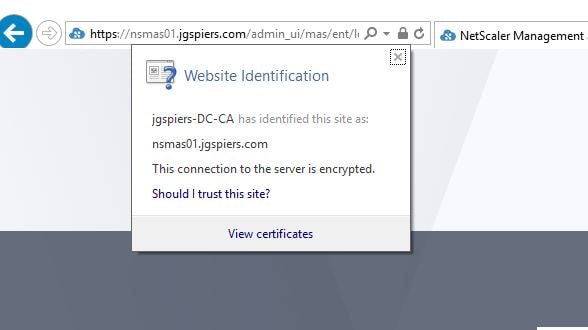
Navigate back to the Settings tab and click View SSL Certificate.
The certificate we have just installed will show as below.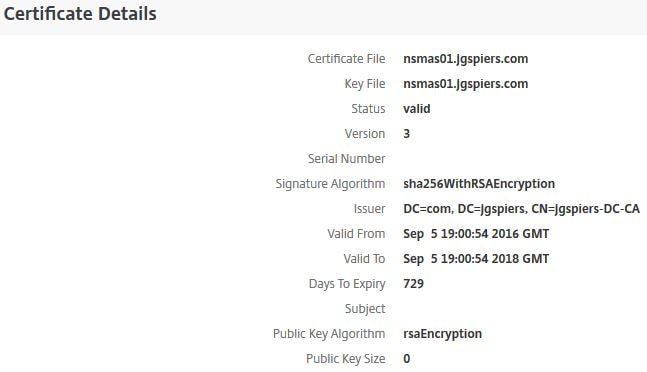
To reboot the NMAS server, click on Reboot NetScaler MAS under System Administration.
Click Yes.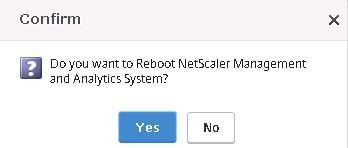
There are certain commands to use when shutting down or rebooting the MAS appliance via CLI.
Reboot (clean) – shutdown -r now
Shutdown – shutdown now
Note: Do NOT use the reboot command as this will result in a non-clean reboot requiring database recovery.
Note: Prior to upgrading to NetScaler MAS 12.1, upgrade to MAS 12.0.57.24 first.
To upgrade MAS to the latest version download the upgrade package from the Citrix website.

Then navigate to System -> Upgrade NetScaler MAS -> browse for the downloaded MAS upgrade package and click OK.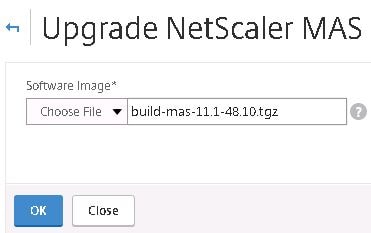
Click Yes.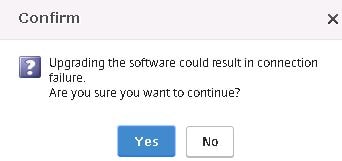
The upgrade takes place.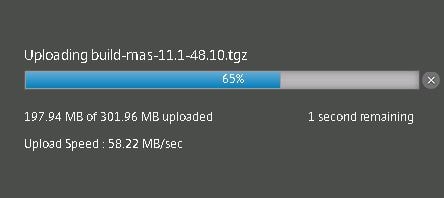
MAS reboots to complete the upgrade.
When MAS has rebooted we see the latest version has been installed as shown below.
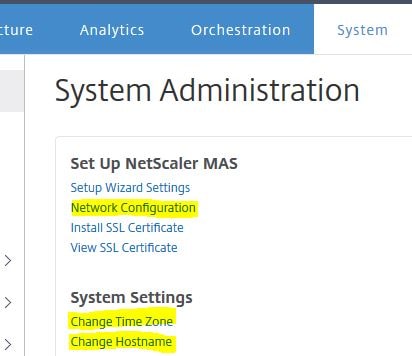
By clicking Change System Settings you can specify settings such as Secure Access Only and Session Timeout. Set the Session Timeout to 5 minutes for NMAS sessions to end automatically after 5 minutes.
You can also check Prompt Credentials for Instance Login so that when you browse to a managed NetScaler GUI via MAS, you are prompted for a password rather than being logged on automatically using credentials from the associated profile.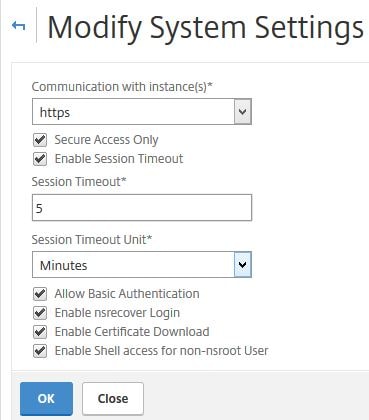
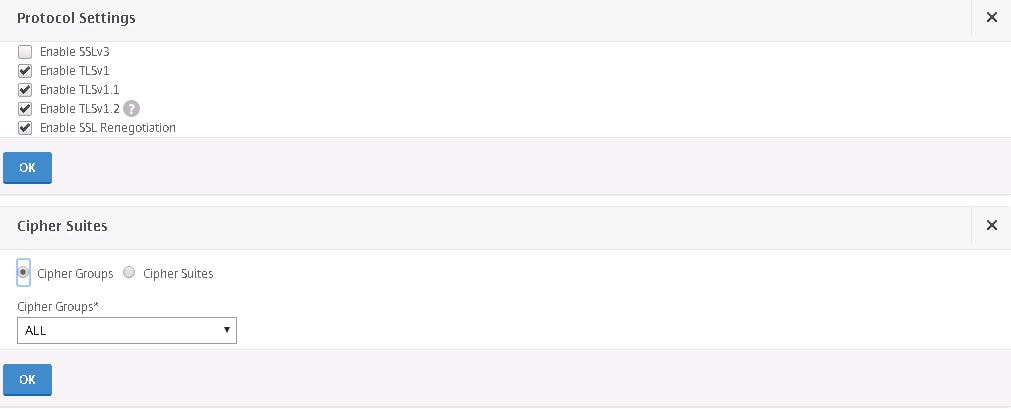
Under System -> SSL Settings you can enable/disable Protocols and choose Cipher Suites. By default all Cipher Suites are enabled on NMAS.
Click Configure User Experience Improvement Settings.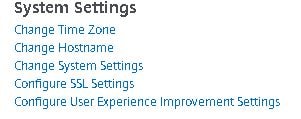
Enable or disable CUXIP. You will remember that at the very start of our NMAS installation when logging on to the GUI for the first time we are asked if we want to enable CUXIP. Click OK.
Click System Prune Settings under System -> Policy Administration.
By default events, audit logs and task logs are pruned every 15 days from the NMAS system. Click OK.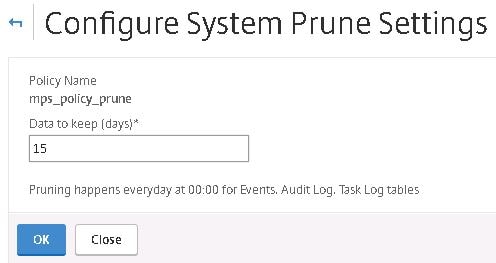
Click Configure System Backup Settings. Here you can configure the number of NetScaler MAS server backups to retain, encryption settings if desired and the option to transfer backups to an external location such as an FTP server. By default NMAS backups occur every night at 12:30AM. You can keep a maximum of 30 backups. In more recent MAS versions, it seems that a maximum of 10 system backups can be kept.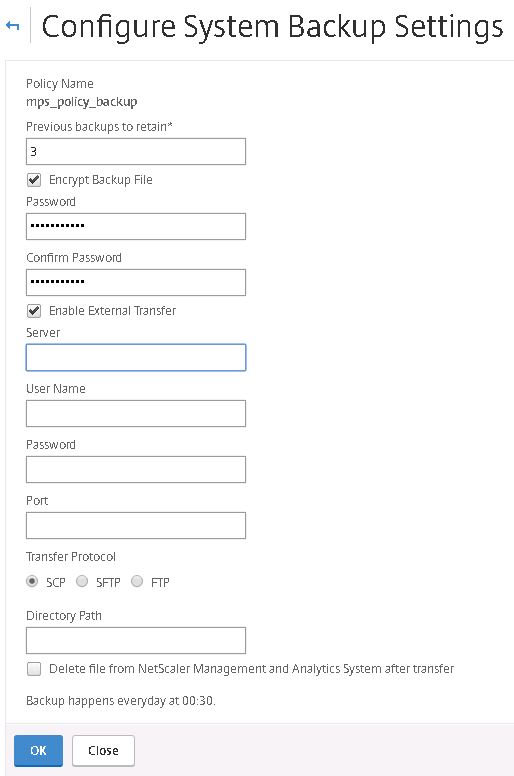
In MAS 11.1 build 51.26 you have the option of replicating the full MAS configuration to a backup node. Only one node can act as a backup node to a primary node. File syncrhonization will occur by default every minute and a full database replication to the backup node will occur every 15 days.
When deploying a MAS node, select option 5. Remote Backup Node.
Enter the IP address of the node you would like to act as the backup node including the password for an owner user account.![]()
Backup node registration is now successul.
NetScaler MAS also backs up your NetScaler VPX, SDX, SD-WAN instances etc. Here you can choose to password protect those backup files and specify backup intervals. You can retain up to 3 instance backups on NMAS unless you are running build 12.0.41.16 and above where the limit was increased to 50. You can also create on demand backups and restores straight from the NMAS console. See https://jgspiers.com/netscaler-backup-restore/ for more information on NetScaler ADC backups and restores. 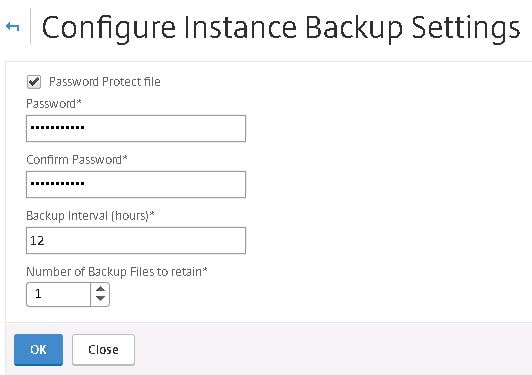 In MAS 12.0.51.24, you can choose whe
In NetScaler MAS 12.0.41.16+ backups can be performed of an instance when a configuration save trap is received from a NetScaler instance.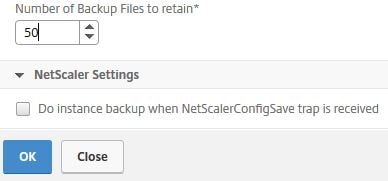
Starting MAS 12.0.51.24 a number of new backup related options are available. By default MAS runs an instance backup every 12 hours however you now have an option of specifying up to four time based backups. This is in addition to the Interval Based backups by default set to 12 hours.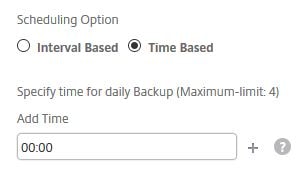
You have the option to perform an instance backup when a NetScalerConfigSave trap is received from the NetScaler instance by MAS. This was previously a Citrix Command Centre feature. Also you have the option to include GeoDB files in the backup or not. By default, they are not included due to their large size.
You can also send a backup to an external location in MAS 12.0.51.24+. Specify the remote IP, credentials and port. Specify the Transfer Protocol and Directory Path.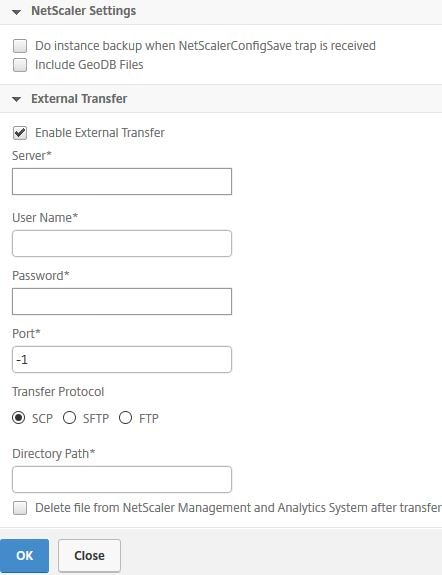
To configure external authentication to NMAS using LDAP, click System -> Authentication -> LDAP -> Add.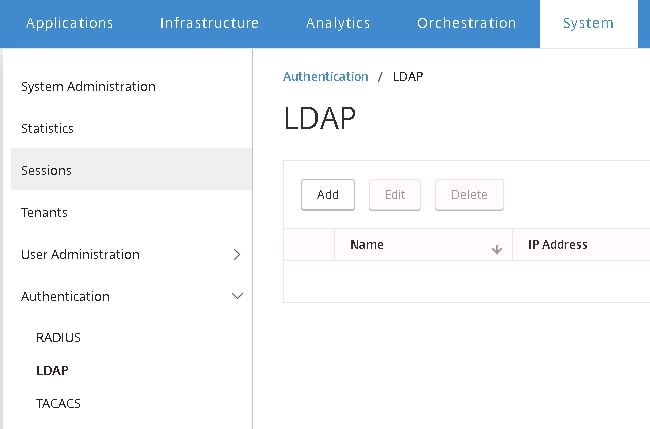
Configure your LDAP server parameters. Notice the Enable Change Password option. This feature is available for NetScaler Gateway/Unified Gateway when using Secure LDAP. Using NMAS, you have to also use LDAPS to get this to work. If you use standard LDAP and have this checked, users are still prompted to change their expired passwords however they won’t be able to succeed as I will show.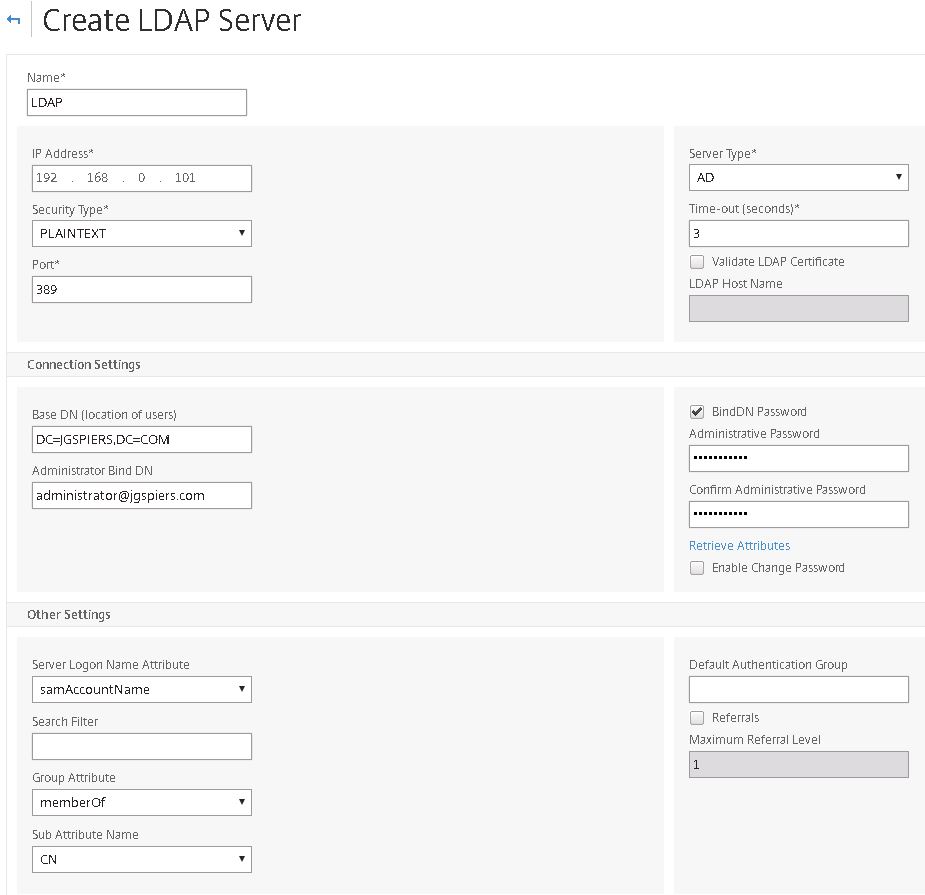
Here’s an example of the password change feature using plain LDAP. See https://jgspiers.com/configuring-ldaps-citrix-netscaler/ for information on configuring LDAPS on NetScaler Gateway to allow the changing of passwords when they have expired.
When users try and change their password using non-secure LDAP they won’t succeed. If capturing authentication logs on NMAS you will get a Server is unwilling to perform error. Instead, use LDAPS or if you have to use standard LDAP do not check the Enable Change Password box.

When passwords are changed and secure LDAP is used a more promising Password modified success, authenticated message will be generated.![]()
Now that we have configured LDAP for external authentication, click Authentication -> Authentication Configuration.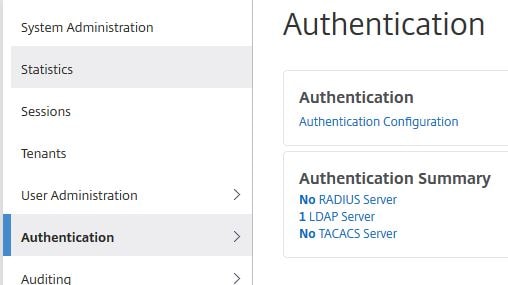
Choose EXTERNAL under Server Type, click Insert.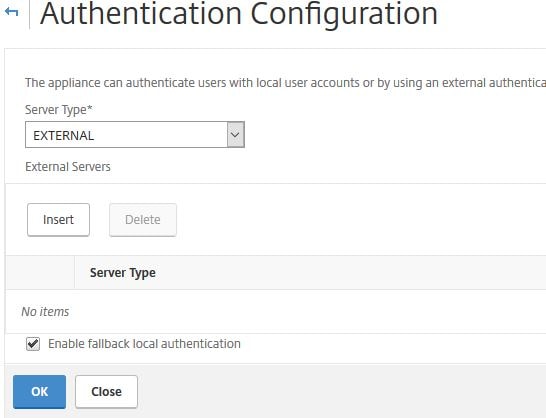
Tick the newly created LDAP object and click OK.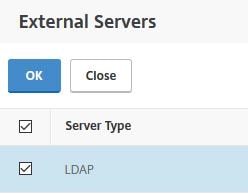
You can leave Enable fallback local authentication enabled or disable it based on your preference. This allows local authentication to be used in the event LDAP is unavailable for example. Click OK.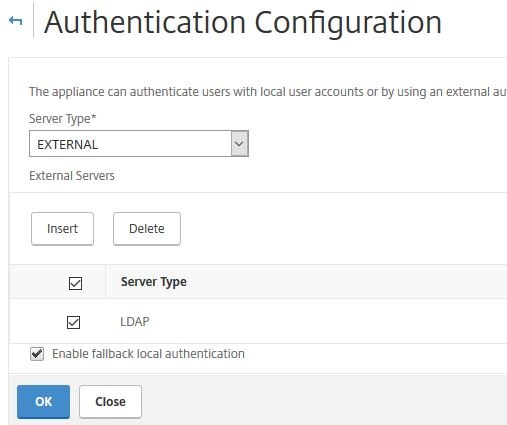 Click User Administration -> Groups -> Add.
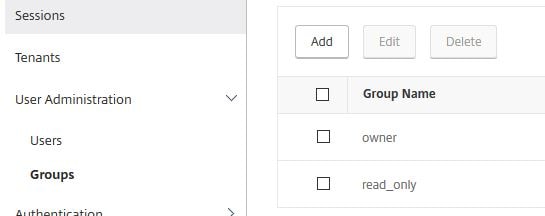
Type a group name as available in Active Directory. Assing the admin permission and click Next.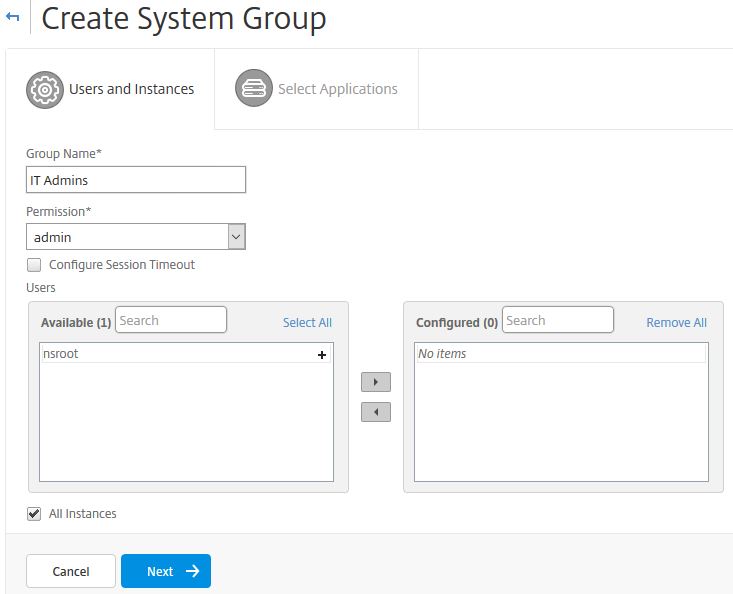
Click Finish.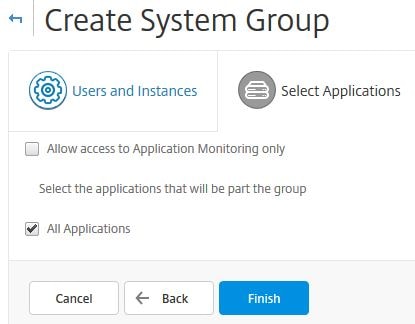
Now log on using a domain user who is a member of the IT Admins domain group.
That user will be granted admin permissions to NMAS.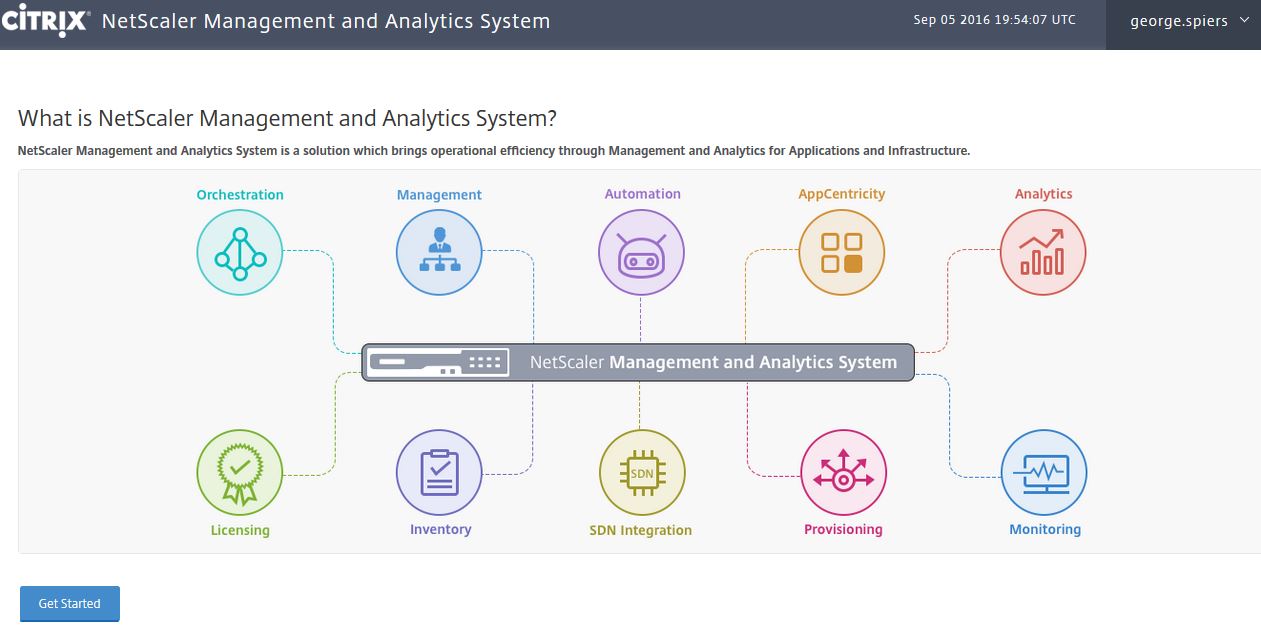
Navigate back to System -> User Administration -> Users -> Add.
Create a user name, password, assign groups and enable external authentication if the user is part of Active Directory. Click Create and you have a new NMAS user.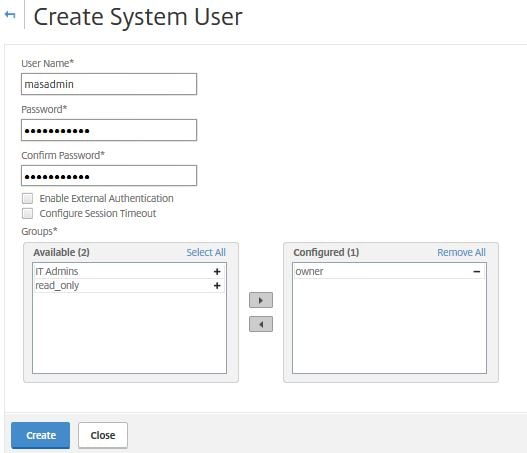
To enable account lockouts on logon failures to NMAS, navigate to System -> User Administration -> User Lockout Configuration.
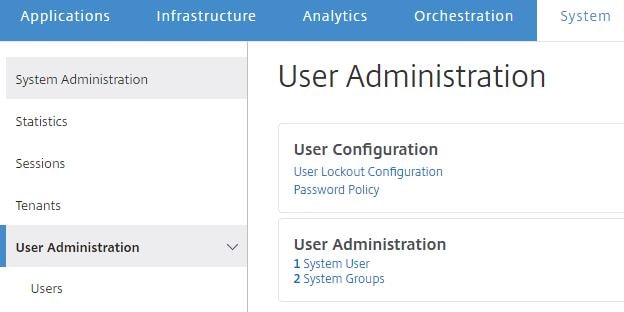
Check Enable User Lockout. As a minimum you must set 3 or more invalid login attempts. Specify a User Lockout Interval in seconds and click OK.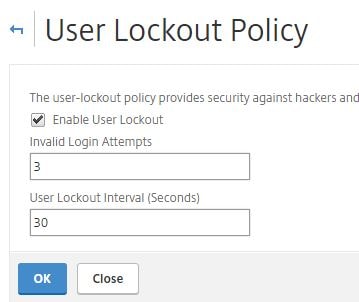
The next time a user enters their password wrong to NMAS 3 times, they will be locked out for the defined amount of time as shown below.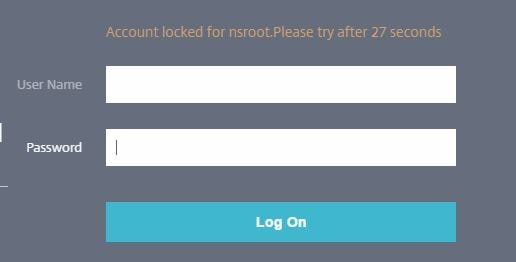
To configure password complexity for NMAS accounts, navigate to System -> User Administration -> Password Policy.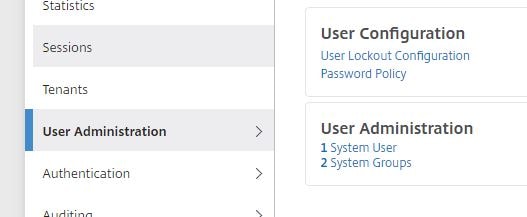
Check Enable Password Complexity and then enter a Minimum Password Length value. Click OK.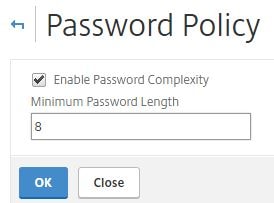 The next time you try and create a user or change a password for an NMAS user without meeting the complexity requirements, an error message will appear as below.
Tenants (multi-tenancy) gives you a way to provide access to external, outside or tenants simply put. Doing so allows tenants to add and manage their own network instances including monitoring them and creating their own users and groups. Click Tenants -> Add. For example, you may host a NetScaler VPX for a 3rd party but they have full control for management. Using NMAS, creating a tenant for that 3rd party will allow them to manage their own NetScaler device through NMAS. They only see and manage their own instances in other words tenants are only able to see their own instances and not others.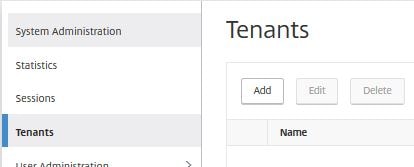
Provide a tenant name (for example a domain name or company name) and the username/password. Click Create.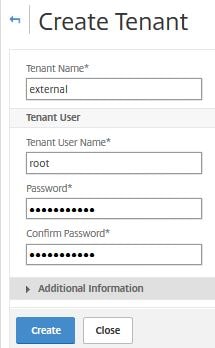
As you can see below the new root tenant account is visible under Users.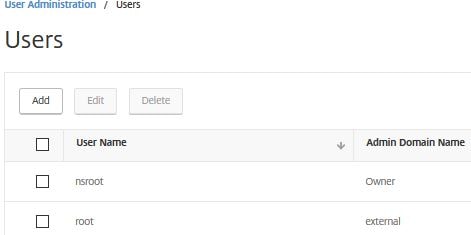
When editing the properties of the root account notice that it is a member of a newly created group external_admin_group.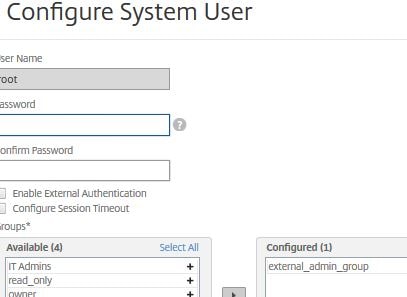
When creating tenants two groups are created by default for admin and read only permission.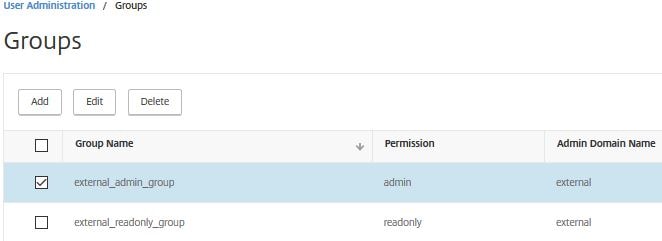
As an example logging on using the external/root tenant account and viewing Groups, only the two tenant groups are visible and not anything else.
Under System -> Events you can view MAS related events such as user logons and the system state.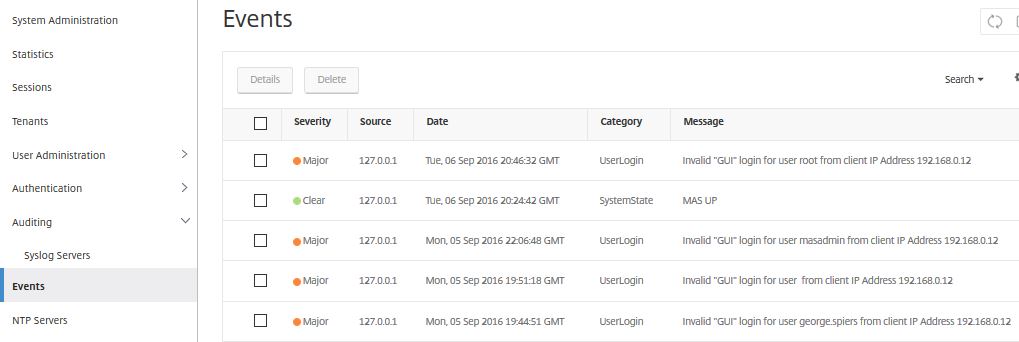
Under System -> NTP Servers click Add.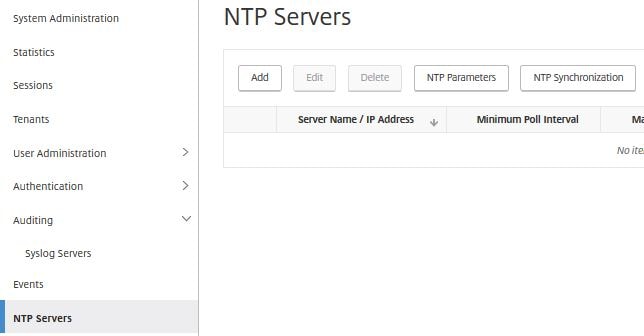
Specify the details for your internal or external NTP server and click Create.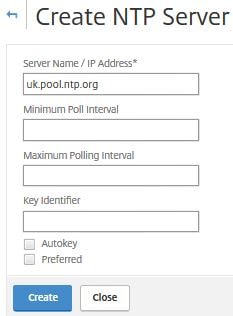
Click Yes.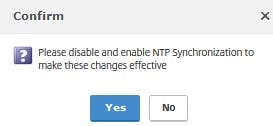
Click NTP Synchronization.![]()
Check Enable NTP Synchronization -> OK.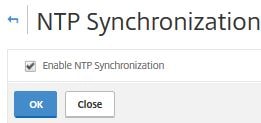
Click Yes. NMAS will restart.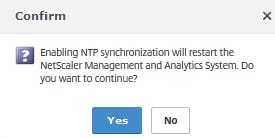
To create a more secure Cipher Group to use with NMAS rather than the default, click System -> Cipher Groups -> Add.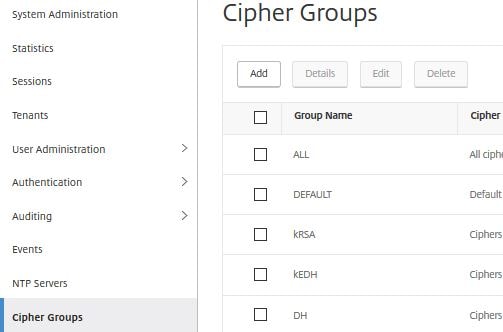
Specify a name, description (mandatory), move secure Cipher Suites to the right and then click Create.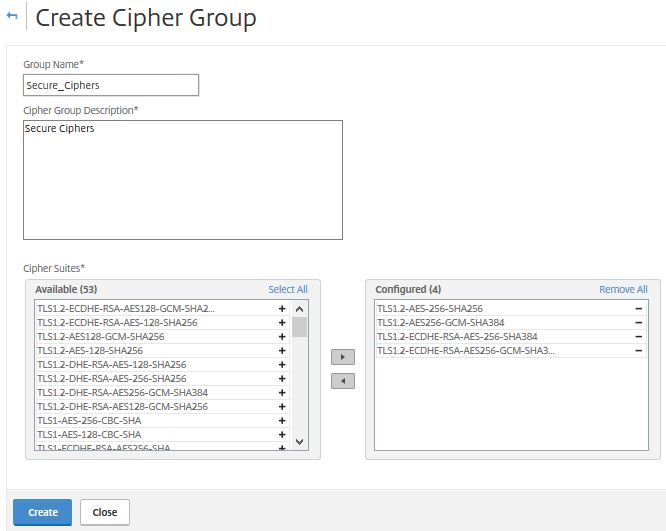
To attach the Cipher Group to NMAS navigate to System -> SSL Settings and under Cipher Suites use the dropdown to select the newly created Cipher Group. click OK.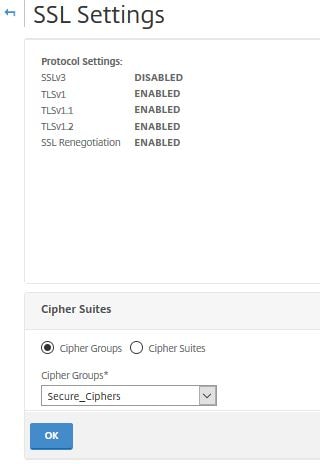
Click Yes.
NMAS restarts to apply the new Cipher Group.
As an example, a secure HTTPS connection to the NMAS GUI shows the below secure Cipher Suite in use which has been negotiated by my browser and the NMAS server.![]()
To enable email notifications for alerts on certificate expiration and SNMP traps etc. click System -> Notifications -> Email -> Add.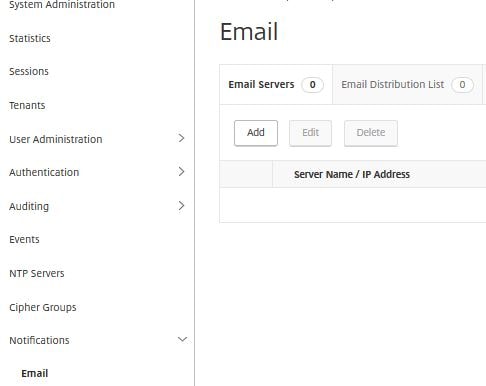
Enter your SMTP server details. Click Create.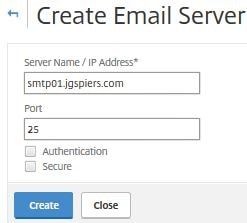
Click the Email Distribution List tab -> Add.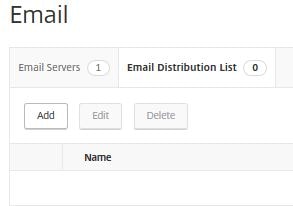
Enter a name and email address that you want the alerts to go to including the from address. Click Create. You can now create rules which send an email alert once triggered. Rules are explained later.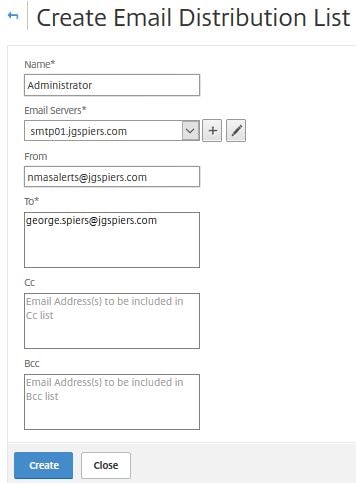
You can also send notifications via SMS using an SMS server.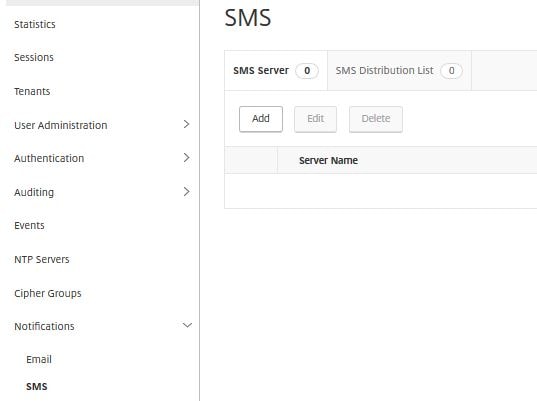
To send SNMP Traps received by NMAS to another location click on SNMP -> Trap Destinations -> Add to add a new destination.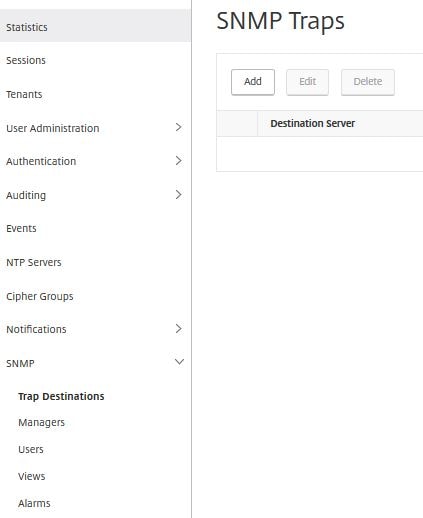
Take a look at the NetScaler you added to NMAS. During discovery, Trap destinations are configured pointing to the NMAS server as shown below.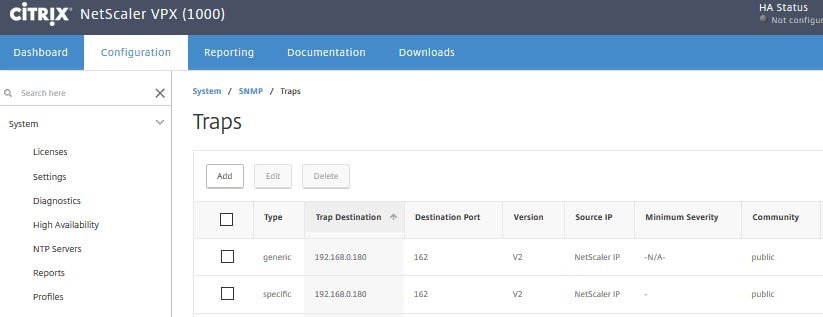
Back over on NMAS, navigating to System -> Diagnostics -> Task Log to view the status of completed or running tasks. A running task could be the discovery and adding of a NetScaler device to NMAS or manual backups, certificate installation etc.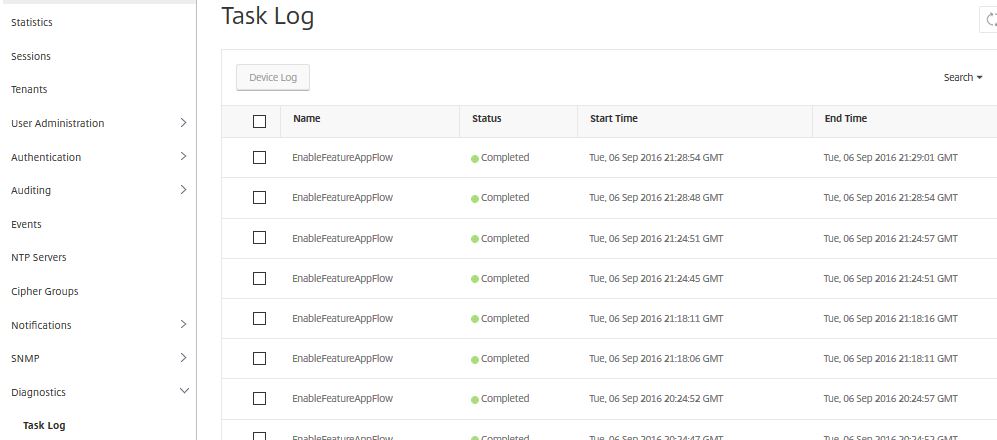
To generate a Technical Support File for Citrix to analyse through CIS navigate to System -> Diagnostivs -> Technical Support -> Generate Technical Support File or use command show techsupport via CLI.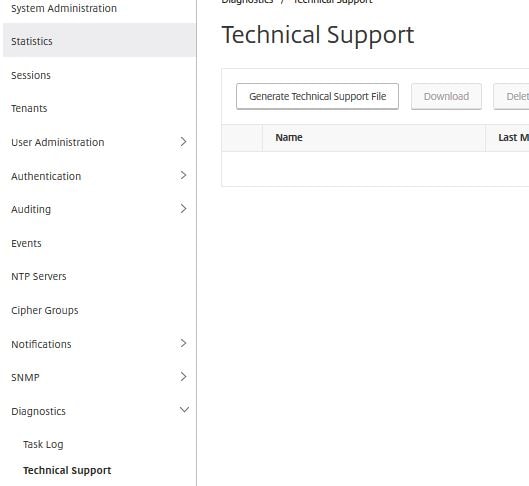
Specify a collection duration and click OK.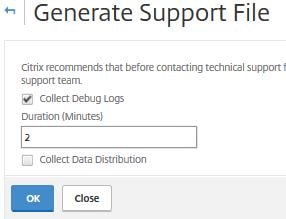
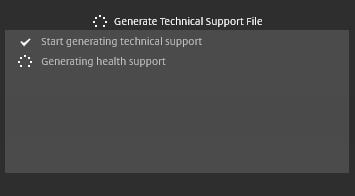
Click Download to download the generated file to your local computer, then upload to CIS. For more information on CIS see https://jgspiers.com/citrix-insight-services/
Note: Whilst CIS cannot analyse the data for you, Citrix support can retrive your tech support bundle from this location.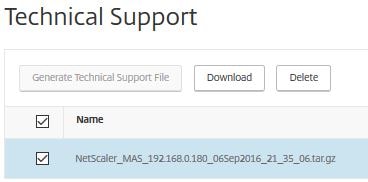 Navigate to Configure ICA Session Timeout.
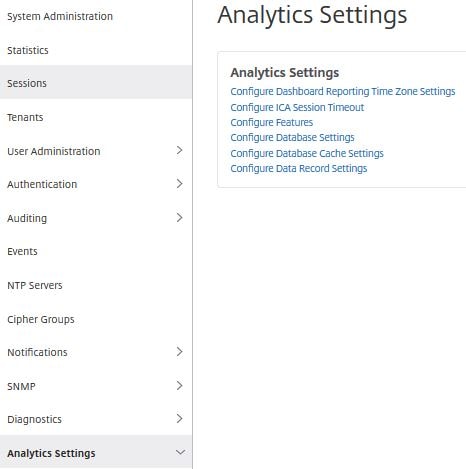
Here you can specify a time limit for which inactive ICA sessions will be timed out. Click OK.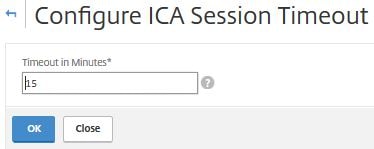
Click Configure Database Settings. By default, database indexing is enabled which allows for efficient database querying. You can also enable Database Cleanup which runs in the event that the regular cleanup job is prevented due to heavy load on NMAS. Click OK.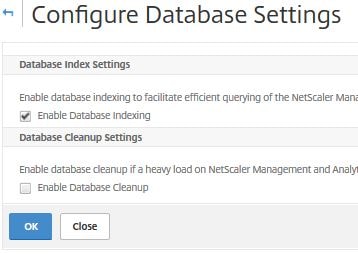
Click Configure Database Cache Settings. Here you can reset the database cache or disable database caching in the event you want all queries to be submitted against the SQL server for any reason. Click OK.
Click Configure Data Record Settings. Here you can enable or disable certain logs. You can also specify data persistency values and show certain Web Insight reports on the dashboard.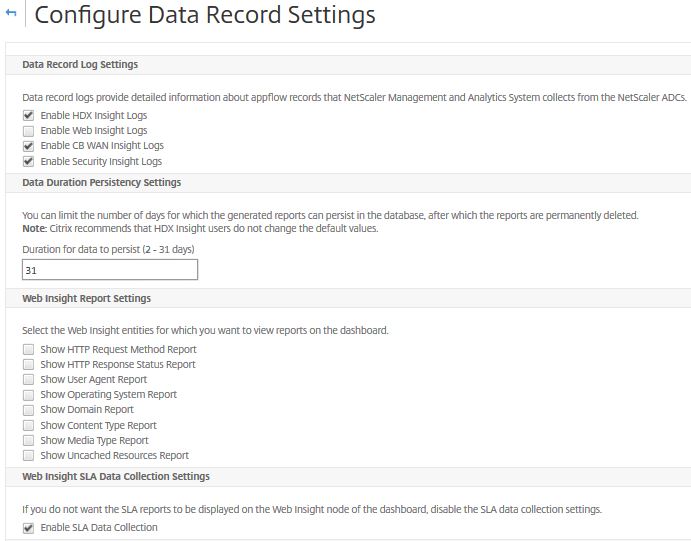
Navigate to System -> Analytics Settings -> Database Summarization. Here you can see the default minute, hourly and daily data persistency values for Gateway, Web, Security, HDX Insight and Wan Optimization. These values can be changed and for example lowered. If lowering the values, there will be an increase in storage consumption.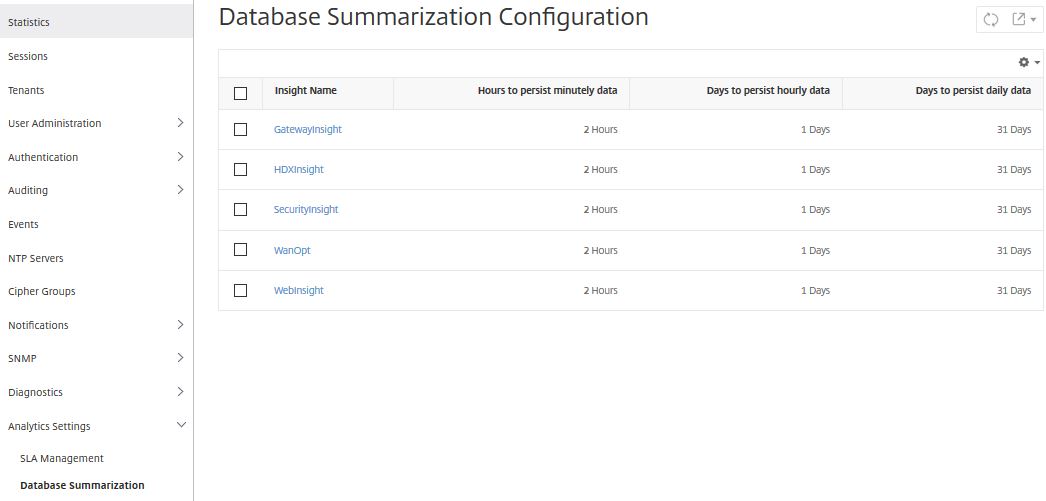
Navigate to System -> Advanced Settings -> SSL Certificate Files. Here you can view SSL certificates and SSL keys currently uploaded to NMAS. You also have the ability to upload, delete or download certificates.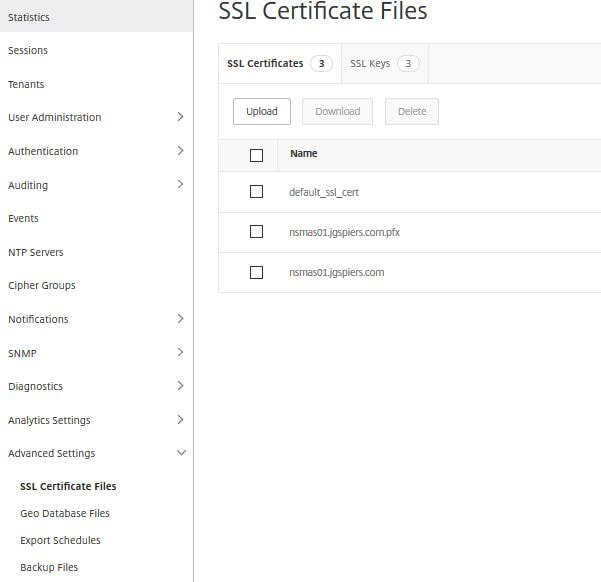
To upload a Geo Database File navigate to System -> Advanced Settings -> Geo Database Files -> Upload. You can download a Geo Database File from http://geolite.maxmind.com/download/geoip/database/GeoLiteCity.dat.gz. This is the free Open Source version. Using a Geo Location database allows you to map connecting IPs to City’s which in NMAS will be defined as a datacentre (renamed “Sites” in 12.0.41.16+). Gathering location information helps determine if issues such as slow access to NetScaler hosted resources are coming from a certain location.
Note: MAS 12.1 uses an internal database, and you can no longer upload a 3rd party database such as GeoLite.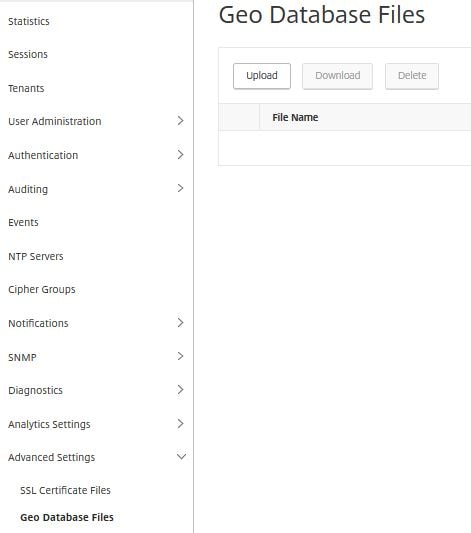
The GeoLiteCity.dat database file is uploading.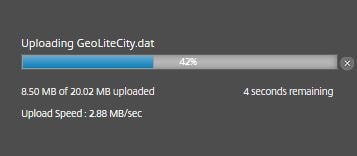
And now the upload is complete. Later I will show how to add datacentres (Sites) and how to view where users are connecting from.
Navigate to System -> Advanced Settings -> Backup Files. Here you can backup the NMAS server. Click Back Up.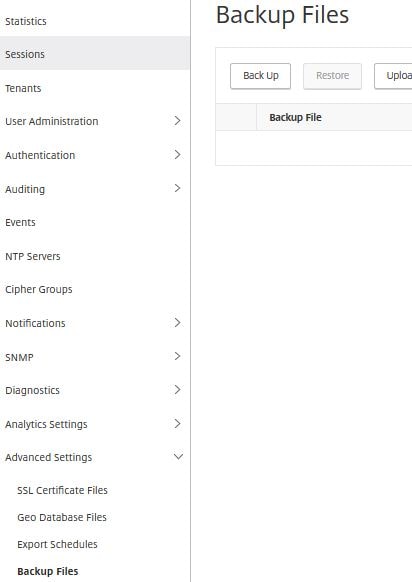
Choose to password protect the file and then click Continue.
The backup is complete and the file can be used to restore NMAS. You can also download the file, or transfer is externally to a server such as FTP.
Back to Geo Locations. To enable Geo data collection navigate to the Infrastructure tab and click Instances. Navigate to your NetScaler device, click Action -> Enable/Disable Insight.
Note: In NetScaler MAS 12.0.41.16+ Infrastructure has been renamed to Networks.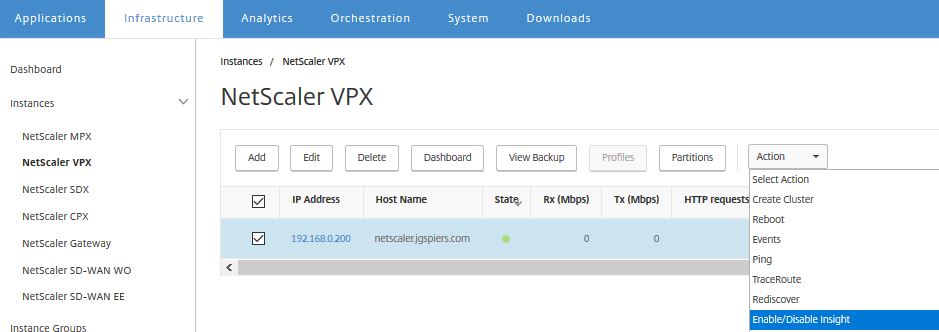
Check Enable Geo data collection for Web and HDX Insight. You will receive the Success! message. Click the back button.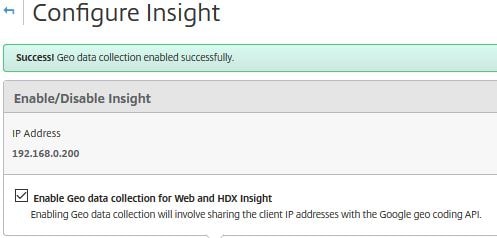
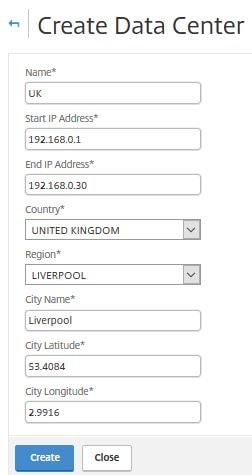
Click Data Centers. In NetScaler MAS 12.0.41.16+ navigate to Networks -> Sites. In this build going forward, Infrastructure has been renamed Networks and Data Centers has been renamed to Sites.
Specify a name, and other IP information etc. as shown below. You map the IP address information to Country and Region. If you route internal connections through NetScaler and collect HDX Insight data via NMAS this provides a way to group those connections by region. Take another example where you have a mobile workforce that use Verizon 4G LTE on Androids and connect through NetScaler, you’ll be able to tell these users apart just by grouping them in to a location by using the Verizone mobile public IP address scope. Click Create.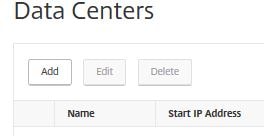
The next time a user connects using an IP from the UK data center location, it will appear in the World map. You can group locations by RTT, WAN latency etc. giving you an overview of how each location is performing.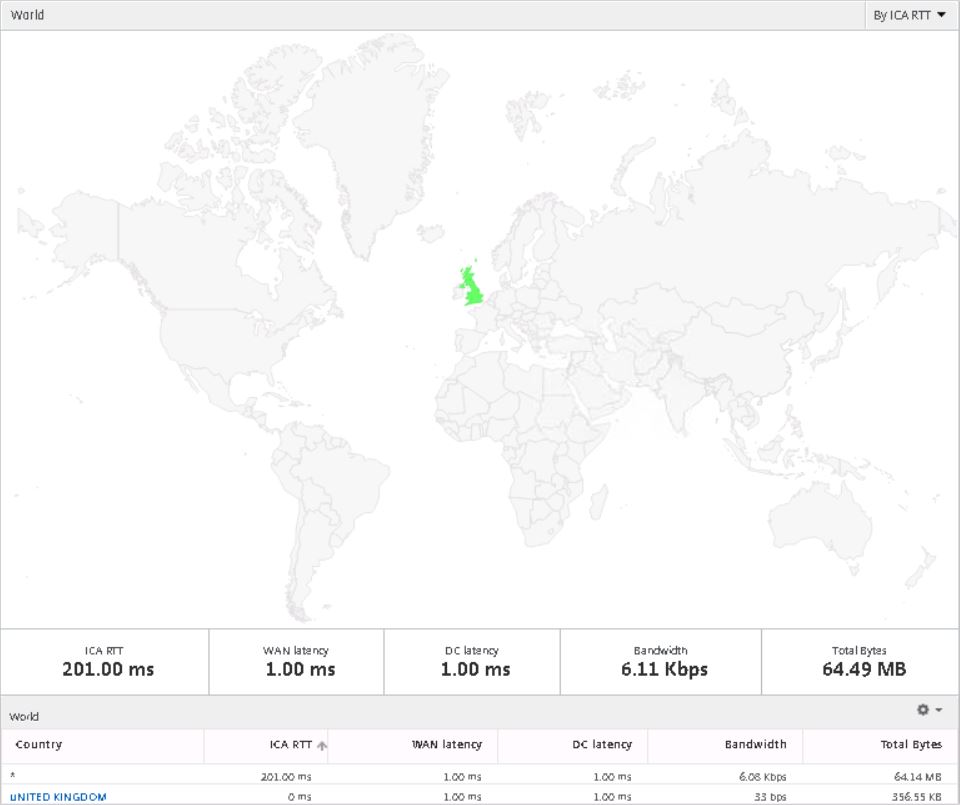 MAS high availability requires both NetScaler MAS servers to be running the same software. If you are load balancing client requests to NMAS using NetScaler (recommended) the NetScaler version must be v11 or later. Citrix also recommend placing both nodes within the same subnet.
To deploy a secondary NMAS server for high availability deploy the second NMAS server and after configuring the IP address, host name etc. specify 1. NetScaler MAS Server to deploy a NMAS server. When asked if this is a MAS standalone deployment type no and press enter. Then type no when asked if this is the first server node. Press enter.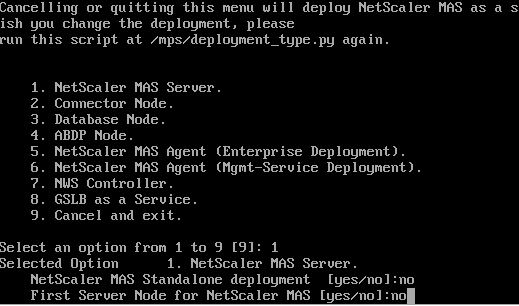 Type the first NetScaler MAS node’s IP address. Enter the password of an NMAS administrator account such as nsroot and press enter.

Type yes to restart the NMAS server and press enter.![]()
Log on to the first NMAS server, click on the System tab. Notice a new Deployment menu is available. Click this. You will see the two NMAS server IP’s in the list of Server Nodes. These nodes should be accompanied by an orange circle symbol. Click Deploy to deploy the NMAS high availability deplyoment configuration.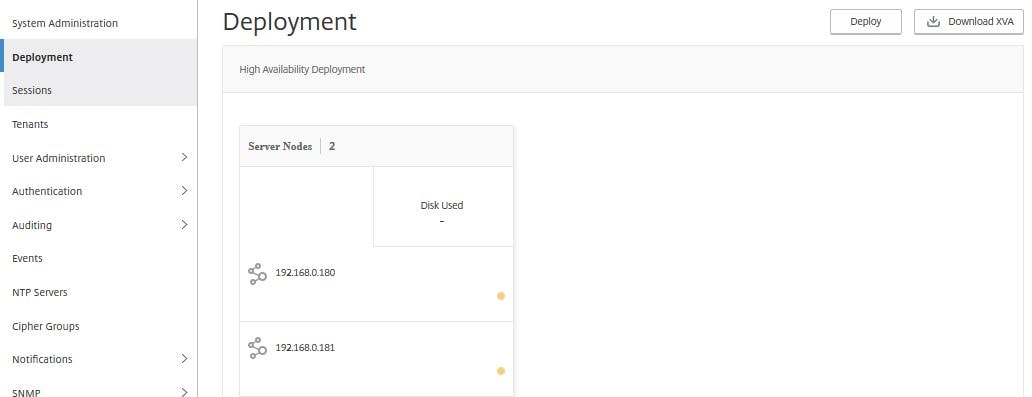
Click Yes. At this stage both NetScaler MAS nodes will be restarted.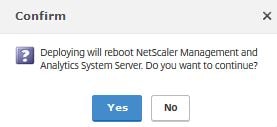
It will take around 8-10 minutes for the highly available deployment to complete.
Once the deployment is complete, you can log back on to NMAS and each MAS node will be online. Click on the first node.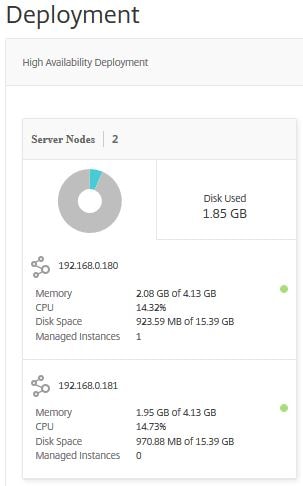
A new screen appears showing which instanced are being managed by the 192.168.0.180 node.
If the first node goes offline, the second node takes over the management of any instances that were being managed by the first node. Note that MAS high availability is active-active. Beginning MAS 12.0.51.24 high availability has changed to active-passive. If you upgrade an active-active deployment to 12.0.51.24+, the deployment is changed to active-passive. Note that after an upgrade some NetScaler instances may continue to send traffic to the passive node for approximately 5 minutes, this traffic will be lost. Heart beats are sent between nodes to determine health.
If we log on to the managed NetScaler instance and look at traps for example, you will notice it is configured to send traps to 192.168.0.181.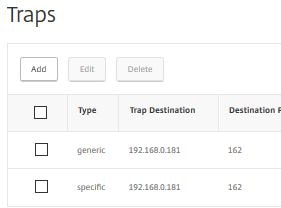
If we simulate a failure of 192.168.0.181, the traps dynamically change back to MAS node one which is 192.168.0.180.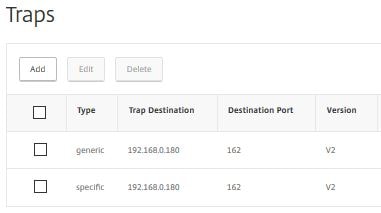
As another example of failover the below App Flow Policies have dynamically altered to include the second MAS node IP address.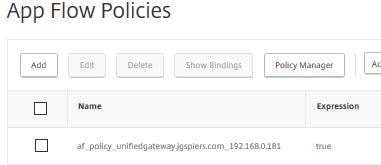
To degrade a MAS configuration from high availability to single node, navigate to System -> Deployment -> Break HA.
Click Yes. Both nodes will restart and the high availability deployment will break.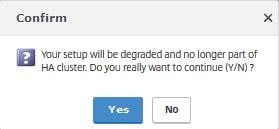
To view Web, HDX and Gateway analytics, click on the Analytics tab and then click Instances under Web Insight. Here you can see the NetScaler instance I have added to NMAS, the hits and bandwidth consumed within the past hour.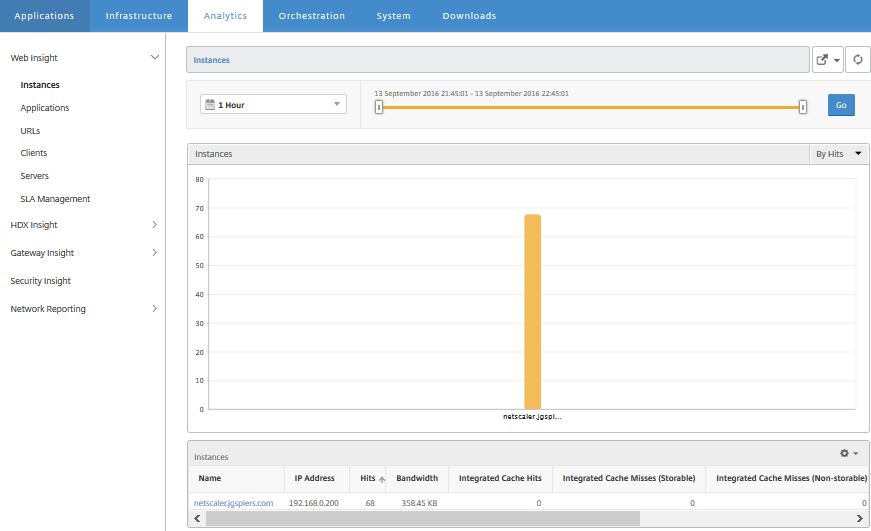
You can click on the instance name which gives you further analytics information such as the browsers used to access the NetScaler. This could be helpful in the situation that users are complaining about slowness and every one of them is using the same browser. Maybe the browser isn’t compatible with the NetScaler hosted application for example.
Click on Applications under Web Insight. This shows any vServer hosted applications including the hits, bandwidth, response time etc.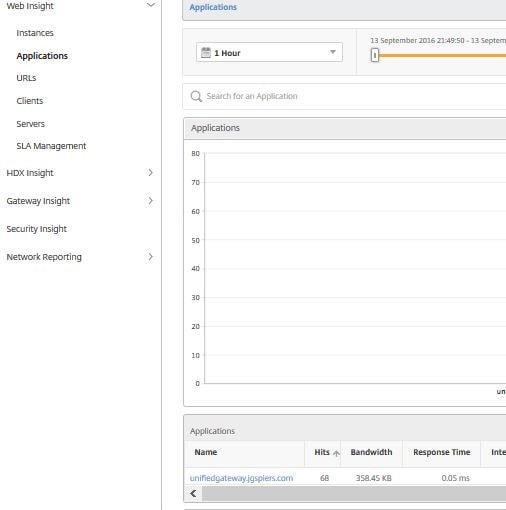
If response time is high on a particular vServer for example a web application vServer, you can click the vServer for further statistics. If server processing time is high, there may be an issue with the servers hosting the application such as overloading. If client network latency is high then you know the problem lies at the client network. This type of insight is invaluable when troubleshooting issues.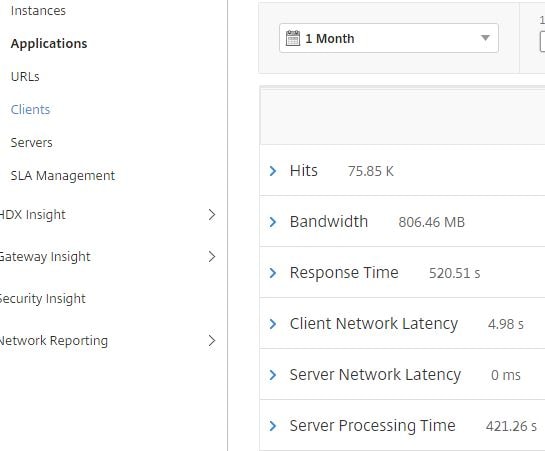
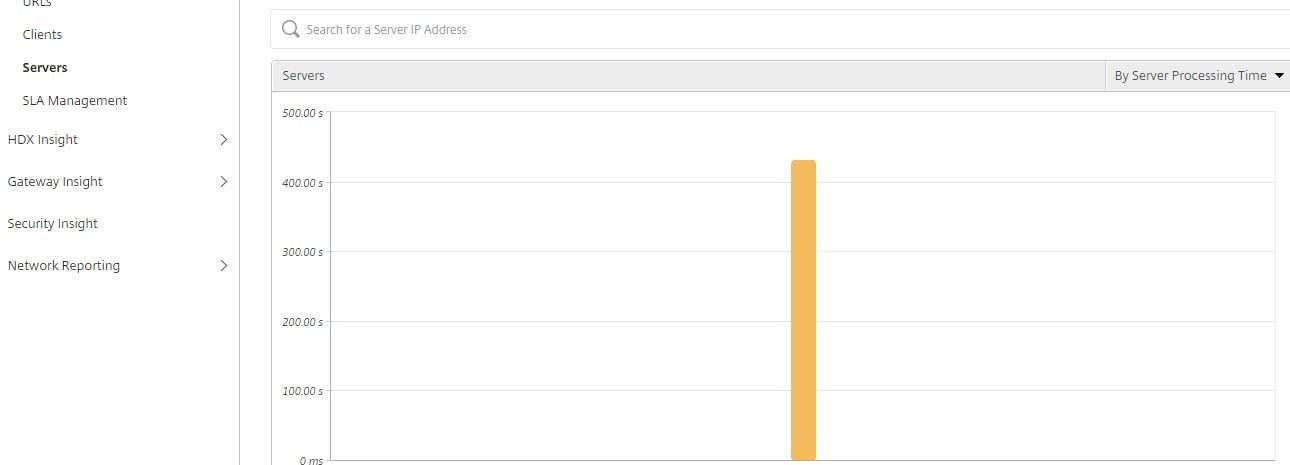
If server processing time is high which server is the culprit? You can actually sort the processing time by server so you will immediately be able to identify if a certain server has a fault. Click on Servers then sort by server processing time located to the right of your screen.
Click on Clients to get a view of the connecting clients including the clients IP address and how many clients connected over a certain time frame. In NetScaler MAS 12.0.41.16 SSL Insight has been added, and from the Applications, Clients or Servers pane you can view handshake failures between client and server, what ciphers have been negotiated between client and server, TLS version used during the session and so on for secure Load Balanced applications.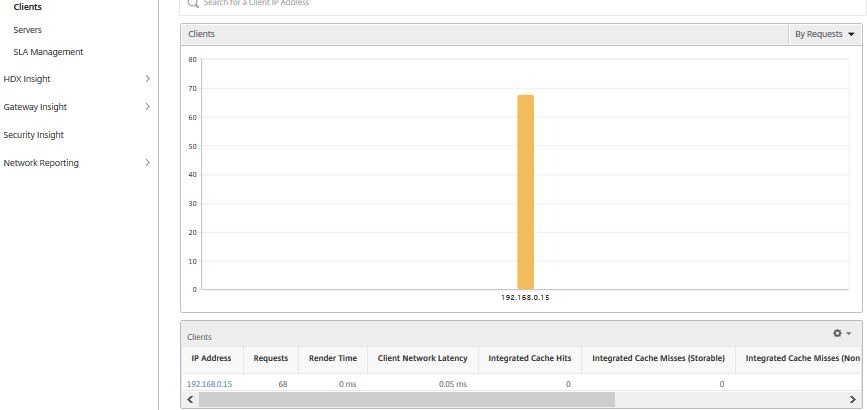
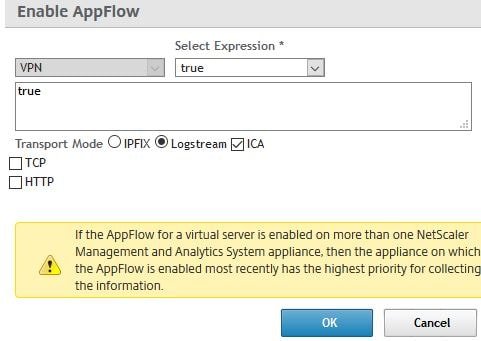
On the HDX Insight section, analytics for HDX traffic to XenApp & XenDesktop is shown. Firstly for any data to appear you need to enable AppFlow on your NetScaler Gateway virtual server(s). AppFlow can be delivered via traditional IPFIX protocol or the newer LogStream method if using MAS 12.0+. Keep in mind that whilst LogStream is a new and efficient way of transporting analytics data from NetScaler instances to NetScaler MAS, it is current in beta.
Also as explained by Nick Rintalan https://www.citrix.com/blogs/2018/08/15/hdx-insight-2-0/, HDX Insight is more efficient when transported through a new NSAP virtual channel. To make use of this, the following is required:
- NetScaler MAS 12.1.
- NetScaler 12.0.57.24 or 12.0.58.15.
- Citrix Receiver for Windows 4.10+.
- Citrix Receiver for iOS 7.5.4+.
- Citrix Receiver for Mac 12.8+.
- XenApp and XenDesktop 7.16+.
 Below you can see ICA RTT (screen lag time), WAN latency, DC latency and bandwidth including connecting users. This is the same sort of information you will be familiar with when using NetScaler Insight Center.
Note: To allow ICA round trip time calculations to be logged, enable the following policy settings in Citrix Studio:
- ICA Round Trip Calculation
- ICA Round Trip Calculation Interval
- ICA Round Trip Calculation for Idle Connections
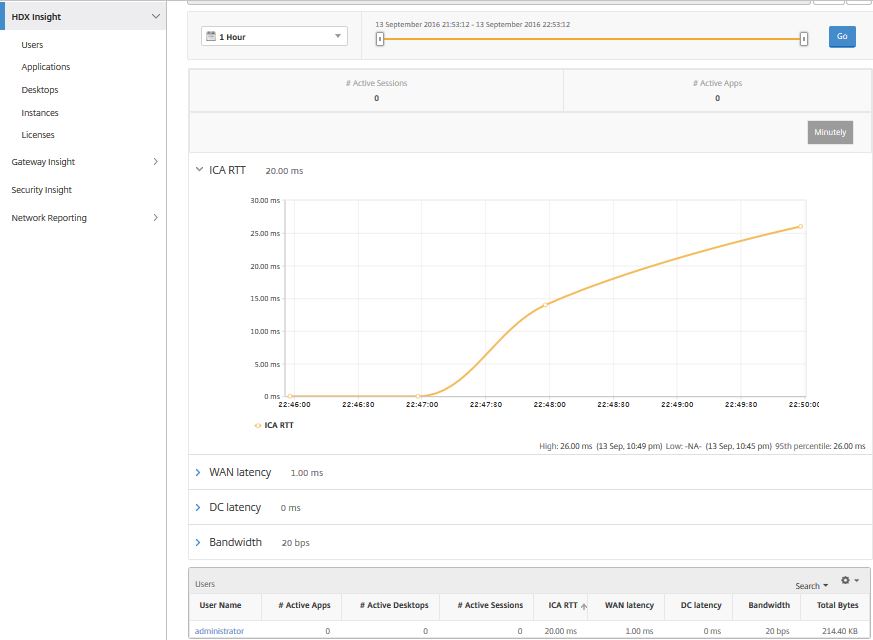
If you click on an individual user, you can see each HDX session, active or terminated, that the user made within the selected time frame. Other information includes several latency statistics and bandwidth consumed during the session. You can also get bandwidth information from individual virtual channels such as audio, printer mapping and client drive mapping.
Note: MAS 11.1 build 51.21 displays additional user metrics such as WAN hitter and Server Side Retransmits.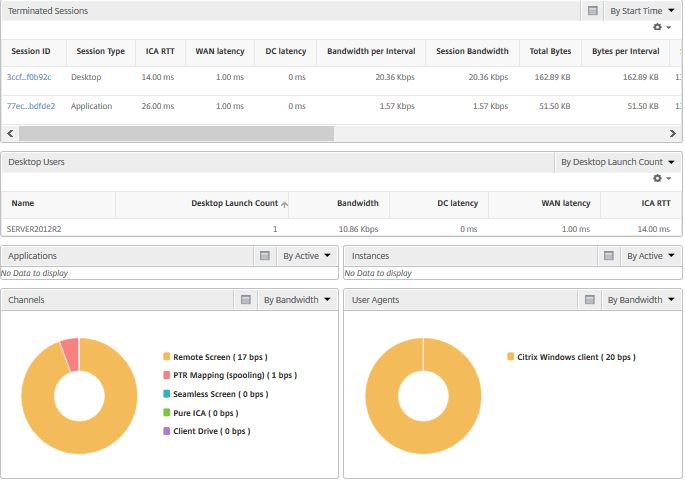
In MAS 12.0.41.16 you can view the User Agent of all connected users by navigating to HDX Insight -> Users.
Clicking the Desktops section shows latency metrics and any past or present connections to Desktop sessions. 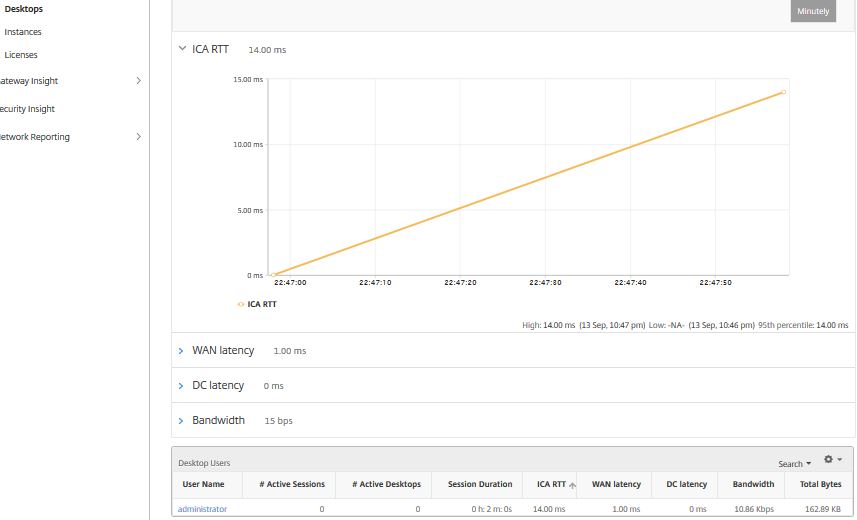
Over to Gateway Insight you can see statistics on failed logons, EPA failures, Application Launch failures, Single Sign-On failures. You can see what browsers were used during authentication and Operating Systems used. You can see active user sessions, licenses consumed, terminated sessions, bandwidth uses by all or specific Gateways etc.
Note: NetScaler MAS 11.1 build 51.21 allows you to see the start and end time of terminated sessiosn within Gateway Insight. You can also export Gateway Insight reports to your local computer in PDF, JPEG, PNG or CSV format or schedule reports to be sent to an email address.
To use Gateway Insight you must be running NetScaler v11 build 65.x and above. To enable Gateway Insight, enable AppFlow by ticking HTTP within the Enable AppFlow box as shown below.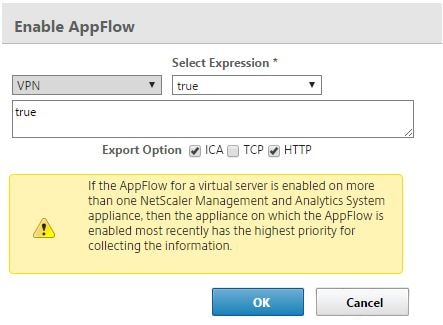
To enable EPA scan logging you must enable AAA Username logging using either your NetScaler CLI or GUI. To use the GUI, navigate to Configuration -> System -> AppFlow -> Settings -> Change AppFlow Settings.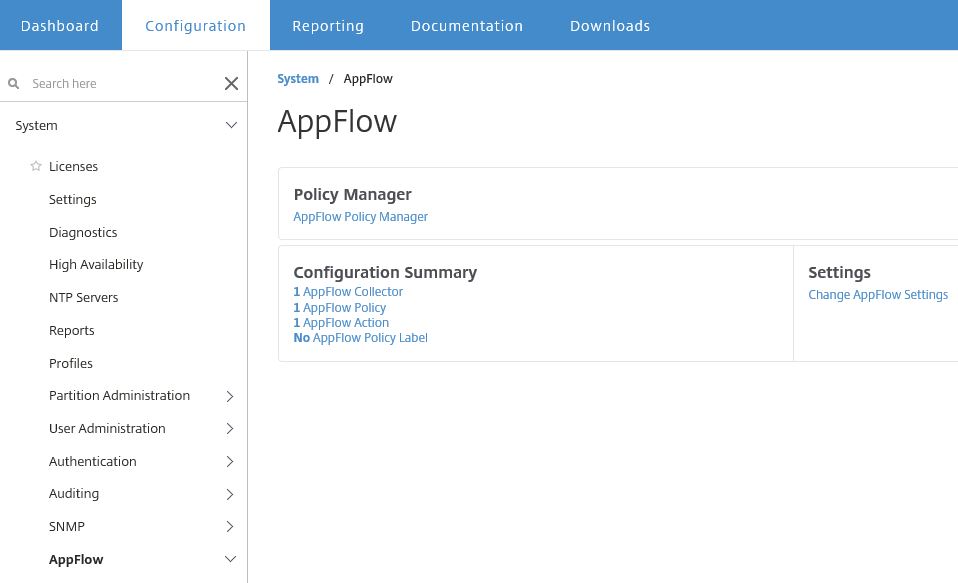
Select AAA Username -> OK.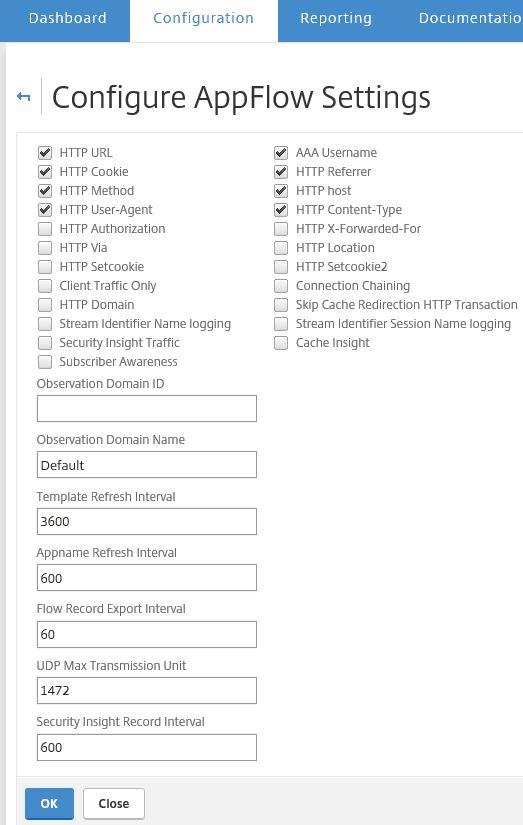
Now navigate to NetScaler MAS and click Analytics -> Gateway Insight. On the main overview page you will see statistics for EPA/SSO/Authentication and Application Launch plus some other pieces.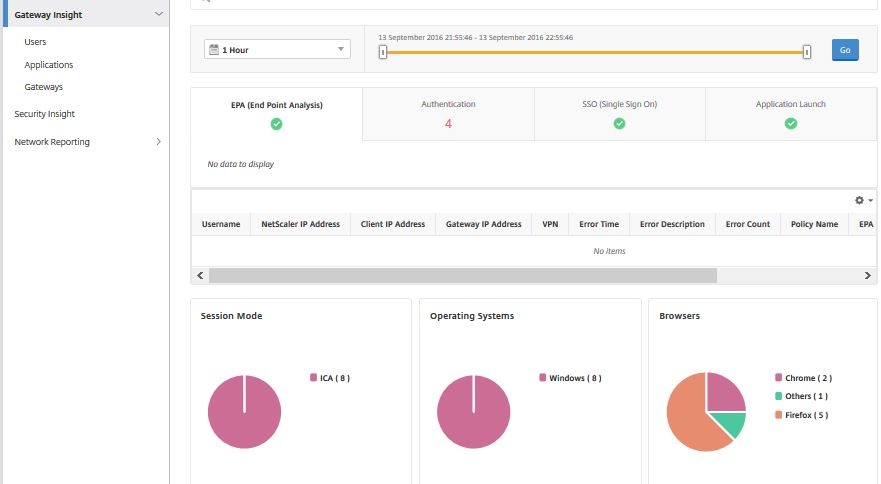
Under the User Logon Activity section you get a view of the number of users who have authenticated to NetScaler Gateway over the selected period of time.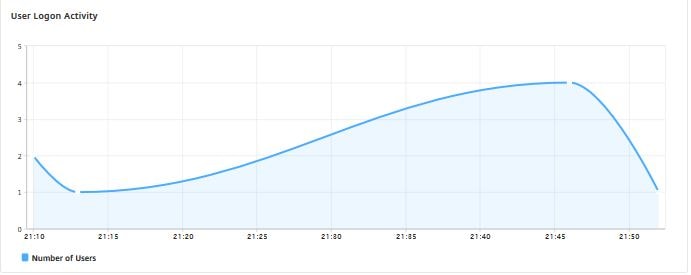
Click on the Authentication tab to get a list of user authentication failures, what gateway was used, client IP address and timestamp information is also included.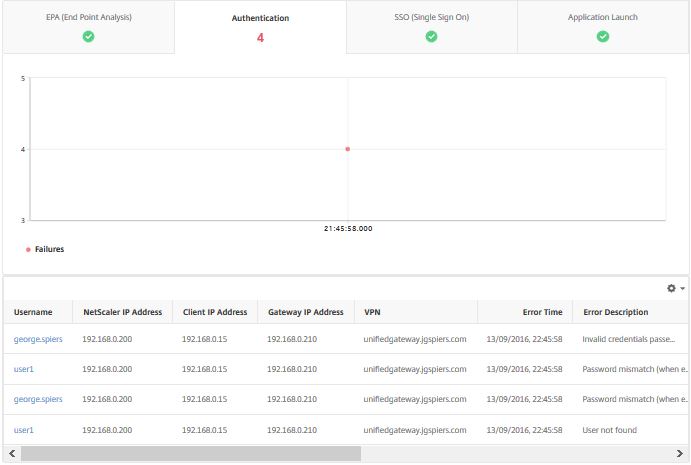
If you click on an individual user MAS sorts all authentication failures in to view for that user including failure reasons etc.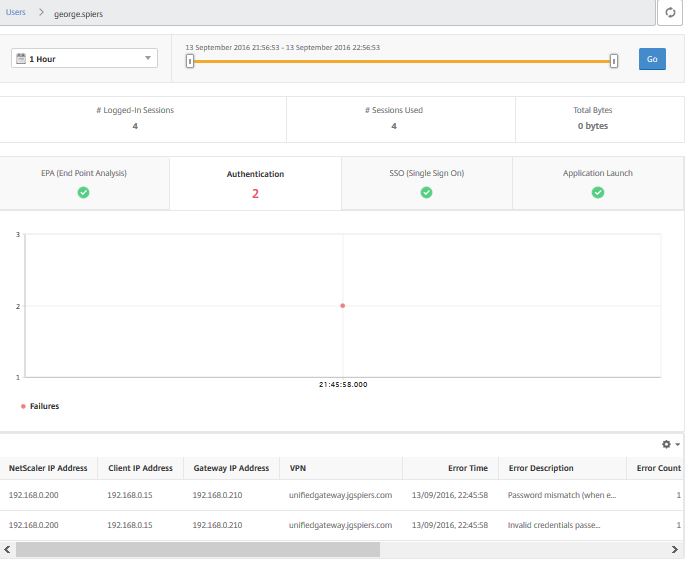
Clicking on Terminated Session and Active Sessions towards the bottomg of the page gives you a list of Active and Terminated Sessions for that particular specified time frame.
Click on Gateways. Here you can see current Active Sessions to any NetScaler Gateway/Unified Gateway, the number of sessions, Operating Systems used, bandwidth consumed and so on. If you have multiple Gateways, you can click on one to get specific details such as authentication failures against this Gateway, total number of sessions etc.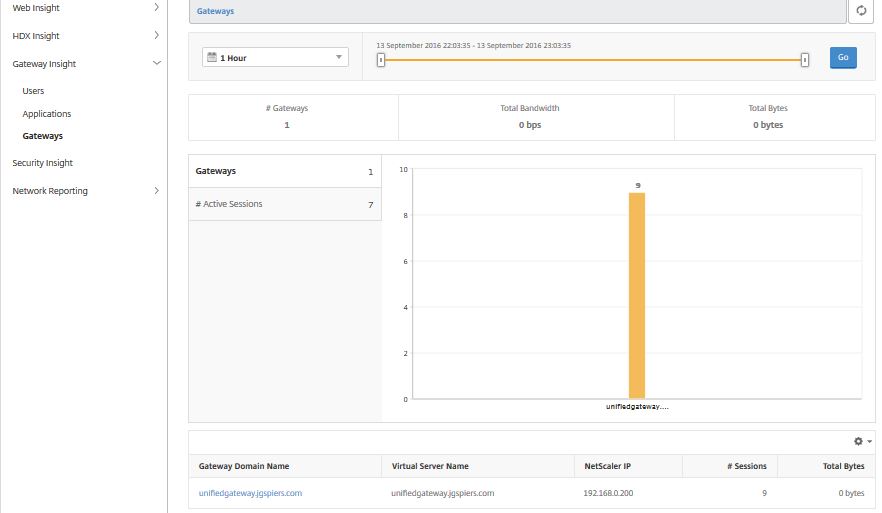
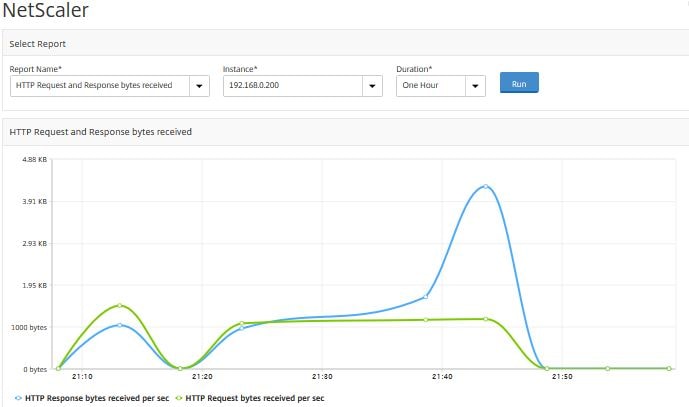
Navigate to Analytics -> Network Reporting -> NetScaler. This section allows you to generate a number of reports against instances such as:
Client – Server connections to a Load Balanced vServer.
TCP Established Server – Active Server Connections over a specified timeframe.
IP Bytes Usage for transmitted IP bytes received and send per second.
Resource Utilization usage for memory and CPU.
And more.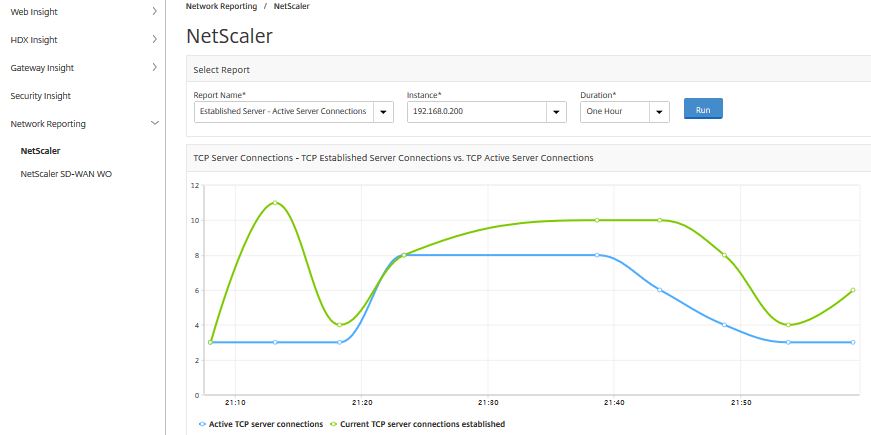
Click on the Infrastructure (Networks) tab. This section gives you an overview of the environment such as how many certificates, NetScalers, Virtual Servers, Applications, SD-WAN appliances have been configured within NMAS.
If you scroll down the page you will come to the Events by Severity section. This graphics shows any clear, minor or major events that have occured on any of your configured instanced in the last 5 minutes, hour, day, week or month. In this example during the past day my NetScaler has encountered a number of minor and major events. Directly below you can also see the health and up time for the appliance over the past day.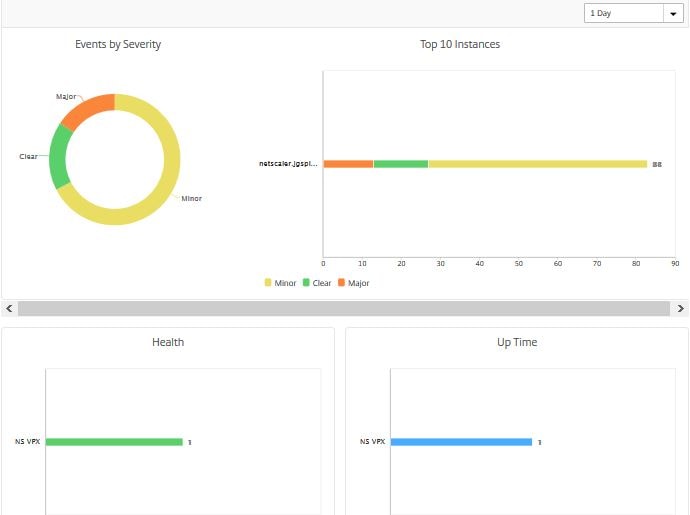
Scroll down further and you will come across models, versions, certificate expiry, NetScaler Config saved status and configuration drift. This is helpful, because if you for example have expiring certificates or you have NetScaler configurations that are not saved you will be alerted.
Click on Dashboard -> SSL Certificates. This shows a nice dashboard with the certificates, key strength, self signed vs CA signed and so on.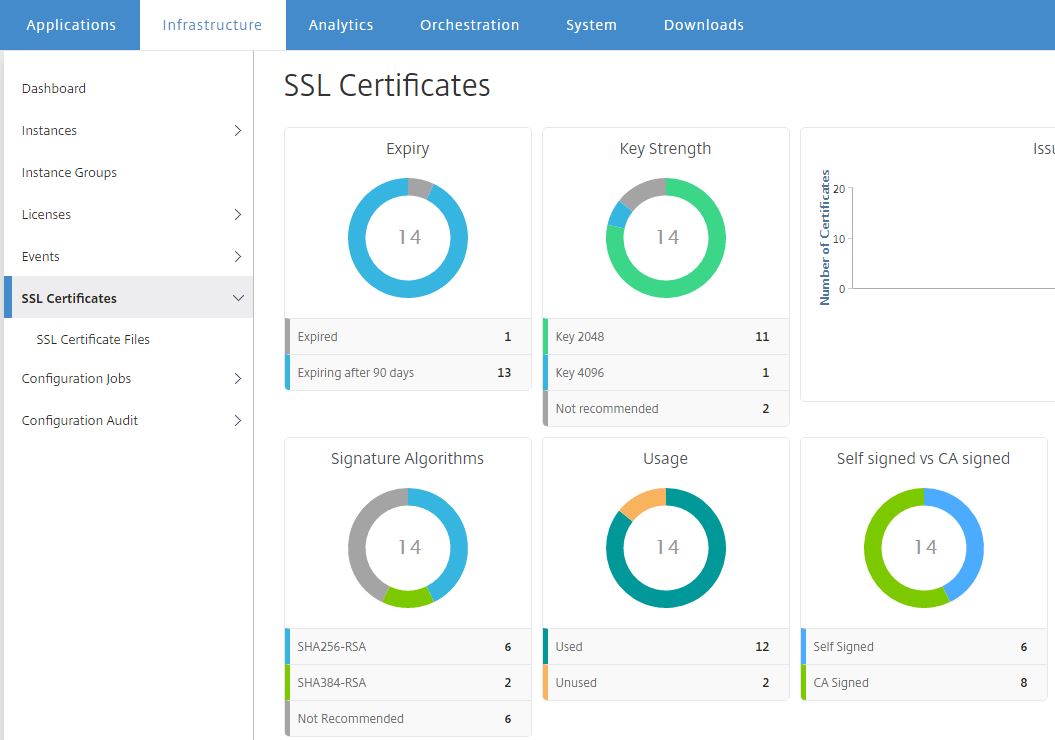
If you click on to one of the sections on the dashboard such as Self Signed, you will be directed to a view containing the self-signed certificates for easy viewing and management.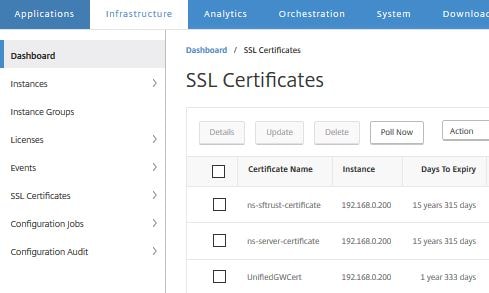
Navigate to Infrastructure (Networks) -> Configuration Audit. From here, you can see a report for Configuration Saved, Not Saved and Configuration Drift. If you click on one of the sections i.e. Config Saved you are brought to the below screen. From here you see a list of your instances that have their configuration saved.
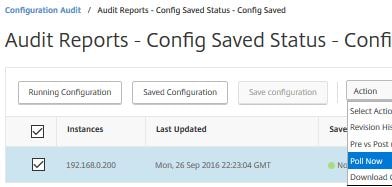
If you select an instance and click Action, you have the option to poll now, run configuration differences between points in time, and download configuration locally.
If you click on the Running Configuration button, you get a list of all configration entries currently running. The same goes for the Saved Configuration button. With NetScaler MAS 49.16 you can receive emails when there are differences between running and saved configurations on a NetScaler appliance.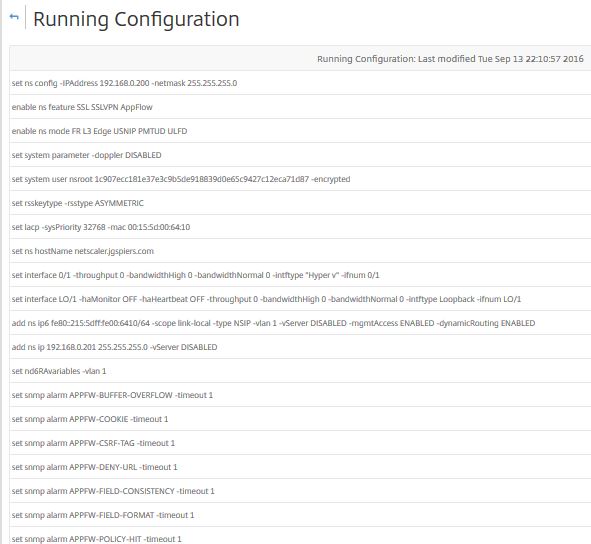
Audit Templates can be used to make sure certain configurations exist on your NetScaler appliances. Say for example you want to make sure all appliances have the optimal cache settings configured or have certain SNIPS or NTP servers configured, the Audit Templates runs every 12 hours and if the NetScaler appliance does not have the configuration the template is looking for, the appliance is flagged as being different from the template.
Note: Starting MAS 12.0.51.24, Audit Templates are available as Configuration Jobs. Simply save the Audit Template as a Configuration Template, and then you can create a Configuration Job based on the saved template.
To get started, navigate to Infrastructure (Networks) -> Configuration Audit -> Audit Templates -> Add. In this example, I’ll use an Audit Template to make sure certain DNS name servers are configured on my appliance.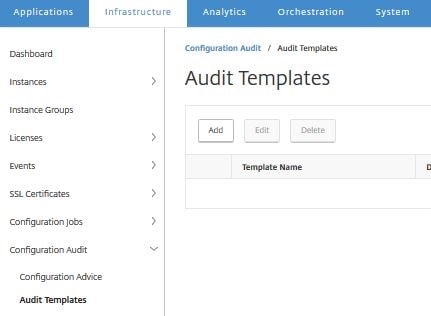 Enter a template name, description (optional) and click Add Instances.
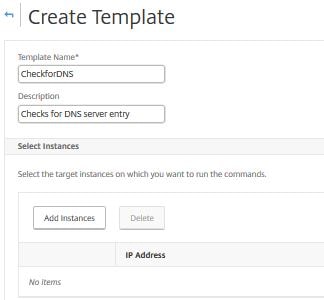
Add the NetScaler instance(s) or Instance Groups and click OK.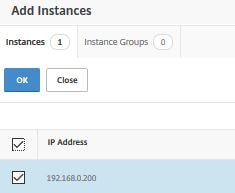
Now under Template Commands enter the commands you want the template to check is present in ns.conf and click OK.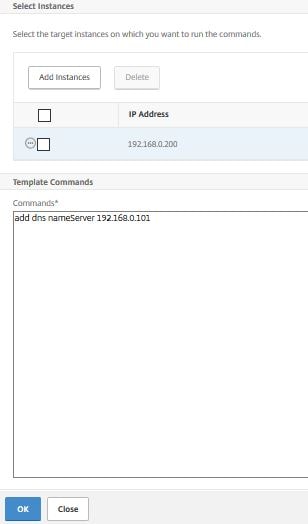 The audit template is ready to go. As previously mentioned, audits run every 12 hours. We can however force an audit.
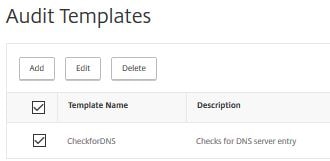
Navigate to Infrastructure (Networks) -> Configuration Audit and click on Config Saved.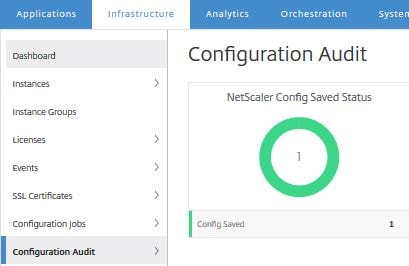 Select the instance you have configured auditing for, click Action -> Poll Now.
Click Yes to begin a poll on ns.conf.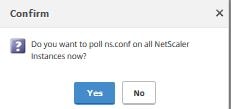
Navigate back to Infrastructure (Networks) -> Configuration Audit. After a few moments (if the DNS name server/command is not present in ns.conf) a Diff Exists alert will show in red. Click on Diff Exists.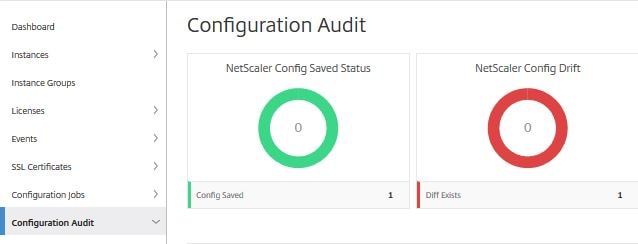
Here we can see the appliance and that a difference exists between the template and running configuration. Click on Diff Exists again.
Now we can see that the template CheckforDNS has failed and the NetScaler appliance has a different configuration from what the template is looking for. Click Diff Exists. Finally you are shown the configuration the template is looking for and the running configuration which is blank because no such name server has been configured or has been removed/lost. You also get a view of the correction configuration/the command to run to correct the configuration. Using the Export all the corrective commands exports the commands to a TXT file. You could then run the commands via CLI to correct the configuration or use Configuration Jobs straight from NMAS to correct multiple instances.
Navigate to Infrastructure (Networks) -> Configuration Audit -> Configuration Advice. NMAS has the ability to scan your instance and give you a list of best practice recommendations to configure on the NeScaler. What’s even better is you can deploy most recommendations straight from the NMAS console. You can upload a configuration file or select and scan a managed instance. Click Select Device, choose your instance and click Get Configuration.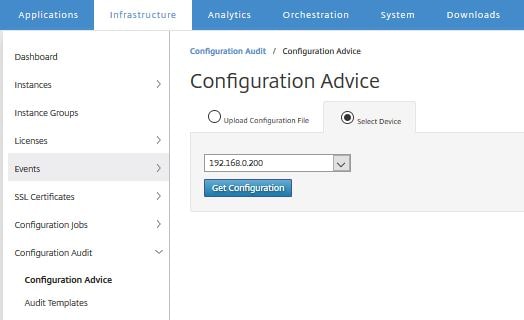
NMAS analyzes the configuration.
Once complete, a list of recommendations will be displayed in view.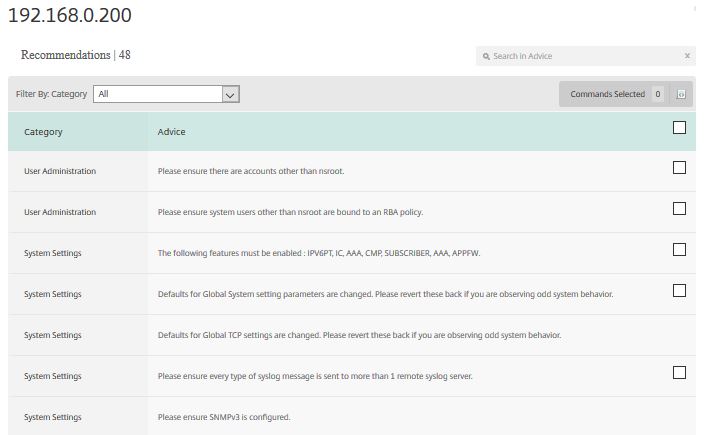
Check a recommendation such as the one I have below.
Enter some required user information. 
To the right of the screen is a small icon. Click this then choose Apply Now.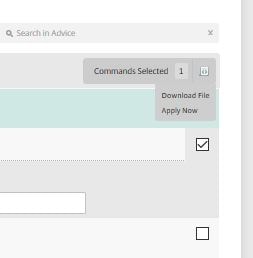
The recommendation has been applied to the remote appliance.
Over on the remote appliance we can see the new user has been created successfully.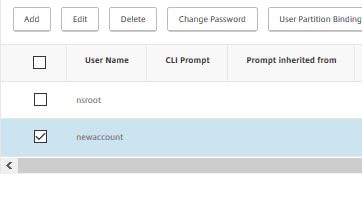
Notice that the user wasn’t added to any groups and remember there was no field to select a group over on NMAS. With this in mind, be aware that you may have to perform some final configurations on an applied recommendation.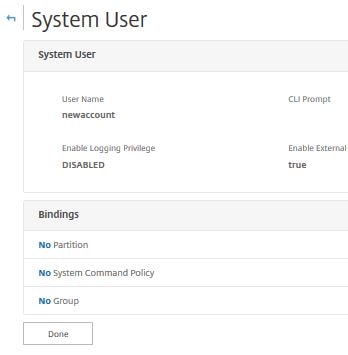
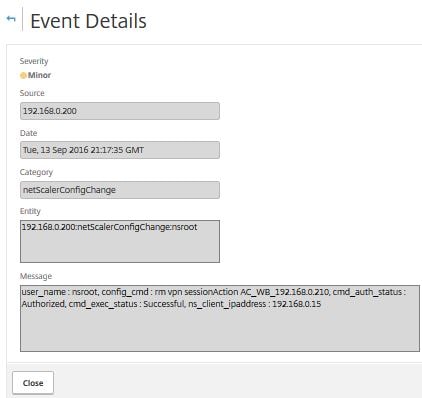
Navigate to Infrastructure (Networks) -> Events -> Reports and click on an instace that is reporting events by severity. You may need to adjust the time period to 1 month for example. From there you can see a list of events logged such as configuration changes, if the NetScaler went down, SNMP authentication from devices etc. Select an event and click Details.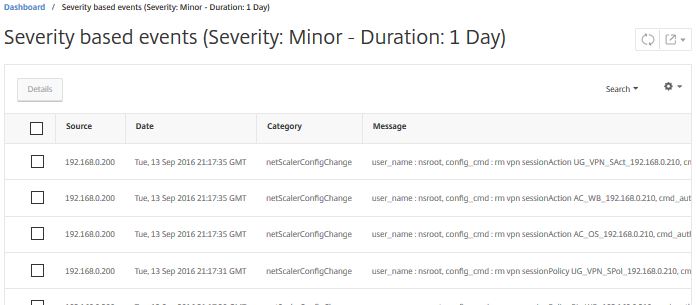
This view gives you a easy to read view of the event and what happened during this event.
Navigate to Infrastructure (Networks) -> Instances and click the subgroup that applied to you i.e. NetScaler VPX. In here you will find any discovered NetScaler VPX appliances. If we select the appliance, we can click View Backup.
No backup exists. This is because this NetScaler was only recently discovered and automatic backups take place at 12:30am. To take a manual backup, simply select Back Up.
Enter a password to protect the file if desired and click Continue.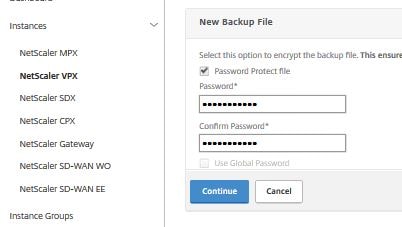
After a few moments the backup will complete. From here you can download the file or perform a restore.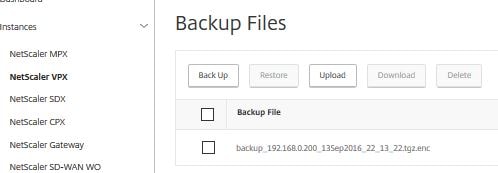
Navigate back to the Infrastructure (Networks) -> Instances section and select one of your NetScaler instances. Click Action. Notice the different actions you can perform on an instance such as ping, view events, reboot, Enable/Disable Insight.
Note: You cannot change the host name to use a custom name for example.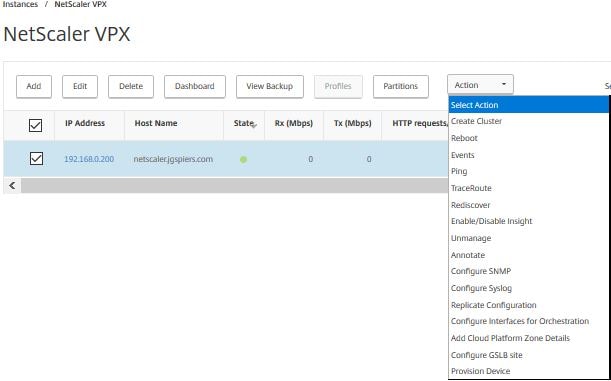
You can also replicate configuration of one device to another.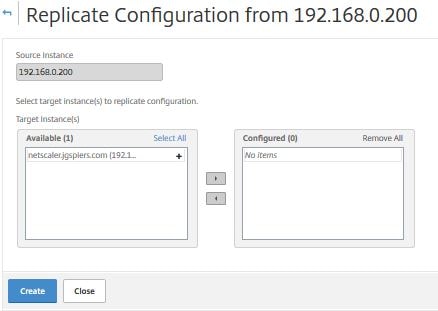
Navigate to Infrastructure (Networks) -> Licenses -> Settings. Here you can upload a license to NMAS. By default MAS can monitor up to 30 virtual servers within discovered instances. In NetScaler MAS 12.0.41.16+ you can manage 30 applications. If you want to go beyond that, you will need to purchase licenses known as “virtual server packs” that come in packs of 100.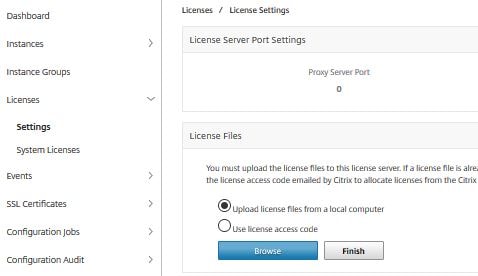
By clicking System Licenses you can see the virtual server limit of 30 and the actual number of managed virtual servers.
Introduced with the 11.1.49.16 version of NetScaler MAS is the ability to choose which Virtual Servers you want to manage. This is great in the situation you only want to manage up to 30 without having to buy additional server packs for Virtual Servers that you don’t care so much about managing/monitoring. To pick and choose navigate to Infrastructure (Networks) -> Licenses -> System Licenses -> Modify licensed Virtual Servers. 
Select a Virtual Server and click Mark Unlicensed. Starting MAS 49.16 you can view and get alerts when virtual server license packs expire.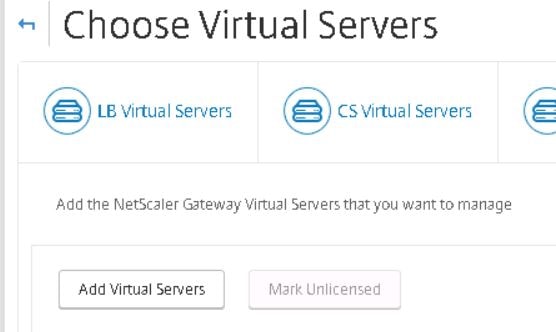
If you click on Event Messages you can get a list of clear, minor and major events logged by your NetScaler, SDX and SD-WAN (WAN Op edition) instances.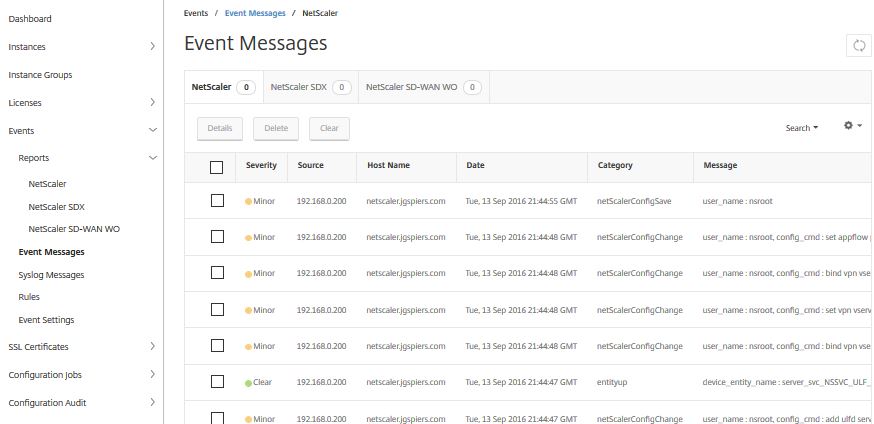
Beginning MAS 12.0.51.24 virtual servers that are non-addressable are not automatically licensed, unlike previous versions of MAS which did license them. If you still want to license those virtual servers, disable Auto-select Virtual Servers.
Non-addressable Virtual Servers such as Unified Gateways for example will not be automatically licensed.
Starting MAS 12.0.51.24, you can disable the auto-selection of Virtual Servers to be licensed entirely. In previous versions of MAS servers were licensed automatically after each polling cycle if the number of licenses servers were less than the licenses limit. MAS 12.0.51.24 allows you to manually choose which servers are licensed without having to unlicense virtual servers. Navigate to Networks -> License Settings -> System Licenses and switch Auto-select Virtual Servers to Off.
Now click on Select Virtual Servers.
Choose which servers you want to license and click Save and Exit. 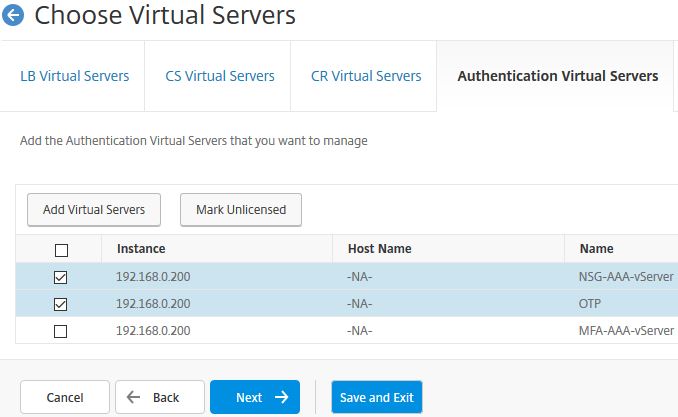
Click on Rules. Here we can create a rule based on an incoming event. Click Add.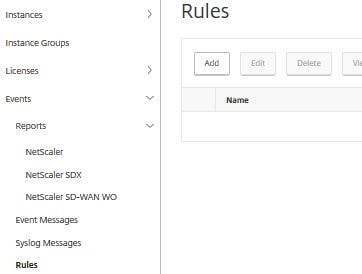
We will create a rule that sends an email based on a certain type of received critical event. 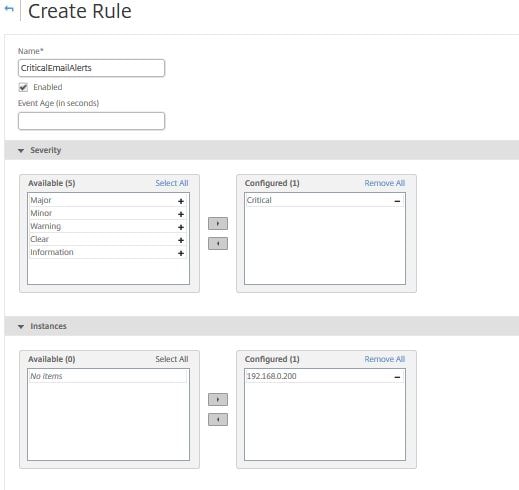
Under Category choose entitydown and sslCertificateExpiry. At the bottom of the page, click Add Action.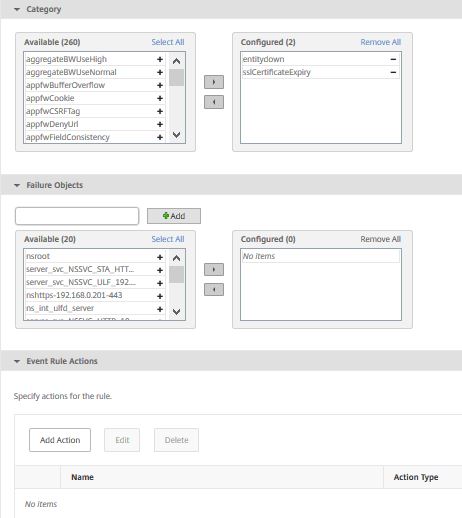
Set the Action Type to Send e-mail Action and choose your pre-created email distribution list. You can choose to repeat the email notifications and the frequency they are repeated. Click OK.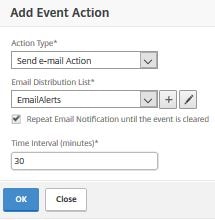
The new rule is created. The new rule can be triggered if the device is rebooted or goes offline.
Click on Event Settings. Here you can alter the severity settings for any event category. Choose an event category and click Configure Severity.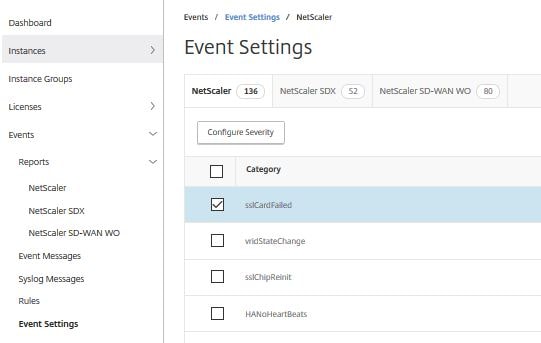
Use the Severity dropdown box to choose a severity other than Major.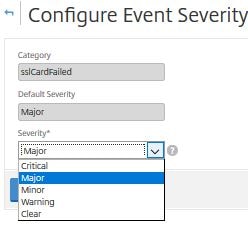
Navigate to SSL Certificates -> Install.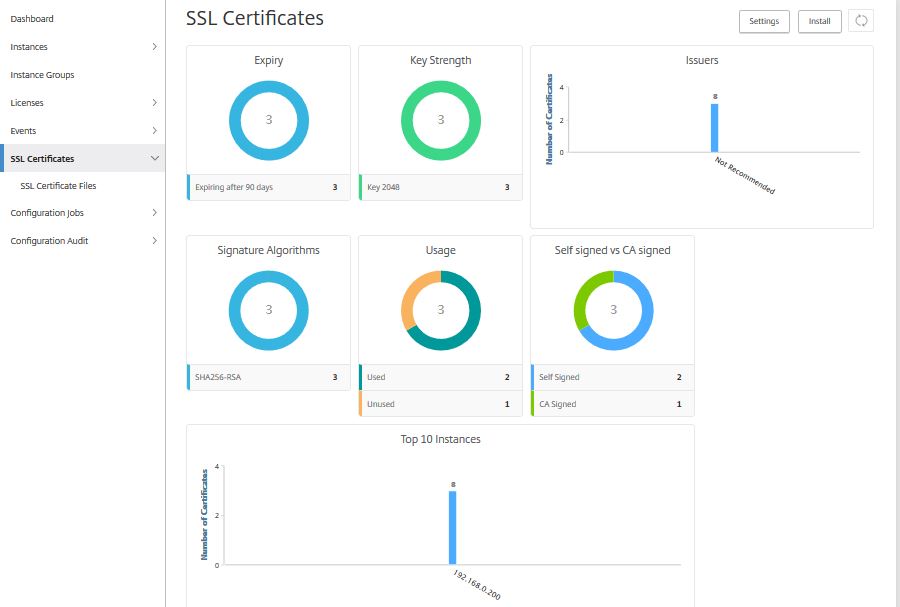
We can use this wizard to install a certificate on a remote NetScaler instance. Complete the below fields.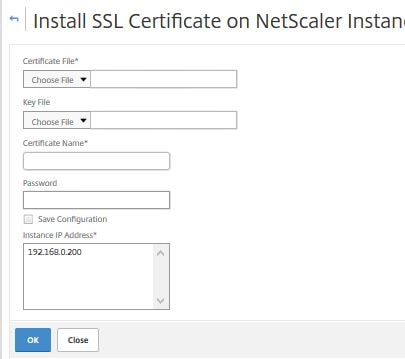
After the below fields have been completed such as the Certificate Name, Certificate File, Key File, click OK.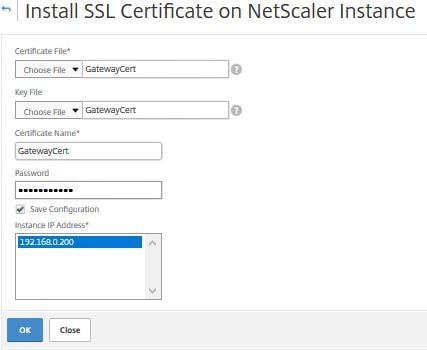
If everything was correct we should now have a new GatewayCert certificate installed on the remote NetScaler appliance.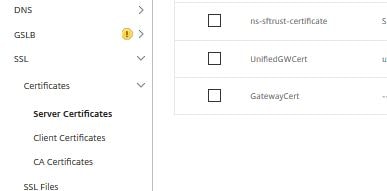
Navigating to SSystem -> Diagnostics -> Task Log you can see the InstallSSLCert task completed.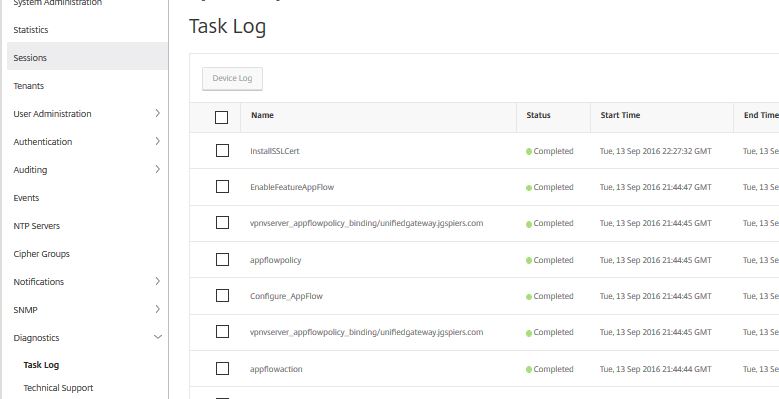
Drill in to the task to see the actual different steps (commands) used to complete the certificate install.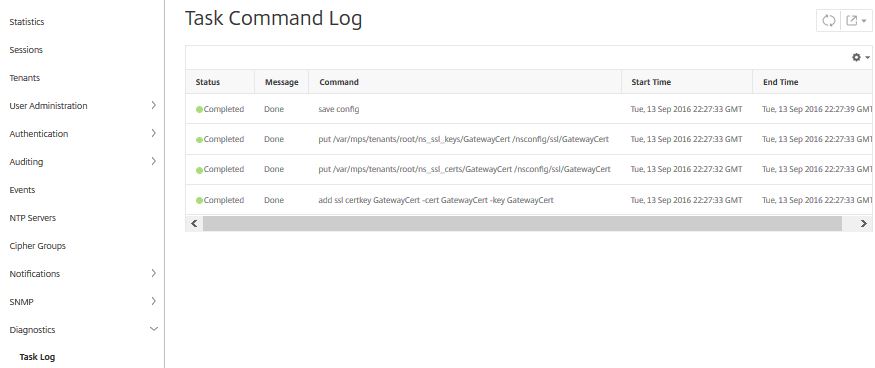
To create configuration jobs to automate tasks on NetScaler appliances navigate to Infrastructure ((Networks) -> Configuration Jobs -> Create Job.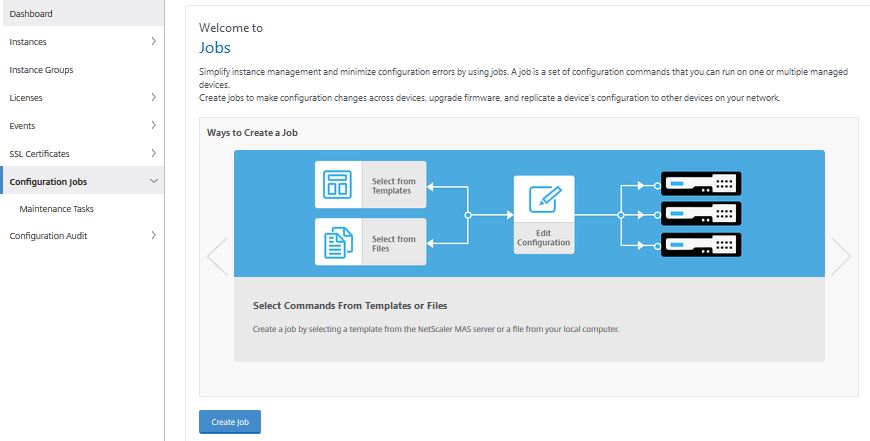
Here’s a look at the difference deployment types we can use. Jobs are able to run on NetScaler, NetScaler SDX and NetScaler SD-WAN WO.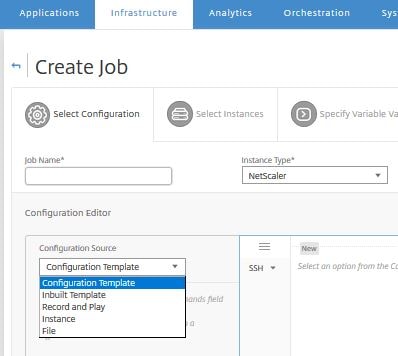
Using an Inbuilt Template shows one possible configuration job (NSConfigureSyslogServer) to configure Syslog on the NetScaler.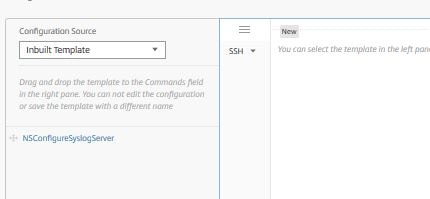
Syslog messages that are received from NetScaler Instances can be exported to PDF, CSV, PNG and JPEG in MAS 12.0.41.16.
Another template has been added to MAS 12.0.41.16 called Master Configuration. This template as the commands show makes a backup of the ns.conf file on the instances the job runs on. Next the job takes the ns.conf file you have specified within the job (master configuration) and uploads it to the instances defined within the job. Doing this allows you to replicate configuration from one node out to many others.
By selecting Instance as the Configuration Source you can extract commands ran on the selected source instance over a defined period of time and use these commands to create a configuration job. As you can see over the past day 2 commands have been run. Click (hold click) and drag the 2 commands item to the middle white canvas. Doing this allows you to replicate configuration easily from one NetScaler to another.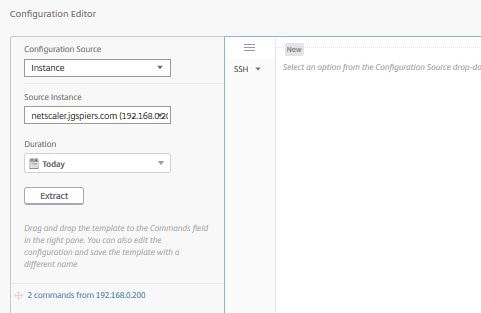
Now we can see the actual commands. If they are the commands we need, we can make a configuration job out of them.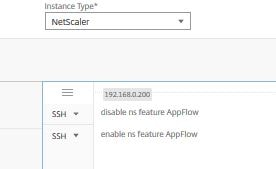
If you choose File as the configuration source, you can upload a file containing commands to be used for a configuration job.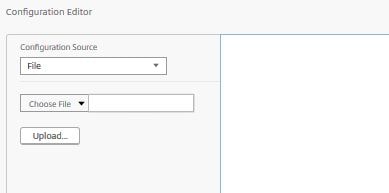
Selecting Record and Play as the configuration source let’s you run GUI actions manually on the NetScaler with NMAS recording those commands. This is a handy feature! Select a source instance and click Record.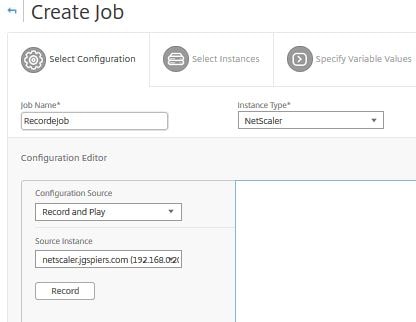
NMAS is attempting to authenticate with the NetScaler instance using whichever profile you have attached to the NetScaler Instance.![]()
If for any reason the NetScaler profile contains a wrong username or password for the appliance, you may get this message aswell as the instance becoming down/unmanaged by NMAS.![]()
Once authentication is done a popup window will appear showing the NetScaler GUI. From here you will make any configurations that you like.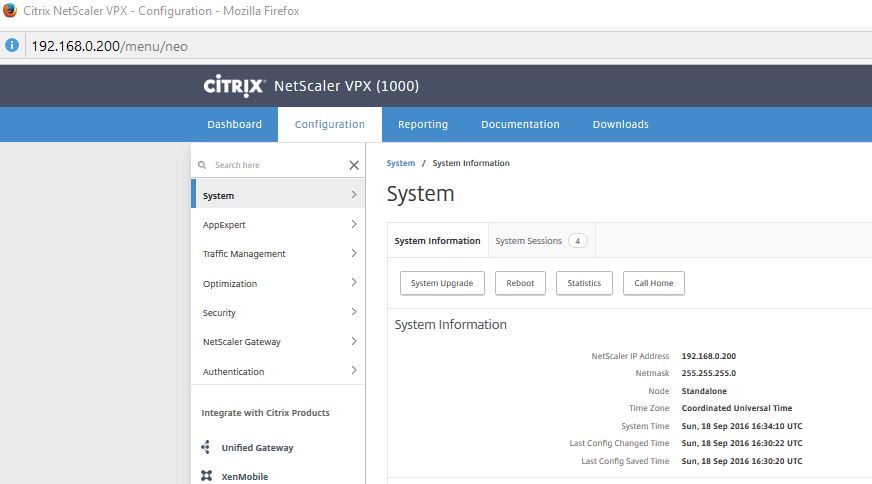
For simplicity, let’s just create a new user (superadmin). 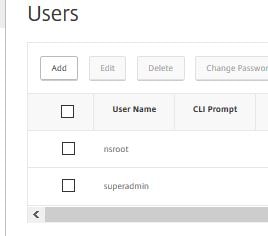
Now navigate back to NMAS and click Stop.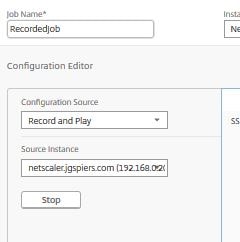
NMAS will retrieve a list of the commands ran on the NetScaler appliance. I only configured one user but you can run an capture multiple/advanced configurations.![]()
Once complete 2 commands from instanceip appears as shown below. Drag this item on to the white canvas.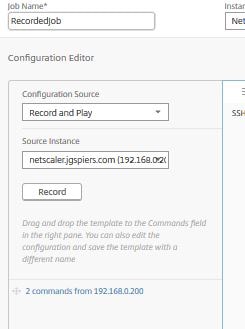
The commands appear as below, showing what was involved to create the user.
Once happy, click Next.
Now since we have to run this job on an instance, we need to add one. Click Add Instances. If you do not want to run a job right now you can click Save & Exit and pick up where you left off at a later stage.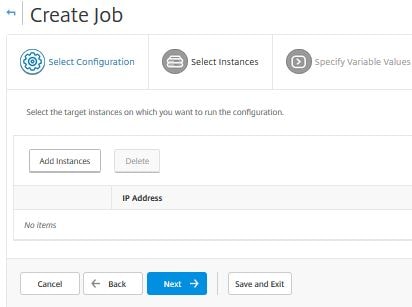
Select an instance or instance group and click OK.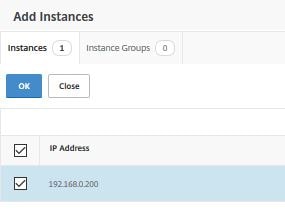
Click Next.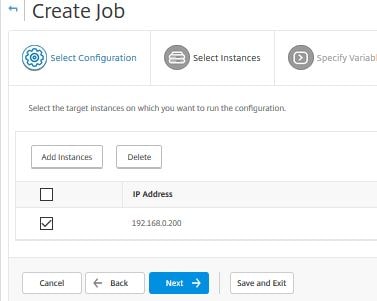
Click Next.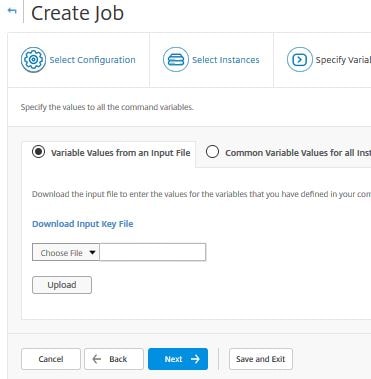
Specify to Ignore error and continue, Stop further execution or Rollback successful commands upon command failure.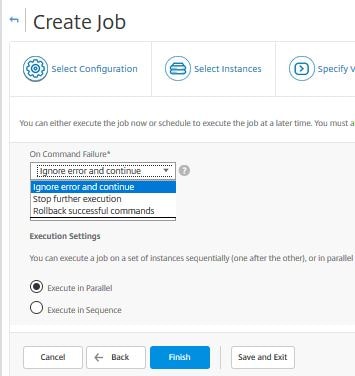
Specify an execution time, now or later.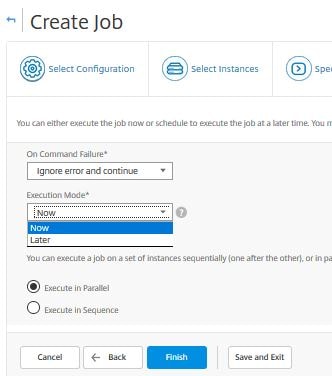
If you click later, you can run the job daily, or on a specific day of the month or week. Starting NetScaler MAS 49.16 you can receive email alerts each time a job has been executed or has been scheduled.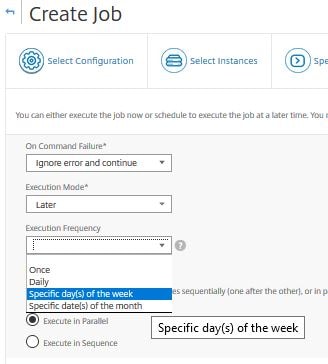
If you have selected this job to run on multiple instances, specify to execute the jobs in parallel or in sequence.
In NetScaler MAS 12.0.41.16+ you can specify a username and password that will be used to run the Configuration Job. In previous versions, the job always ran under the Admin Profile attached to the NetScaler instance.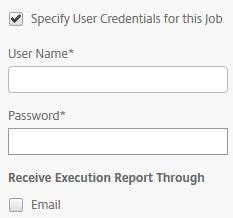 Now, click Finish.
You will be directed to the Jobs screen and shown the progress of the job.
Now the job is complete once you get the Completed message under Execution Summary. You can download a report of the job or email it. Click Download.
The file downloads as a PDF and is displayed as below, showing the commands ran and on what instance they ran on etc.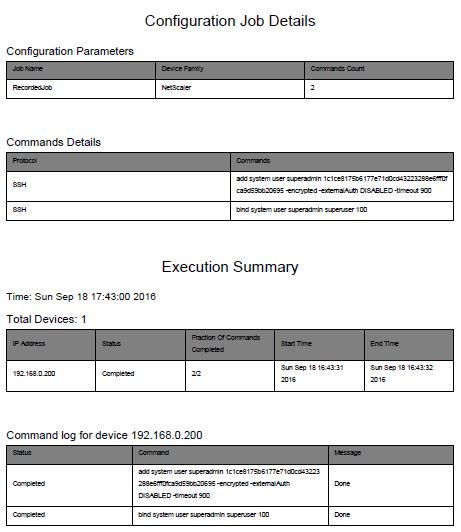
Back on the NMAS console, you can execute the job again or view the execution history.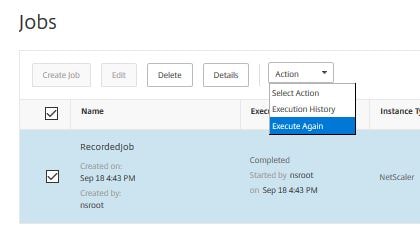
The execution history shows below with some important yet brief information on the job. Notice the Download Report and Email Report options are here giving you the option to perform these actions at any time.
If you clicked on Execute Again you will receive a warning that the job will perform the same commands against the same instance. Click Yes if you want to proceed.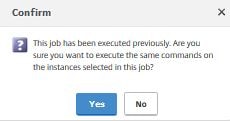
Starting with NetScaler MAS version 11.1 build 49.16 you can edit completed Configuration Jobs, add or remove commands and run them again against the same or different NetScaler Instances or Instance Groups. Simply select a completed job and click Edit.
Make any desired changes and continue on with the wizard until complete.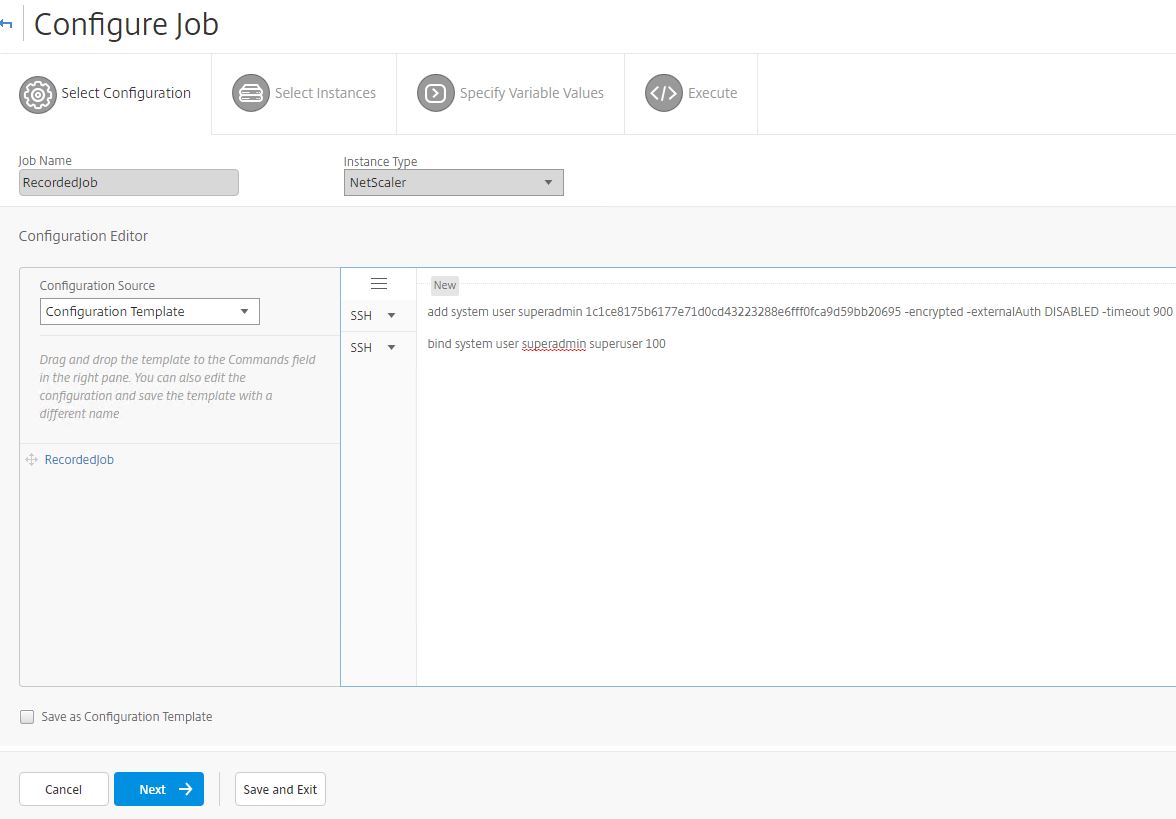
NetScaler VPX check-in/check-out licenses on MAS 12.0.41.16+
The check-in/check-out feature of MAS 12.0.41.16+ allows VPX appliances to dynamically check-in and check-out licenses as the appliance comes online or goes offline. Pools of NetScaler’s can effectively share a smaller pool of licenses with MAS acting as the VPX license server. There are some prerequities for this to work:
- MAS should be on build 12.0.41.16 and above.
- VPX appliances should also be on build 12.0.41.16 and above.
- VPX appliances can communicate with NetScaler MAS over TCP port 27000 and 7279.
- Licenses already installed on VPX appliances can be rehomed to NetScaler MAS.
To install a VPX license on MAS, navigate to Networks -> Licenses -> Browse.
To upgrade a NetScaler appliance straight from NMAS, navigate to Infrastructure (Networks) -> Configuration Jobs -> Maintenance Tasks. Highlight the UpgradeNetScaler built-in task and click Execute. Notice there are other tasks to configure HA pairs etc. 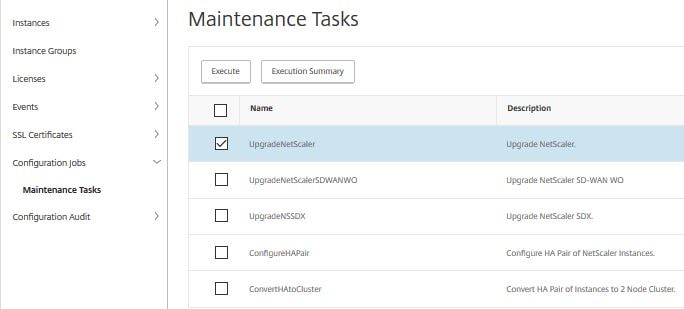
Click Add Instances.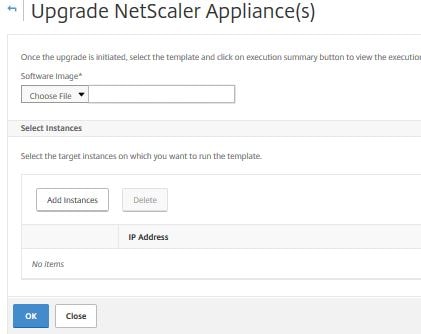
Select the instance you want to upgrade and click OK.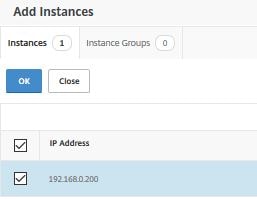
Insert the NetScaler upgrade file (in .tgz format) and click OK.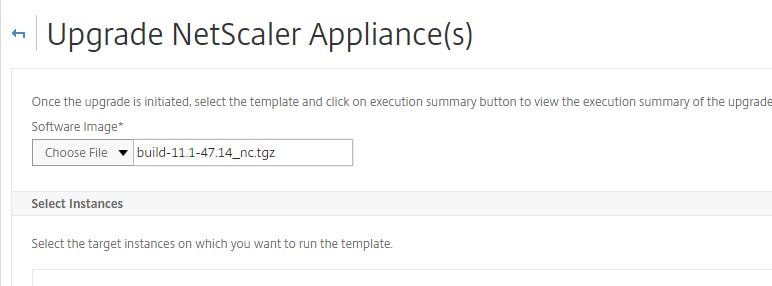
The upgrade image will start to upload to the NetScaler appliance. Once complete you are returned to the NMAS screen. You have to view the Task Logs to check the status of the upgrade.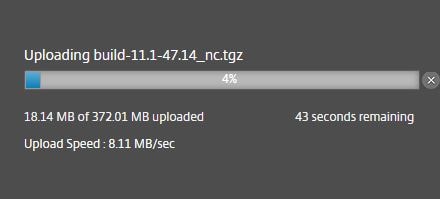
If we navigate to Task Logs you can see the task is In Progress.
Drilling in to the Task Command Log shows that NetScaler build 11.1 47.14 is installing.
After a few moments, and a few refreshes, the install should return “Completed”.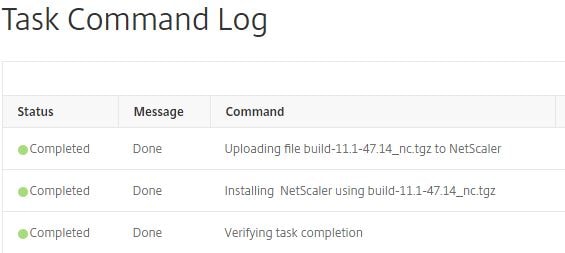
The UpgradeNetScaler task reports complete and the appliance has been upgraded. I have used this method on production NetScaler devices and have not had any issue with upgrades so far. Using NMAS to upgrade the NetScaler could not be easier!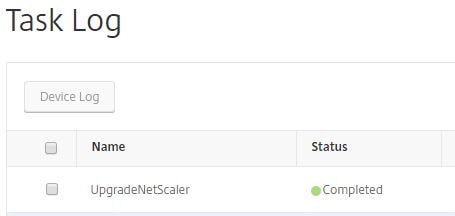
To create thresholds to receive alerts based on certain factors exceeding limits navigate to System -> Analytics Settings -> Thresholds -> Add.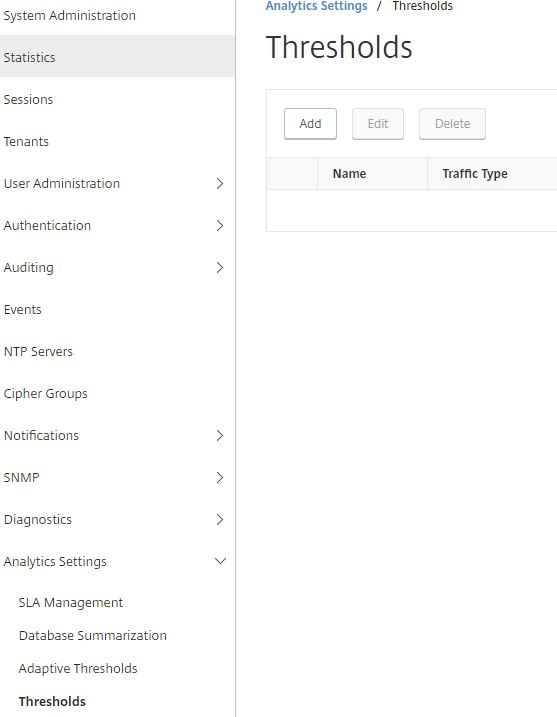
Enter a name. Select Traffic Type (HDX/Web) and then the entity such as Desktops, Applications, Licenses in use for HDX. Check Enable Alert, Notify through Email and select your email distribution list. Select a metric such as DC latency (ms), select a comparator such as equals to, greater than and finally enter a value.
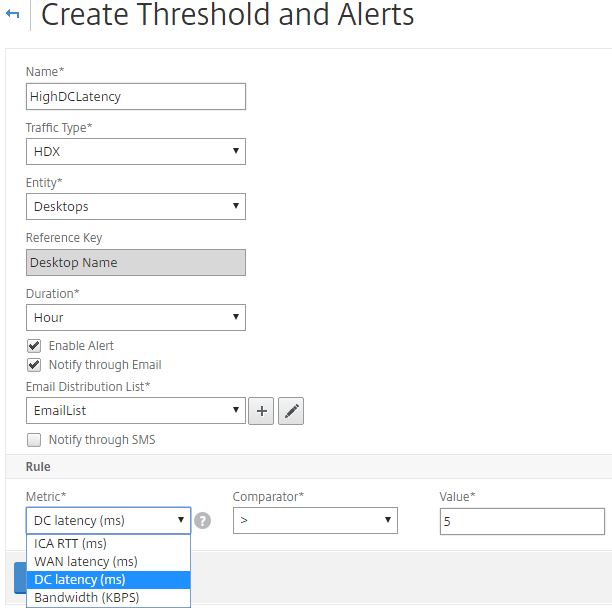
For this threshold an email will be sent if DC latency for Desktops is greater than 5ms for the duration of 1 hour. Click Create.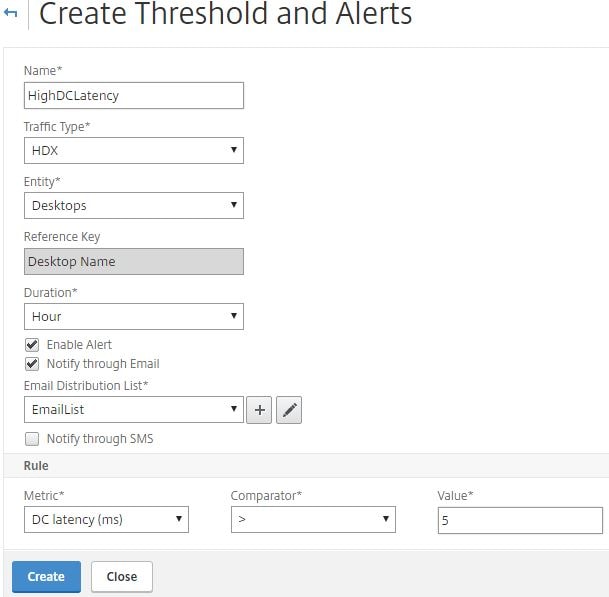
The new threshold shows created as below.

Integrating MAS with Citrix Director allows you to view HDX Insight data, trends and historical analytics data straight from the Director dashboard. You will need Director 7.11 and a Platinum XenApp or XenDesktop license. Other points to note are:
- Citrix Receiver 11.8 for MAC and Citrix Receiver 3.4 and later versions are required to display accurate ICA RTT metrics.
- NetScaler MAS 11.1.49.16 or later is required.
- VDAs running v7 or later is required.
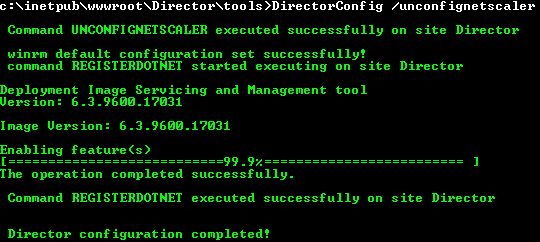
To integrate MAS with Director, firstly open CMD (as administrator) and run command cd c:\inetpub\wwwroot\director\tools. Next run DirectorConfig /confignetscaler. Enter the IP of your MAS server. Enter MAS credentials and complete the other challenges. Eventually you should see a Director configuration completed! message.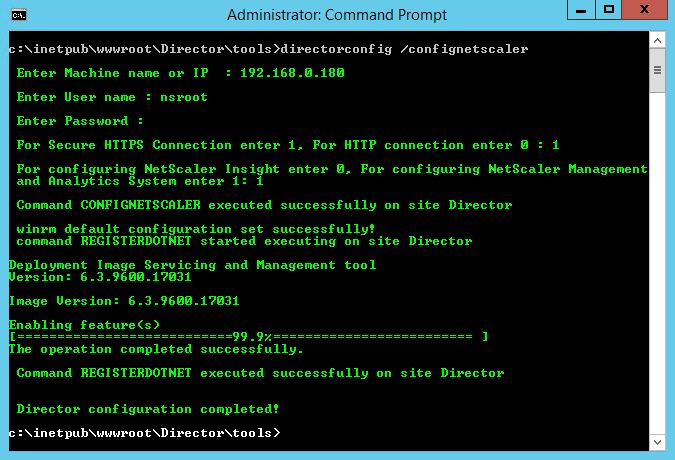 To unconfigure Director with MAS run commmand directorconfig /unconfignetscaler.
Clear MAS Configuration
If you ever need to wipe the configuration on a MAS appliance run the following commands on the appliance via CLI:
- shell
- masd stop
- killall postgres
- sh /mps/scripts/pgsql/deleteuser.sh
- sh /mps/scripts/pgsql/createuser.sh
- chown -R mpspostgres /var/mps/db_pgsql/
- rm -rf /var/mps/db_pgsql/data
- su -l mpspostgres -c “sh /mps/scripts/pgsql/initpgsql.sh”
- cp -f /mps/postgresql.conf /var/mps/db_pgsql/data/
- su -l mpspostgres -c “sh /mps/scripts/pgsql/startpgsql.sh”
- su -l mpspostgres -c “sh /mps/scripts/pgsql/drop_pgsql_db.sh”
- su -l mpspostgres -c “sh /mps/scripts/pgsql/create_pgsql_db.sh”
- su -l mpspostgres -c “sh /mps/scripts/pgsql/drop_pgsql_user_sh”
- su -l mpspostgres -c “sh /mps/scripts/pgsql/create_pgsql_user_sh”
- su -l mpspostgres -c “sh /mps/scripts/pgsql/stoppgsql.sh”
- touch /mpsconfig/.recover
- masd start
If you want to run the deployment selection/change the deployment, run shell -> deployment_type.py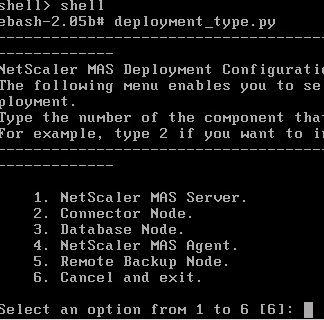
Troubleshooting Netscaler MAS
NetScaler MAS Troubleshooting Guide – https://support.citrix.com/article/CTX224502
This document should still apply largely to MAS http://docs.citrix.com/en-us/netscaler-insight/11-0/ni-troubleshoot-tips-ref.html
Also read the HDX Insight Diagnostics and Troubleshooting Guide – https://support.citrix.com/article/CTX215130
Your NMAS version must be the same or higher than your NetScaler firmware version.
When you have enabled AppFlow against your NetScaler Gateway or Load Balanced vServer etc. and you can not see any Insight traffic, make sure firewall rules are in place to allow UDP 4739 from NetScaler NSIP to NMAS IP. You can check if MAS is receiving any appflow traffic by performing the following steps:
Launch PuTTY, and connect to your NetScaler Insight Center IP.
Type shell. Press enter.
Type command tcpdump -i 1 src NSIP and dst port 4739 where NSIP = your NetScaler IP.
![]()
If you still do not see NetScaler AppFlow data, connect to your NetScaler appliance with PuTTy.
Run command disable feature appflow followed by enable feature appflow.
Review the MAS putty screen to see if traffic is appearing. If not, review firewall configuration.
Example output showing AppFlow traffic between NetScaler MAS and NetScaler VPX. 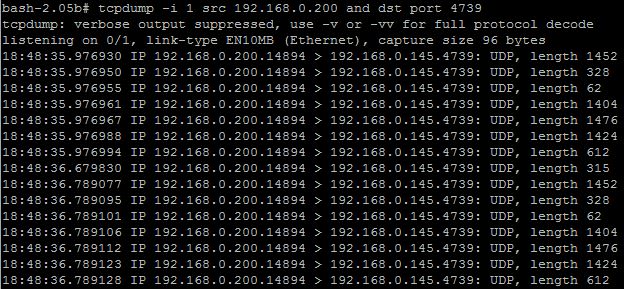
Nina
April 2, 2017Very insightful and detailed writeup!
werner
August 2, 2017Thanks! Great stuff
Newbie
March 28, 2018Thanks George for an awesome write up… one question if I may?
re MAS version, you mentioned “Your NMAS version must be the same or higher than your NetScaler firmware version.”
Now, the question – is it ok to run NMAS ver 12.x with NS instances on ver 11.x?
I have this setup working in this way
It’s just dawned on me perhaps I should change the setup so that both ends are on ver 11.x.
And when we have a need to move NS to 12.x only then change MAS to 12.x.
Your opinion or exp on this would be most appreciated.
Newbie
George Spiers
March 29, 2018Hey – MAS 12.0 supports NetScaler back to 10.1 and later however see here for the full list of supported NetScaler versions required per MAS feature https://docs.citrix.com/en-us/netscaler-mas/12/system-requirements.html#par_anchortitle_78b0
Newbie
March 29, 2018Thanks George…
Interesting, although NMAS 12 appears to support 11.1.x, I have had to work through several NMAS 12 system errors.
Each time Support suggested I updated to the newer version of NMAS 12.x – only to get more error/bugs down the line. So suspecting root cause due to the cross between 12.x and 11.x? Or maybe NMAS 12.x is just too buggy?
So now leaning towards a nmas11.x with ns11.x setup – with the hope the setup will be bug free.
Do share any thoughts or exp.
Thanks again,
N.
George Spiers
March 29, 2018If you are trying to get Insight such as HDX Insight working then yes there has been quite a few issues with that! I’ve lost track of which appliances are stable with Insight, however just make sure the MAS version is the same or newer than the ADC.
N
March 29, 2018Thanks again George…
To play it safe i have dropped down to 11.1 vs 11.1.
Working sweat.
Fingers crossed, happy forever after
Regards,
N.
George Spiers
March 30, 2018Let me know how it goes
Newbie
March 30, 2018Hello again George,
Re Clear MAS Configuration, just wondering if these commands also clear the AppFlow settings on the Netscaler instances?
Or is it a case of having to manually remove AppFlow settings on the Netscaler separately?
Regards,
N.
George Spiers
March 31, 2018Either remove the policies manually or else disable HDX Insight on your appliance from MAS and that should automatically unbind the policies etc.
Newbie
March 30, 2018Hi George,
Just wanted to share some exp of the disk size.
You mentioned “120GB disk space (500GB recommended for better performance)…
I have learnt that 120gb default of primary hdd FreeBSD partition cannot be increased.
For example, if you increase the “primary” hdd to any larger size, the primary FreeBSD boot disks still remains at the default 120GB.
Below is the extract of nmas with a 300gb primary hdd, notice the OS still uses 120gb config, (no mention or use of the 300gb thick provisioned hdd):
=============================================
bash-2.05b# df -h
Filesystem Size Used Avail Capacity Mounted on
/dev/md0 542M 483M 47M 91% /
devfs 1.0k 1.0k 0B 100% /dev
procfs 4.0k 4.0k 0B 100% /proc
/dev/da0s1a 1.6G 173M 1.3G 12% /flash
/dev/da0s1e 110G 691M 101G 1% /var
=============================================
So the only way to increase storage is add as an additional 2nd hdd with the larger size.
The primary will be used for bootup/os/firmware etc.
The 2nd hdd will be used for storing logs etc.
Best practice is to add 2nd hdd during initial installation.
See CTX222832 for further detail.
On the subject of hdd, do you know of ways to manage/purge old log data, so that hdd does not get full?
Happy Easter
N
George Spiers
March 31, 2018Yes under System Administration you can access System Prune Settings and adjust the default values so you aren’t retaining more data than you need.
Jan Gerrit Kootstra
December 17, 2018Hello George,
Is it a configuration issue or do MAS backups exclude /var/netscaler/logon/themes?
Regards,
Jan Gerrit
George Spiers
December 19, 2018Hello – that is true, it does exclude them. However normal ADC backups don’t include that folder either.
Amar Honnungar
December 21, 2018This clears up a huge amount of files (Historical data) from /var filesystem. One should run a scripts to archive the historical data as MAS can get corrupt. In my case, /var was filled up so the WEB portal was not launhing at atll
Pingback: Citrix Troubleshooting 101: Frequently Asked Questions | eG Innovations
Venkatesh K
September 8, 2019Hi George, I am trying the migration from command center to Mas but getting a java handshake ssl error and migration is not happening. Could you please help me with this? The Mas version i have is 12.1.x
Venkatesh K
September 8, 2019And command center version is 5.2.48.2
George Spiers
September 29, 2019What is the actual error in full, can you paste it? What is in the Migration Log, anything?
Pingback: Expert analysis of Citrix Monitoring Tools & Software | eG Innovations
Adam
November 18, 2020Thank you for describing clearly how to setup LDAP authentication, it is really not clear from the Citrix documentation that the name of the local group on the ADM needs to be the same as your AD domain group.
Saved me tons of time. Thanks!
Rob Arnett
September 20, 2021Awesome Article, Thanks for all the information. I am having an issue with Certificate installation.
I have a MAS I am setting up and when I install the Cert, it installs and shows it, but I can not access the MAS via HTTPS:// Get that the device did not respond?