VM Backup from Altaro is an easy to implement, high-performance backup and replication product that runs on Hyper-V or VMware to protect your most critical VMs from data loss, corruption, or failure, ensuring business continuity for your data and applications.
Priced competitively, the solution is additionally easy to implement and ships with a user-friendly interface, removing any need for extra expenditure on training and certification for your IT administrators who will manage the product.
Top Features
Whilst the product runs across VMware and Hyper-V, there are a host of features available such as:
- Monitor and manage all of your Hyper-V and VMware hosts from a single interface.
- Backup of all guest Operating Systems such as Windows, Linux, Unix, etc.
- 256-Bit AES encryption on backups.
- Backup compression and inline deduplication for reduced storage consumption.
- WAN-optimized replication for improved Recovery Time Objective (RTO).*
- Zero impact Hot/Live VM backups by leveraging Microsoft VSS.
- Full scheduling of backups, retention policies, and ability to back up VMs to multiple locations.
- 2FA support when using the cloud-based management console.*
- Integration with cloud storage providers such as Microsoft Azure and AWS.*
- Multiple copies of your data both locally and off-site.
- Granular restores at a file level, or full VM restores including the ability to restore to different hosts.
*Unlimited Plus Edition Feature
There are four different editions of VM Backup (Unlimited Plus, Unlimited, Standard, Free), you can easily view the feature comparison here.
Licensing
Licensing is kept simple, that is, you either license per host or per VM.
If you license per host, unlike some other products, you aren’t restricted to a particular number of CPU sockets. Each VM on that host can be backed up, and licenses are tied to the host under a perpetual model.
If you license per VM, it doesn’t matter what host the VM is on which is common in enterprise environments where VMs move around especially during maintenance or when Hypervisors re-balance VMs. This model uses subscription licensing which can be purchased for 1, 2, or 3 years with different levels of discount applied based on the duration you choose.
All licenses come with one year of 24/7 priority support including unlimited updates to the product for ongoing improvements and features.
For an idea of pricing and the options click here.
Installation and Configuration of Backups
I mentioned previously that the VM Backup solution is easy to implement, and Altaro do provide comprehensive yet easy to follow documentation within their Support Center website to assist you.
The VM Backup product installs onto a range of supported Operating Systems on a VM of your choice. You can pick from Windows Server 2008 R2 SP1 right up to Windows Server 2022. For a full list of supported Operating Systems click here.
Once you have downloaded the VM Backup executable, launch it on your target OS and run through the installation which is very straight forward and takes seconds. Once you reach the end of the installation wizard, you are given the option to launch the Management Console which is shown below.
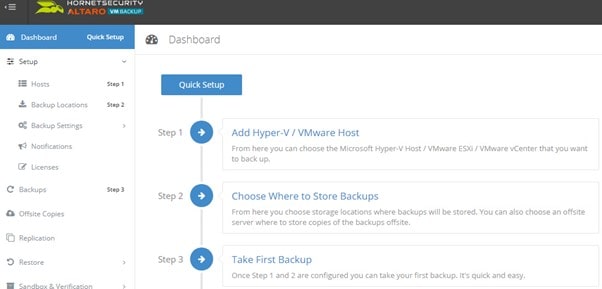
Connecting to your Hypervisor Environment
The Quick Setup wizard can be used to easily get you up and running in minutes. For VMware environments, you can connect directly to individual ESXi hypervisors or to vCenter which will prompt a discovery and allow you to protect all ESXi hypervisor hosted VMs managed by vCenter.

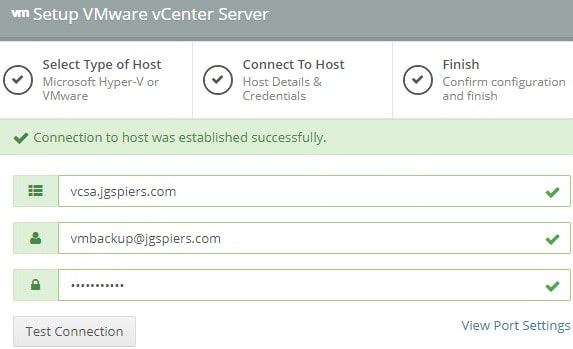
Once the connection to vCenter for example has been added and established, a VM discovery will take place.

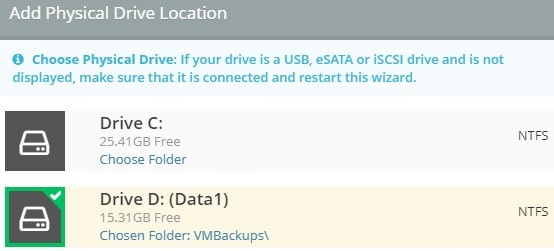
Defining Backup Locations
Continuing to Step 2 of the Quick Setup Wizard by clicking on Backup Locations from the console, here you determine where to store your backups.
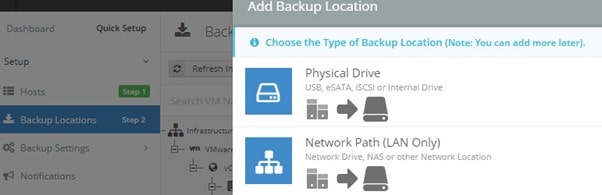
In my example I would simply choose to store them on a local drive since I am running within a test environment, but there are various options available depending on your requirements.
You can also create as many Backup Locations as you want, and simply drag and drop VMs on to the locations to complete an assignment. While on Primary Backups you can only have one Backup Location per VM, for Offsite Copies you can have multiple Offsite Copy Locations to keep multiple copies of your data.
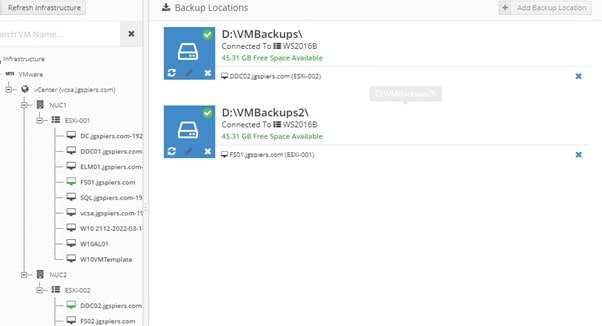
Don’t forget to save your changed using the Save Changes button to the bottom-right of the console screen.

Taking a Manual Backup
Finally on Step 3, by clicking the Backups blade we can choose a VM that is protected by VM Backup and execute an on-demand backup.
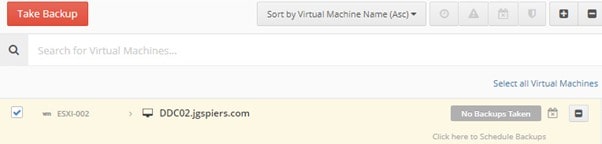
Without hesitation, a progress bar appears which you can hover over to get some details on what the job is currently working on. You can also browse to the Dashboard blade of the console to view details of the backup job from there.

Since the VM I am backing up is rather small, it only took a couple of minutes to complete the process for the first time.

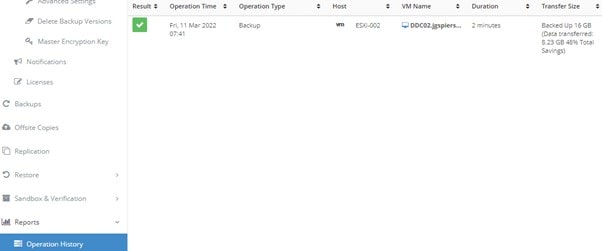
Any backup job is logged under Reports for historical purposes, and you can see the result of a job, duration, and the transfer size including savings made by the deduplication and compression efforts of the solution.
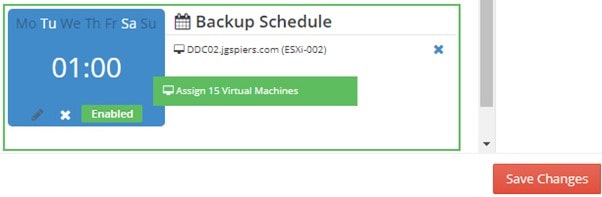
Defining a Schedule
Since we rarely want to take manual backups, VM Backup offers complete scheduling functionality which you can configured by clicking Backup Settings > Schedule Settings. By default two schedules are created, but you can crate your own by clicking on Add Backup Schedule.
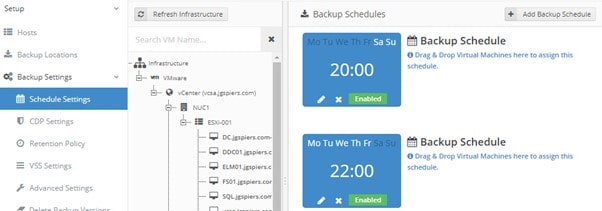
The scheduling window is fairly straight forward and allows you to also configure offsite backups within the same schedule.

Once you create your schedule, applying the schedule to VMs is as simple as dragging the VMs of your choice to the schedule. If you wanted to apply VMs from entire VMware/Hyper-V hosts or all VMs managed by vCenter for example, you can drag those objects as well. Once satisfied, click Save Changes.
Testing the Restore Process
Full VM Clone Restore
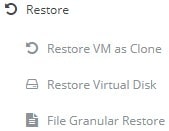
There are different ways to restore such as:
- Restore VM as Clone
- Restore Virtual Disk
- File Granular Restore
- Exchange Granular Restore
- Boot From Backup
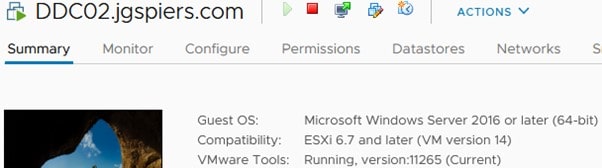
To show some of the capabilities, I’ll simply delete VM DDC02 from VMware.

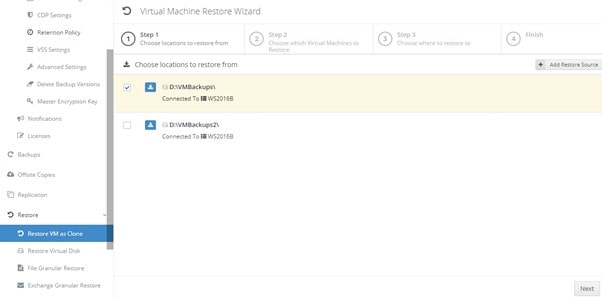
Back over in the VM Backup Management Console, navigate to Restore > Restore VM as Clone. Choose your backup location that contains the VM and click Next.
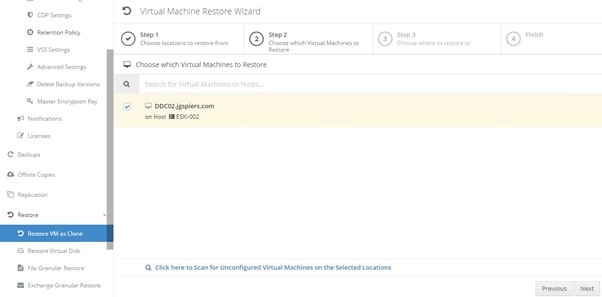
VM Backup scans and detects the VM we previously backed up and makes it available for selection.
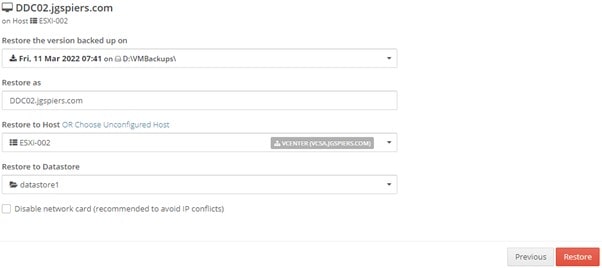
You can then simply choose the version of backup you want to restore, name of the restored VM if you are not wanting to use the original name at this stage, where to restore to including datastore, and a useful setting to which is to disable the network card which can come in handy when you are testing the restore functionality for example as part of DR/backup validation.
Once you start the restore, you can return to the Dashboard to track progress.
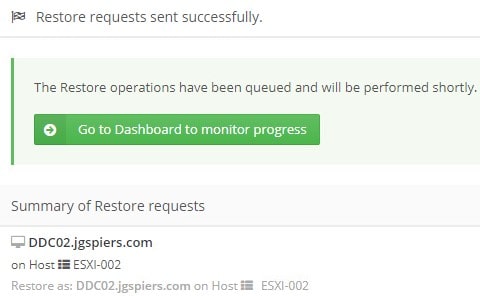
Under the Active & Upcoming Operations tile is the status of the restore job.

In VMware the VM itself also appears and shows as restoring.

Once the restore is complete, which again took only 1-2 minutes, the Dashboard moves the job to the Recent Operations tile and of course to the Reports section.

To confirm the restore was successful, I browsed back to vCenter where I could locate my restored VM and power it on.
Note that to avoid any backup issues with the restored VM, you should delete the old object from Altaro VM Backup, protect the newly restored VM, and take a manual backup until the scheduled backup takes place. To remove the object from VM Backup, you do so under the Backups blade and by right-clicking on the object to remove.

Granular File Restore
The option for File Granular Restore can be found from the Restore blade in the VM Backup management console and is actioned much in the same manner as the other restore jobs.
Once you select your backup source, the VM you want to restore from, and the particular backup job you are restoring from, the wizard then displays an explorer interface which easily lets you select one or many files to restore.
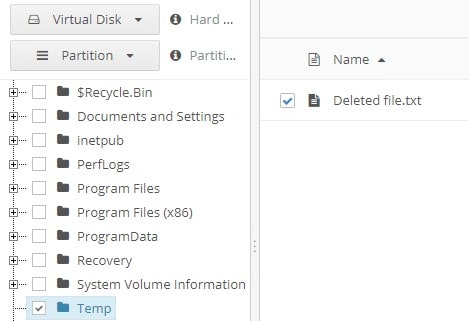
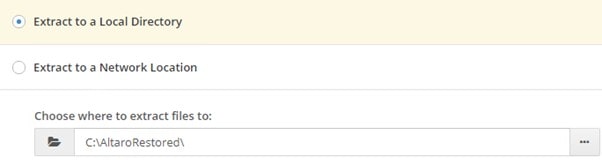
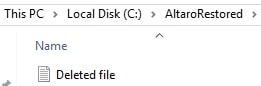
Furthermore, you can restore to a local directory where VM Backup is running, or back to the VM using the network location option. I’ll show restoring locally for now.
Once the job is complete, the file appears restored within my local drive. I can then verify the integrity of the file and copy it to the intended destination server.
Testing and Verifying Backups
Whilst organisations take many backups, not a lot of restores are carried out. This raises a gap in that the restores have not been tested and there is a risk that restoring a backup is in fact testing the backup content itself is valid. To be frank, the last thing you want is for a VM to need a restore only for the backup to be corrupt. Thankfully, VM Backup includes the option to test and verify your backups, even on a schedule. You can configure this under the Sandbox & Verification blade.
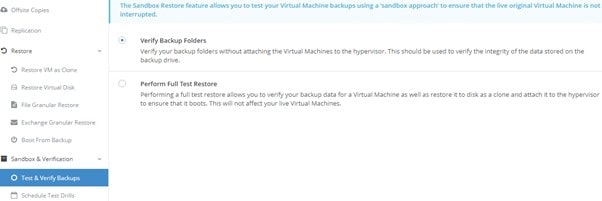
What you can do here is test the integrity of your backups and even perform a full test restore without affecting the live virtual machine. Furthermore, you can schedule test restores so you can be sure that you have assurance going forward that your backups are valid without spending manual effort in testing them.
Summary
VM Backup from Altaro is a rather self-sufficient and easy to use product which doesn’t rely on you having a vast amount of knowledge and experience managing backup solutions. This is what will be appealing to customers who want a stress free and noncomplex way of protecting critical data and services.
Whilst I demoed a couple of features, there are many more that will be of use to customers and their varying requirements.