It has been a short time since I wrote the Unidesk 3.x blog posts and a lot has changed with Unidesk in version 4. Firstly, the company itself has been bought by Citrix, which was announced at Summit in January 2017. The product is now called Citrix App Layering. At a software level, the main infrastructure components in App Layering 4.x have been simplified from 2.x and 3.x by merging them all in to one component. The deployment model has also been made easier, making App Layering the layer composer and Provisioning Services or Machine Creation Services deployer to the masses.
Recap on Unidesk 3.x:
https://jgspiers.com/installing-configuring-unidesk-3-4-hyperv/
https://jgspiers.com/unidesk-os-layer-creation-process/
https://jgspiers.com/creating-unidesk-desktops/
https://jgspiers.com/updating-unidesk-os-layer/
https://jgspiers.com/creating-unidesk-application-layers/
https://jgspiers.com/unidesk-maintenance-schedules/
https://jgspiers.com/unidesk-high-availability/
Back to Citrix App Layering 4.x. (Previously Unidesk)
♣ App Layering Introduction
♣ What’s new and known issues – Unidesk 4.0.8
♣ What’s new and known issues – Citrix App Layering 4.1
♣ What’s new and known issues – Citrix App Layering 4.2
♣ What’s new and known issues – Citrix App Layering 4.3
♣ What’s new and known issues – Citrix App Layering 4.4
♣ What’s new and known issues – Citrix App Layering 4.5
♣ What’s new and known issues – Citrix App Layering 4.6
♣ What’s new and known issues – Citrix App Layering 4.7
♣ What’s new and known issues – Citrix App Layering 4.8
♣ What’s new and known issues – Citrix App Layering 4.9
♣ What’s new and known issues – Citrix App Layering 4.10
♣ What’s new and known issues – Citrix App Layering 4.11
♣ What’s new and known issues – Citrix App Layering 4.12
♣ What’s new and known issues – Citrix App Layering 4.13
♣ What’s new and known issues – Citrix App Layering 4.14
♣ What’s new and known issues – Citrix App Layering 4.15
♣ What’s new and known issues – Citrix App Layering 4 1812
♣ What’s new and known issues – Citrix App Layering 4 1901
♣ What’s new and known issues – Citrix App Layering 4 1902
♣ What’s new and known issues – Citrix App Layering 4 1903
♣ What’s new and known issues – Citrix App Layering 4 1905
♣ What’s new and known issues – Citrix App Layering 4 1907
♣ What’s new and known issues – Citrix App Layering 4 1908
♣ Additional known issues
♣ App Layering Accounts
♣ ELM Hypervisor Support
♣ File Share Support
♣ OS Support for OS Layers
♣ Management Console Browser Support
♣ Storage Requirements
♣ Firewall Rules
♣ App Layers Explained
♣ Image Templates and Connectors Explained
♣ Installing App Layering Enterprise Layer Manager
♣ ELM CLI Configuration
♣ Upload License
♣ Change GUI Password
♣ Integrate ELM with Active Directory
♣ Assign User Roles
♣ Configure HTTPS to Management Console
♣ Create ELM Share and set permissions for User Layers folder
♣ Expand ELM Layering Service Storage
♣ Reclaim disk space from cancelled tasks
♣ Create and configure Hyper-V Connector (New to v4.6)
♣ Install App Layering Agent on PVS
♣ Upgrade ELM Appliance – Citrix App Layering
♣ Manage ELM from Citrix Cloud (deprecated)
The Unidesk (now Citrix App Layering) software this post focuses on is version 4.6 which was released October 2017. The last official Unidesk version before the takeover by Citrix was version 4.0.8, released December 2016. The original version 4 release of Unidesk had won Best of Citrix Synergy and Best of VMworld in the past year to no surprise as it is an excellent desktop and application image management platform and a great move by Citrix to bring it under their portfolio of products.
Citrix App Layering is available along with Elastic Layers for all versions of XenApp and XenDesktop so long as you have Customer Success Services (previously Software Maintenance). If you provision to more than one system i.e. PVS/MCS or vSphere/XenServer, you need a XenApp or XenDesktop Platinum license on top of Customer Success Services. When User Layers are released to production, that will also be a Platinum feature.
The XenApp and XenDesktop service from Citrix Cloud entitles you to all features of Citrix App Layering.
Citrix App Layering will replace Citrix AppDisks, as App Layering offers a lot more in terms of layering applications together to create a desktop. App Layering 4.x also sees the release of a new feature called Elastic Layering that layers applications on to a VDI desktop or Session Host on-demand as a user logs on. This means applications that only a small amount of users need can be dynamically layered rather than creating specific desktops or Session Hosts for these users or layering the application to more users than needed. When a layer is elastically added to a machine once, it doesn’t need added again throughout the uptime of that machine. So if a XenApp RDSH host is running and User A logs on, they could receive Firefox elastically, and User B with the same Elastic Layer assignment logs on, but Firefox is already available/mounted so does not need to be mounted again. If User A and B both log off, the Elastic Layer is kept mounted on the VDA until that VDA is restarted. This is to support any user or User A/B logging back on to the VDA again and preventing the need for the layer to be re-attached to the VDA. The support of XenApp and Session Hosts also means that some businesses may be able to reduce their persistent desktop farms saving on the extra compute needed to power persistent desktops. Many times a persistent desktop is required because users need a different set of applications and customisations than the rest of us. Now with Elastic Layering and Citrix Workspace Environment Management XenApp shared desktops have more room to grow in the datacentre because of the way we can configure sessions to be more unique/custom than ever before based on the user logging on.
App Layering is also hypervisor agnostic, allowing you to deploy layers across different hypervisors at the same time without redeploying components or the layers. This is a package once and deploy to many approach with support for Nutanix and XenServer, Hyper-V, vSphere, Azure and more.
This guide will cover installing App Layering 4.6 on Hyper-V. For a guide on a VMware deployment of the ELM appliance, see Carl Stalhood’s App Layering Enterprise Layer Manager post.
What’s new in Unidesk 4.0.8:
- Full support for Nutanix Acropolis HV including MCS connector.
- Windows Server 2016 support.
- Ability to configure vSphere connector to cache boot and packaging disks and reuse them. Once these disks have been cached due to creating your first App Layer, subsequent App Layer creation times are cut in half.
- Imprivata OneSign single sign-on support.
- Unidesk Roles and the ability to assign Unidesk Roles to AD Groups. https://jgspiers.com/citrix-app-layering/#User-Roles
- Elastic Fit. The ability to check if a layer can be deployed elastically. This is based on factors such as if the application has drivers. It is up to you to fully test if it works elastically or not.
- User Layers (Labs) support for Windows 7 x64.
Known issues:
- Issues with Windows Search when using User Layer.
- A The installer has insufficient privileges to modify this file error appears the first time Skype for Business that is delivered elastically is launched.
- If using Elastic Layering with Windows 7 or Windows Server 2008, create a file share with a sector size of 512.
- Persona Management for Horizon View is not supported elastically.
- Shortcuts to Microsoft Office applications deployed elastically may be visible in the Start Menu for users who are not assigned the layer. The applications won’t work for those users.
- When adding a version for upgrading your Windows 10 OS Layer, set the disk layer size as 60GB.
- PVS does not support periods in the filename of a vDisk, even though the ELM Appliance allows periods in Image Template names.
- When using Elastic Layering in Hyper-V, you must use unmanaged RDS pools.
- Elastic Layers are only supported on floating desktop pools in Horizon View.
- Pulishing layered images to the same Azure resource group simultaneuosly fails.
- During a major upgrade in Windows 10, sometimes Windows 10 creates a Recovery Volume as a new partition on the same disk as the OS Layer. You must remove this volume before finalising the layer.
What’s new in Citrix App Layering 4.1:
- Ability to manage the ELM via Citrix Cloud.
- Ability to configure XenServer and Nutanix connectors to cache boot and packaging disks and reuse them. Once these disks have been cached due to creating your first App Layer, subsequent App Layer creation times are cut in half.
- You can now import the gold OS Image directly to ELM during OS Layer creation when using vSphere or XenServer connectors.
- User Layers can be stored in multiple file shares of your choice using the Storage Locations tab within ELM.
- You can now search for Platform Layers that were created using a particular OS Layer.
- Default passwords for ELM administrator accounts must be changed from the defaults.
Known issues:
- Issues with Windows Search when using User Layer.
- A The installer has insufficient privileges to modify this file error appears the first time Skype for Business that is delivered elastically is launched.
- If using Elastic Layering with Windows 7 or Windows Server 2008, create a file share with a sector size of 512.
- Persona Management for Horizon View is not supported elastically.
- Shortcuts to Microsoft Office applications deployed elastically may be visible in the Start Menu for users who are not assigned the layer. The applications won’t work for those users.
- When adding a version for upgrading your Windows 10 OS Layer, set the disk layer size as 60GB.
- PVS does not support periods in the filename of a vDisk, even though the ELM Appliance allows periods in Image Template names.
- When using Elastic Layering in Hyper-V, you must use unmanaged RDS pools.
- Elastic Layers are only supported on floating desktop pools in Horizon View.
- Pulishing layered images to the same Azure resource group simultaneuosly fails.
- During a major upgrade in Windows 10, sometimes Windows 10 creates a Recovery Volume as a new partition on the same disk as the OS Layer. You must remove this volume before finalising the layer.
What’s new and known issues in Citrix App Layering 4.2:
- User Layers (Labs) support for Windows 10 x64.
- Notification to user if User Layer is unavailable (optional and error message is customisable).
- Removal of support for NFS shares.
- Automatic updates are now disabled when adding new versions to the OS Layer.
Known issues:
- Issues with Windows Search when using User Layer.
- Windows 10 Store Apps turned off by default.
- Changes to Windows Indexing Options do not persist when User Layers are enabled on both Windows 7 and Windows 10.
- A The installer has insufficient privileges to modify this file error appears the first time Skype for Business that is delivered elastically is launched.
- If using Elastic Layering with Windows 7 or Windows Server 2008, create a file share with a sector size of 512.
- Persona Management for Horizon View is not supported elastically.
- Shortcuts to Microsoft Office applications deployed elastically may be visible in the Start Menu for users who are not assigned the layer. The applications won’t work for those users.
- When adding a version for upgrading your Windows 10 OS Layer, set the disk layer size as 60GB.
- PVS does not support periods in the filename of a vDisk, even though the ELM Appliance allows periods in Image Template names.
- When using Elastic Layering in Hyper-V, you must use unmanaged RDS pools.
- Elastic Layers are only supported on floating desktop pools in Horizon View.
- Publishing layered images to the same Azure resource group simultaneously fails.
What’s new and known issues in Citrix App Layering 4.3:
- Ability to export all layers and import layers to other ELM appliances. For example, from a Proof of Concept/Testing ELM appliance to a Production appliance. Both appliances must run atleast version 4.3. This feature is currently in labs.
- Appliance security improvements based upon Apache HTTP Server 2.4 benchmark.
Known issues:
- Same as App Layering 4.2.
What’s new and known issues in Citrix App Layering 4.4:
What’s new:
- Support for running the ELM Appliance on Windows Server 2016 Datacenter Edition.
- Connector caches (if enabled) are cleared after an ELM upgrade. This prevents old boot disk and drivers being used on newly deployed images.
- Registry caching improvements have been introduced for particular applications such as EPIC. This results in a variety of performance improvements in the environment.
- When exporting or importing layers you can specifically select the Network File Share for export/import rather than being restricted to using the default SMB Network File Share. This feature is currently in labs.
Known issues:
- Known issues with import/export:
- Newly imported layers do not reain their Elastic Fit status. For a workaround re-run Elastic Fit on the layer.
- Known Issues with User Layers:
- Issues with Windows Search when using User Layers.
- When using User Layers, make sure Microsoft Office is in the layered image and not Elastically Layered.
- When using Windows 10 and User Layers, you can turn off Store Apps on Windows 10 Enterprise but not Professional edition. If you want to completely disable Windows 10 Store Apps, create a new OS Layer version and run RemoveStoreApps.cmd as an administrator from C:\Windows\Setup\Scripts\. Users will have access to Cortana and Edge only.
- When upgrading the OS Layer to a new major version of Windows 10, for example version 1511 to 1607, existing users may experience Store Tile reconstruction on their initial logon follwing the upgrade. During this period, which is generally less than one hour, users may notice that they lack their proper icons or icons do not respond. These issues will resolve themselves once reconstruction is complete.
- User Layers will not be compatible if you roll back Windows 10 from version 1607 to 1511 for example.
- Changes to Windows Indexing Options do not persist when User Layers are enabled on both Windows 7 and Windows 10.
- Known Issues across all platforms:
- You may be asked to reset the App Layering administrative passwords when upgrading from App Layering 4.0.8 to 4.1 and above. This is a one-time task.
- When accessing the App Layering management console via Internet Explorer running on Server OS, fonts for the console may not load correctly. As a workaround, add the ELM management console URL to the Trusted Sites zone.
- When adding an OS Layer version, use the same Hypervisor that was originally used to create the OS Layer.
- When logging in to a Packaging Machine, you must use the built-in administrator account or else RunOnce scripts will not be executed and the layer will be unable to finalise.
- Known Issues with Elastic Layers:
- A The installer has insufficient privileges to modify this file error appears the first time Skype for Business that is delivered elastically is launched.
- If using Elastic Layering with Windows 7 or Windows Server 2008, create a file share with a sector size of 512.
- Persona Management for Horizon View is not supported elastically.
- Shortcuts to Microsoft Office applications deployed elastically may be visible in the Start Menu for users who are not assigned the layer. The applications won’t work for those users.
- Known Issues with Windows 10:
- When adding a version for upgrading your Windows 10 OS Layer, set the disk layer size as 60GB.
- When upgrading Windows 10 for example from 1511 to 1607, sometimes a Recovery Volume is created by Windows 10. This volume must be removed before you finalise the OS Layer to avoid boot failures.
- Known Issues with PVS:
- PVS does not support periods in the filename of a vDisk, even though the ELM Appliance allows periods in Image Template names.
- When using PVS, disable IPv6 in the OS Layer.
- Known Issues with Hyper-V:
- When using Elastic Layering in Hyper-V, you must use unmanaged RDS pools.
- Known Issues with VMware Horizon View:
- Elastic Layers are only supported on floating desktop pools in Horizon View.
- Known Issues with Azure:
- Pulishing layered images to the same Azure resource group simultaneuosly fails.
- The Azure File Share feature is not supported.
- Using a FQDN in Azure can fail if not entered in the format Azure expects.
- Known Issues with Imprivata:
- Imprivata Application Layers must be created with the appropriate broker Platform Layer as a prerequisite.
What’s new and known issues in Citrix App Layering 4.5:
What’s new:
- You can now specifically select layers to export or import. (Labs Feature)
- Elastic Fit now analyses layers that have been imported into the appliance.
- Child Domains are supported.
Known issues:
- Known Issues with User Layers:
- When using Windows 10 and User Layers, you can turn off Store Apps on Windows 10 Enterprise but not Professional edition. If you want to completely disable Windows 10 Store Apps, create a new OS Layer version and run RemoveStoreApps.cmd as an administrator from C:\Windows\Setup\Scripts\. Users will have access to Cortana and Edge only.
- When upgrading the OS Layer to a new major version of Windows 10, for example version 1511 to 1607, existing users may experience Store Tile reconstruction on their initial logon follwing the upgrade. During this period, which is generally less than one hour, users may notice that they lack their proper icons or icons do not respond. These issues will resolve themselves once reconstruction is complete.
- User Layers will not be compatible if you roll back Windows 10 from version 1607 to 1511 for example.
- Changes to Windows Indexing Options do not persist when User Layers are enabled on both Windows 7 and Windows 10.
- Known Issues across all platforms:
- You may be asked to reset the App Layering administrative passwords when upgrading from App Layering 4.0.8 to 4.1 and above. This is a one-time task.
- When accessing the App Layering management console via Internet Explorer running on Server OS, fonts for the console may not load correctly. As a workaround, add the ELM management console URL to the Trusted Sites zone.
- When adding an OS Layer version, use the same Hypervisor that was originally used to create the OS Layer.
- When logging in to a Packaging Machine, you must use the built-in administrator account or else RunOnce scripts will not be executed and the layer will be unable to finalise.
- Known Issues with Elastic Layers:
- A The installer has insufficient privileges to modify this file error appears the first time Skype for Business that is delivered elastically is launched.
- If using Elastic Layering with Windows 7 or Windows Server 2008, create a file share with a sector size of 512.
- Persona Management for Horizon View is not supported elastically.
- Known Issues with Windows 10:
- When adding a version for upgrading your Windows 10 OS Layer, set the disk layer size as 60GB.
- When upgrading Windows 10 for example from 1511 to 1607, sometimes a Recovery Volume is created by Windows 10. This volume must be removed before you finalise the OS Layer to avoid boot failures.
- Known Issues with PVS:
- PVS does not support periods in the filename of a vDisk, even though the ELM Appliance allows periods in Image Template names.
- When using PVS, disable IPv6 in the OS Layer.
- Known Issues with Hyper-V:
- When using Elastic Layering in Hyper-V, you must use unmanaged RDS pools.
- Known Issues with VMware Horizon View:
- Elastic Layers are only supported on floating desktop pools in Horizon View.
- Known Issues with Azure:
- The Azure File Share feature is not supported.
- Using a FQDN in Azure can fail if not entered in the format Azure expects.
What’s new and known issues in Citrix App Layering 4.6:
- Hyper-V Connector – Further automates the importing of an OS Layer and creation of layers. This is currently a labs feature.
- Note: SCVMM is not supported by this connector.
- Office 365 User Layer – Allows you to preserve Outlook user data and configuration settings. This is currently a labs feature.
- Note: UPM (Citrix Profile Management) is required to use Office 365 User Layer. You cannot use a Office 365 User Layer and full User Layer together. It is one or the other. The Office layer must be included in an Image Template and published as part of a layered image.
- Ability to assign Elastic Layers to different OS Layers. Previously, Elastic Layers could only be used on the OS Layer that they were created on. This is currently a labs feature.
- Note: There is no guarantee that this will work, but you can now try it.
Known issues:
- Same as in App Layering 4.5
What’s new and known issues in Citrix App Layering 4.7:
What’s new:
- When creating an Office layer on Windows 10, Optimizer.hta now launches the Office Prep sxcript. As a result, you mut now use Optimizer.hta as part of preparing an Office app layer.
- Windows 10 1703 is now supported when Store Apps are disabled. There is a script included in C:\Windows\Setup\Scripts than can remove Store Apps.
Known issues:
- Many known issues from previous releases are carried forward to this release.
- Fonts for the management console might not load correctly when using Internet Explorer. To prevent this issue, add the appliance IP address to the Trusted Sites list in Internet Explorer.
- Microsoft Office cannot be elastically layered due to the way its licenses are integrated with the Windows Store.
- You must disable Windows 10 Store Apps if you want to be able to upgrade to future Windows 10 versions. You can disable Windows 10 Store Apps on Windows 10 Enterprise only.
- Upgrading to a new Windows 10 major release requires an extra step. The upgrade can create a recovery volume which must be removed before finalising the OS Layer version. Otherwise, the recovery volume can cause desktops to fail to start correctly.
What’s new and known issues in Citrix App Layering 4.8:
What’s new:
- Office 365 User Layer is now out of labs. You need a profile management solution such as Citrix Profile Management to use this feature. Office must also not be elastically layered, which is not supported.
- Export and Import layers is now out of labs.
- The Hyper-V connector is now out of labs. You need to install the App Layering agent on every Hyper-V server you want to deploy images to. Also, OS imports are still done via the Network File Share and SCVMM is not supported by this connector.
- When creating new versions of layers, including OS, Platform and App layers, you can now select any prior version to start from.
Known issues:
- Many known issues from previous releases are carried forward to this release.
- You can access the App Layering management console using the Manage tab with App Layering in Citrix Cloud. When accessing this tab, consider that access to the console using Citrix Cloud will be slower than direct access.
- When installing App Layering, you must use the default of 4 CPU. Increasing the value could cause issues with the appliance.
- If you are using Roles in a large, complex AD environment and logins are slow, make sure that all Roles have been assigned to explicit users rather than to groups. Citrix have noticed that tasks such as logging in complete noticeably faster in large, complex AD environments when all roles have been assigned to explicit users.
- When permissions are wrong when you publish an image, an error message might appear that says the operating timed out.
- Pointing to a child XenServer node in a XenServer pool produces an unexpected error message. To avoid this, only use the primary node when creating connector configurations.
- The App Layering Nutanix Connector does not work with Nutanix AHV 5.5 at this stage because AHV 5.5 removed support for SSLv3 which App Layering Connectors are restricted to using.
What’s new and known issues in Citrix App Layering 4.9:
What’s new:
- The Nutanix connector now supports Acropolis Hypervisor 5.5.
- The App Layering appliance has been patched with the latest CentOS patches.
- An issue that occurred in some cases when adding a new version to an App Layer is fixed. When Windows registry keys include a very high number of subkeys and you add a new version to the layer, portions of the registry are no longer dropped.
- You can save changes to files downloaded using ShareFile. You can not save changes once you install ShareFile Drivemapper 3.10 which was released in December 2017.
Known issues:
- Many known issues from previous releases are carried forward to this release.
What’s new and known issues in Citrix App Layering 4.10:
What’s new:
- Support for Windows 10 1709.
- This release includes stability improvements when using PVS to stream images on Hyper-V or vSphere.
- You do not have to turn off Store Apps when creating a Windows 10 OS Layer.
Known issues:
- After upgrading to App Layering 4.10 or later, signing on starts the Windows First Sign-in screen. This is normal during upgrades. Your User Layer is being brought up to date with the OS version. No User Layer files are lost in the process.
- Many known issues from previous releases are carried forward to this release.
What’s new and known issues in Citrix App Layering 4.11:
What’s new:
- Full support for Windows 10 Store Apps. Previously they had to be removed from your image.
- The Azure Connector now supports both desktops and session hosts.
- Support for the Japanese language version of your OS.
- Office 365 layers for Session Host. Office 365 Outlook data is persisted in this new specialised User Layer.
- Management of Connectors can now be performed via System -> Connector.
Known issues:
- Many known issues from previous releases are carried forward to this release.
What’s new and known issues in Citrix App Layering 4.12:
What’s new:
- Windows 10 1803 support.
- App Layering handling of Citrix Profile Management profile streaming has been improved. Elastic Layers and Profile Streaming can now be used together.
- The connector cache for VMware Connectors now allows you to reuse its packaging disks when adding new versions to layers. This can significantly reduce the time it takes to add a new version to a layer.
- Based on your hypervisor, the packaging cache size for all configurations now default to an appropriate starting size. The hit rate indicates how well the cache is working so that you can adjust the cache size to improve layering performance.
Known issues:
- Managed disks in Azure are not supported.
- Many known issues from previous releases are carried forward to this release.
What’s new and known issues in Citrix App Layering 4.13:
- Support for additional platform versions:
- Nutanix AHV v5.8.
- Citrix XenServer 7.5.
- Citrix PVS 7.18.
- Citrix XenApp & XenDesktop 7.18.
- The Azure connector now supports placing packaging disks and published images into premium storage accounts.
- An option in the GUI exists to clone Image Templates.
- You now have the option to select “Remind Me Later” on upgrade notifications.
- Multiple fixes have been introduced to this release to improve App-V compatibility with App Layering.
Known issues:
- Many known issues from previous releases are carried forward to this release.
What’s new and known issues in Citrix App Layering 4.14:
- User Layers for Windows 10 x64 and Windows 7 x64 are now generally available.
- vSphere 6.7.x support.
- When deploying the ELM to Azure, the Standard_D4s_v3 virtual machine (which runs on newer generation hardware) is now recommended.
- A new default setting loads Elastic Layers only after login completes. This results in faster login times. If an Elastic Layer does not load correctly using this new setting, you can select the new Elastic Layer Compatibility Mode which overrides the default and loads layers as they previously did.
- Search Indexing options set in App Layers or set by a user are now present and functional upon login.
- When creating or editing an image template, users now have the ability to publish layered images directly from the wizard’s Confirm and Complete tab, with a single click.
Known issues:
- Many known issues from previous releases are carried forward to this release.
What’s new and known issues in Citrix App Layering 4.15:
What’s new:
- Support for XenServer 7.6.
- Support for VMware Horizon View 7.6.
- Support for Virtual Apps and Desktops 7 1808, and 7.15 LTSR CU3.
- Support for Citrix Provisioning 1808.
- Support for Windows 10 1803 64-bit, including new installations of Windows 10 1803 Professional, the first time this edition has been supported in App Layering.
- A separate Citrix MCS on Azure connector now exists.
- The XenServer connector has received performance improvements to reduce App Layer version creation times.
- The Hyper-V connector now allows you to choose a template VM.
Known issues:
- Many known issues from previous releases are carried forward to this release.
What’s new and known issues in Citrix App Layering 4 1812:
- Importing your OS image into an OS Layer via a Hyper-V connector is now supported.
- You can clone an Application Layer to produce another layer with the same properties.
- The Nutanix connector makes better use of caching, which will decrease Application Layer version creation times.
- A second NIC can now be added to the Platform Layer for images published to PVS.
- When you create or edit a vSphere Connector configuration, privileges on the user account are verified when you select the Test or Save buttons.
Known issues:
- When User Layers are enabled, MSI installers are blocked from running on provisioned desktops at system startup. This is because the Layering service must be running before the MSI file can run, and the Layering service doesn’t run until a user logs in.
- Many known issues from previous releases are carried forward to this release.
What’s new and known issues in Citrix App Layering 4 1901:
- References to other Citrix products in the management console have been updated to reflect the new rebranded product names.
- The vSphere Connector has been improved to support browsing for Virtual Machines by host, in addition to by folder.
- Support for Citrix Virtual Apps and Desktops 7 1811.
- Support for Citrix Provisioning 1811.
- Support for Nutanix AHV 5.9.
Known issues:
- Many known issues from previous releases are carried forward to this release
What’s new and known issues in Citrix App Layering 4 1902:
What’s new:
- Support for Windows 10 1809.
- A new connector for Azure Government subscriptions.
- Support to run the ELM on Windows Server 2019.
- Windows Server 2019 is not yet supported officially as an OS Layer.
- Performance improvements to the Hyper-V connector to decrease App layer version creation times.
- Layering operations such as packaging and publishing can be done using the Hyper-V connector configured against a host running Server 2019.
Known issues:
- Azure File Storage is not supported by App Layering. Create a network file share or SMB file share in Azure to use with App Layering.
- You must download the run the OS Machine Tools from 1812, otherwise KMS Office activation will not be triggered at desktop startup.
- Many known issues from previous releases are carried forward to this release
What’s new and known issues in Citrix App Layering 4 1903:
What’s new:
- App layers can be assigned as Elastic layers across different OS layers. This is a labs feature There is no guarantee that your App layer will work.
Known issues:
- When creating an OS layer on Hyper-V Server 2019, you may receive error “Failed to create new VHD. Make sure there is enough space on the share specified in the connector configuration”. This error is due to an issue with the PoSH “New-VHD” cmdlet. In the meantime, as a workaround, make sure the gold machine has no checkpoints and make sure the disk is in the same directory path that is configured in the Connector configuration.
- Many known issues from previous releases are carried forward to this release
What’s new and known issues in Citrix App Layering 4 1905:
What’s new:
- Support for Citrix Hypervisor 8.0, Virtual Apps & Desktops 7 1903, Virtual Apps & Desktops 7.15 LTSR CU4, Citrix Provisioning 1903, Citrix Provisioning 7.15 LTSR CU4.
- Support for Windows 2019 as an OS layer.
- Support for Office 2019, but you must upgrade the App Layering OS Machine Tools first.
- Support for secure SMTP connections using TLS 1.2 when sending email.
- Hyper-V connector improvements:
- BITS server is now used by the Hyper-V connector to copy files to and from the appliance.
- Progress reporting now includes the percent complete during file copies, rather than just elapsed time.
- A CIFS share is no longer required on the Hyper-V server.
Known issues:
- After upgrading to 1905 from 1903 or earlier, when you prepare your OS layer, you must download and run the OS Machine Tools from this release, otherwise KMS Office activation will not be updated to use Office 2019.
- Many known issues from previous releases are carried forward to this release.
What’s new and known issues in Citrix App Layering 4 1907:
What’s new:
- Support for Citrix Provisioning 1906.
- Support for Virtual Apps and Desktops 7 1906.
Known issues:
- Many known issues from previous releases are carried forward to this release.
What’s new and known issues in Citrix App Layering 4 1908:
What’s new:
- Support for Windows 10 1903 as an OS layer.
- Support for VMware Horizon View 7.9.
- You can now manually repair user layer files so that all files and registry settings coming from a specific set of app layers can be made visible again.
Known issues:
- Users cannot sync their OneDrive files when On Demand syncing and elastic layers are enabled. To use OneDrive, On-Demand syncing, include the app in images where elastic layering is not enabled.
- If Windows Defender processes do not start on an app layer created form a Windows 10 1809 OS layer, upgrade App Layering to 19.8 or later, and create a version of the OS layer where the latest Defender security updates are applied.
Additional known issues:
- When using App-V 5.x with Unidesk 4.0.8, VDAs may blue screen.
- Upgrade to Citrix App Layering 4.1 or 4.4+.
- If upgrading 4.0.8 to 4.4, you have to upgrade to 4.3 first as a hop.
- Upgrade to Citrix App Layering 4.1 or 4.4+.
- When using App-V 5.x with App Layering 4.2 or 4.3, various issues exist including publishing errors.
- Citrix released a private build (4.3.0.44) which could be obtained by contacting Citrix Support. The fix was then later built in to version 4.4.
- When using PVS and Citrix Workspace Environment Management a conflict in layer priority deletes the Netlogon service dependency on the Norskale Agent Host Service.
- Citrix will address this issue in a future release by making the DependOnService key mergeable. For more information including a workaround see https://jgspiers.com/citrix-workspace-environment-manager/#Install-WEM-Agent
- If installing Citrix Receiver including Single Sign-On into an Application Layer, the Citrix Single Sign-on Network Provider will be lost after publishing the image. This is because the Platform Layer (which contains the VDA software) also writes to the Network Provider’s underlying registry REG_SZ key. For a workaround, manually edit the ProviderOrder REG_SZ key within the Platform Layer and insert a value of PnSson.
- When using App Layering Elastic Layers, App-V, and Citrix Profile Management which is configured to delete profiles from the VDA after user logoff, the profiles are never fully deleted.
- Upgrade to App Layering 4.6 and then contact Citrix Support for updated drivers. These drivers should be part of the App Layering 4.7 build when released.
- Office and Windows activation does not work after an upgrade to App Layering 4.5 when Elastic Layering is enabled.
- Upgrade to App Layering 4.6.
- When booting an App Layering image with PVS, you receive a blue screen of death with error: “CvhdMp.sys – SYSTEM_THREAD_EXCEPTION_NOT_HANDLED”.
- Create a second version of the Platform Layer. You don’t have to make any adjustments to the layer, just create a second, publish the image out to PVS and try booting.
- When accessing the ELM through Internet Explorer running on Windows Server, the fonts may not load correctly. To prevent this issue add the ELM FQDN to the Trusted Sites zone.
- When adding a version to your OS Layer, use the same hypervisor that was used originally to build and import that OS Layer.
- When creating an Application Layer use the build-in administrator account to log on. Otherwise RunOnce script will not run and finalisation of the layer will not occur.
- Microsoft Office cannot be made an Elastic Layer due to the way its licenses are integrated with the Windows Store.
- App Layering versions up to 4.9 do not work with the Windows 10 Store. You must therefore disable Store apps. If you have created Application Layers before disabling Store apps, you must recreate those layers.
- If using App Layering 4.10+ you can leave Store Apps enabled.
- Reverting to an ealier version of a Windows 10 OS Layer for example from version 1607 to 1511 will void any User Layers.
App Layering Accounts:
Three App Layering Accounts exist after a standard installation of the Enterprise Layer Manager Appliance:
- Management Console Administrator Account – This is the default management console account which has administrator privileges over the ELM. The default credentials are administrator\Unidesk1.
- Appliance Root User Account – The Linux superuser account. You will need to use this account if you have to reset the password of the Appliance Administrator or Management Console Administrator accounts. The default password is v9Yx*6uj.
- Appliance Administrator Account – This is the command line utility account you use initially to configure the ELM appliance.
You will be asked to change the password to each three acounts the first time you log on to the App Layering management console.
App Layering 4.x ELM hypervisor support:
- Azure ARM.
- Citrix XenServer 6.5, 7.0, 7.1, 7.2.
- Windows Server 2012 R2 and 2016.
- vSphere vCenter 5.5.x, 6.0.x and 6.5.x.
- Nutanix AHV.
Network File Share supported protocols:
- SMB (Server Message Block) – Elastic Layers only supported on SMB file shares.
- NFS (Network File System) – Elastic Layers not supported on NFS file shares.
- Update: NFS is no longer supported at all starting Citrix App Layering 4.2. You can continue using existing NFS shares but they are not editable. It is recommended to switch to SMB going forward.
Note: A 10GB network connection between the ELM and file share is recommended.
Citrix App Layering 4.x can publish layers to:
- Microsoft Azure.
- Note: Citrix recommend a 10GB connection to the Azure publishing location.
- Citrix MCS on XenServer, Nutanix (new in 4.0.8) and vSphere.
- Citrix Provisioning Services 7.1+ up to 7.15.
- Note: Citrix recommend a 10GB connection between ELM and the PVS store.
- Citrix XenApp 6.5 and XenApp/XenDesktop 7.0 to 7.15.
- VMware Horizon View 6.x & 7.x, 7.1, 7.2.
- Note: View Persona Management is not supported with Elastic Layering.
App Layering 4.x supports the following OS for OS Layer images:
- Windows Server 2008 R2, Server 2012 R2 & Server 2016 (new in 4.0.8) Standard and Datacenter editions.
- Windows 7 32 & 64bit.
- Windows 10 64bit.
App Layering Enterprise Layer Manager browser support:
- Internet Explorer 11.
- Firefox version 45-52. Firefox dropped NPAPI support starting Firefox 52 so you will have issues using UDMC with Firefox. There is a workaround, but recent versions disable this workaround.
- Chrome does not work because NPAPI plugins are not supported.
Note: Browsers must have Silverlight 4 installed.
Note: Citrix Cloud allows connecting to your ELM running version 4.1+ through the Citrix Cloud Connector. The connection is made through a Citrix Cloud hosted browser and traffic is routed through the Cloud Connector installed within your Resource Location.
Storage requirements:
- Network file share running SMB for Elastic Layering. This share is attached to the ELM appliance. Recommended 40-100GB. The size is dependant on how many Elastic Layers you create. This share is also used to convert VHDX disks in to OS Layers and I also use it to create Platform Layers.
- Local storage attached to the ELM appliance used for temporary files and finalized layers. Recommended 350-500GB. The size is dependant on how many layers you create. The size can be expanded which I show later.
Firewall port requirements:
| Source | Destination | Purpose | Protocol & Port |
| UMC User/Administrator | ELM/UMC Console | Log on to and use Management Console | TCP 80 or 443 |
| ELM | ELM | ActiveMQ Console | TCP 8161 |
| ELM | Log deliveries from Unidesk Agent | TCP 8787 | |
| ELM | Log deliveries from users | TCP 8888 | |
| Unidesk Agent | Communication | TCP 8016 | |
| Unidesk Agent | Log gathering | TCP 14243 | |
| Active Directory | LDAP | TCP 389 or 636 | |
| Connector for Azure | Communication | TCP 3000 (HTTP) 3500 (HTTPS) | |
| Connector for PVS | Communication | TCP 3009 (HTTP) 3509 (HTTPS) | |
| Connector for vSphere | Communication | TCP 3004 (HTTP) 3504 (HTTPS) | |
| Connector for XenServer | Communication | TCP 3022 (HTTP) 3502 (HTTPS) | |
| Connector for Nutanix | Communication | TCP 3006 (HTTP) 3506 (HTTPS) | |
| ELM | applayeringwebapi.azurewebsites.net | Logs and Phone Home data | TCP 443 |
| OS Image | XenServer XenCenter | Communications | 5900 |
The layers that make up a complete image:
- OS Layer – Contains the base OS image e.g. Windows 10 or Windows Server 2016. The OS layer is read-only and shared between many different virtual machines. The OS Layer generally only contains the Operating System and any Windows patches whilst all applications are stored in separate Application Layers. Even applications with drivers and system services etc. are supported by Citrix as Application Layers.
- Platform Layer (NEW) – This new type of layer is what really makes OS Layers hypervisor agnostic. You can build one OS Layer and deploy it to Hyper-V, vSphere and XenServer at the same time for example. This means management of one single image across multiple hypervisors. This is achievable all by using Platform Layers. The Platform Layer holds the hypervisor tools, PVS tools and the VDA software. You could have one Platform Layer containing Hyper-V integration tools and a second Platform Layer containing VMware Tools. It doesn’t matter to the OS Layer, as using a Platform Layer dictates which environment an OS Layer will run under. There are also two types of Platform Layers:
- Platform Layer for packaging layers and versions – If you are packaging layers on a Hypervisor different from the one used during the OS Layer creation, the Platform Layer is used to ensure that any hypervisor dependant software is available to you during the Application Layer creation process. This Platform Layer is only used during layer creation across different hypervisors and does not restrict the ability for the layer to be published across different hypervisors in production. Another example that would require a Platform Layer for packaging would be when installing the RDS version of App-V 4.6 which requires the Remote Desktop Services role to be installed. You would not have the RDS role installed on your OS Layer so therefore the Platform Layer for packaging will accomodate that requirement.
- Platform Layer for publishing layered images – The publishing Platform Layer is always required when you publish layered images. The Platform Layer consists of the hypervisor tools and virtualization tools needed to run under a specific environment. If we want to deploy XenDesktop machines running on Hyper-V with PVS, we would create a Platform Layer containing the PVS Target Device software, XenDesktop VDA and Hyper-V integration services tools.
- Application Layer – Contains applications such as Adobe Reader, Office, Firefox, LOB etc. which are layered on top of the OS layer to achieve a complete desktop build. An Application Layer is basically made up of the file and registry entries created on a machine when an application is installed. Application Layers are also read-only and shared between many different virtual machines. Apps can be bundled together or kept in separate layers depending on the requirements. An Application Layer is tied to an OS Layer, so you can’t use the same layer on a Windows 7 and Windows 10 OS Layer for example.
- User Layer – The User Layer is a replacement for the Personalization Layer that was part of the old Unidesk 2.x and 3.x products. User Layers was introduced in App Layering for Windows 7 x64 originally and then on Windows 10 x64 once App Layering 4.2 was released. This layer is currently in Labs. The User Layer is the only read/write layer in an App Layering stack. As a user first logs on to a Desktop OS, the user layer is created and any changes they make to the VM during that time is captured in the User Layer. Once a user logs off a XenDesktop VDA, the User Layer is detached from the VM and will follow that user to the next desktop they log on to. You can eiter turn this feature on or off.
- Office 365 Layer (NEW in 4.6) – In addition to User Layers, you could alternatively deploy an Office 365 Layer which captures Outlook data files and configuration settings. If you are wanting to use an Office 365 Layer, you cannot use a User Layer as well. This feature is new in App Layering 4.6 and is currently in Labs
Other App Layering components:
- Connectors – Platform Connectors provide the connection to MCS or PVS, allowing you to publish layers out to your desired target platforms. Connectors can also connect to Azure, vSphere, Hyper-V and so on to import OS Layers, create Packaging Machines and so on.
- Image Templates – An Image Template consists of an OS Layer, Platform Layer and any number of Application Layers. These templates allow you to publish layered images out to your desired destination platform such as PVS running on Hyper-V. Using a Image Template, you can also enable/disable Elastic Layers.
Installing App Layering Enterprise Layer Manager:
Before we begin, Enterprise Layer Manager is the replacement of the Unidesk Management Appliance if you were familiar with earlier versions. The App Layering Management Console built inside of ELM is simplified, so for those that used the Unidesk Management Console before you’ll notice it is easier to navigate and understand this iteration. Master and Secondary Cachepoints are also gone, handing that job over to MCS & PVS. With a single appliance, it is now easier than ever to configure App Layering and backup and restore not just the App Layering ELM appliance but the layers that make up your VDA virtual desktops. Everything in 4.x is simplified and easier for the administrator.
The ELM install media can be downloaded direct from the Citrix downloads website. This install shows ELM installed on Hyper-V Windows Server 2016.
Once you’ve downloaded the media. Extract the hyperv_4.6.0.6 folder.
Using Hyper-V manager or SCVMM, right-click your Hyper-V server and select New -> Virtual Machine. 

Select Next. 
Enter a name and location for the ELM virtual machine and click Next. 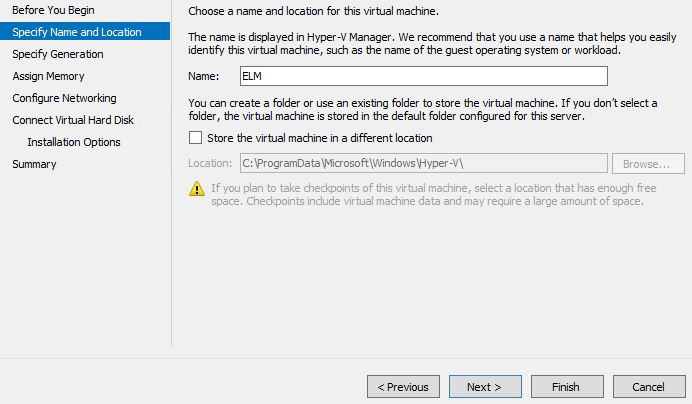
Specify the machine as Generation 1. Currently Generation 2 is not supported to run ELM. 
Specify 8GB RAM, a recommendation from Citrix. Make sure Use Dynamic Memory for this virtual machine is left unticked. 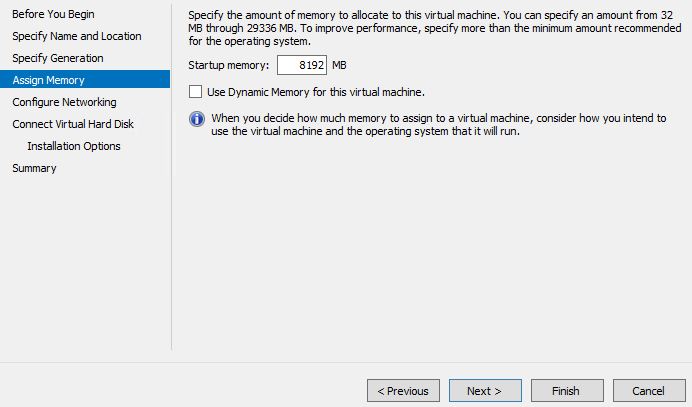
Specify a virtual switch and click Next. 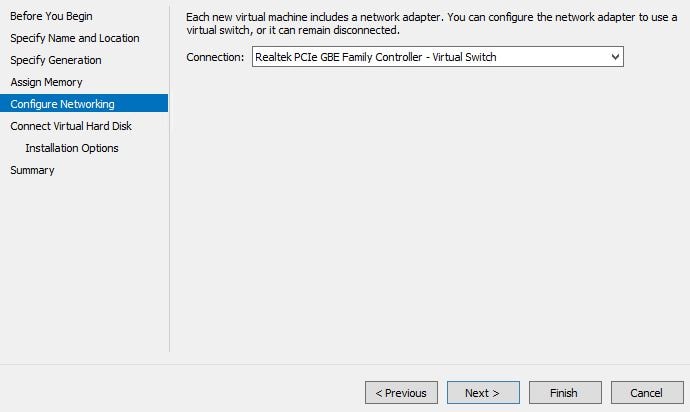
Select Use an existing virtual hard disk and browse for the unidesk_hyperv-system.vhdx VHDX file that comes with the Citrix App Layering install media. This is your ELM operating system which is based on CentOS. You should have already moved this OS disk to shared/highly available production storage that your production Hyper-V cluster servers use. Click Next. 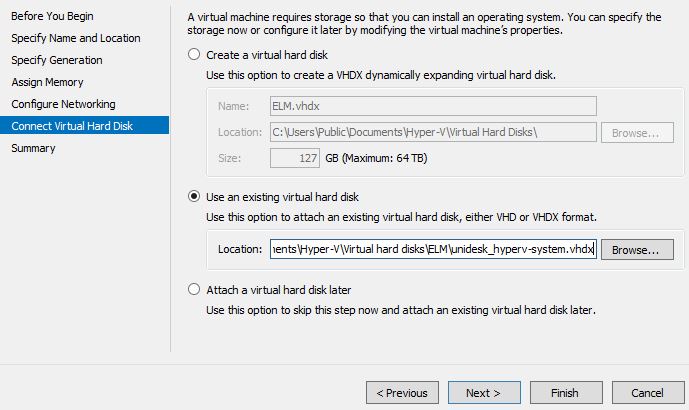
Click Finish. 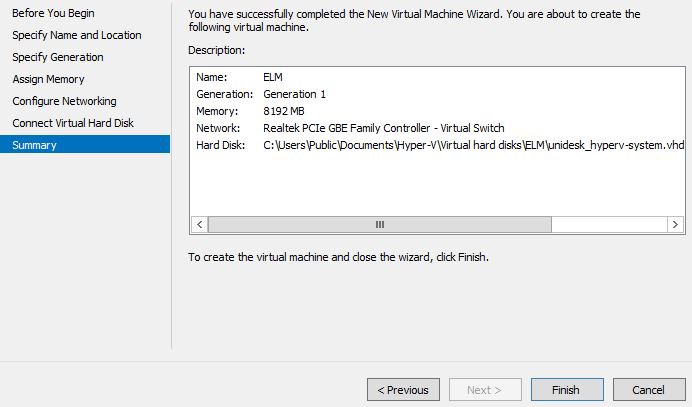
Now that the virtual machine is created, right-click it and select Settings. 
Change the virtual processors to 4, a Citrix recommendation. 
Click on IDE Controller 0 -> Hard Drive -> Add. 
Click Browse. 
Select the unidesk_hyperv-repository virtual hard disk. This disk is where temporary files and finalized layers reside. 
Remove the virtual DVD Drive by selecting it and choosing Remove. Click OK. Now power on the ELM Virtual Machine. 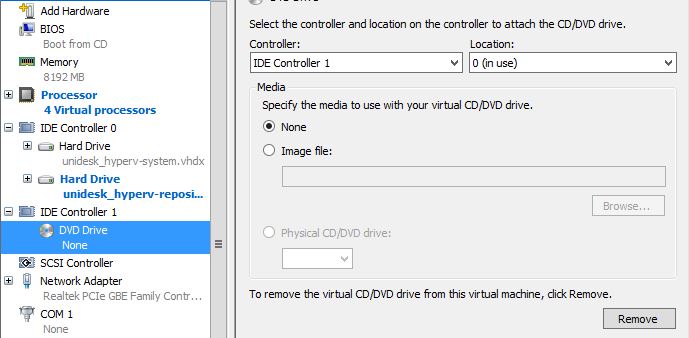

Once the ELM has started we need to perform some initial configuration. Log on to the console using default credentials administrator/Unidesk1. You can also shell on to the appliance using PuTTy.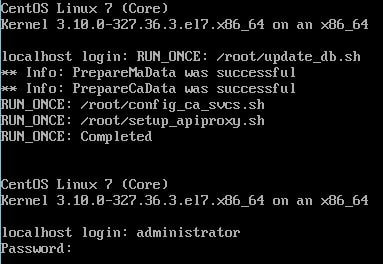
Type C and press enter. This allows us to configure a network address. 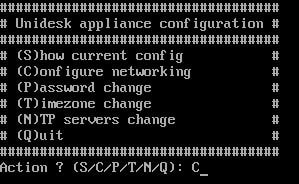
Select S for a static IP setup. 
Enter the IP address, gateway and DNS addresses that the ELM VM should be configured with. 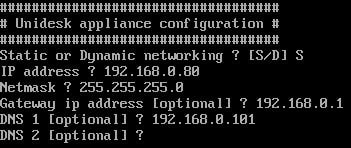
Press Y to save the settings and restart networking. 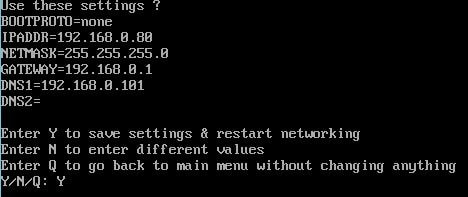
Network services are restarting. ![]()
To change the CLI default username/password. Enter P and press enter. 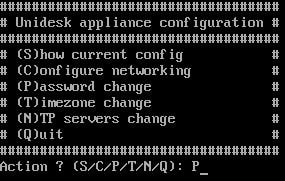
Specify a new password. This is for the CLI administrator account. It is not for the UMC GUI administrator account whose password can be changed via GUI later. 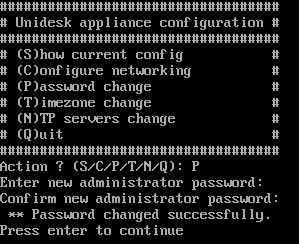
To change the timezone, choose T followed by pressing enter to see a list of available timezones.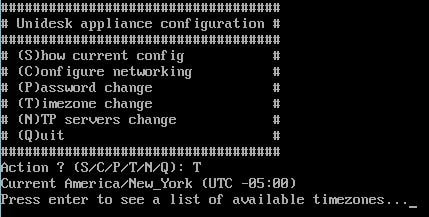
You can search for your timezone if preferred. Once you see your timezone, simply enter the associated number and press enter. 
Press enter again. ![]()
To change NTP servers, select N. You can specify up to a maximum of 6 NTP servers. By default, 4 NTP servers from centos.pool.ntp.org are already configured. At this stage the basic configuration is complete and you can log onto the App Layering Management Console. 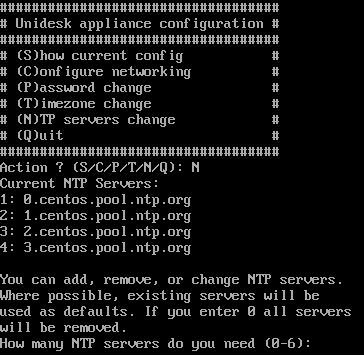
Using the IP you specified for the ELM appliance during configuration, connect to the GUI. Your browser will need to support/have Silverlight 4. Enter the default credentials of administrator/Unidesk1.
Note: Unlike previous versions, you do not need to append /udmc to the end of the URL as it is now automatically inserted.
Accept the Terms and Conditions.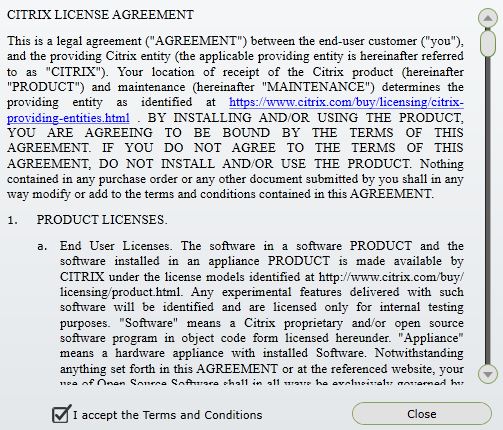
At this stage you are prompted to change account password such as the root and console administrator passwords. This is new since Citrix App Layering 4.1. Click the down arrow.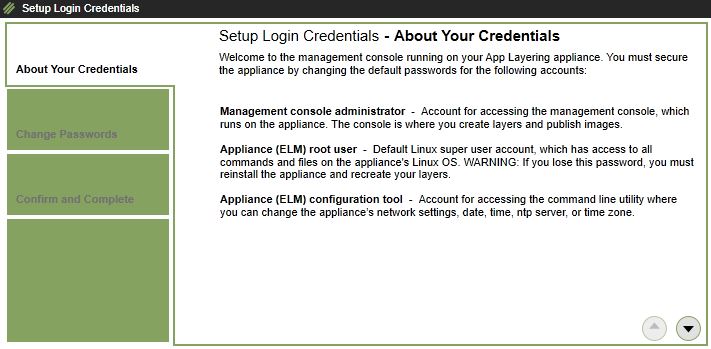
Enter new passwords for the management console user, root user and configuration tool accounts. Click the down arrow.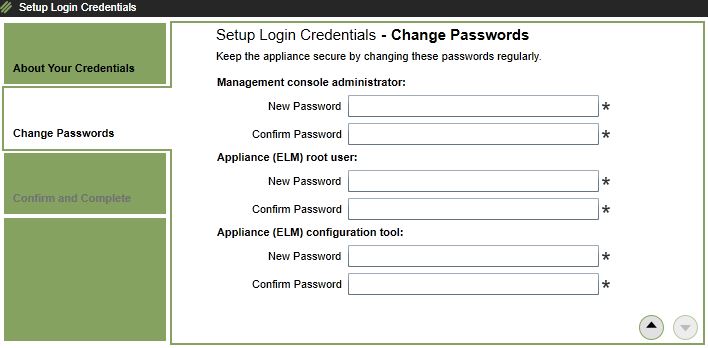
Click Change Credentials.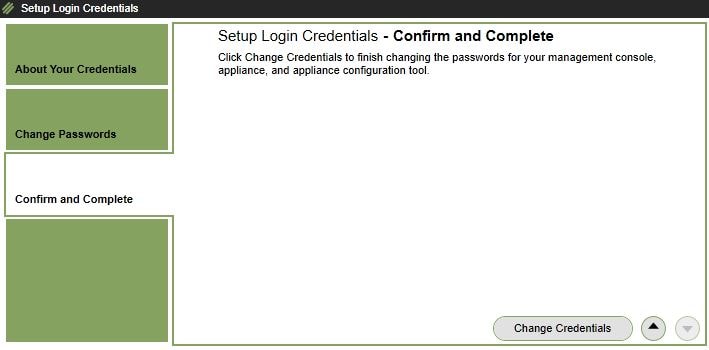
Click OK.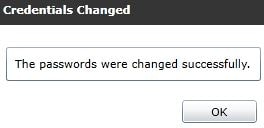
To change the GUI administrator password in future using the Management Console click on Users. Select Administrator and click Edit Properties. 
Enter a password, then click the down arrow. 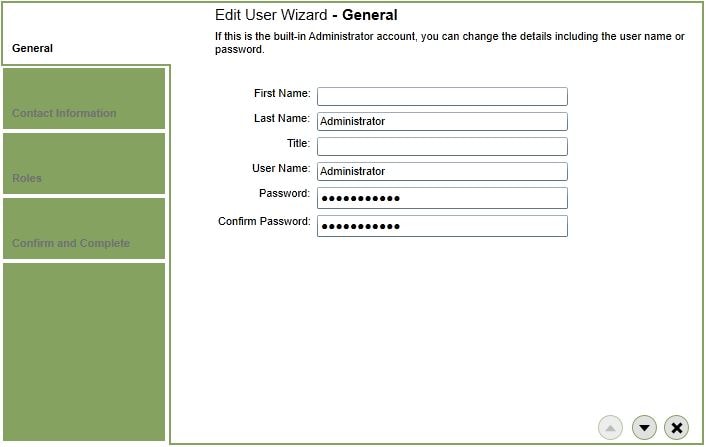
You can add some additional information such as phone, email address etc. 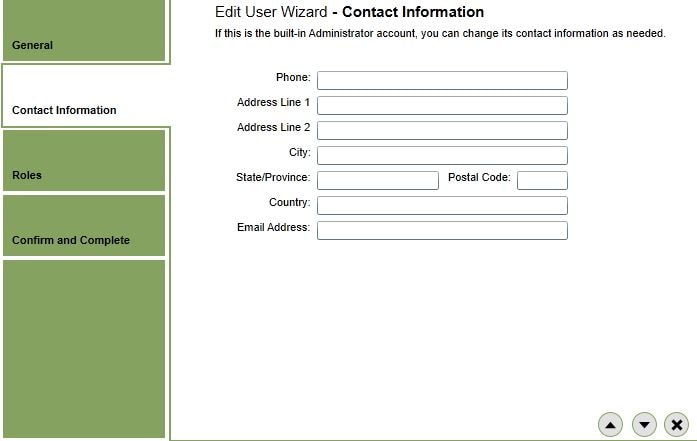
Roles cannot be assigned since this is the built-in administrator account. 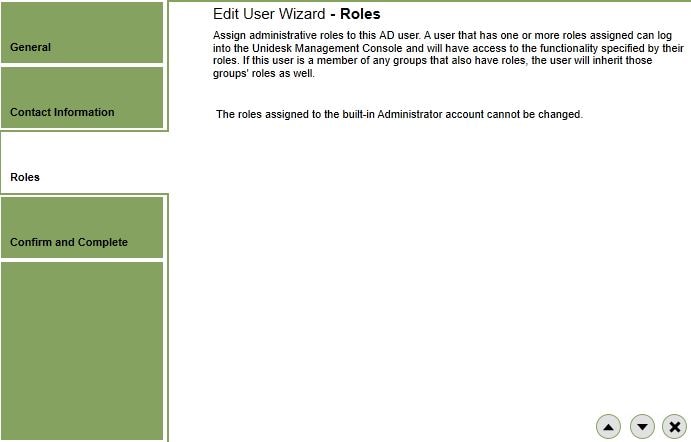
Click Update User to update the administrator account with a new password. 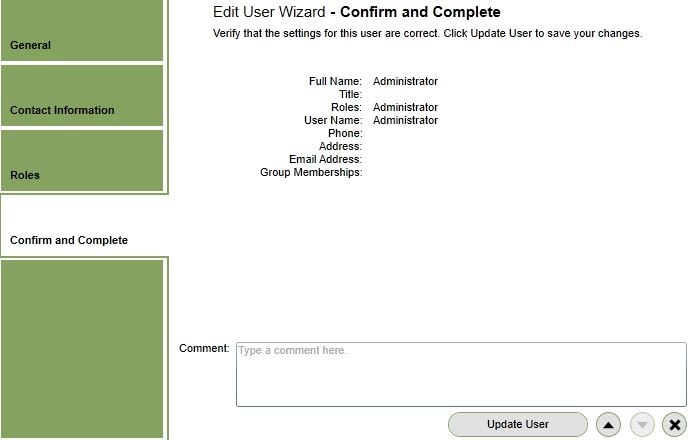
The Enterprise Layer Manager appliance must be connected to your Active Directory domain in order to assign roles and Elastic Layers to users. To make the association, navigate to Users -> Directory Service -> Create Directory Junction. 
Specify a name, server address and port. You can use ports 389 or 636 for secure LDAP. Under the server address enter your domain FQDN. This ensures App Layering will use all available Domain Controllers in your domain, preventing a single point of failure. Click Test Connection. 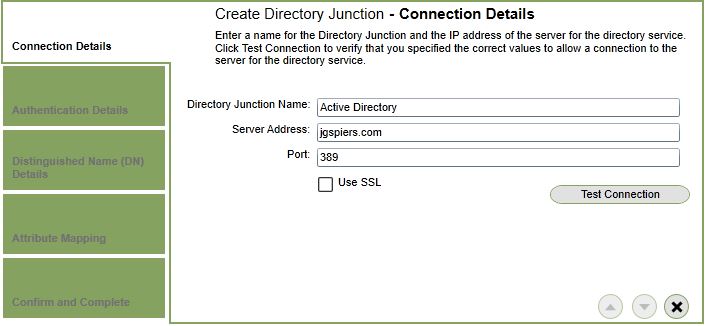
The connection should succeed so long as the ELM appliance is allowed to contact Active Directory over 389 or 636. 
Enter a service account to be used for Active Directory queries. Click Test Authentication and make sure you get a succeeded response. 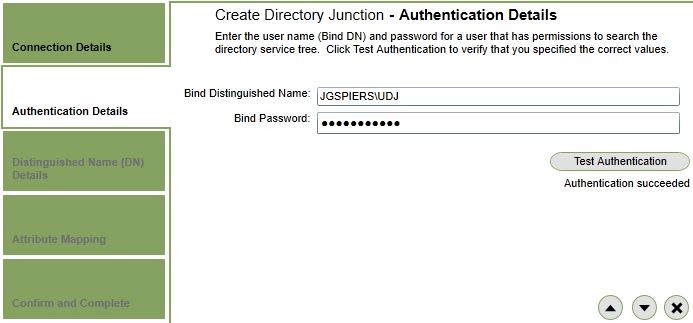
Specify a search point App Layering will use to discover users and groups. This search point should be the Organizational Unit that contains users/groups or computers that you want to have receive Elastic Layers. Avoid creating overlapping Directory Junctions. In this example I am using a high level users OU that contains all business user accounts. Click Test Base DN. The DN is valid so continue on. 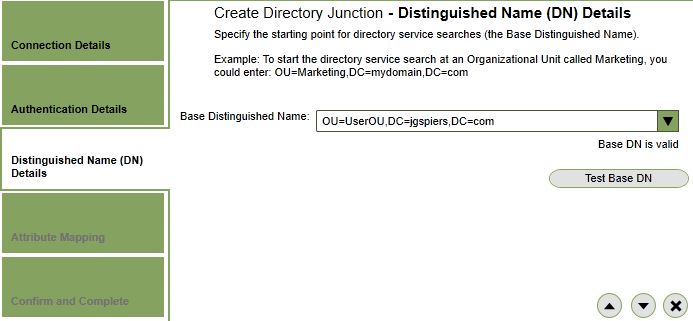
User Attributes are automatically configured for Active Directory and should not be changed away from the default values unless you have a good reason. Click the down arrow to continue.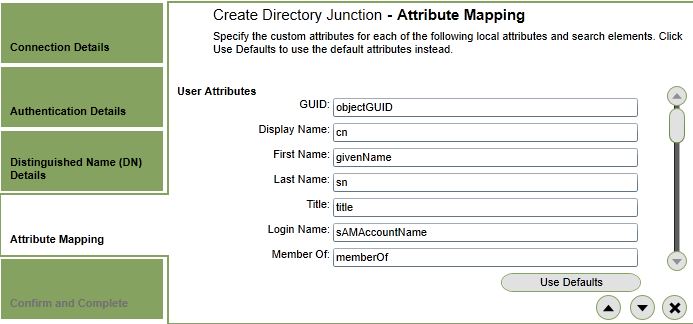
Click Create Directory Junction. 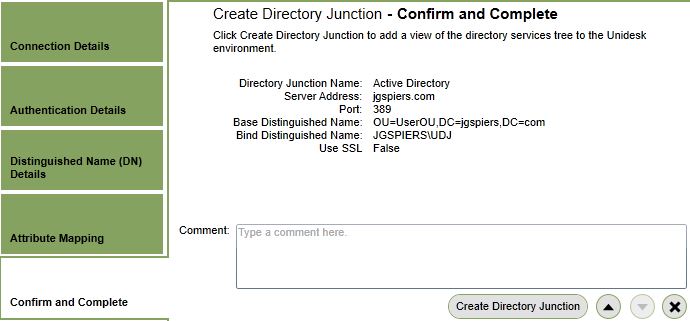
The Directory Junction now appears as below. 
Now when you go to Users -> Directory you are shown the list of users and groups that are in Active Directory. 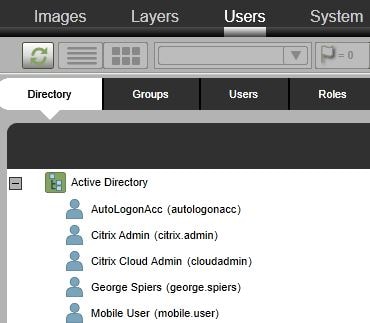

If you click on a user you can edit account properties by selecting Edit Properties. 
The ELM has a read-only connection to Active Directory so you cannot change any information from the Management Console. You can however assign roles to a user such as the Administrator role or more specific roles. 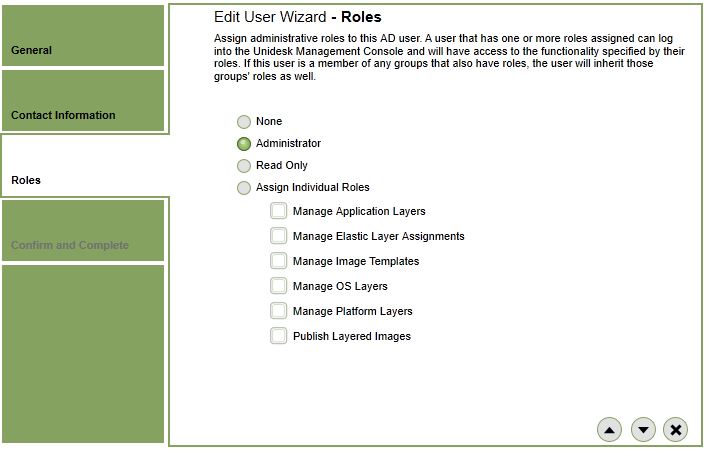
When a user is assigned a Role or assigned an Elastic Layer, the user icon turns green. The same applies to Security Groups, as you can also apply Roles or Elastic Layers to Security Groups. With Security Groups you can also assign Machine Assignments or User Layer Assignments, which you cannot do with singular user accounts.
The user will also appear under the Users tab when configured with a Elastic Layer or Role. When Groups are assigned with Roles or Elastic Layers, they appear under the Groups tab.
You can delete a user from the App Layering console, this does not actually delete the user from the App Layering console. What it does is removes any Elastic Layers assignments and Roles from that account. Note again that this does not delete the account from Active Directory.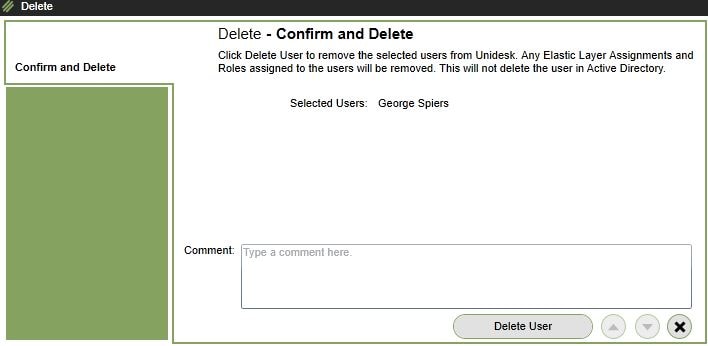
You can also edit groups, including associating machines with the group. You can tie Elastic Layers to a group, and associate machines with the same group so that when group members log on to those machines, they receive the Elastic Layers tied to the group.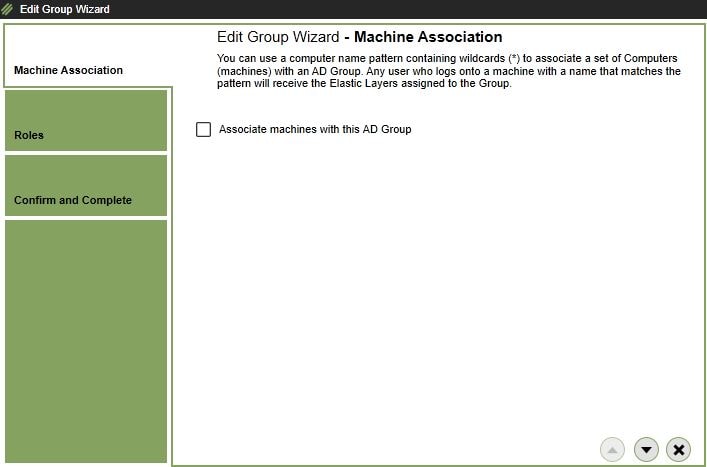
You can also specify roles at a group level. 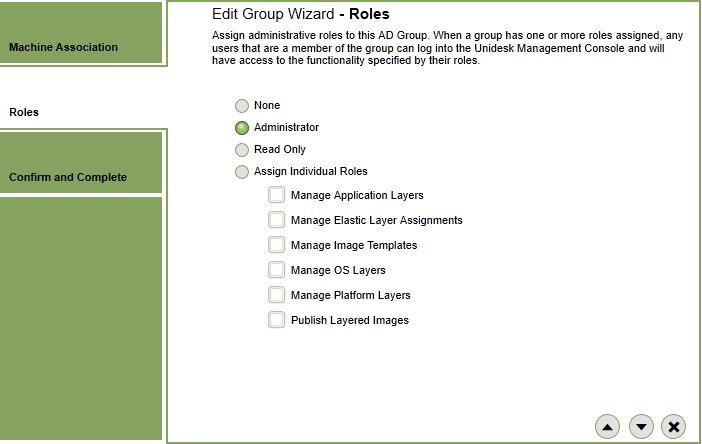
When groups are configured with Elastic Layers, Machine Assignments, User Layers or Roles, they appear under the Groups tab. 
As you may have noticed, we connected to the App Layering Management Console over HTTP. It is also possible to connect over HTTPS however you will need to install a certificate matching whichever host name you decide to use, to ensure you don’t get any certificate errors or warnings. To upload a certificate (which can be self-signed), navigate to System -> Settings and Configuration -> HTTP Certificate Settings -> Edit. 
Click Upload. 
Select the PEM certificate. The certificate must be in PEM format and the private key must not be password protected. ![]()
Click Save. 
Click Yes. 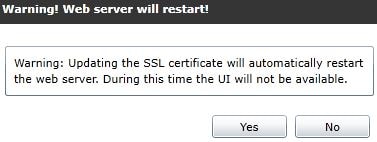
The certificate install completes and the ELM appliance restarts. 
Now we can connect to the console over HTTPS. 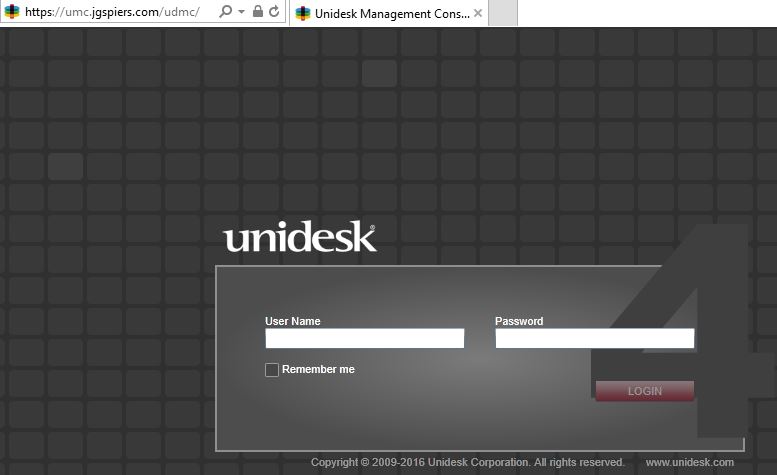
The next thing you need to do is create a Network File Share which will become home to your Elastic Layers and provide a staging area for upgrades, and the share will act as the staging area for new OS Layer creations. This share will typically be a DFS Namespace so that it can be replicated across file servers and kept highly available. It is recommended this share be on a 40-100GB disk. This is all dependant on how many Elastic Layers you will have. Create a service account and assign the account Full Control permissions to the share. Note that you cannot use the same account used to create a Directory Junction.
All other users must have read permissions to the share.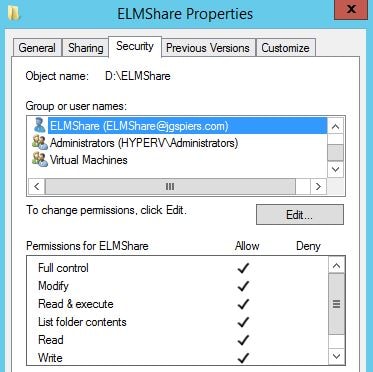
Over in the App Layering Management Console, navigate to System -> Settings and Configuration -> Network File Shares -> Edit. Enter the share location followed by the service account credentials. Click Test Network File Share followed by Save once the test is complete.
Note: Since App Layering 4.2, this button is renamed to Test SMB File Share. This is because App Layering now only supports SMB. When you click this button, SMB 3.0.2, 3.0, 2.1, 2.0 and 1.0 is tested in that order. The first version that the ELM appliance can successfully connect on is used.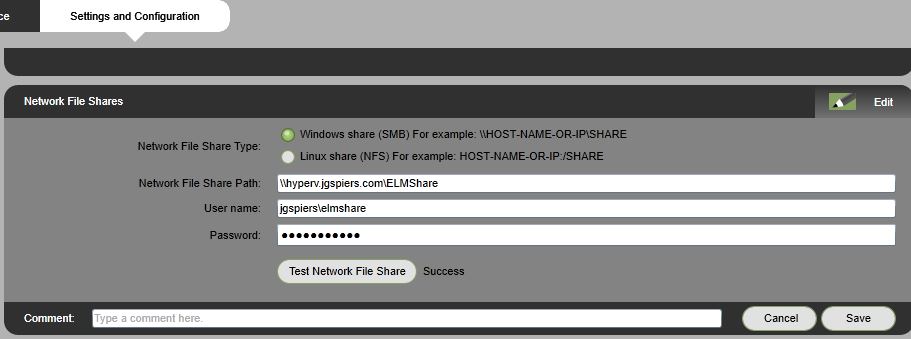
If you are using User Layers, lock down each User Layer folder(s) with the following permissions:
| User | Permissions | Apply to |
| Creator Owner | Modify | Subfolders and files only |
| Owner Rights | Modify | Subfolders and files only |
| Users or groups | Create Folder/Append Data
Traverse Folder/Execute File List Folder/Read Data Read Attributes |
This folder only |
| System | Full Control | This folder, subfolders and files |
| Domain Admins or directory admins | Full Control | This folder, subfolders and files |
If you wish to use User Layers, rather than use the main NFS you can specify additional Storage Locations by navigating to System -> Storage Locations -> Add Storage Location.
Note: You will not see the Storage Locations tab until you enable User Layers under System -> Settings and Configuration -> Labs.
Enter the network path and click the down arrow.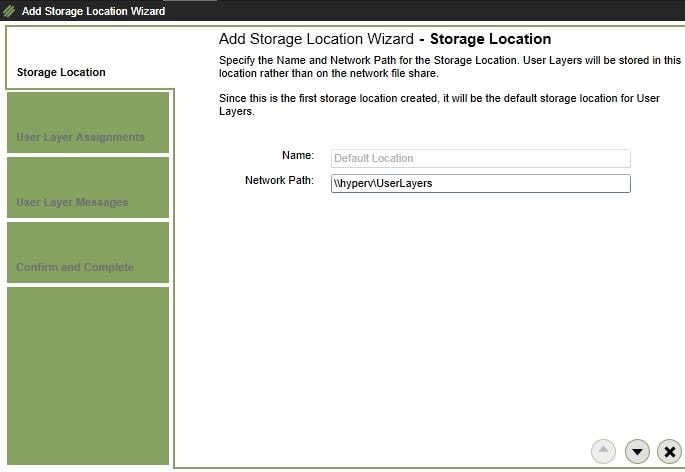
Click the down arrow. When you create additional Storage Locations, you can assign groups of users to those Storage Locations. This means that the ELM will place a User Layer in a particular Storage Location, depending on who the user is and what Storage Location they are assigned to. If a user is not assigned to a particular Storage Location, their personal User Layer will end up in the default Storage Location.
If users are assigned to multiple groups that are associated with multiple Storage Locations, a users User Layer will be stored in the highest priority Storage Location.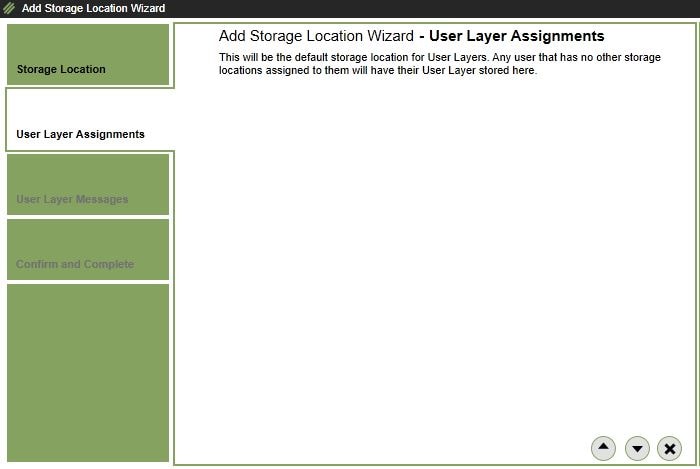
If you wish, you can override default messages that will be shown to users if a User Layer is in use and cannot be attached or a User Layer is unavailable to the user.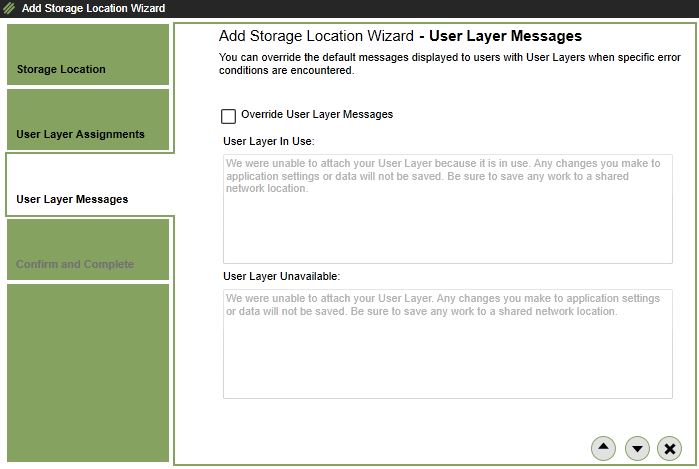
Click Add Storage Location.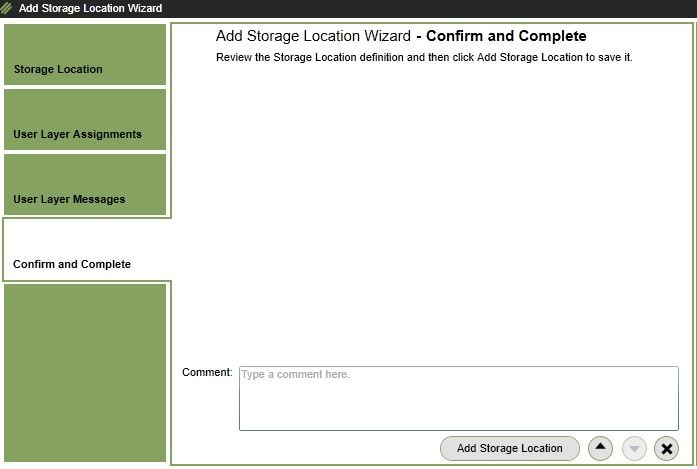
If you want to add more Storage Locations for User Layers, repeat the same process.
Note: If you are migrating User Layers from one Storage Location to another, simply copy them across.
There are also some other settings you can configure under Settings and Configuration such as Management Console session timeouts and log settings. 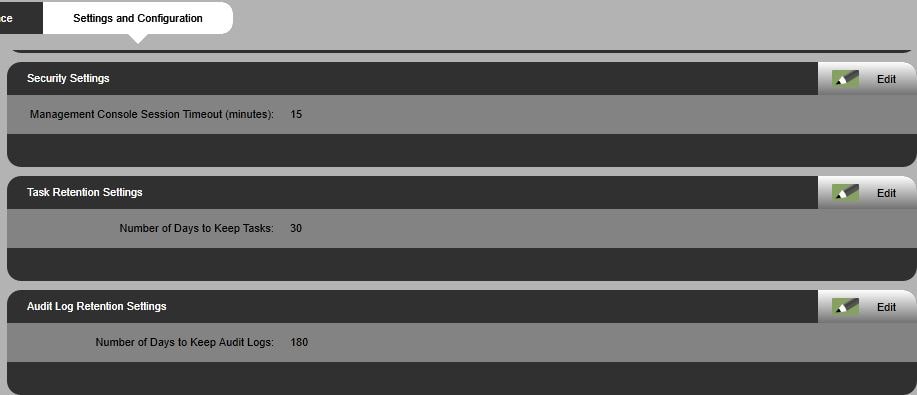
You can expand the ELM Layering Service storage upwards from 300GB by simply adding another virtual disk to the ELM appliance. Once the virtual disk is added, browse to System -> Manage Appliance -> Expand Storage.
The appliance will scan for any unformatted virtual disks. Select the virtual disk you want to add to the storage pool and click the down arrow. 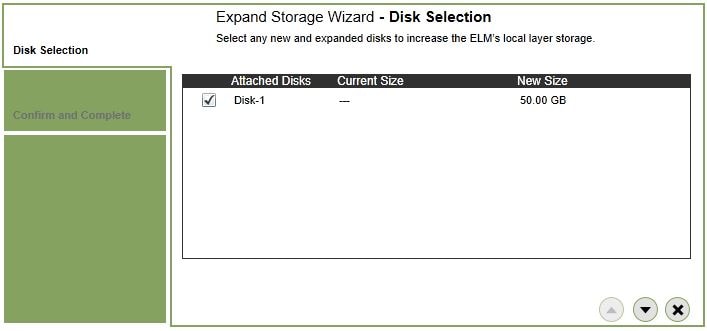
Click Expand Storage. 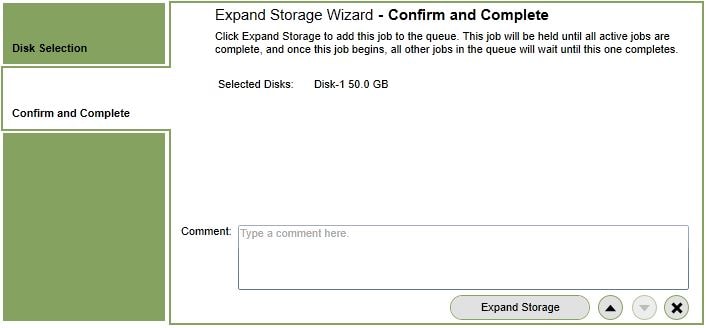
A new task is created which you can view the status of. 
After a few seconds the storage expansion task should complete and the Layering Service disk space size will reflect the expansion. It is recommended to reboot the ELM appliance once storage expansion is complete. 
Reclaim disk space from cancelled tasks
If you forcefully cancel a task in Citrix App Layering, any disk space consumed by these tasks is not released. Once there are no tasks running on ELM delete all files from /mnt/repository/Unidesk/Packaging Disks to reclaim free space. You must reboot the ELM afterwards to see the free space.
Create and configure Hyper-V Connector:
Prior to App Layering 4.6, there was no specific connector for Hyper-V. This meant that when creating OS Layer versions or App Layers for example, there were some manual tasks involved such as copying disks and manually creating a Packaging Machine. This new connector feature is currently in labs.
Note: Before you create a Connector to Hyper-V, you must install the App Layering Agent on to those Hyper-V servers you want to create a connection to. Parts of the steps to do that are explained https://jgspiers.com/citrix-app-layering/#PVS-Agent
To create a Hyper-V Connector, begin to create an App Layer or Image Template and at the Connector section click New. Using the drop-down select Microsoft Hyper-V (Labs) and click New.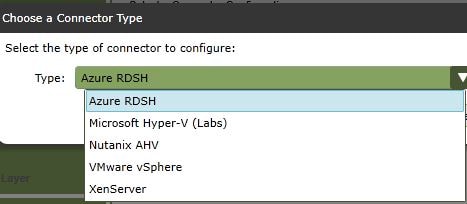
An HTML5 web page opens for you to begin the connector creation. Specify a Config Name and then under Agent specify your Hyper-V server. Enter a credentials and click Check Credentials. Once credentials have been passed you can select a Virtual Switch and adjust the values for RAM and CPU. These RAM/CPU values will determine what is given to the Packaging Machine and any machine you create directly on the Hyper-V servers, if you wanted to publish full VMs directly to them using this Hyper-V Connector. Scroll down.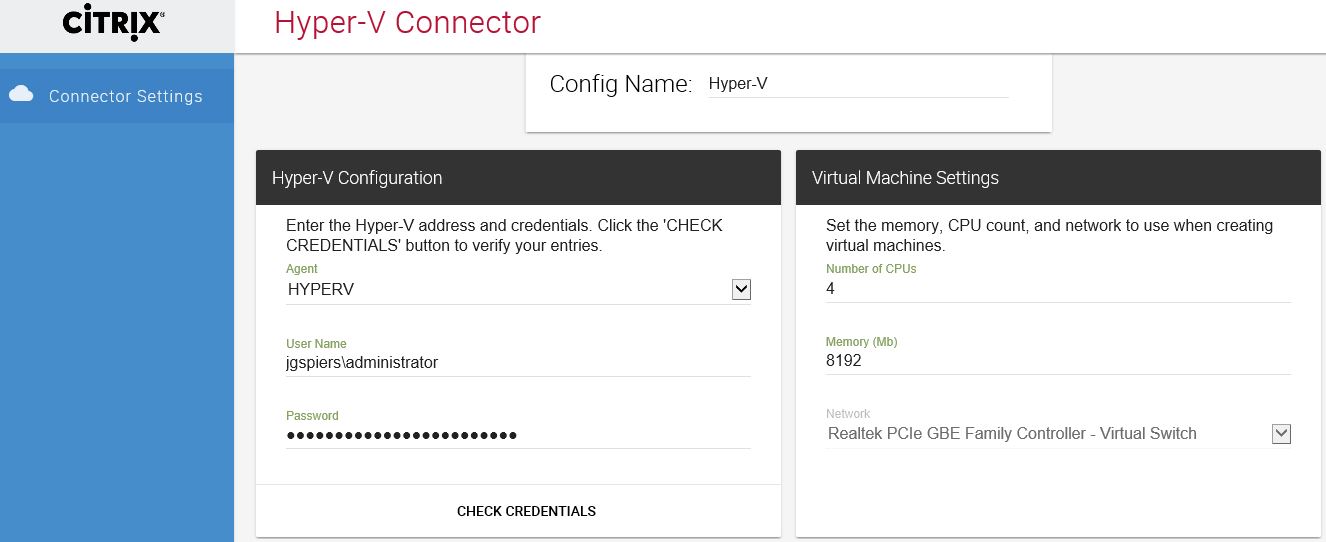
Enter a path that will act as the staging area for Packaging Machines. The Remote Path and Local Path must ultimately point to the same location. By default the Connector uses the Agent Credentials to connect to the path. Otherwise, you have the option of specifying alternate credentials. The Layer Disk Cache Size in GB setting allows you to allocate storage on your path to store cached layers. The goal with cached layers is to reduce the time it takes to prepare Packaging Machines. Once done, click Save.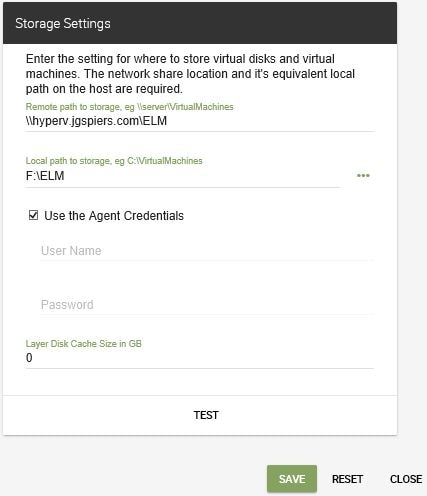
The new Connector will appear and can be selected for operations. 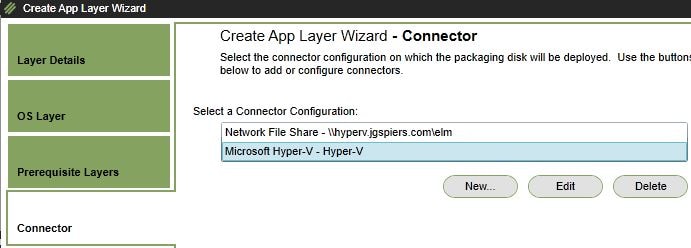
Create and configure Connectors on App Layering 4.11:
A new Connectors tab has been made available in App Layering 4.11, alowing you to more easily create and manage connectors.
Navigate to System -> Connectors and you will be able to add a Connector using the Add Connector Config option.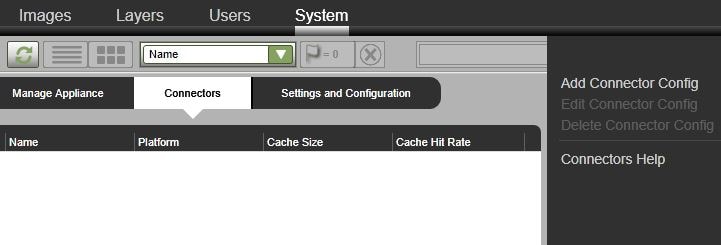
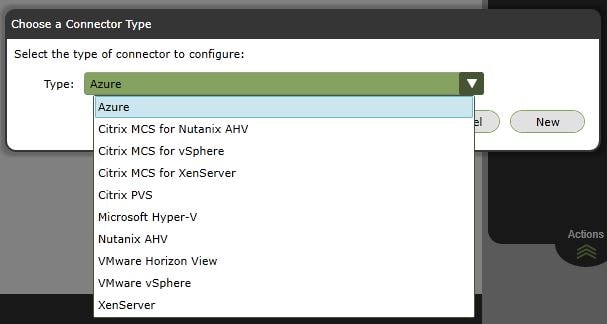
The Connectors pane also shows the Connector Cache Size (if configured) and the hit rate against that cache. Using a cache is recommended as it helps to speed up layer creation. 
Install App Layering Agent on PVS:
To register ELM with Citrix Provisioning Services we need to install the App Layering Agent on each PVS server, or a master PVS server.
Note: The App Layering Agent requires .NET Framework 4.5 to be installed and the PVS Console must be installed on all the PVS servers that you are installing the agent on.
Before installing the agent you must also install the PVS PowerShell snap-in.
PVS 7.1 – 7.6 – Run command C:\Windows\Microsoft.NET\Framework64\v4.0.30319\InstallUtil.exe McliPSSnapIn.dll from directory C:\Program Files\Citrix\Provisioning Services Console\
PVS 7.7+ – Run command C:\Windows\Microsoft.NET\Framework64\v4.0.30319\InstallUtil.exe Citrix.PVS.snapin.dll from directory C:\Program Files\Citrix\Provisioning Services Console\
If your PVS server runs Server 2008 R2 OS then also run PowerShell command Enable-PSRemoting.
Note: If you upgrade PVS, your PVS Connectors may not work until you run these snapin installation commands again.
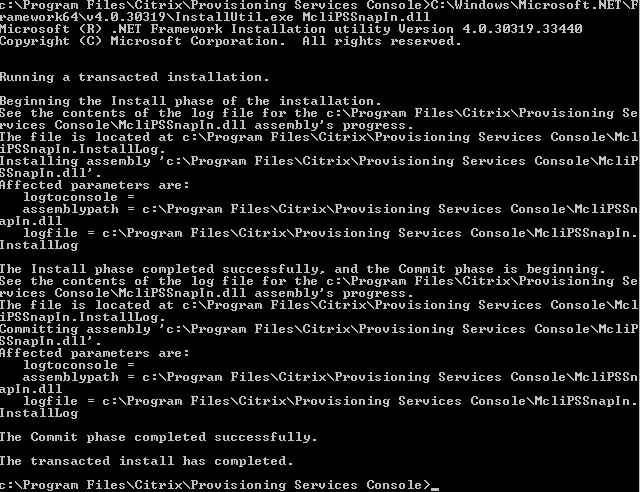
We can now install the agent at this stage to our desired PVS servers. Run citrix_app_layering_agent_installer.exe as an administrator.
Click Next.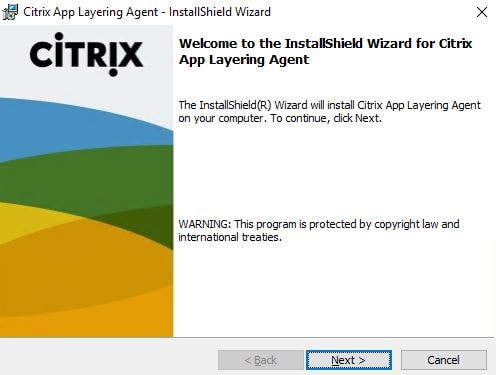
Accept the License Agreement. Click Next.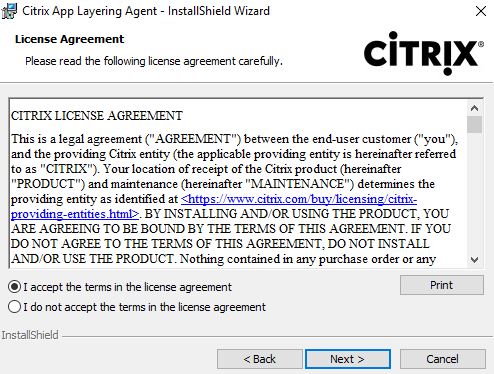
Click Next. An inbound firewall rule is created for this port. You can change the port if desired.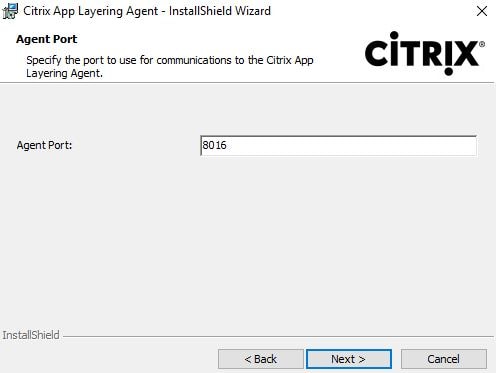
Click Install.
Now enter the FQDN of the ELM appliance including App Layering Administrator account credentials.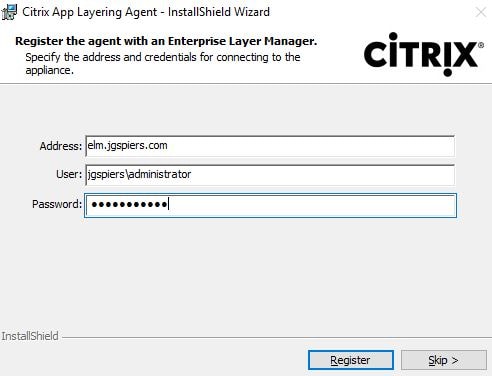
Click Finish.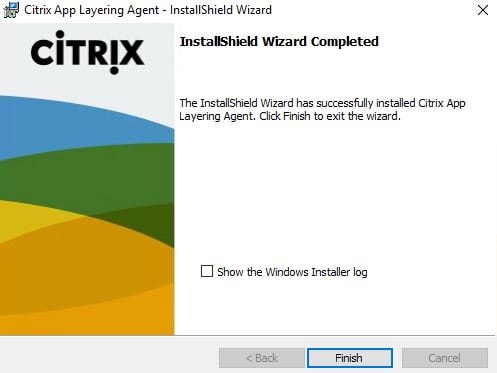
At this stage you are ready to provision your first OS Layer and import it in to ELM. For that, see http://www.jgspiers.com/create-update-os-layer-citrix-app-layering/
Upgrade ELM Appliance – Citrix App Layering
To upgrade an App Layering appliance, download the Citrix App Layering Upgrade Package currently available from Citrix Cloud or Citrix downloads.
Note: To upgrade from Unidesk 4.0.8 to 4.4+, you must first upgrade to 4.3 and then upgrade to 4.4 or above.
Note: Before upgrading an ELM appliance, take a snapshot.
Since App Layering 4.2, the ELM appliance automatically checks for upgrades by sending a probe to applayeringwebapi.azurewebsites.net. If an update is found, it is downloaded to your Network File Share but not applied. You do however get a notification that an update is available. If the ELM appliance cannot reach applayeringwebapi.azurewebsites.net then you will find the task fails with an error. Also, if you have not yet configured a Network File Share, you’ll also get an error. These errors are just for your interest and do not affect anything. You can either allow the traffic or upgrade the appliance manually.
Note: If upgrading to 4.2 or later, download the upgrade or full package from Citrix Cloud or https://www.citrix.com/downloads/citrix-app-layering/
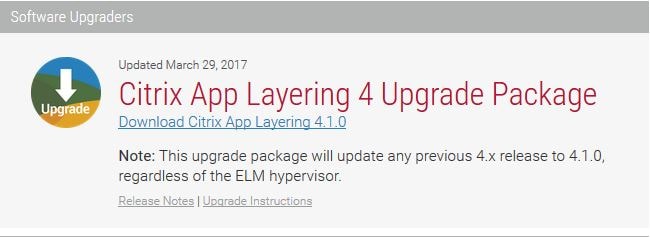
The package is around 715MB in size. 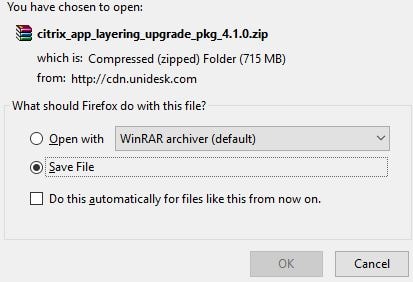
Once the package is extracted you’ll get the updated version of the Agent Installer (use to upgrade PVS agents if you have them), Image Tools and a citrix_app_layering_upgrade_4.x.x.vhdx disk.
Copy the upgrade VHDX disk to your ELM Network File Share. 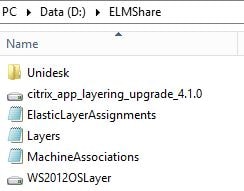
Log on to the App Layering Management Console, navigate to System -> Manage Appliance -> Upgrade. 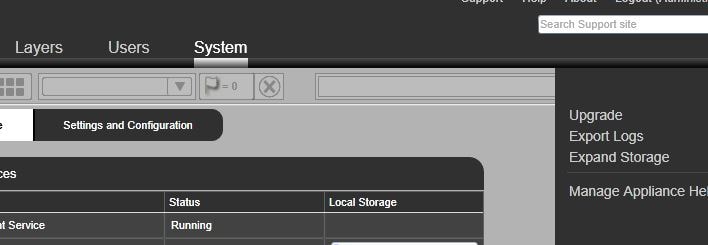
Click Browse and select the upgrade disk from ELM Share. Click the down arrow.
Click Upgrade.
Note: If you have any outstanding running tasks, you’ll not be able to upgrade until these are completed. 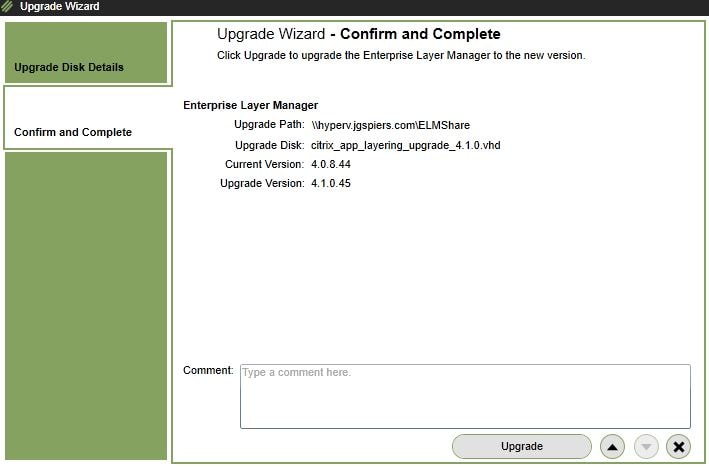
The ELM upgrade will begin. As per the warning, don’t navigate away or refresh the page. 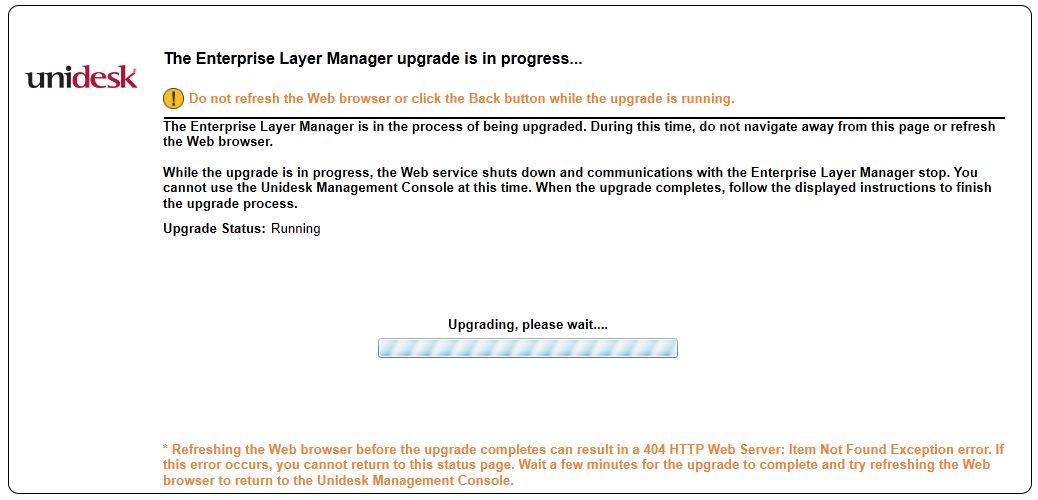
You’ll eventually be presented with an upgrade has finished page. Refresh the web page.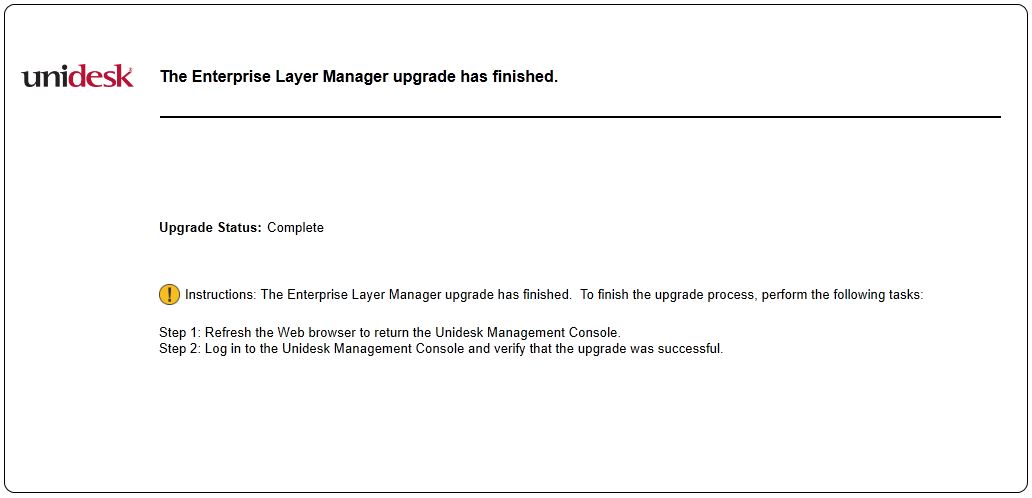
Log on to the Citrix App Layering appliance with your normal credentials.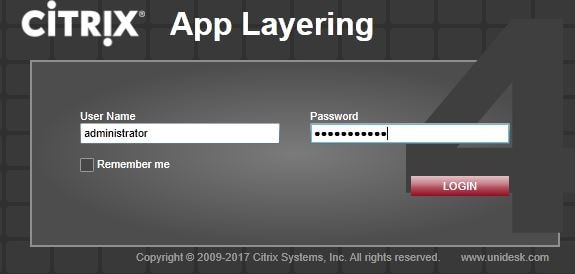
Accept the Terms and Conditions and click Close. 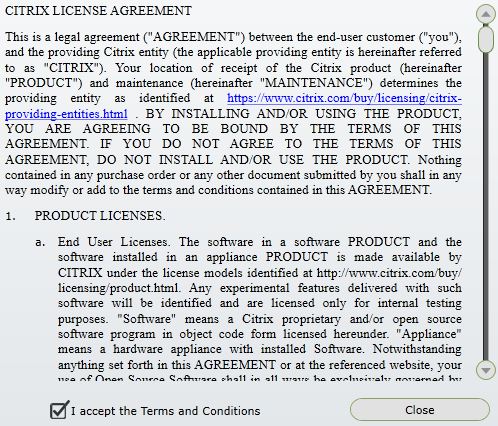
A Setup Login Credentials wizard will appear. This wizard makes sure the ELM Root User, Configuration Tool and Console Administrator accounts are secured with passwords other than the default. Click the down arrow.
Note: You will not see this wizard if you already completed it using an earlier version of App Layering.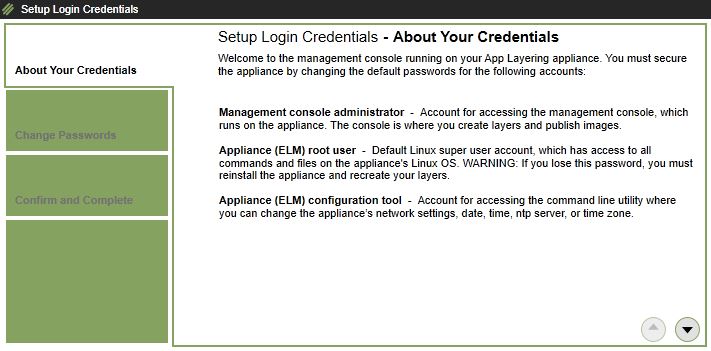
Enter secure passwords for each account. 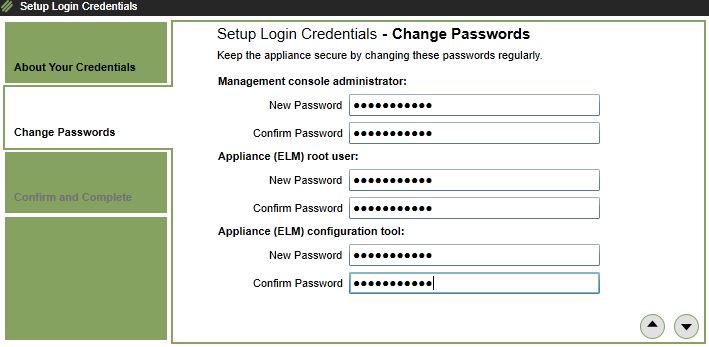
Click Change Credentials. 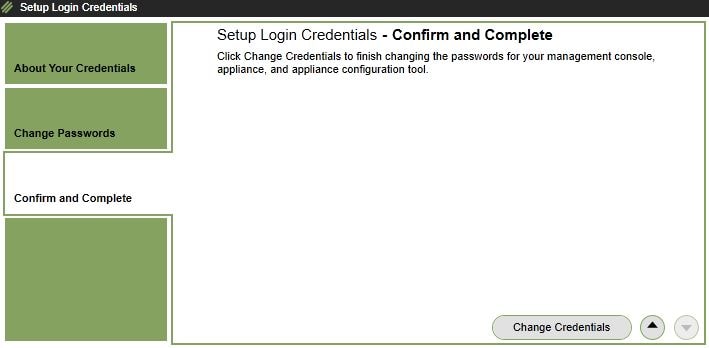
Click OK. 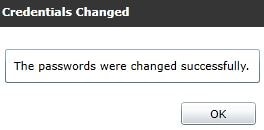
Click OK. 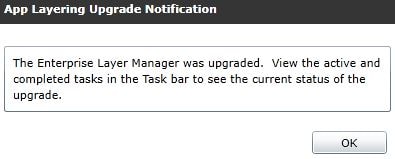
Now the About pane shows the new 4.x version of ELM installed. 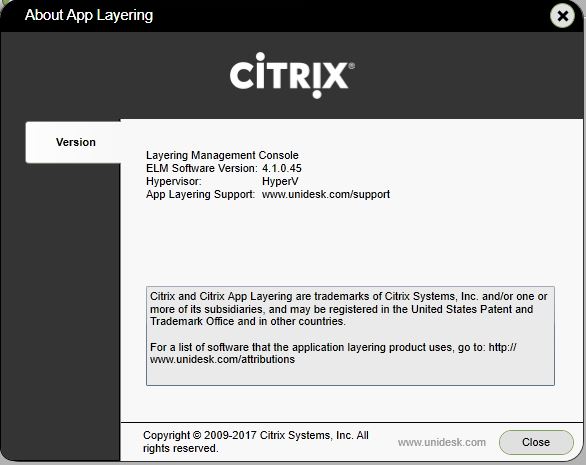
At this stage, if you have PVS servers then you should copy the PVS App Layering Agent upgrade media locally to each PVS Server and run the App Layering Agent upgrade on each server.
Manage ELM from Citrix Cloud (removed Oct 18):
Note: This functionality has been removed from October 2018.
It is possible to manage ELM appliances that are on Citrix App Layering version 4.1.0 and above using the Citrix Cloud. This feature is currently in Labs. Instead of connecting to the Management Console with your own internal web browser, you can connect via the Citrix Cloud portal which uses HDX to establish a secure connection to the appliance. It feels and looks like a Secure Browser session running back to the on-premise ELM appliance. Sign in to Citrix Cloud to access App Layering. Request a trial and on the Overview page click Get Started.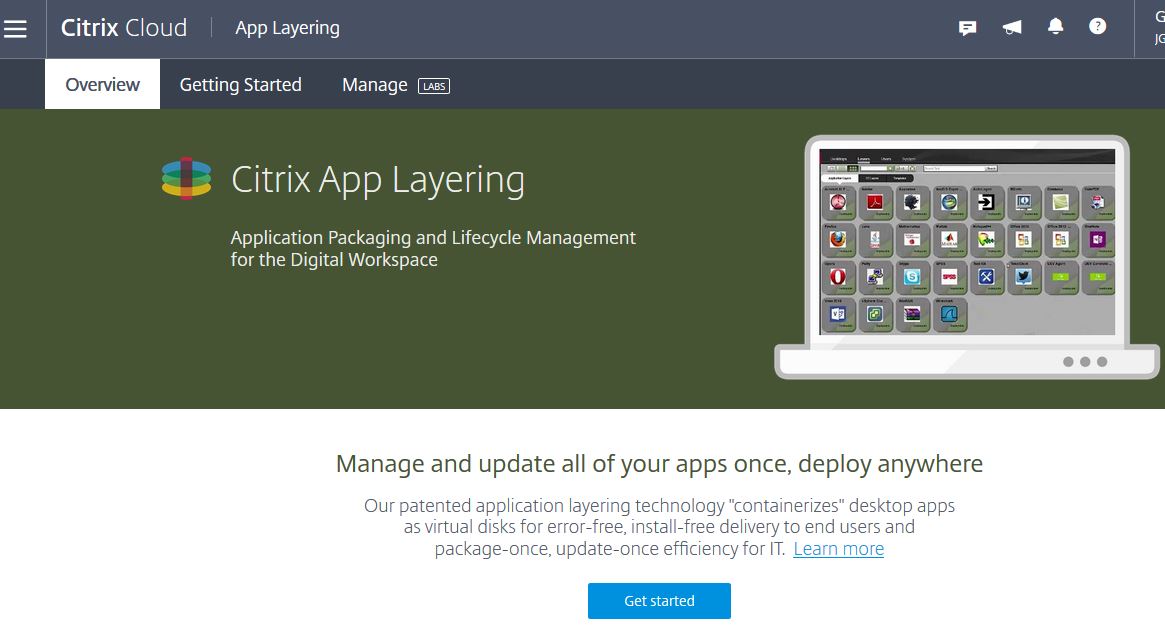
You can connect to an existing ELM appliance which is version 4.1.0+ if you already have one. At which stage you deploy a Resource Location, skip the Getting Started page and go straight to Manage. If you haven’t deployed an ELM appliance yet or worked with Citrix Cloud, you’ll need to set up a Resource Location first. Select the Hypervisor or Cloud you are using and click Get Cloud Connector. 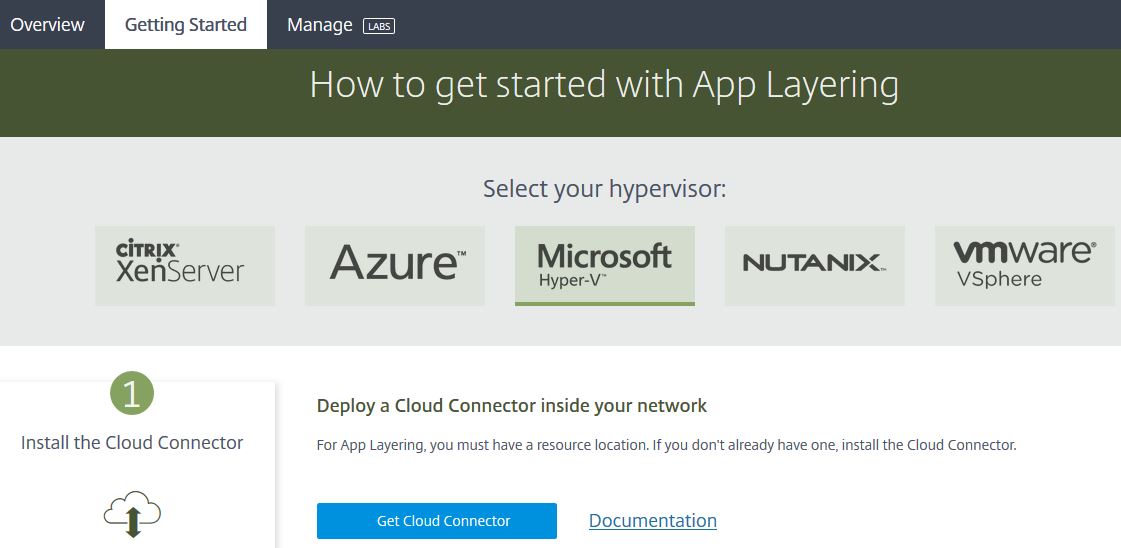
Click Download. Download the Connector to your Resource Location. 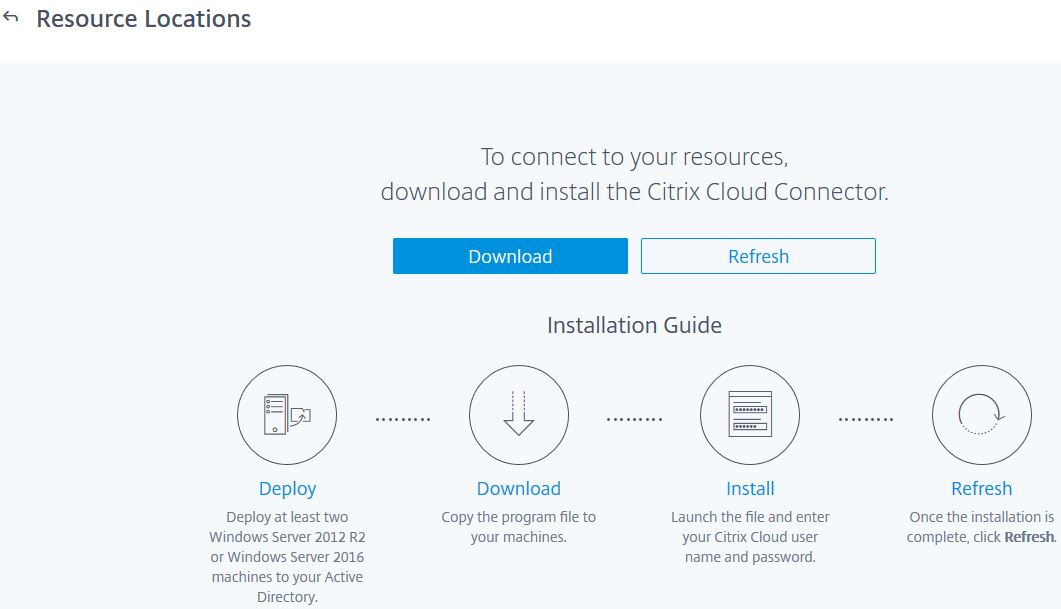
Run the cwcconnector install media as an administrator. The Cloud Connector should be installed on a Windows Server 2012 R2+ domain joined server and in pairs for high availability.
Cloud Connector requirements:
- .NET 4.5.1 or later.
- AD Domain joined machine for install.
- Active Directory schema version 2008 R2 or later.
- Correct UTC time or else Cloud connection will fail.
- 40GB of disk space and 4GB RAM.
Note: Turn off IE ESC (Enhanced Security Configuration) before installing the Connector.

Click Sign In. 
Enter your Citrix Cloud credentials of an account with Full Access. Click Sign In. 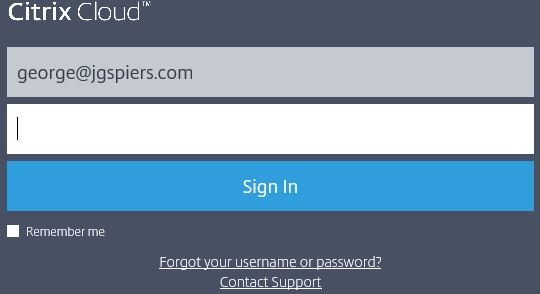
The Connector will perform connectivity checks and install any prerequisites needed. All communication to Citrix Cloud is 443 outbound only from the Connector.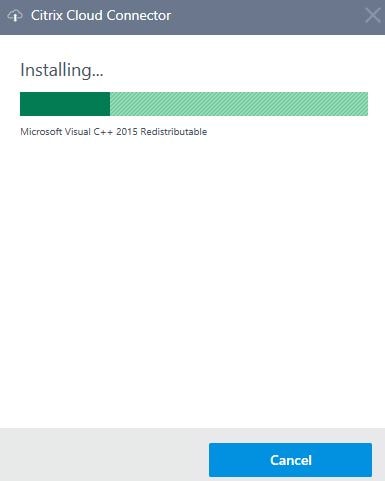
Another Connectivity Test will be performed. 
Click Close. 
Back over on the Citrix Cloud portal, click Refresh on the Resource Location screen. 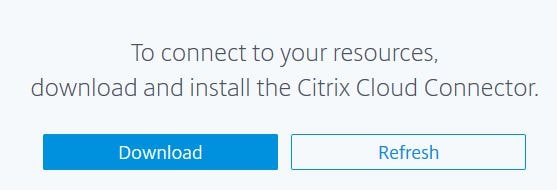
As mentioned before, you should install a pair of connectors for high availability. Connector updates are handled by Citrix Cloud automatically with only one connector being upgraded at a time. Now that we have a Resource Location in place, navigate back to App Layering.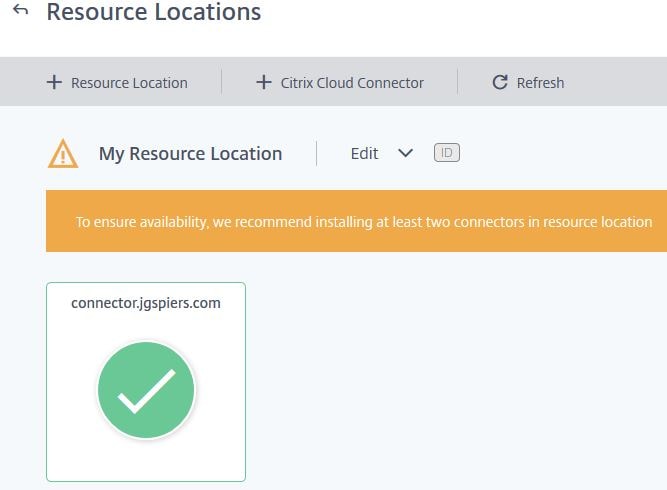
Select your preferred Hypervisor and click Download for Hyper-V. This initiates a download of the Citrix App Layering 4.x ELM (Enterprise Layer Manager) appliance. 
Save the media to your Resource Location. 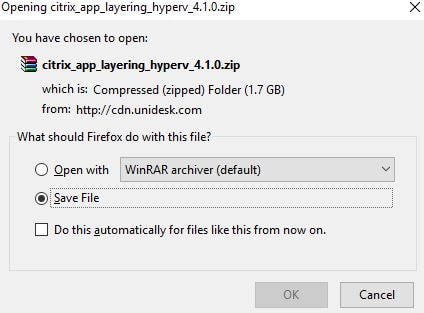
The extracted media will contain an Agent installed, Gold Image Tools and in my case Hyper-V disks. 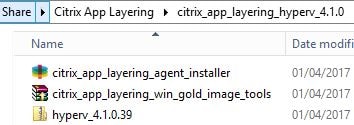
Both disks will be attached to a Virtual Machine. 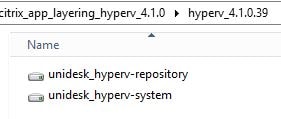
To create a VM, run through the wizard using Hyper-V Manager or SCVMM. 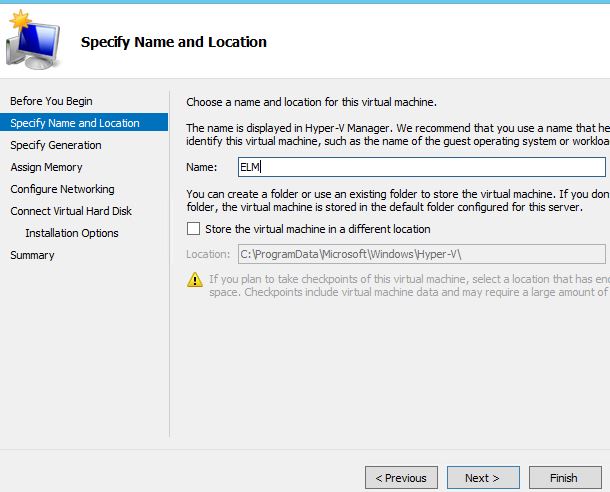
Make sure to select Generation 1. 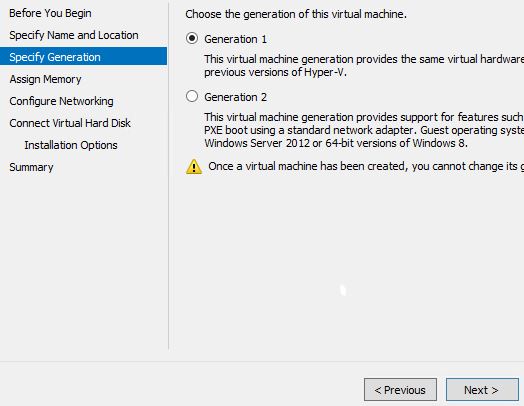
Specify 8GB RAM and do not select to use Dynamic Memory. 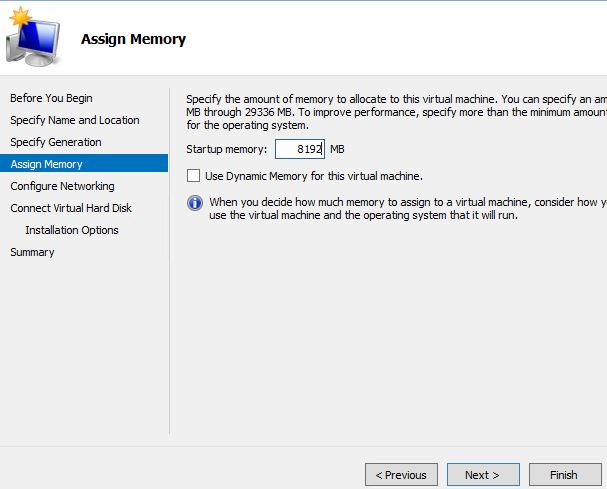
Attach a Virtual Switch. 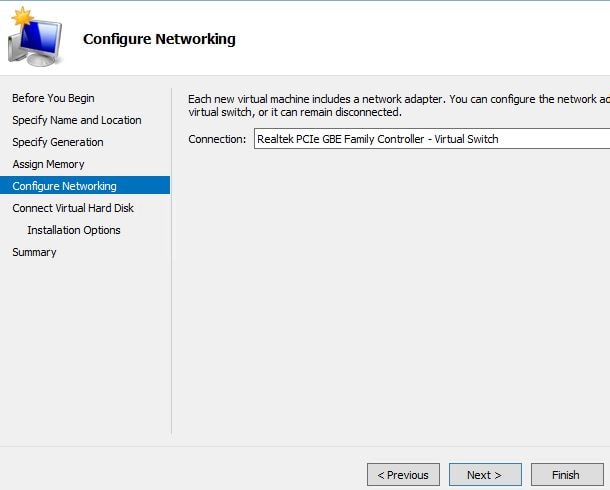
Browse and attach the system.vhdx disk. 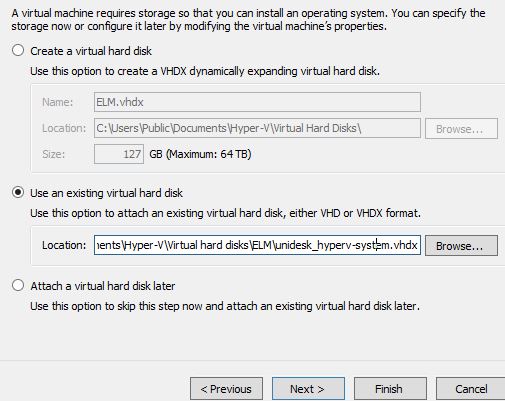
Click Finish. Do not start the appliance at this stage. 
Go in to the settings of the VM. Change the Virtual Processors to 4. 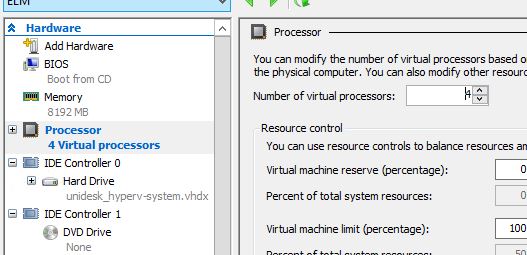
Click on IDE Controller 0 and attach the repository.vhdx disk. Click OK. Now boot the appliance and configure the network settings, timezones etc. See https://jgspiers.com/citrix-app-layering/#CLI-Config for instructions. 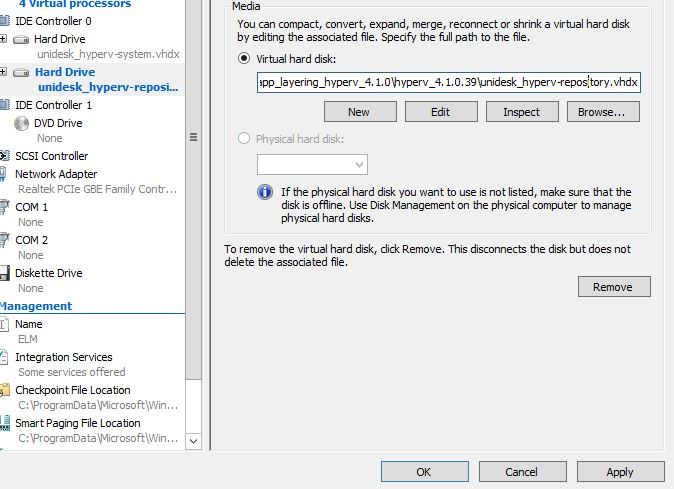
Once the appliance is configured via CLI, navigate back to the Citrix Cloud – App Layering portal and click Log in to Appliance. 
Select your Resource Location from the drop-down and enter the appliance IP address. Click Connect. 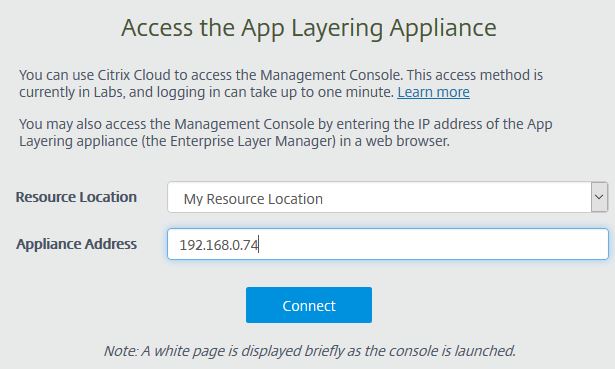
Initially you’ll see a mixture of white screens and Connecting messages. 
Once the HDX connection is established, you’ll see the familiar ELM appliance log on screen. 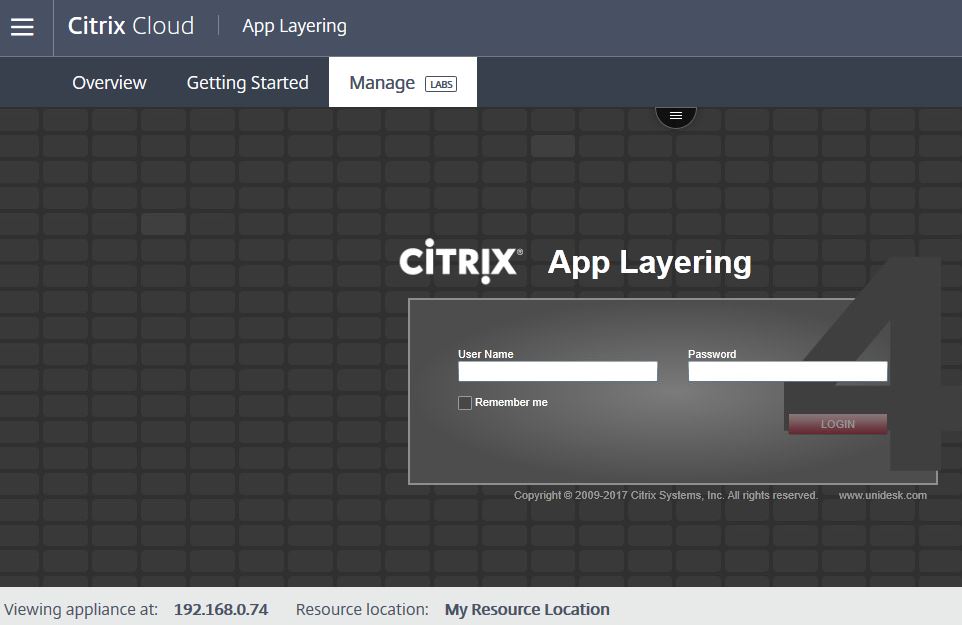
There are some current limitations of using the ELM appliance through Citrix Cloud. See https://www.unidesk.com/support/learn/4.1.0/ms_hyper-v/configure_the_appliance/get_started_login_hv4#log_in_cloud
Pingback: Unidesk Enterprise Layer Manager – Carl Stalhood
Morufudeen
February 2, 2017Hello George,
Fantastic write up! Appreciate the time you take to write these blogs. I haven’t had much luck getting PVS to work with Unidesk so far. I get this message “Cannot find PowerShell Snapin ‘Citrix.PVS.SnapIn’ on server ‘pvs01.msl.pri’, ensure that it is installed” when I try the PVS connector. I am not sure what I’ve been doing wrong. I’m running Unidesk 4.0.8.52, PVS 7.12 and Windows Server 2012 R2. My hypervisor is vSphere 6.5. I’ve tried to register the Powershell snapins too on the PVS server prior to installing the agent as you advised in this blog.
Many thanks,
Deen
George Spiers
February 2, 2017From the PVS server, run command C:\Windows\Microsoft.NET\Framework64\v4.0.30319\InstallUtil.exe Citrix.PVS.snapin.dll from directory C:\Program Files\Citrix\Provisioning Services Console.
Now install the PVS agent on the server
Finally make sure the correct firewall rules are in place on the PVS server https://jgspiers.com/installing-configuring-unidesk-4/#Firewall
Morufudeen
February 3, 2017Many thanks George. I was just being silly. I was registering mcli as I’ve been used to doing that. I registered Citrix.PVS… as you’ve mentioned and straight through. Good to read the manual properly as they say. Thanks once again. I can continue with your latest post now for my testing.
Adil
August 7, 2017Thank you very much George for your usual help
I follow this nice article, with a difference, that I work with vsphere, and I got to the creation of pvs connector
I can not configure the pvs connector I installed the Citrix App Layering Agent on the pvs server During installation I get an error: “a failure occured whene executing ‘netsh'” Error Adding Certificate I put ok and the wizard finishes installation just after 1. I removed security on PowerShell 32 and 64 on the pvs server Set-ExecutionPolicy Unrestricted 2. I executed the EML registration command on the pvs server successfully Citrix.AppLayering.Agent.Service.exe register / i / e: IP_address_of_ELM / u: Domain \ Administrator 3. I also run the commands below: From a command prompt, go to: Cd “c: \ program files \ citrix \ provisioning services console” C: \ Windows \ Microsoft.NET \ Framework64 \ v4.0.30319 \ InstallUtil.exe McliPSSnapIn.dll C: \ Windows \ Microsoft.NET \ Framework64 \ v4.0.30319 \ InstallUtil.exe Citrix.PVS.snapin.dll 4. I activated the remote powershell on Powershell 32 and 64 Enable-PSRemoting When I create a new pvs connector, and I check the connection, the system returns the following error message: One or more the pvs configuration is invalid, please check your selections And set the field red: Console And the following message: Citrix App Layering Agent Error: Error: read ECONNRESET
Your help please.
George Spiers
August 7, 2017Hello Adil.
This is a known issue. Have a look here: https://support.citrix.com/article/CTX225948
Timon
November 2, 2017Hi Adil,
I had a similar issue where a previously working PVS connector failed and I received the “One or more the PVS configuration is invalid, please check your selections”. The username and password fields are then highlighted red. It turned out to be caused by a failed DNS server.
Updating the Layer Manager appliances network settings to remove the bad DNS server resolved the issue. The odd thing was it was the secondary DNS server and all our other connectors worked correctly.
Pingback: Citrix Application Layering “Failure Importing the OS Layer” - Zero To Hero
Pingback: Citrix App Layering Agent unattended installation - Dennis Span
Jacob
December 1, 2017So this doesn’t support SCVMM? Does that mean it wouldn’t work very well wit ha Hyper-V cluster?
George Spiers
December 2, 2017There is a Hyper-V Connector in App Layering 4.6+ which does work well from when I have used it, albeit the feature is in labs. It will work just fine with a Hyper-V cluster.
Alex
January 17, 2018Hi. I’m trying to use app layring (4.8.0.11) in hyperv environment with hyperv connector. But I can’t create a hyper-v connector, because there are no type of connector, I see only Azure, Nutanix, Vmware, Xen, but no hyperv. Whats the metter?
George Spiers
January 17, 2018If you are trying to create a Hyper-V connector from within the “Create OS Layer” wizard you can’t. You should go to the “Create App Layer” wizard and create the connector from there.
Victor
January 24, 2018Hi George!
As Alex, using Hyper-V I’m triying to create an OS Layer, but no Hyper-V connector is displayed, after installing the agent on the Hyper-V servers.
Also, as you mention, triying to create an App Layer, shows “No Items Available” on the “OS Layer” config…
I’ve checked the logs, and shows that all the Hyper-V servers contacted and registered with the appliance… but there’s no way to create an OS Layer…
Any help?
George Spiers
January 24, 2018Hi Victor
You can’t use a Hyper-V Connector to create the OS Layer. You have to use the SMB share, copying the disk to the share and then importing using the SMB share connector.
The Hyper-V Connector can be used to create App Layers and Platform Layers..
Bdouille
February 10, 2018Hi Georges,
I need some help.
I can not create a PVS Connector. I have a PVS 7.15 CU1. The stores are NFS folders.
After check credential, when i test before saving, I get an error message: “The user does not have write acces to the default path \\xxxx\StoreY to the PVS Store STORE_Y”.
I’m sure the account has the full rights to write to this folder.
The PVS are also configured with domain account.
Any help?
George Spiers
February 12, 2018Hi – App Layering no longer supports NFS shares since App Layering 4.2. Use SMB shares instead.
Bdouille
February 14, 2018Thank you. I will look at this point
Bdouille
February 14, 2018HI,
I checked and it is SMB sharing.
This is the default path defined at the PVS Store; like this “\\FSGCEVDSK1P\VDISK1\Master”, on my NetAPP array
George Spiers
February 14, 2018If permissions are not a problem then there may be an issue between ELM and NetApp. I would in this case log a support call with Citrix so they can check. Some NetApp filers are known to not work with ELM’s SMB client.
Srini
March 3, 2018Hi George, I have 15 PVS vDisks in my environment. I wanted to convert them into Layered images. Published image from ELM to PVS server, when i booted PVS targets with new vDisk from ELM write cache is redirected server rather than local hard disk.
One thing I noticed: SCSI controller on OS layer — LSI Logic SAS and PVS targets — ParaVirtual. I added SCSI controller to OS layer and added temp disk to install ParaVirtual driver on OS layer. Removed temp disk once driver is installed successfully. I am not having boot issues with new vDisk, only WC disk is not initialized or not recognized during boot.
SCSI Controller 0 is LSI Logic SAS — OS disk SCSI 0:0 (Virtual disk node)
SCSI Controller 1 is ParaVirtual — Temp disk SCSI 1:1
PVS targets WC disk Virtual disk node is SCSI 0:0. I am not sure whether Virtual disk node will cause this issue.
George Spiers
March 5, 2018On your PVS targets use a single SCSI Controller which will be of type “LSI Logic SAS”
Make sure the WC disk is set to SCSI (0:0) Hard disk 1.
Ideally these settings should be defined in the VM Template you use with PSV with the exception of the WC disk. If you use the XenDesktop Setup Wizard to deploy VMs there is no need to have a WC disk attached to the VM template.
John
April 4, 2018When using Elastic Layering in Hyper-V, you must use unmanaged RDS pools.
What this exactly means, no power manged catalogs?
George Spiers
April 5, 2018This isn’t related to Citrix but rather Microsoft RDS.
Sivakumar
June 5, 2018Hi George,
First of all Thank you very much for all your contributions. I am referring you documents for all App layering related doubts.
l need a help in importing the App layers to a new ELM machine which are created by different Appliance ( identical appliance in different DC). could you please suggest me how to do that.
George Spiers
June 5, 2018If you have App Layering v4.8 you can export layer(s) from one appliance and import to the other. That is the only way to do it.
Pingback: App Layering – Enterprise Layer Manager (ELM) 4.11 – Carl Stalhood
Leo van Geel
June 25, 2018George, did you ever do this for a Hyper-V environment with a separate PVS network for streaming? We have a multi tenant environment where each client has its own vlan.
Our target devices have:
– 1 Legacy Network Adapter on PVS network
– 1 Network Adapter on client VLAN
– 1 Network Adapter on PVS vlan to take over from the legacy adapter.
My disk crashes similar to https://support.citrix.com/article/CTX229910
any advice? Should I do as explained in solution 2 in that article?
Leo van Geel – The Netherlands.
George Spiers
June 25, 2018Not specifically but there are a couple of things to try:
1. Check the NIC slot number if using ESX.
2. Make sure Target Device hardware is not too different from the Packaging Machine.
3. Check publishing Platform Layer hypervisor version is set correctly for the hypervisor you are using.
4. Make sure E1000 NICs are not in use.
5. Create a second version of the Platform Layer. You don’t have to make any adjustments to the layer, just create a second, publish the image out to PVS and try booting.
Of course you can also refer to https://support.citrix.com/article/CTX229910 and point 2 if nothing else is working for you.
Leo van Geel
June 25, 2018Thanks for the reply.
It is Hyper-V not ESX.
So the packaging machine needs to have the three network adapters?
Legacy, Prod Lan , PVS LAN?
Leo
George Spiers
June 25, 2018No, it should just have the PVS LAN NIC attached. I only ever needed Legacy when creating an OS Layer.
Daniel
October 31, 2018Hi Leo,
did you get it fixed? I`m facing the same issue. My Layered Image (vDisk) boots into a blue screen. I also have the three NICs and Hyper-V.
George Spiers
October 31, 2018Did you create the original OS Layer with a single Legacy NIC, and then when creating the Platform Layer did you add the two Synthetic NICs to the Packaging Machine?
Daniel
November 2, 2018No, I´ve created all the layers with one legacy NIC and two Synthetic NICs.
Daniel
November 14, 2018I did the following:
1. Create OS Layer with a single Legacy NIC
2. Create Platform Layer with one legacy and two synthetic NICs
3. Create Image Template and publish Layered Image to PVS –> Target Device boots into Bluescreen
4. Create Image Template and publish layered Image to Hyper-V. Booting the VM and create vDisk using PVS Imaging Wizard –> Target Device hangs at Windows boot screen
I used all your Best-Practices when creating the layers (Disable IPv6, running the Preparation Skript, …)
I´m about to lose my mind ….
Any ideas?
Martin Nygaard Jensen
July 30, 2018Hi George,
do you have an official article or something saying this:
When booting an App Layering image with PVS, you receive a blue screen of death with error: “CvhdMp.sys – SYSTEM_THREAD_EXCEPTION_NOT_HANDLED”.
Create a second version of the Platform Layer. You don’t have to make any adjustments to the layer, just create a second, publish the image out to PVS and try booting.
Do you just mean add version, run finalization script in os, and finalize in elm?
George Spiers
July 30, 2018Yes correct. I received this issue before and that was the fix. Not saying it will be your fix, but something else to try. I know some people have created a brand new Platform Layer and that has fixed their issue.
J
August 28, 2018Hi George,
What storage types are required for the other layers, elastic must be SMB. how about User Layers and other layers?
Can everything sit in the same SMB network share?
Do User Layers have a SMB and high iOPs requirement?
George Spiers
August 28, 2018App Layering only supports SMB, so that is where your User Layers go. IOPS consumption would vary considering what data a user places in the layer, their profile size, what applications cache data there such as Outlook OSTs etc. Mileage will vary so it is wise to perform your own consumption monitoring in a small PoC environment first. Also keep in mind that User Layers is not yet generally available for production. No doubt some more data from the community will appear online as the technology becomes GA.
Pingback: Expert analysis of Citrix Monitoring Tools & Software | eG Innovations
Pingback: Citrix App Layering Agent unattended installation - Dennis Span