Since XenApp and XenDesktop 7.9 and StoreFront 3.6, it is possible to use SAML authentication with a number of external identity providers and integrate that with the Citrix Federated Authentication Service so that users can be authenticated from NetScaler through to StoreFront.
In this post, I will show you how you can use ADFS as an Identity Provider, passing authentication to StoreFront though the NetScaler with SAML authentication and FAS. This can help if two companies are merging together, but do not want to merge domains. It can also help if you have third-party companies accessing applications in your environment which may have required forest trusts to be formed between the required domains, slightly overkill in scenarios where only one application is accessed or when you want to avoid multiple complex forest trusts.
Note: You can configure ADFS authentication with SAML direct to StoreFront 3.9+. See https://jgspiers.com/adfs-authentication-direct-to-storefront-3-9-using-saml-and-citrix-federated-authentication-service/
Authentication can be anything when using FAS. In my case, ADFS links to Active Directory so users log on using username (UPN) and password however in theory you could enter whatever you are asked for and be authenticated by NetScaler, issued a certificate and then authenticated to Active Directory with that corporate certificate. For example, you could be asked for a username and random one time code. No password is asked. So long as you provide a UPN in the SAML assertion, FAS can accept it.
Moving forward, the SAML SP (Service Provider) is the NetScaler within your company, and the SAML IdP (Identity Provider) exists on the domain that want access to your applications and resources.
Since SAML (an XML based authentication method) won’t work directly with Active Directory, we set up authentication with FAS so that authentication can occur at the VDA using certificate based authentication. This is a requirement because Active Directory support either username/password or Smart Card auth.
♣ Prerequisites/Introduction
♣ Required Ports for Federated Authentication Service
♣ Configure ADFS
♣ Configure NetScaler with SAML
♣ Configure StoreFront and the Citrix Federated Authentication Service
Prerequisites/Introduction
It is important to understand the flow when using SAML with NetScaler for authentication to StoreFront and VDAs:
- As a user logs on to NetScaler Gateway (the SAML Service Provider), NetScaler redirects the request to a SAML Identity Provider such as ADFS, Okta, Google or Ping Identity.
- User authenticates with the Identity Provider via Active Directory for example. A SAML token is signed and handed to the user via their web browser.
- User passes token to the NetScaler Gateway (SAML Service Provider).
- The SAML token is used by NetScaler to look up the users identity and the assertion (User Principal Name) is sent to StoreFront.
- StoreFront contacts the Federated Authentication Service and asks for a certificate to be generated for the authenticated user.
- The Federated Authentication Service speaks to AD to verify the user, FAS then speaks with Active Directory Certificate Services and submits a certificate request for the user, ADCS issues a certificate for the authenticated user. At this stage the Federated Autentication service holds the user certificate and private key. This certificate is not shared with StoreFront, however StoreFront is made aware that FAS has been able to enrol a certificate for the authenticating user.
- StoreFront contacts the Delivery Controllers at which stage application enumeration happens.
- When the authenticated user makes a connection to a VDA, the VDA has to authenticate the user so contacts FAS and redeems the certificate.
- Once the Credential Plugin running on the VDA gets the certificate, Kerberos authentication is performed against Active Directory again before the logon is successful.
Note: This post assumes you have a working Active Directory Certificate Services installation running. Many articles on the internet contain guidance to deploying an internal PKI.
What else you need to use SAML with ADFS and FAS:
- XenApp/XenDesktop 7.9+ and StoreFront 3.6+.
- An ADFS server. (I am using ADFS 3.0 on Windows Server 2012 R2).
- A dedicted server (Citrix recommendation) for FAS. Recommended to have 1-2 FAS servers per StoreFront store that is using FAS.
- External FQDN for NetScaler Gateway URL and ADFS URL.
- A public certificate for the external NetScaler Gateway URL and ADFS URL.
- Three internally issued certificates for:
- Token-signing.
- Token-decryption.
- Signature verification.
- Note: Whilst ADFS generates self-signed Token-signing and decrypting certificates, I recommend using your own internally issued certs.
- SQL server (although possible to use Windows Internal Database, SQL is always recommended).
Required Ports for Federated Authentication Service
| Source | Destination | Port | Purpose |
| StoreFront | FAS Server | TCP 80 | Send user’s identity assertion |
| FAS Server | AD Certificate Services | TCP 135 | Certificate request |
| AD Certificate Services | FAS Server | TCP 135 | Issue certificate from certificate request |
| VDA | FAS Server
Domain Controller |
TCP 80
TCP 389/636 |
Get user certificate from FAS server
Authentication of connecting user |
Configure ADFS
Before installing the ADFS role on Windows Server, draw up PowerShell and enter command Add-KdsRootKey -EffectiveTime ((get-date).addhours(-10)). This command immediately creates a Key Distribution Service Root Key, stored in Active Directory and allows us to create a group Managed Service Account password for the ADFS service account we create later. Run this command from a Domain Admin or Enterprise Admin account.

Now intall the ADFS role using Server Manager, then launch the Active Directory Federation Services Configuration Wizard -> Next. 
Specify a Domain Admin account to perform the ADFS configuration. Click Next. 
Import a public issued cerificate that matches the external ADFS URL. In my case, this is adfs.jgspiers.com. Set the Federation Service Name as your ADFS URL. The Federation Service Display Name will show to all users at log on. Click Next.
Note: The ADFS URL must be different from the ADFS server hostname. In my case, the ADFS server has a hostname of idp.jgspiers.com and an ADFS URL reachable via adfs.jgspiers.com.
Under Create a Group Managed Service Account enter a unique name. Managed Service Accounts are supported in Windows Server 2012 onwards and come with strict, complex passwords which are changed automatically every 30 days. Click Next.
Check Specify the location of a SQL Server database and enter your SQL server details. Click Next. 
Click Next after reviewing your options. 
Click Configure. 
Providing no errors occur, the ADFS server will be successfully configured. Click Close. 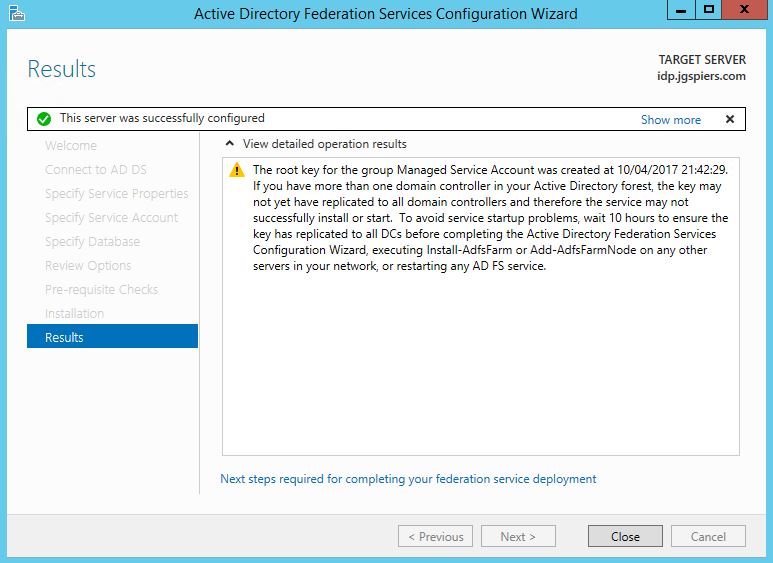
Create an internal A Record for your ADFS URL. You also need to create an external A Record on your public DNS servers for the ADFS FQDN.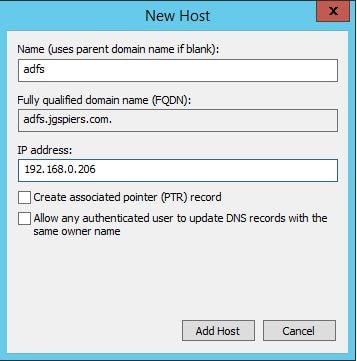
Next on the ADFS server, launch PowerShell and run command Set-ADFSProperties -AutoCertificateRollover $false. I am doing this because I do not want to use the ADFS generated Token-decrypting and Token-Signing certificates. Instead we will use our own generated through ADCS (Active Directory Certificate Services). In my case I have two certificates with subjects of:
- tokensigning.jgspiers.com
- tokendecrypting.jgspiers.com

Enrol the certificates, install them on the ADFS server and then launch the ADFS Management console. Browse to AD FS -> Service -> Certificates and delete the existing, autogenerated Token-decrypting and Token-signing certificates.
Use the Add Token-Signing Certificate and Add Token-Decrypting Certificate actions to add your own self-signed certificates as shown below. 
Token-decrypting certificate: 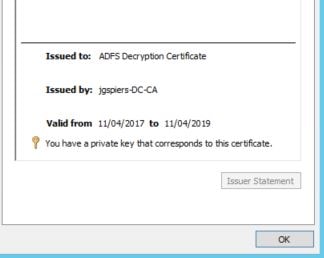
Token-signing certificate: 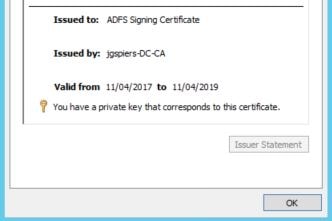
Within the ADFS Management Console, click each certificate and select the Set as Primary action.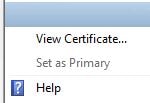
On the ADFS server, launch MMC and add the Computer Certificates Snap-in. Navigate to the Personal store, right-click on the Signing certficiate and click All Tasks -> Manage Private Keys. 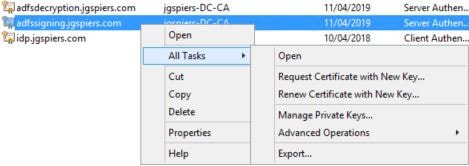
Click Add. 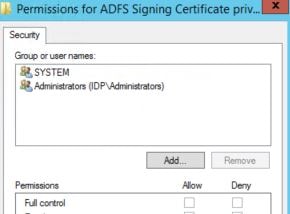
Click Object Types and check Service Accounts -> OK. Enter the name of the Managed Service Account you used during ADFS configuration. 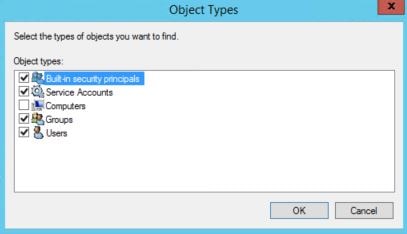
Specify Read permissions for the service account and click OK. Perform the same action on the Decrypting certificate. Afterwards, restart the Active Directory Federation Services service. 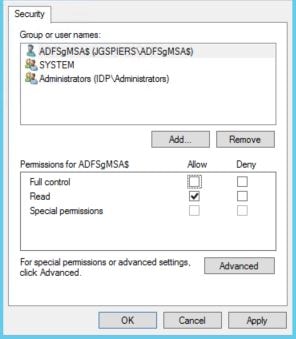
Navigate back to the ADFS Management Console and browse to AD FS -> Trust Relationships -> Add Relying Party Trust. Using this wizard we create a trust relationship between ADFS and NetScaler.
Click Start. 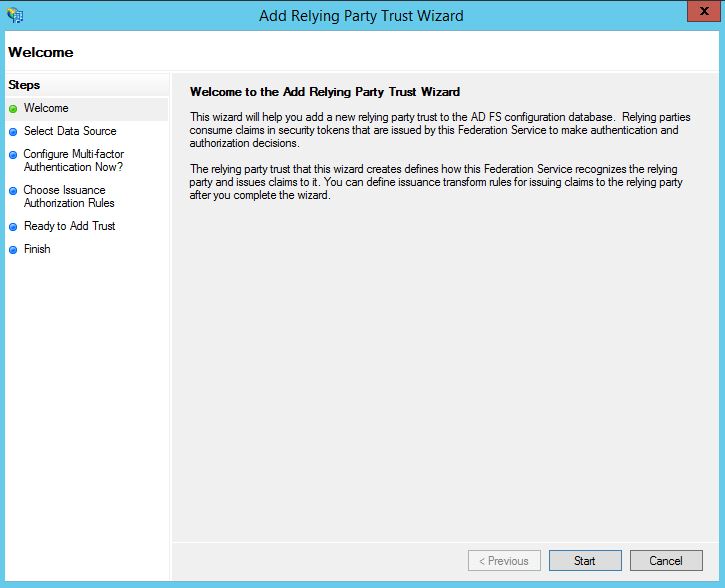
Check Enter data about the relying party manually and click Next.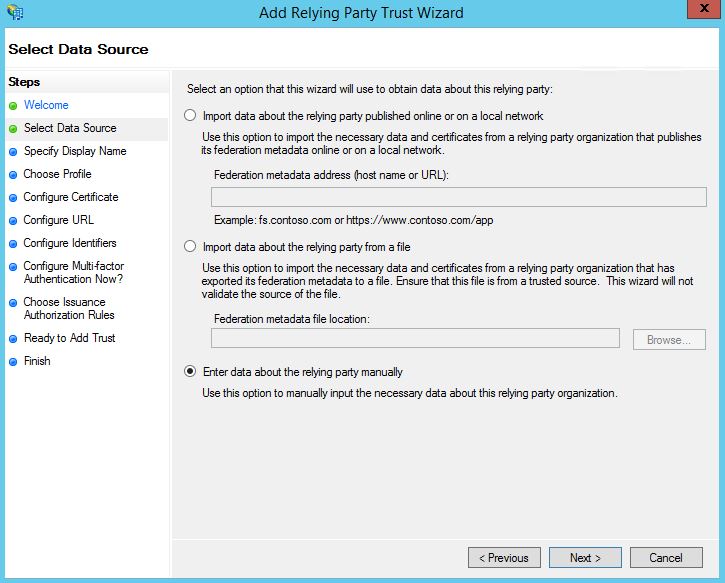
Enter a descriptive display name and optional notes. Click Next. 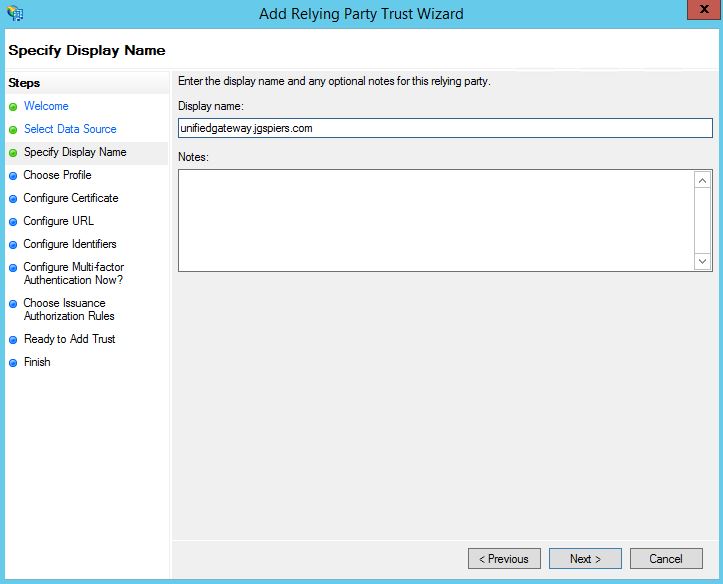
Check AD FS profile and click Next. 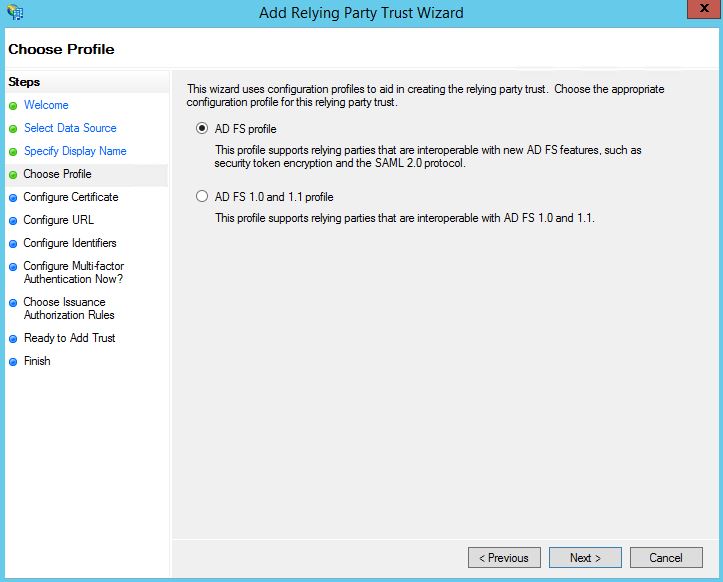
Click Next. 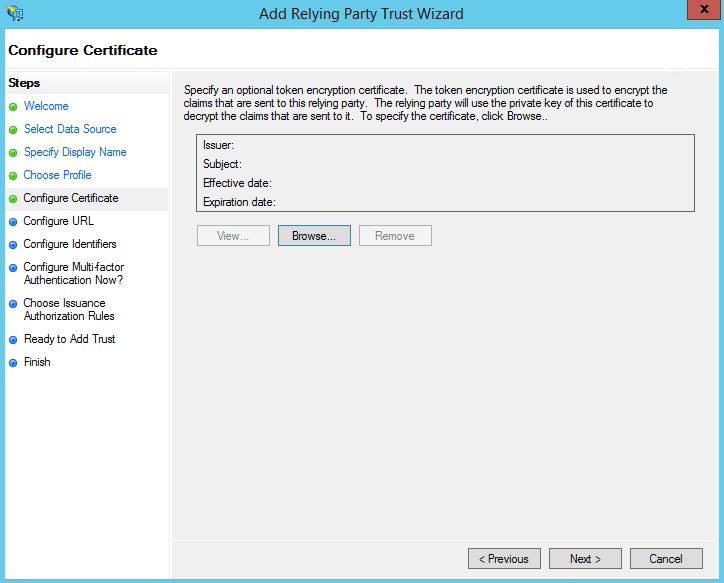
Check Enable support for the SAML 2.0 WebSSO protocol and enter the NetScaler external URL with /cgi/samlauth appended to the URL. Click Next.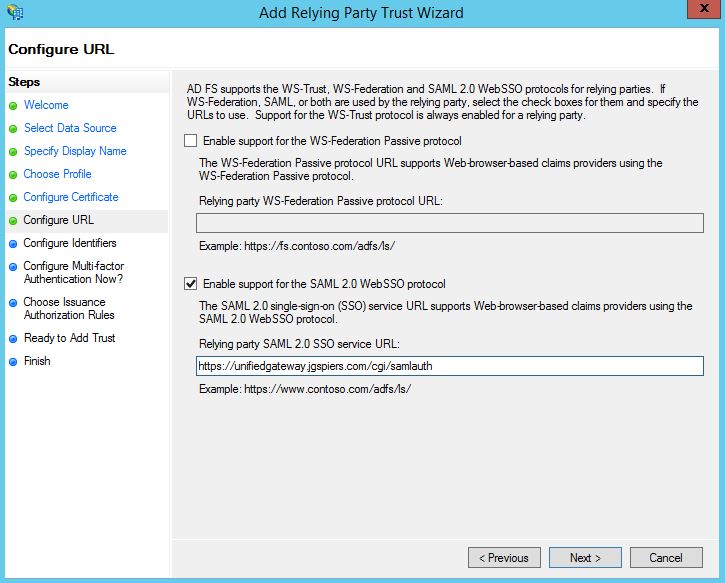
Enter a unique identifier string for the Relying Party Trust. In this example, I’m simply using the NetScaler URL. This same identifier string will later be referenced in the NetScaler SAML policy so take note of it. Click Next. 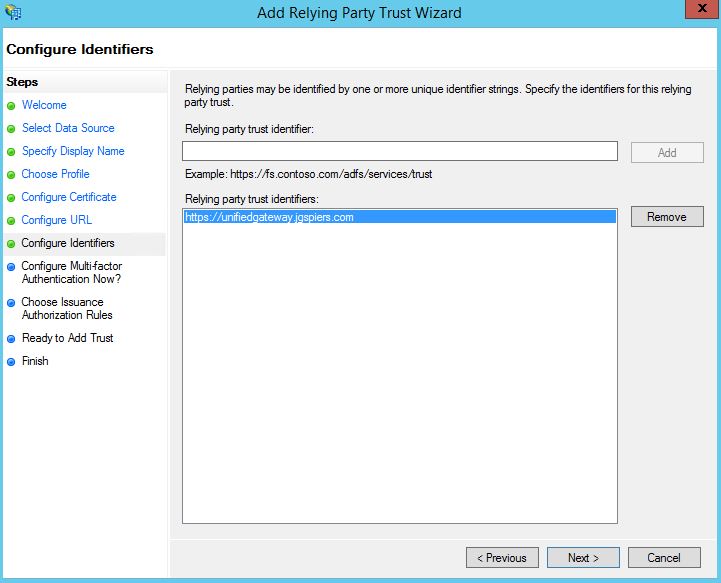
Click Next as we are not configuring MFA. 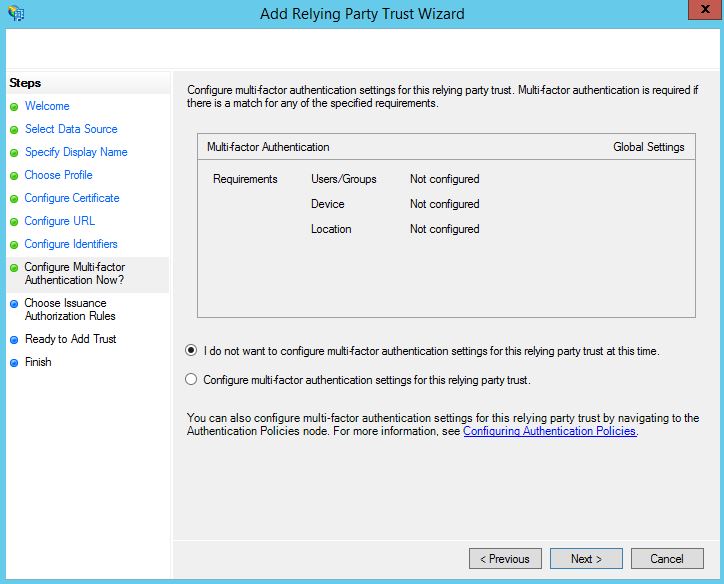
Specify to Permit or Deny all users access to this relying party. I’m going to specify Deny then show you how to create Issuance Authorization Rules to restrict ADFS log ons to certan Active Directory group members for example. Click Next.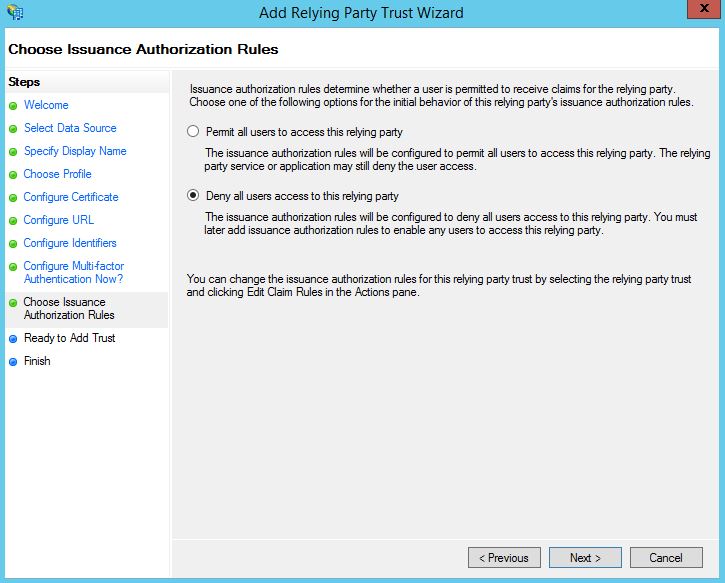
Click Next. 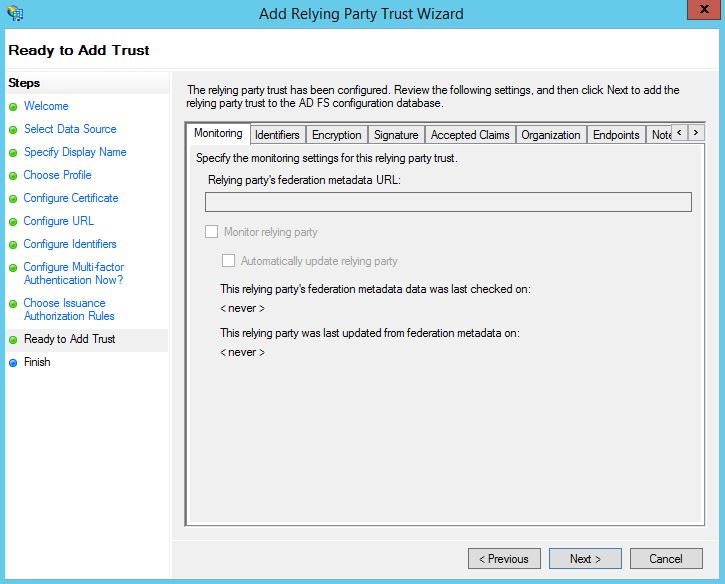
Click Close. The Relying Party Trust will now be successfully created. 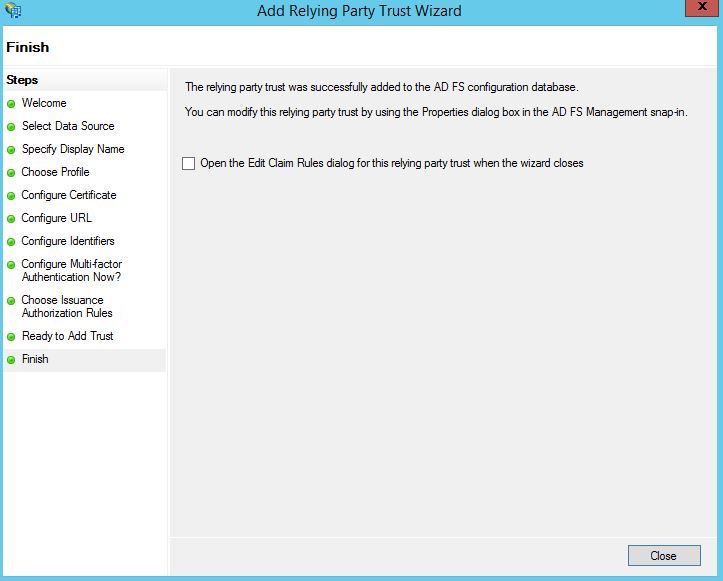
The new Party Trust shows as below, highlight it, then click Edit Claim Rules. 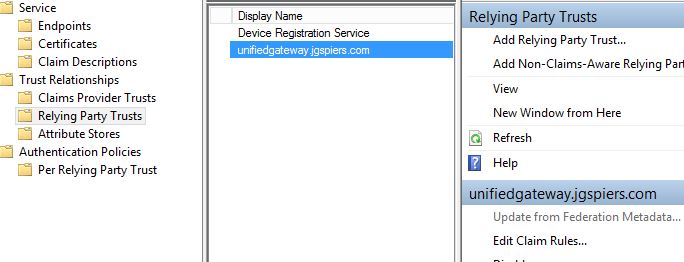
Click on the Issuance Authorization Rules tab. By default, no rules are created because I did not select Permit during the Relying Party creation wizard. When no rules are available, no users can authenticate with ADFS. Click Add Rule. 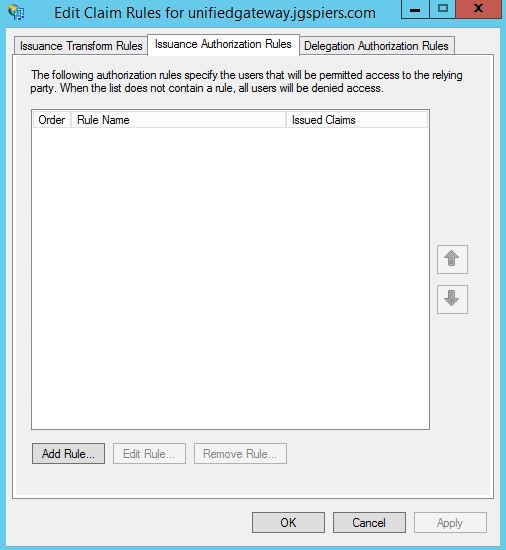
Select the drop-down Permit or Deny Users Based on an Incoming Claim. Click Next.
Note: If you wanted all users to be able to authenticate through ADFS, simply choose drop-down option Permit All Users.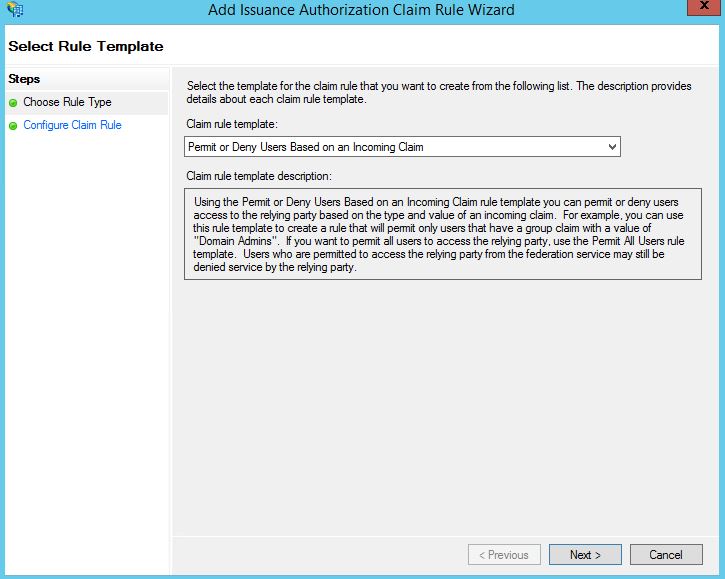
Specify a rule name and then under Incoming claim type select Group SID. Click Browse and search for a Domain Security Group. You can then Permit or Deny access to users that are a member of this group. In my example, only Domain Admins will be permitted access. Click Finish. 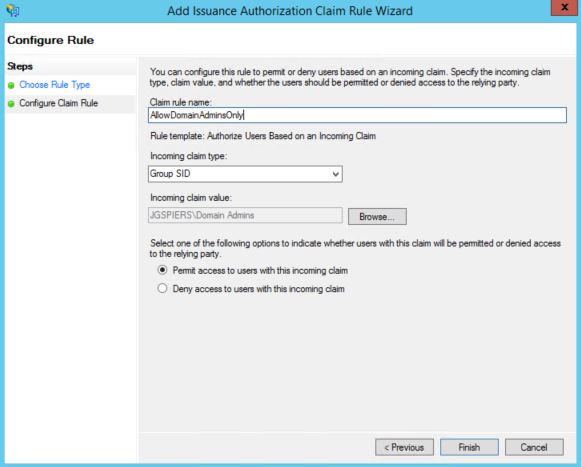
The new rule appears. You can create multiple rules if required. 
Click on the Issuance Transform Rules -> Add Rule. 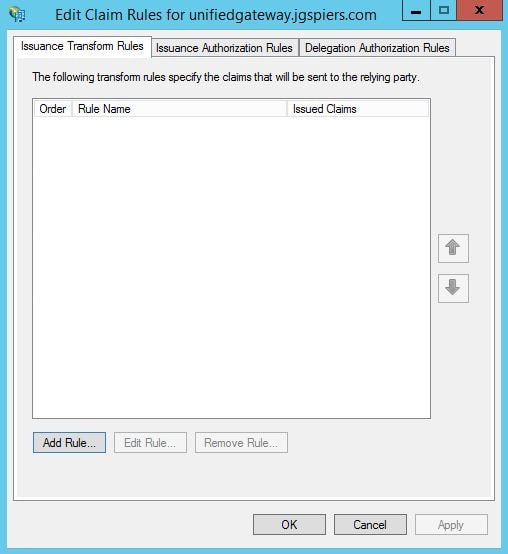
Using the drop-down select Send LDAP Attributes as Claims. We want to send the users UPN as a claim in the signed token sent to NetScaler from ADFS. Click Next. 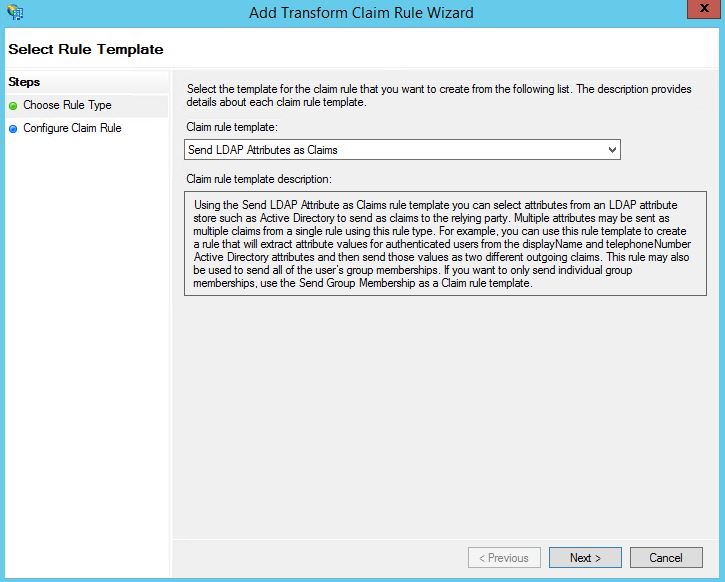
Enter an appropriate Claim Rule Name. Under LDAP Attribute select User-Principal-Name. Under Outgoing Claim Type select Name ID. Click Finish. 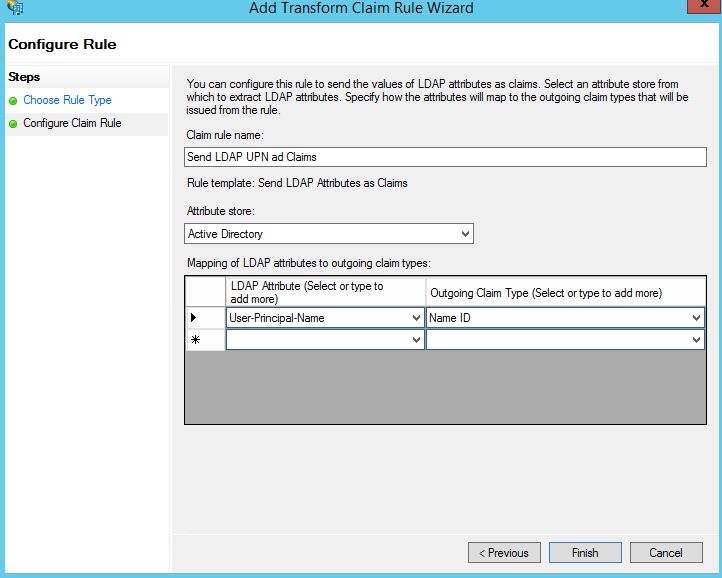
Click Add Rule again. 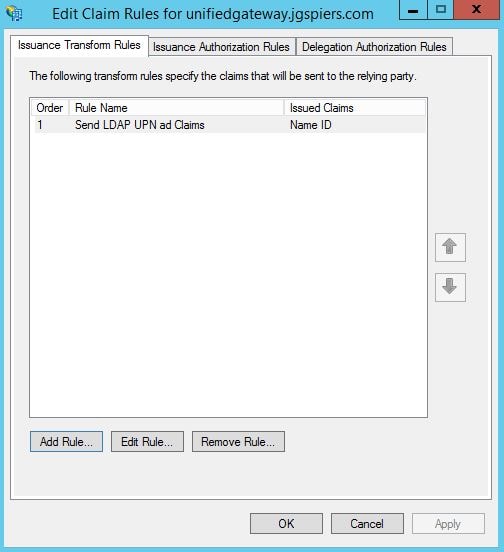
Using the drop-down select Send Claims Using a Custom Rule. Click Next. 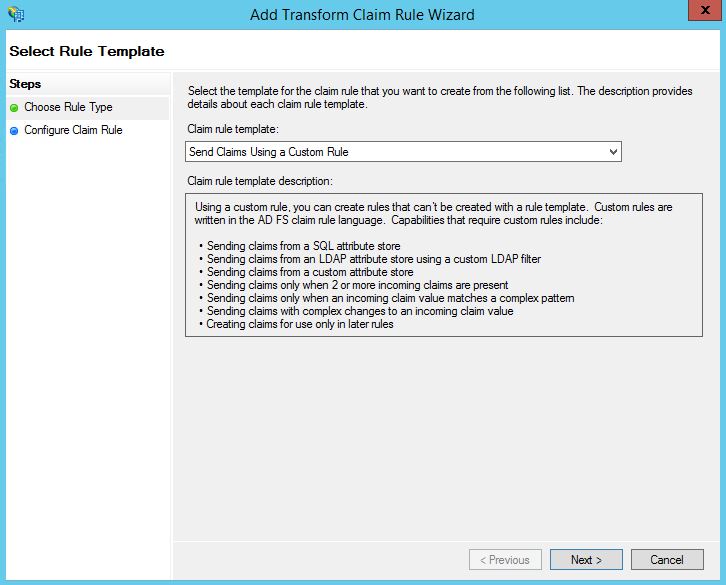
Enter a name as below and copy the below text in to the Custom rule box:
=> issue(Type = “logoutURL”, Value = “https://adfs.jgspiers.com/adfs/ls/”, Properties[“http://schemas.xmlsoap.org/ws/2005/05/identity/claimproperties/attributename”] = “urn:oasis:names:tc:SAML:2.0:attrname-format:unspecified”);
Note: Replace adfs.jgspiers.com with your own ADFS URL.
Click Finish -> OK.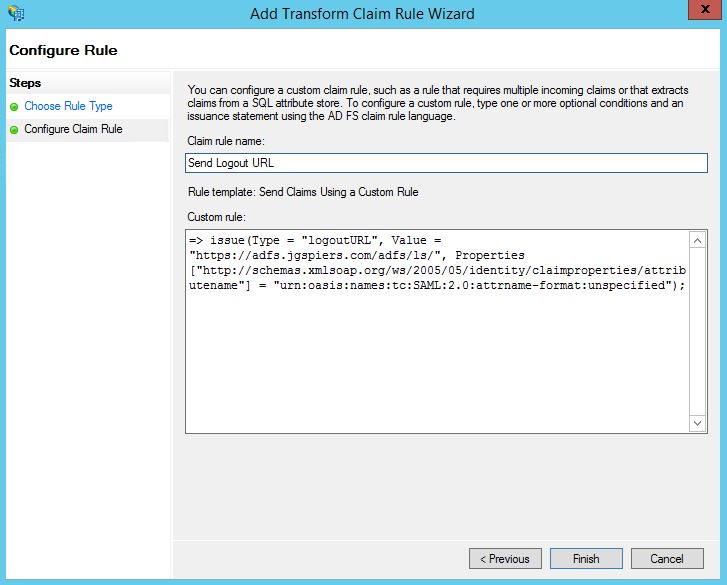
Highlight the NetScaler Relying Party Trust and click Properties. 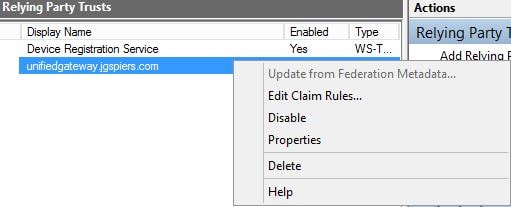
Click on the Signature tab and click add. Add a certificate (can be internally issued) for signature verification requests. NetScaler signs requests before sending them to the Identity Provider and therefore the IdP must trust such requests from NetScaler. The certificate you add here does not have a private key. The private key resides on the NetScaler, and is used for signing. So you will see later that the same certificate is imported to NetScaler along with the private key.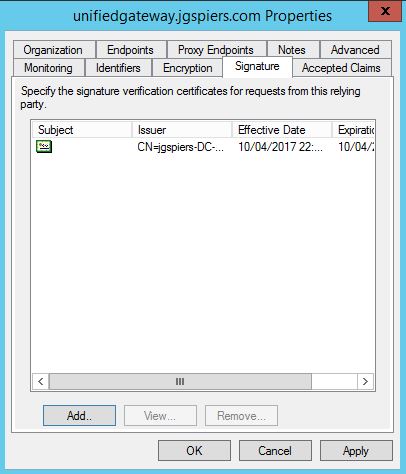
Click on the Endpoints tab. There should be a single entry under SAML Assertion Consumer Endpoints. Click Edit. 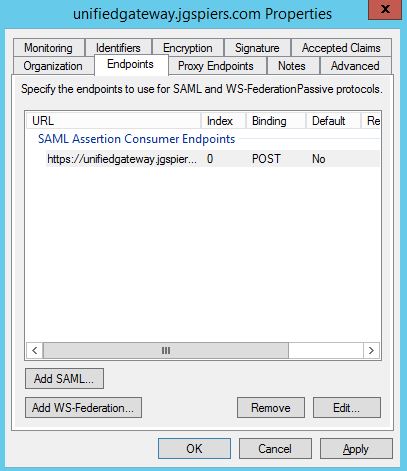
Double check that the details are as below. Click OK. 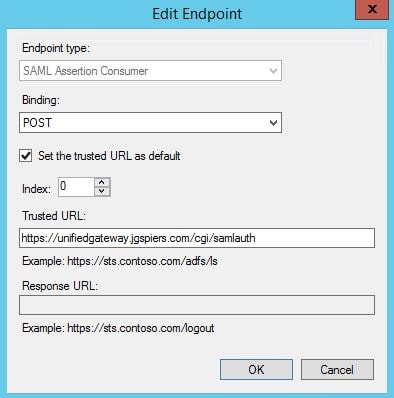
Next we can do some basic browser tests to make sure ADFS is responding properly before configuring NetScaler. Open a web browser and browse to https://youradfsURL.com/adfs/ls/idpinitiatedsignon. You should receive an HTML page as below.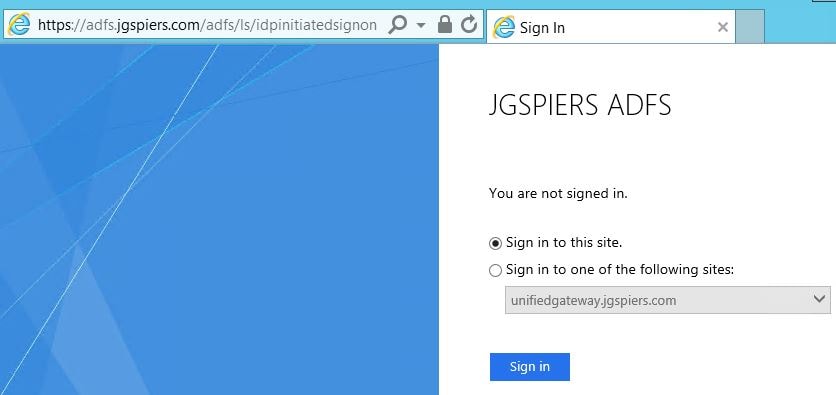
Next navigate to https://youradfsURL.com/adfs/fs/federationserverservice.asmx and confirm you receive an XML response as below. If both tests look successful, we are ready to configure NetScaler SAML authentication.
Configure NetScaler with SAML
I’m using NetScaler Unified Gateway, so my SAML policies will be attached to an AAA vServer. If you are only using NetScaler Gateway without a Content Switch, the actions I take specifically around where I am creating and attaching SAML policies are different, but you should be able to understand the differences and adjust for your environment.
First you need to create a SAML Server. Navigate to Security -> AAA – Application Traffic -> Policies -> Authentication -> Basic Policies -> SAML -> Servers -> Add.
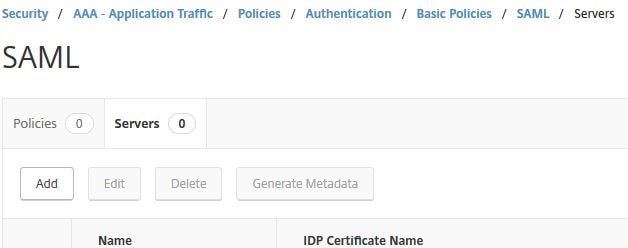
Specify an appropriate name. Under IDP Certificate Name, import the Token-signing certificate found on your ADFS server. Under Redirct URL and Single Logout URL specify the ADFS external URL with /adfs/ls/ appended to the end. Under User Field specify Name ID. Under Signing Certificate Name import the NetScaler signing certificate with private key. This is the same certificate you imported under the NetScaler Relying Party Trust properties within the Signature tab. This certificate will sign authentication requests that are sent to your IdP. The Issuer Name must be the same unique identifier name you specified during the creation of the NetScaler Relying Party Trust. Click on More.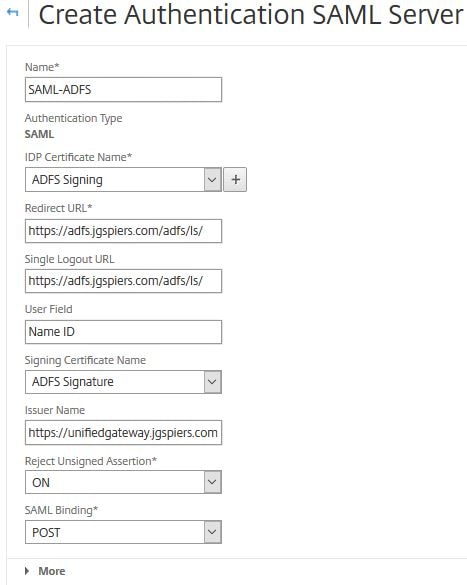
Check the radio boxes for RSA-SHA256 and SHA256. Finish creation of the SAML server.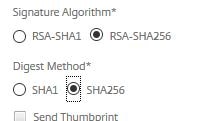
Navigate to Security -> AAA – Application Traffic -> Policies -> Authentication -> Advanced Policies -> Authentication Policies -> Add. 
Enter a name. Under Action Type choose SAML. Under Action choose the SAML server you just created. Under Expression type true. Click Create. 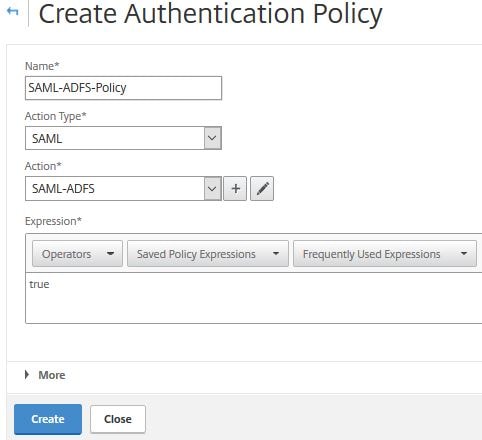
Now bind the SAML policy to your AAA vServer, as below. 
At this stage when you browse to the NetScaler Unified Gateway URL, you should be redirected to ADFS for authentication. Authenticate using your UPN credentials. Click Sign in.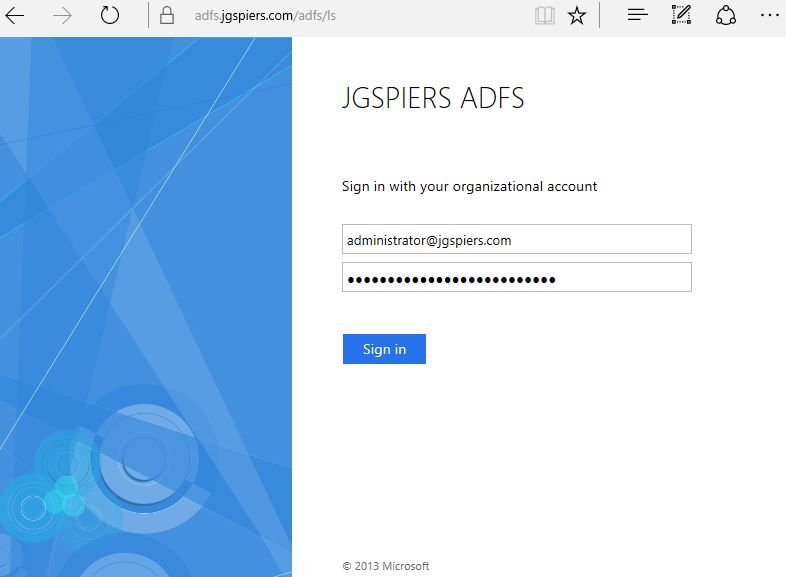
If successful you’ll be directed to Unified Gateway. StoreFront passthrough will not yet work, which brings us to the final step.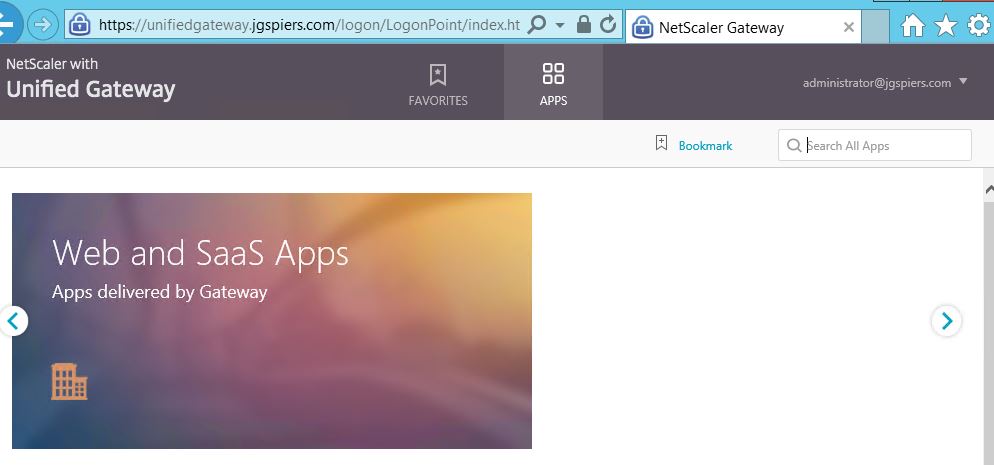
Configure StoreFront and the Citrix Federated Authentication Service
To begin, as a Citrix recommended practice, deploy a dedicated server to host the Federated Authentication Service. The server must be running Windows 2008 R2 or later. This service automatically on behalf of users enrols for certificates against Active Directory Certificate Services, so it is important that this server is secured.
To insall FAS, launch the XenApp/XenDesktop 7.9+ media and click on Federated Authentication Service.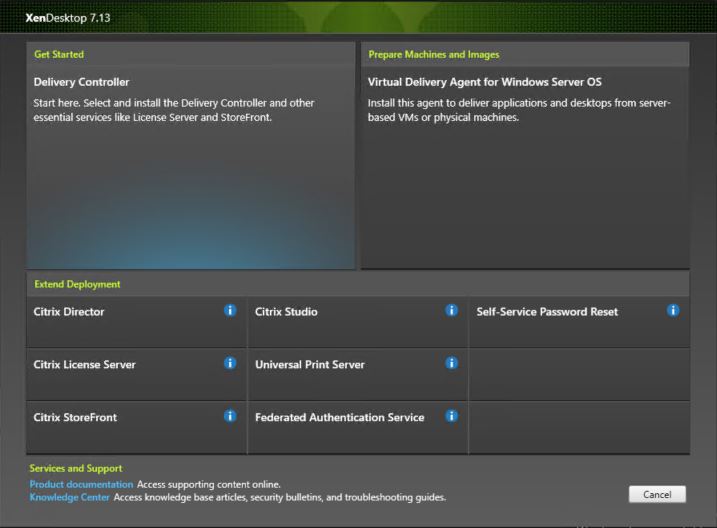
Accept the License Agreement and click Next. 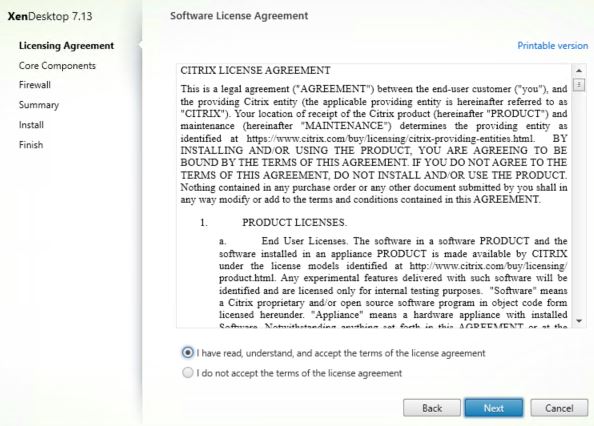
Click Next. 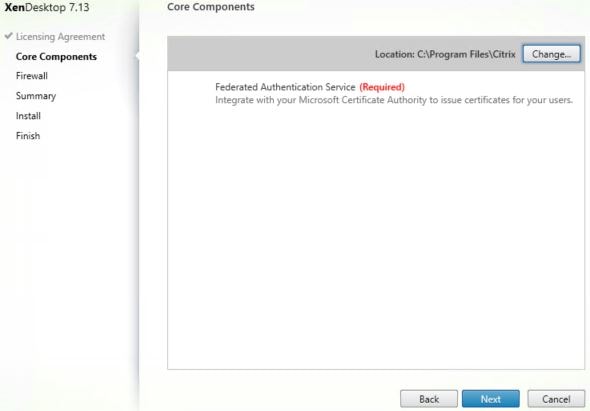
Click Next. Port 80 TCP will be used. 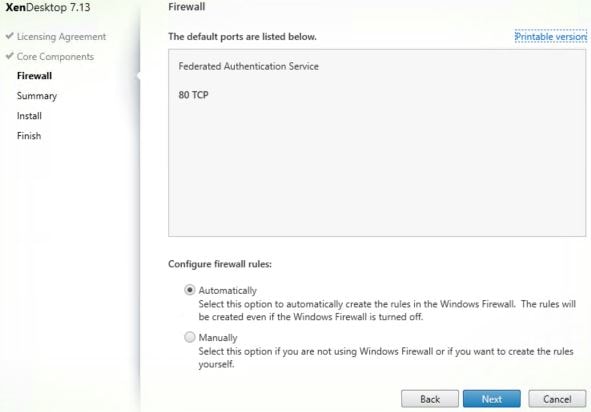
Click Install. 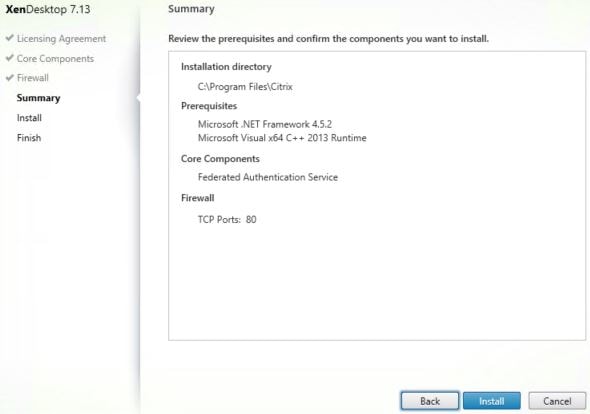
Once FAS has installed, log on to your StoreFront server and launch PowerShell. You are going to enable FAS on the Store of your choice. Run the following commands and propagate to remaining servers if applicable:
- Get-Module “Citrix.StoreFront.*” -ListAvailable | Import-Module
- $StoreVirtualPath = “/Citrix/Citrix” (Note: Change /Citrix/Citrix to your own store path)
- $Store = Get-STFStoreService -VirtualPath $StoreVirtualPath
- $Auth = Get-STFAuthenticationService -StoreService $Store
- Set-STFClaimsFactoryNames -AuthenticationService $Auth -ClaimsFactoryName “FASClaimsFactory”
- Set-STFStoreLaunchOptions -StoreService $Store -VdaLogonDataProvider “FASLogonDataProvider”

On a Delivery Controller, run commands asnp citrix.* and Set-BrokerSite -TrustRequestsSentToTheXmlServicePort $true![]()
Next we need to use Group Policy to specify which servers are used for FAS. On the FAS server, navigate and copy all files and folders from C:\Program Files\Citrix\Federated Authentication Service\PolicyDefinitions. 
Copy them to the PolicyDefinitions folder within SYSVOL aka your Group Policy Central Store.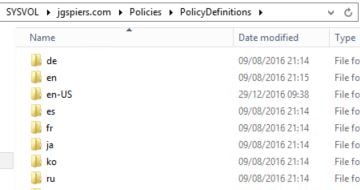
Now create a Group Policy Object which points to your FAS, StoreFront and VDA servers. You could link the policy to a high level OU or at the domain level if you don’t want to be more granular. Expand Computer Configuraton -> Policies -> Administrative Templates -> Citrix Components -> Authentication and double-click Federated Authentication Service.
Check the Enabled radio box. Click Show beside DNS Addresses and enter your FAS server hostname. Click OK.
Note: You cannot use CNAME records when specifying the FAS DNS address.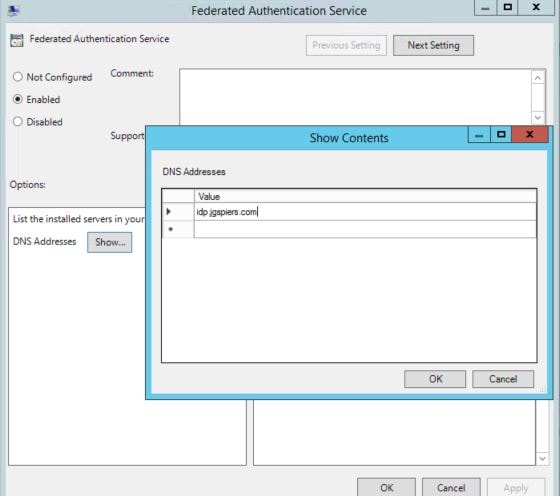
You can also enable the ability for in-session certificates by configuring the In-session Certificates setting. By default, VDAs will not allow access to FAS issued certificates after a user logs on, however this setting does allow the use of certificates and places a certificate in the users personal certificate store after logon. This is useful when you have applications or web applications that require client certificate authentication or you need to sign documents using a digital certificate.
You can specify that prompts for consent to use the certificate in-session can appear on-screen per-application, once for a session or not at all. You can also configure how long a consent lasts for before asking again.
Note: Make sure to also check Available after logon within the FAS administration console under User Rules or else users will be denied access to their certificates when they log on to a VDA. 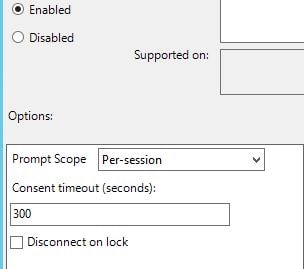
Log on to your FAS server and launch the Citrix Federated Authentication Service console. You may have to run a gpupdate before the FAS address appears as below. Click Ok.
Note: As you apply this Group Policy to VDA, StoreFront and FAS servers, the FAS server address will be published to the registry of each machine under key HKLM\SOFTWARE\Policies\Citrix\Authentication\UserCredentialService\Addresses\Address1(string).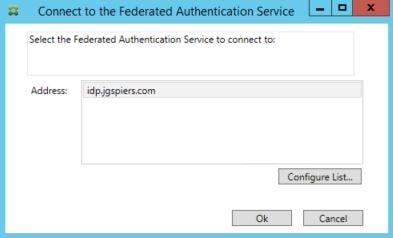
On the Initial Setup page, click Start next to Deploy certificate templates. 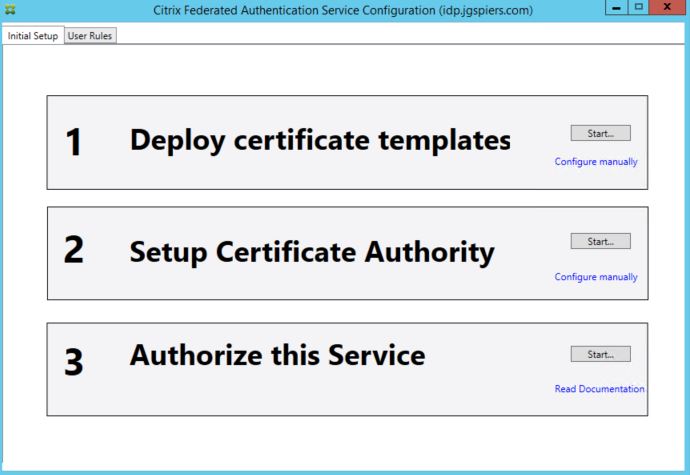
As mentioned in the note, FAS will attempt to install three certificate templates on to your ADCS server. This may require that the account you are running the FAS tool with is a Domain or Enterprise Admin. These steps can also be performed manually if needed using PowerShell. You have the additional option of publishing these templates to multiple Certificate Authorities using PowerShell, if you wanted some high availability/load balancing.
The three templates are:
- Citrix_RegistrationAuthority_ManualAuthorization – This template is used to authorise FAS servers.
- Citrix_RegistrationAuthority – This template is used to generate the certificate request for users.
- Citrix_SmartcardLogon – This template is used to issue certificates to users.
Click OK. 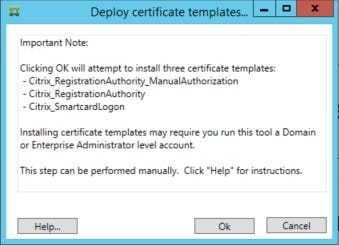
The first section will turn green once the templates have been installed. The second step may also turn green without any additional input. If it dooesn’t, click Start under step 2 and select your Certificate Authority. Do not proceed to step 3 just yet. 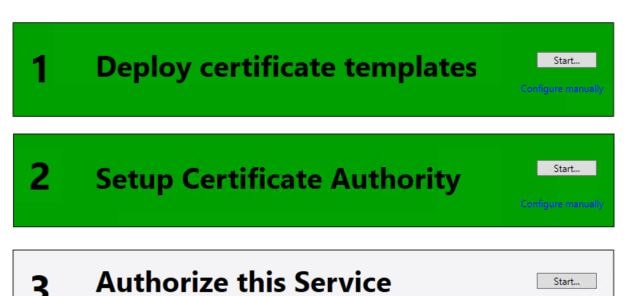
On your Certificate Services server, the three certificate templates show as below. 
Open the Certificate Authority console and navigate to Certificate Templates, right-click and select New -> Certificate Template to Issue. 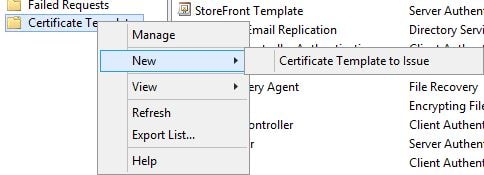
Highlight the three Citrix FAS related templates and click OK.
Note: You can choose to optionally deploy either the Citrix_RegistrationAuthority or Citrix_RegistrationAuthority_ManualAuthorization templates. The first template is for auto-enrolment and the second requires certificate requests using that template to be manually issued. If you are using the Citrix_RegistrationAuthority template, you should restrict the permissions so that only the FAS server can auto-enrol this certificate. 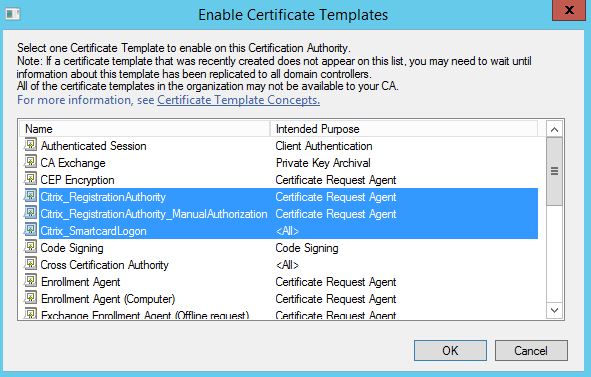
Now return to the FAS server. Click on Start beside step 3, Authorize this service. What this is going to do is submit a certificate request to ADCS based on the Citrix_RegistrationAuthority_ManualAuthorization or Citrix_RegistrationAuthority certificate templates. The first requests manual approval, whilst the second is configured for auto-enrolment. 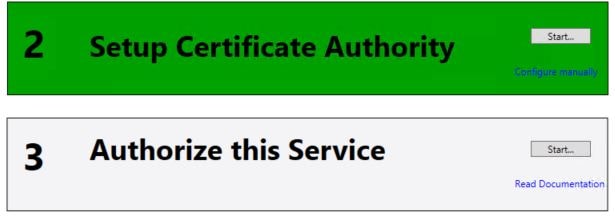
Click OK. The request will be sent to the selected Certificate Authority server, but you can specify another. 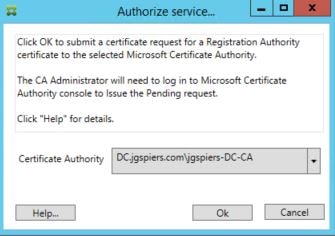
If you are manually approving using the Manual Authorization template, the FAS console will wait for approval. At this stage you need to manually issue the certificate request. 
Open up the Certificate Authority console, navigate to Pending Requests. Right-click on the existing pending request and click Issue under All Tasks. 
Once the certificate has been successfully issued, step 3 will turn green. The Initial Setup is complete. FAS now has the ability to issue certificates to users. 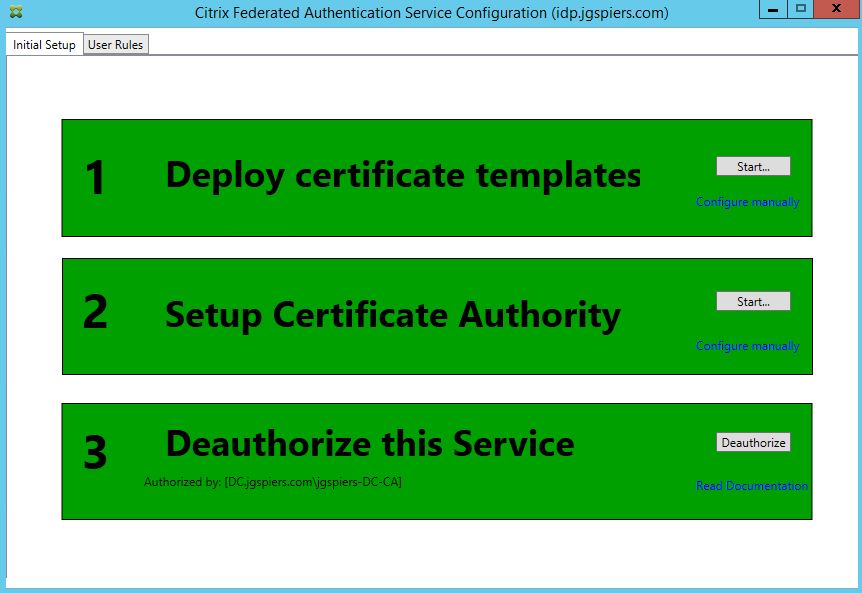
Click on the User Rules tab. A default rule has aleady been created. You can customise this rule, or create your own additional rules. Rules dictate which StoreFront servers can request certificates from FAS, which users certificates can be requested for and which VDAs can consume those certificates. Rules can be applied to different StoreFront servers using Group Policy. For now I will stick with the single default rule and make some modifications. Make sure Certificate Authority matches your CA (you can add multiple CA servers using PowerShell for high availability/load balancing) and the Certificate Template is set to Citrix_SmartcardLogon. Click Edit beside List of Storefront servers that can use this rule.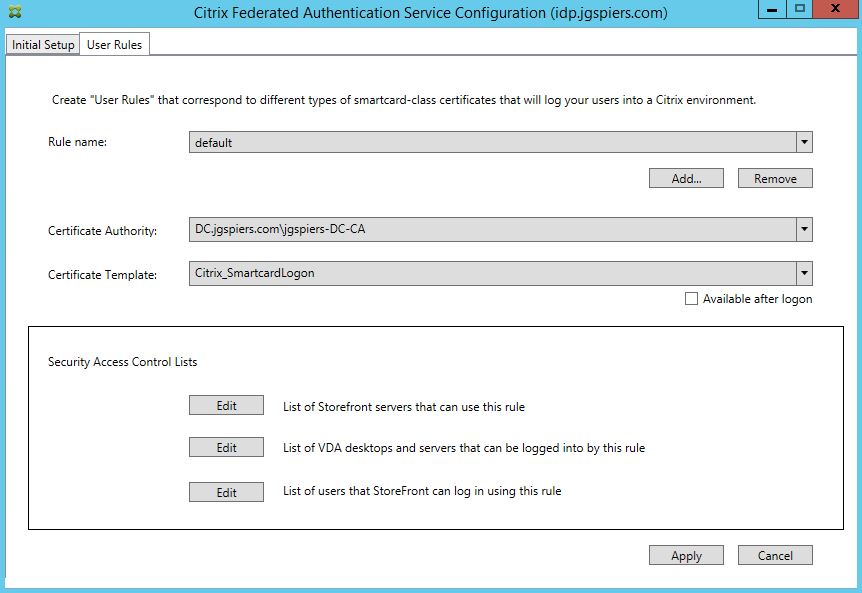
Ensure only your StoreFront servers have the Assert Identity permission. No other server should be included in the list. Click OK. Click Edit beside List of VDA desktops and servers that can be logged into by this rule. 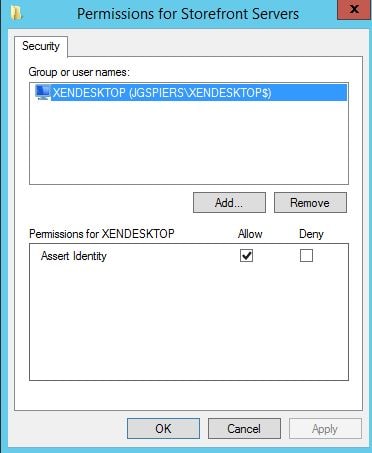
By default Domain Computers have Relying Party Allow rights. You can change this to specify that only certain VDA machines can be logged on to using FAS. Click OK. Click Edit beside List of users that StoreFront can log in using this rule.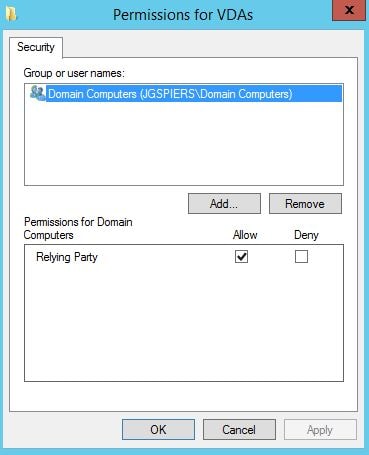
By default, Domain Users can log on using FAS. Again, you can change this. Click OK. 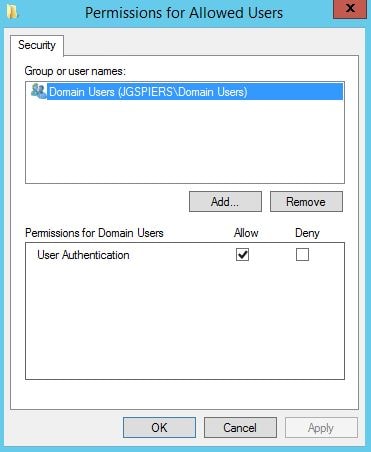
Once you are satisfied with all rules, click Apply and then OK. 
It is strongly recommended that you restrict the FAS server to only being allowed to issue certificates using the single Citrix_SmartCardLogon template and to certain users. Excluding administrators is a good example of users who should not be issued a certificate under FAS. You can configure restrictions within the Certificate Authority console.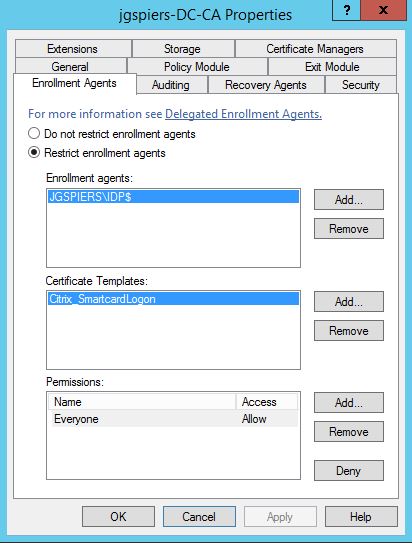
Next we need to perform some configurations on StoreFront. Launch the StoreFront console and click on the store that users will log on to. Now click Manage Authentication Methods. It is assumed you already have a NetScaler configured against the store.
Click the cog drop-down next to Pass-through from NetScaler Gateway and select Configure Delegated Authentication.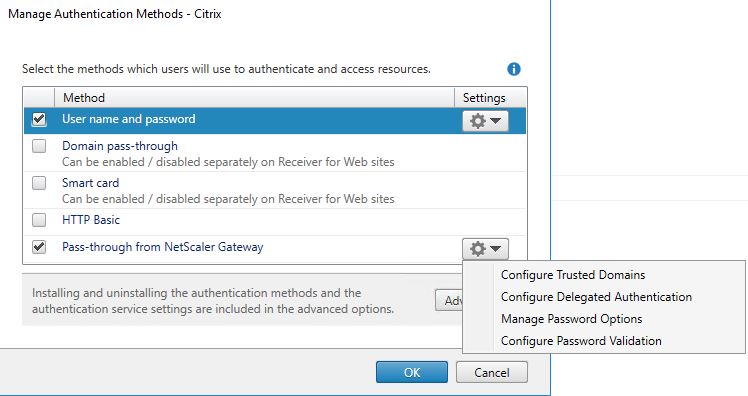
Check Fully delegate credential validation to NetScaler Gateway -> OK. Propagate the change to any remaining StoreFront servers. 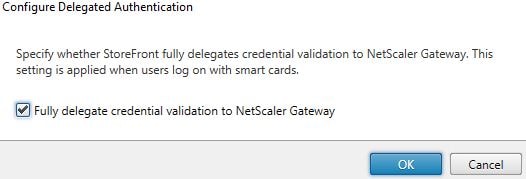
You are now ready to test logging on to NetScaler and connecting to a VDA through StoreFront.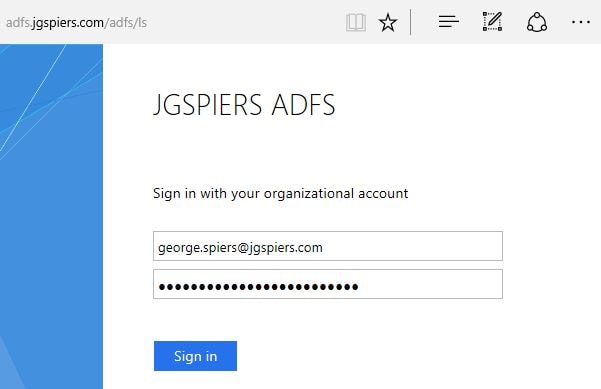
Once the user authenticates with ADFS, StoreFront issues an identity assertion to FAS for user george.spiers@jgspiers.com. 
FAS then begins the issuing of a certificate to user george.spiers@jgspiers.com.
A certificate request is made to the Certificate Authority. 
If the request is granted, FAS issues a certificate to george.spiers@jgspiers.com. 
The request details are logged. 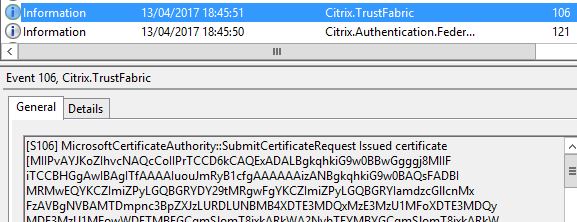
FAS keeps hold of the certificate and private key. The private key is not shared with StoreFront.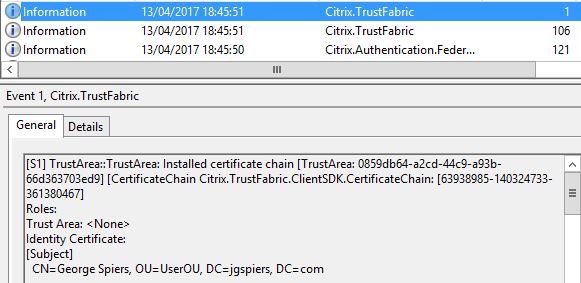
As a user connects to a VDA, the VDA reports that an Identity Assertion Logon is occuring along with details of the user logging on. 
The certificate request can be seen from the Certificate Authority console.![]()
If you double-click on the request, you can see the certificate which expires in 7 days. 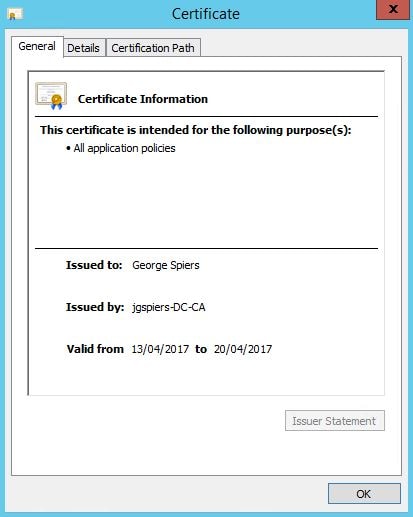
You can also view issued certificates that are cached on the FAS server. Launch PowerShell and issue command Add-PSSnapin Citrix.Authentication.FederatedAuthenticationService.V1 and Get-FASUserCertificate -Address IDP.jgspiers.com with address being your FAS server name. These certficates will be cached by default for 7 days.
If in-session certificates are enabled, StoreFront again issues an assertion to FAS. 
A record is then generated to say that VDA1 is accessing the issued certificate for user george.spiers@jgspiers.com. 
You can remove FAS issued certificates for specific users using a command such as Remove-FASUserCertificate -Address IDP.jgspiers.com -UserPrincipalName george.spiers@jgspiers.com from PowerShell on your FAS server. If you run the same command without the -UserPricipalName switch, all issued certificates will be removed from the specified FAS server.![]()
You can also pre-generate certificates using New-FASUserCertificate. This could help in situations where you want to pre-generate certificates during non-peak hours to reduce load on FAS and ADCS servers.
A number of performance counters come installed on the FAS server after you have installed the FAS role. These are helpful in determining how many certificates FAS has currently enrolled, how quick certificates are generated, signed and so on. Certificate generation normally takes around 1 second, the certificate is then cached for 7 days to make logons faster however assertions will still be made to FAS from StoreFront and the VDA when users are re-authenticating within the 7 days.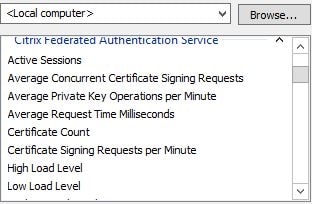
Pingback: Detailed Change Log – Carl Stalhood
Pingback: Citrix Federated Authentication Service (SAML) – Carl Stalhood
Ed
June 2, 2017Any idea how this works with regards to a Citrix licensing? For instance, I am from Domain A and logged in. I also need access to some apps in Domain B. Will I burn a license in both domains accessing Domain B from Domain A or is my license from Domain A all that I need? We are going through a company merger right now and looking at all our options. Citrix Licensing could be an issue (number of licenses in each domain could have to almost double each domain).
George Spiers
June 2, 2017If Domain A and Domain B have separate Citrix farms with separate license servers which I am going to assume they do then yes consuming applications and desktops in both farms will consume licenses from both farms. You could however share one license server between both farms, that should work.
Joe
June 8, 2017George. Thank you for this article. I have a similar scenario. We’re about to enable Smart Card authentication in ADFS. Can we can pass those Smart Card credentials to StoreFront though the NetScaler with SAML authentication and launch XenDesktop resources? Do we need FAS for this at all? My goal is to have the customer only enter one PIN.
George Spiers
June 8, 2017Hi Joe yes that should work fine without FAS.
basem
August 9, 2017Hi
Thank you for your article. Citrix FAS server unable to issue certificate to the users , i got this logs from FAS event viewer server ” Fas server failed to issue a certificate for UPN : ba@domain.com for details check microsoft CA ” , CA log ” Active Directory Certificate Services denied request 0139 because the parameter is incorrect 0x80070057 .
Would you please provide help on how to resolve this issue .
Thank you
Basem
George Spiers
August 9, 2017Based on what template you use, change either the “Citrix_RegistrationAuthority_ManualAuthorization” or “Citrix_RegistrationAuthority” certificate templates Renewal period to 1 day via ADCS and then try again.
Have you successfully completed steps 1-3 in the Citrix Federated Authentication Service console and they appear as Green?
Bob Harrison
August 11, 2017When I get to the Storefront screen and launch an app, I get a windows sign in screen with the message: The username or password is incorrect. Any ideas in which piece of this puzzle I should look? Thanks.
George Spiers
August 11, 2017Look in Event Viewer on the application VMs to see what is going on. Do the VMs trust the certificate you are trying to log on with? Make sure the issuing CA cert is installed on the VDAs. Generally, the Root CA certificate will be installed on each VDA.
Bob Harrison
August 11, 2017On the VDA:
I get the S106 event: Identity Assertion Logon, as an informational message, it looks good.
On the FAS:
I get a 105 event: issued identity assertion
and a 204 event: Relying party
No related messages on Storefront
George Spiers
August 11, 2017On the server that has FAS installed launch PowerShell and run commands “Add-PSSnapin Citrix.Authentication.FederationAuthenticationService.V1” and “Get-FASUserCertificate -Address yourFASservername.domain.com”. Do any certificates appear? There should be one cached for the user account you are using to log on to StoreFront with..
Bob Harrison
August 14, 2017Yes I see the cert. My ADFS guy corrected the expired CRL on our internal root cert, and now the message says. “The request is not supported”
George Spiers
August 14, 2017Go ahead and run Remove-FASUserCertificate -Address yourFASservername.domain.com -UserPrincipalName yourusername@domain.com. I’d re-run through the three FAS configuration steps at this stage then try again.
Bob Harrison
August 16, 2017Uninstalled FAS, re-installed and configured and now it works. Thanks.
Phil
October 5, 2017Hello George:
An excellent article. I’ve used a number of your articles to make my job easier. Much appreciated. Just to confirm, doing SAML authentication using FAS means that I don’t have to set up the mountain of Kerboros delegations required in the same setup of StoreFront/XenApp 6.5 sceanario? I don’t suppose I can deploy FAS with StoreFront 3.8, 6.5?
George Spiers
October 5, 2017Hi Phil. Thanks and good to hear you are making use of the sites content! Yes that is correct, but you cannot use 6.5 with it, so you have to have a 7.9 XenApp/XenDesktop Site at a minimum.
Phil
October 5, 2017Thanks for the quick response. I have a customer with XenApp 6.5 and StoreFront with 100+ Citrix Servers. Not looking forward to the tedium of delegation. Scripting for doing this is out there but still, will require maintenance for Citrix server adds. Another reason to upgrade..,
Thanks again.
George Spiers
October 5, 2017No problem man. Time to start planning that upgrade to FMA 🙂
Pingback: How to configure Workspace 365 to use Office 365 and Citrix XenApp as application bridge through one unified portal | christiaanbrinkhoff.com - Sharing IT Knowledge!
Anonymous
November 15, 2018George, we are having Receiver SSO issue after logging into VDA. We are able to launch published desktop through Netscaler SAML authentication, after setting FAS service and enabling GPO for FAS in VDA side, published desktop launches and SSO automatically. But Receiver configured in VDA is not SSO to Storefront site and it prompts for ID and password. Netscaler external URL is configured different storefront and VDA connect to Internal storefront with different URL. Any idea how to over come this issue?
Nirmal Thangarasu
November 15, 2018George, we are having Citrix Receiver SSO failure inside VDA. We are able to launch publsihed desktop through Netscaler SAML authentication, after setting FAS service and enabling GPO for FAS in VDA side, published desktop launches and SSO automatically. But Receiver configured in VDA is not SSO to Storefront site and it prompts for ID and password. Netscaler external site is configured on different storefront and VDA’s connect to internal storefront servers with different URL.
George Spiers
November 16, 2018You can use a feature called “Certificate Identity Declaration” but it is not documented well enough to deploy. Citrix are planning on bringing native certificate support to Workspace app but no timelines yet.
In the meantime if you need a solution, I recommend you contact your Citrix rep.
vivek
January 3, 2019Hi George Spiers,
One of my customer requirement is to establish Seamless Sign on to Published Desktop using SAML or federation. Is there any specific document which I can refer from scratch and do the same. As I am new to citrix storefront , Netscaler and Federated Authentication. I might need some references to setup the below
1. Seamless SSO to published desktops on storefront–>Is it possible without Netscaler, If so we need the document or any reference point to start off with
2.Is Netscaler Gateway mandatory for SSO to Published desktop?
My end goal is to achieve Federated Logon to VDA’s that are launched as Published desktop. Appreciate a quick response on the documentation part or if any body has published an article or a blog, Please please do share it with me.
George Spiers
January 4, 2019You can SSO to StoreFront using Kerberos if users are internal and accessing desktops from the corporate network.
If external access is required, you should deploy a Citrix Gateway (formerly NetScaler Gateway) and integrate with a SAML identity provider of your choice.
This guide covers ADFS as the IdP, but a lot of the configuration here will be the same, especially the FAS pieces.
If you let me know how users are connecting and which SAML provider/authentication methods you wish to use, I can point you to a few articles.
Pierre
January 11, 2019Hi George,
When users connect from ousite our company, ADFS login page appears well, they enter login.password and they are not redirect to the storefront but get an error page.
Authentification is ok.
Going back on browser solves the issue but the problem does not occur when we connect from Company LAN.
Did I missed something?
Thanks for your help
Regards
George Spiers
January 11, 2019Yes sounds like something has been missed. I assume from company LAN you are going direct to StoreFront and not using SAML? What error message do you get? Have you checked Event Viewer on your StoreFront servers or ADFS servers? Check the “Citrix Delivery Services” log in Event Viewer on StoreFront. Check the Application log on ADFS servers.
Chris
February 6, 2019Hi George,
I am going through your detailed steps above, however I don’t see a place where I can bind the saml policy to the AAA vserver. Before attempting these steps I did go through the XenApp and XenDesktop wizard. I am sure I missed something as I am very new to Citrix products. Also I don’t know if it matters, but I am setting this up on a VPX 1000.
Thanks,
Chris
George Spiers
February 7, 2019Edit your AAA vServer and locate the “Advanced Authentication Policies” section. You bind it there by clicking “No Authentication Policy”.
chaitanya
March 15, 2019Hi George,
Thanks for the Article. It is very informative . I have a FAS environment setup recently. While I was going through my FAS configuration I found that for “Get-FasAuthorizationCerticate -address fas.domain.com” status is showing “MaintenanceDue”. I have no clue what it is please let me know how it can be brought back to status “OK”
George Spiers
March 18, 2019According to Citrix the MaintenanceDue status is harmless and can be ignored, but it has been fixed in the latest FAS release.
Julio Andrade
August 8, 2019Hello, excellent post.
I have one problem, I hope you can help me.
I have configured my enviroment with FAS, it worked fine the las week. But this week appears one error when the user launch the aplication. “Username or password is incorrect”.
The strange is that I can`t see any error in eventvwr.
And this only happenned in some servers. Same user, different application (so different server) and one application works and the other doesn`t.
What can I do o what can I review?
Thakns.
George Spiers
August 18, 2019Nothing is logged on the VDA? If only affecting one user I would delete the user’s certificate from FAS, revoke it from the CA and generate a new one.
Julio
August 30, 2019There are no logs on the VDA, but the most wired is that I have 5 diferent VDA, and all of them are on the same OU and in the same farm XAXD, but only 2 of them launch the apps.
The others send the error ““Username or password is incorrect”.
What can I review?
George Spiers
September 2, 2019Different OS versions, different VDA versions? If they receive the same policies and are of the same type it is odd why they would reject a logon.
Mahesh Kansakar
August 26, 2019Hi George,
Thank for the article, it is a very informative and good one. However i could not get past this error “SAML Assertion verification failed; Please contact your administrator” I am not able to figure out what is the error telling me. In NetScaler these are the three lines out that I see when trying to login:
Aug 26 06:28:34 10.144.132.4 08/26/2019:10:28:34 GMT edc-nsprod01 0-PPE-0 : default AAATM Message 198 448 0 : “SAML: ParseAssertion: Response status success found !”
Aug 26 06:28:34 10.144.132.4 08/26/2019:10:28:34 GMT edc-nsprod01 0-PPE-0 : default AAATM Message 1985 24 0 : “Error while trying to verify the signature”
Aug 26 06:28:34 10.144.132.4 08/26/2019:10:28:34 GMT edc-nsprod01 0-PPE-0 : default SSLVPN Message 19 8525 0 : “AAA Client Handler: Found extended error code 917511, ReqType 16388 request /cgi/samlauth, cookie hdr ”
Thanks
George Spiers
August 29, 2019Hello, check your ADFS Signing certificate which should be bound to both AD FS and ADC.
Aymeric
August 26, 2019Hi George;
Thanks for this article and all your web site ! Is it possible to use SAML to authenticate external users with the native netscaler client and not the Web Client ?
Thanks a lot for your help.
Aymeric
George Spiers
August 29, 2019Hello, I’m not sure it is supported yet.
Ken
October 24, 2019Hi George,
I was tasked with implementing SSO for a client and have been scratching my head. This article saved the day! We publish Desktops to our clients and they use our UPN to sign on through netscaler no saml just the old school way. So this new client wants us to redirect logins to their SSO IDP and they login using their upn. So my question is they login to their IDP, and they pass a token back to our NetScaler, where in this do I associate that returned token to our UPN? The person from our client I’m working with says “ID I will be sending ” I just don’t see where that string of numbers gets associated with an AD account on our side.
George Spiers
November 10, 2019SAML attributes. If you take AD FS as the IDP for example, it is configured to send the UPN as an attribute, which matches AD accounts in your domain. You might have to create shadow accounts in your AD domain for these users. The shadow accounts need a UPN which matches the UPN sent by the identity provider. UPN is a typical attribute used.
Kenneth Bennett
November 11, 2019Thank you! Would I even need FAS in our case?
George Spiers
December 3, 2019If you use SAML authentication then you need FAS.
Kenneth Bennett
December 3, 2019Thank you for your reply. What i meant to say ADFS, since the client is using their identity provider and we are just the SP.
George Spiers
December 3, 2019Nope you don’t need to use ADFS, NetScaler will consume the token from your client’s IdP and go from there.
Lucy
November 4, 2019Are shadow accounts in the resource domain required for this to work?
Bojan
November 8, 2019I have configures Azure AD (SAML) on the Netscaler. This works fine as it authenticates and loads the applications and desktops. I have also configured FAS server and have it working on the StoreFront servers. When I launch applications via Netscaler I have to provide credentials instead of SSO taking over.
When running the Script
($StoreVirtualPath = “/Citrix/Store”
$store = Get-STFStoreService -VirtualPath $StoreVirtualPath
$auth = Get-STFAuthenticationService -StoreService $store
Set-STFClaimsFactoryNames -AuthenticationService $auth -ClaimsFactoryName “FASClaimsFactory”
Set-STFStoreLaunchOptions -StoreService $store -VdaLogonDataProvider “FASLogonDataProvider”)
Launching the applications and desktops stops working. I get the typical “Cannot start desktop”. In logs on StoreFront it shows XML error 28 and Access Denied.
Is this because I need to setup ADFS and SAML for StoreFront authentication for this to work as seamlessly as I wanted? Or am I missing something else?
George Spiers
December 3, 2019Sounds to me that you aren’t getting a certificate? Note that $StoreVirtualPath = “/Citrix/Store” should match your Store path.
Manlio
February 19, 2020Hi George,
Is it possible to setup ADFS(idp) and ADC-Netscaler(sp) without Signing Certificate? If Yes, how can I setup both environment with self signed certificates?
Thank you in advance for your reply.
Julio Andrade
March 24, 2020Hi George,
I follow your post (so clear, thanks). But when I logon trhough NetScaler, it redirects to ADFS login page and then after authentication ir redirect to Storefront portal, but I received an error “Cannot complete your request”.
I reviewed the Storefront’s eventlog and see 3 errors (ID 2,7,10).
Where can be my error?
George Spiers
May 19, 2020Have you configured StoreFront correctly? The Delivery Services event logs should give some indication.
Khanh
April 9, 2020Hi George for the shadow account do I need to make one for each user in that user that access Citrix?
George Spiers
July 12, 2020That is correct.
Ben
April 15, 2020Thanks for the article. Just have a quick question about the default validity period for the Citrix_SmartcardLogon certificates. Are you able to share that? I’ve been looking in the documentation and can’t find anything.
Thanks.
George Spiers
September 7, 20201 week by default.
Ben
April 20, 2020Nevermind, I found the answer here: https://docs.citrix.com/en-us/advanced-concepts/downloads/citrix-federated-authentication-service-scalability.pdf
NISHANT SHARAN
November 27, 2020Hi…I have configured FAS integrated with Azure. Getting below error which checking FAS configuration
Get-FasAuthorizationCertificate : Error: System.ServiceModel.ServerTooBusyException: The HTTP service located at
http://ServerName/CitrixUserCredentialService/Administration is unavailable. This could be
because the service is too busy or because no endpoint was found listening at the specified address. Please ensurethat the address is correct and try accessing the service again later. —> System.Net.WebException: The remote server returned an error: (503) Server Unavailable.
Also on Gateway getting “Cannot Complete Your Request” Not able to understand what’s the issue.
Any lead will be very helpful. Thanks in Advance.
Tony
March 16, 2021HI George,
We just completed FAS setup with SAML (Azure AD) going to Netscaler. Users in current domain login fine however users in trusted domain do not. In FAS Event logs, the error is “Failed to issue certificate for [upn: testuser@test.com].
We have the certificate from our FAS server exported and imported on the trusted domain DC. Not sure what else need to be looked at though.
Users from trusted domain have been added to FAS rule along adding all CTX servers in trusted domain Windows Authorization group as well.
Pingback: Citrix Federated Authentication Service – Advanced Configurations – JGSpiers.com