Using Citrix NetScaler you can load balance TFTP requests to deliver the bootstrap file to PVS Target VMs. You can provide PVS boot information from an ISO generated by Boot Device Manager. You can also use PXE built right in to PVS or use DHCP via options 66/67.
To deploy NetScaler TFTP Load Balancing see here.
I have already gone over the PXE boot option with PVS which you can find here. The problem with PXE is that only one PXE server can reside on the same subnet. This provides a single point of failure.
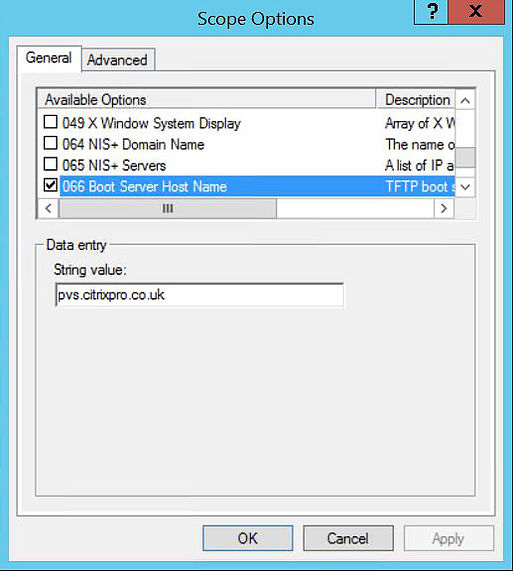
The same goes for DHCP. If you use DHCP options 66/67 to hand out the TFTP server and boot file name, DHCP can only send clients to one IP address. You could point option 66 towards a DNS record which resolves to all your PVS servers in a round robin fashion. I have tested this but if a PVS server is offline the results really are unpredictable. Using this method is not 100% fail proof.
NetScaler is more helpful because it comes with monitors. It can detect when a PVS server is down and won’t send clients to that PVS server until it is back online. This provides High Availability.
BDM is the same as NetScaler in a way. If one PVS server fails clients using the Boot Device Manager ISO may attempt to retrieve the file tsbbdm.bin from a failed PVS server during boot but will quickly move on to the next PVS server in the list. Whilst BDM does not depend on PXE/DHCP to deliver the information, you do have to attach the generated ISO to every Target VM by way of DVD drives. You do also need a PXE booting capable NIC of course to boot to a streaming vDisk.
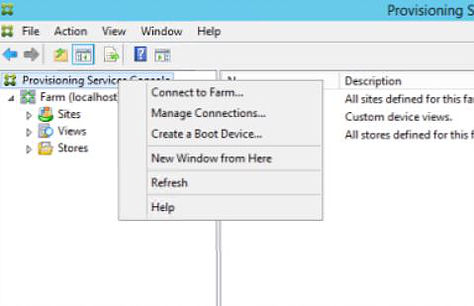
To configure and deploy Boot Device Manager in your environment, open your PVS console and connect to the PVS farm.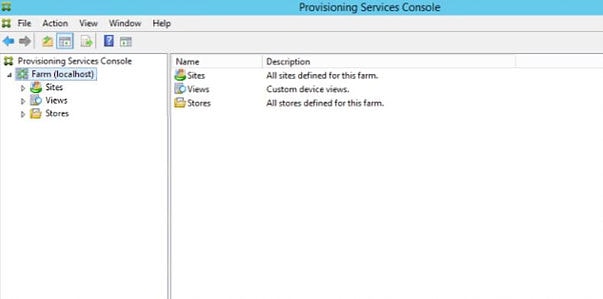 Right-click Provisioning Services Console -> Create a Boot Device.
Here you must specify your PVS hosts via IP address or host name. I created a DNS A record of pvs.citrixpro.co.uk which resolves to PVS01 and PVS02 which are my two PVS servers. Click Next.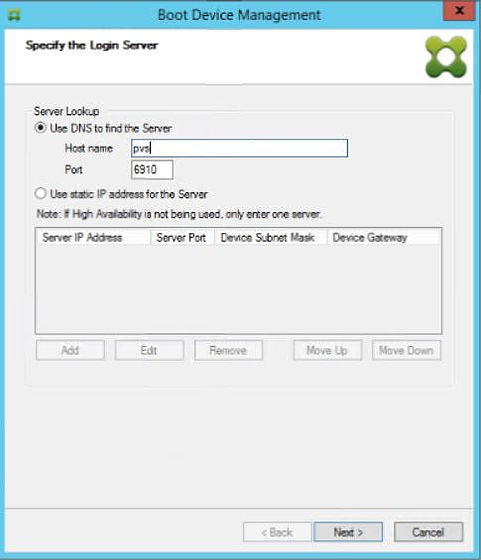
Within DNS manager, the two PVS A records pointing to PVS01 and PVS02 are shown.![]()
Back on the Boot Device Management wizard I like to enable Verbose Mode just to grab more information during boot. Click Next.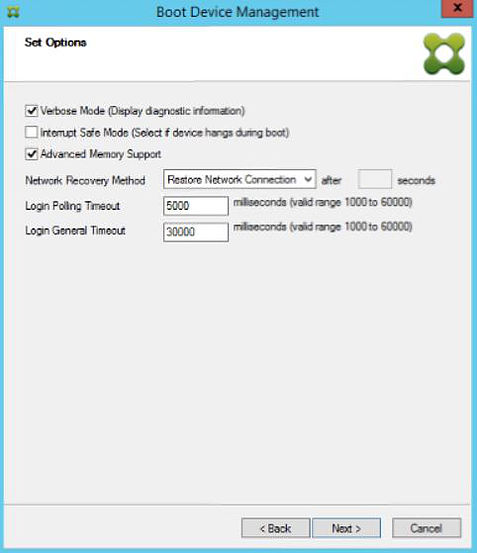
Select Use DHCP to retrieve Device IP and complete other fields such as Primary DNS Server Address and Domain Name. Select Citrix ISO Image Recorder from the drop-down menu and click Burn. This will create an ISO file.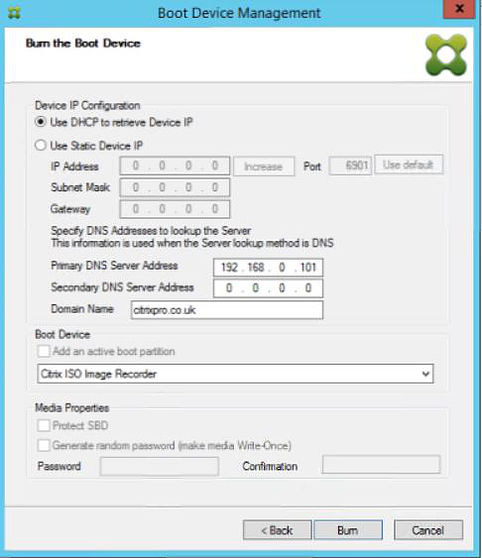
Specify a location to save the BDM ISO file and click Save.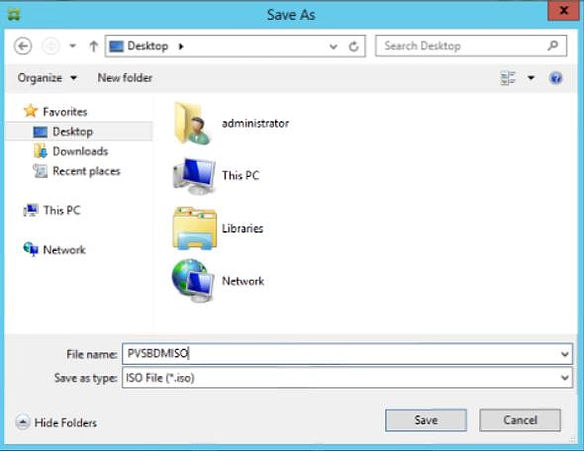
Click OK once the Successful message appears.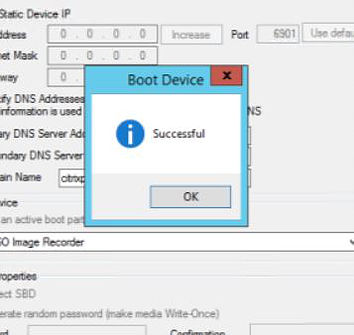
Now depending on your environment you need to store the ISO in a highly available location that all your PVS Target VMs can access to get at the ISO file. For simplicity in this instance I have used a CIFS file share running on a Windows Server VM.![]()
The CIFS share details shown below within the XenCenter console.
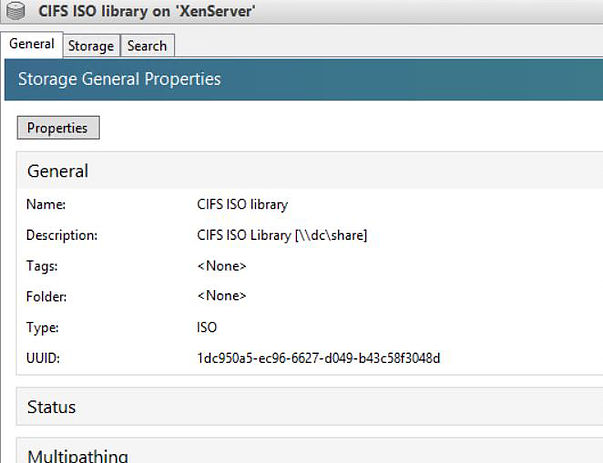
After importing the ISO file to the CIFS share it appears in XenCenter.
At this stage we can attach the ISO to a virtual DVD drive.

Once we boot the VM it has contacted PVS01 to download the bin file and PVS02 to launch the vDisk.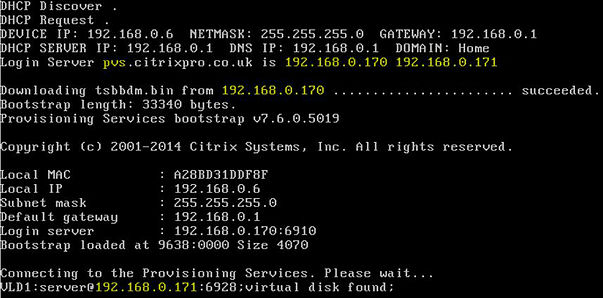
After a restart the VM boots from PVS01.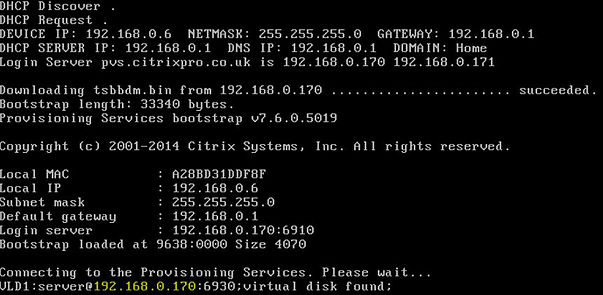
Now as a test I have turned PVS01 off. Lets see how the Target VM acts.

The VM boots and notice how it tries to download the bin file from PVS01 first but fails and moves on to PVS02 and boots from PVS02. This proves the boot process is highly available.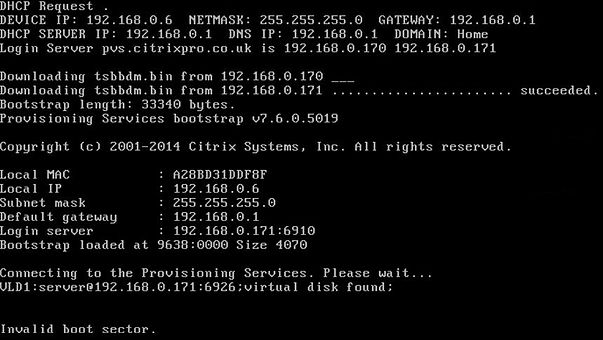
PVS01 is started back up and PVS02 turned off.
The VM boots, tries to grab the bin file from PVS02, realises it cannot, moves to PVS01 and boots from PVS01.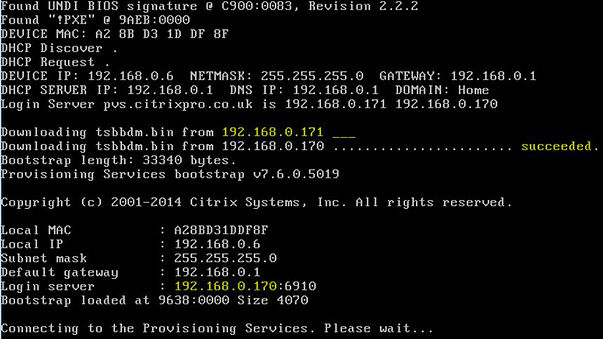
The Boot Partition method
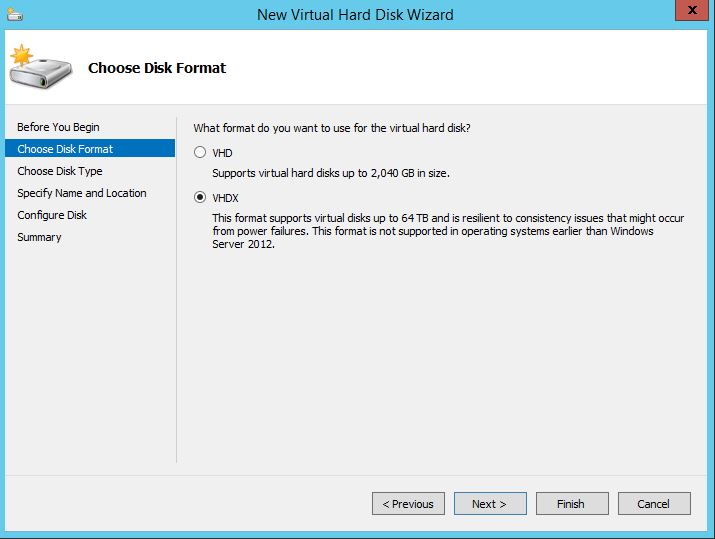
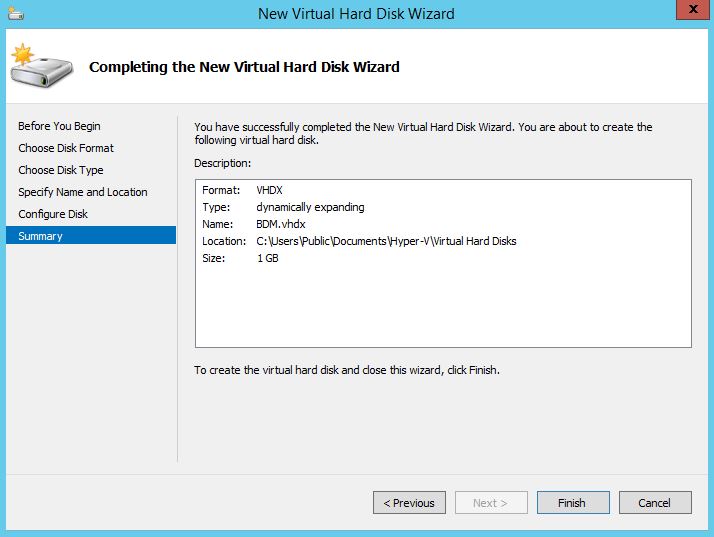
Instead of creating a BDM ISO you can create a Boot Device Partition to include the bootstrap file in a small virtual disk attached to each PVS Target Device VM. You can manually create the BDM media or have the XenDesktop Setup Wizard automatically create the partition for you. For now we will concentrate on the manual method. You need to add a virtual disk to the PVS server or a server that has access to BDM.exe. Within Hyper-V run through the New Virtual Hard Disk Wizard. Choose to create a VHDX. Click Next.
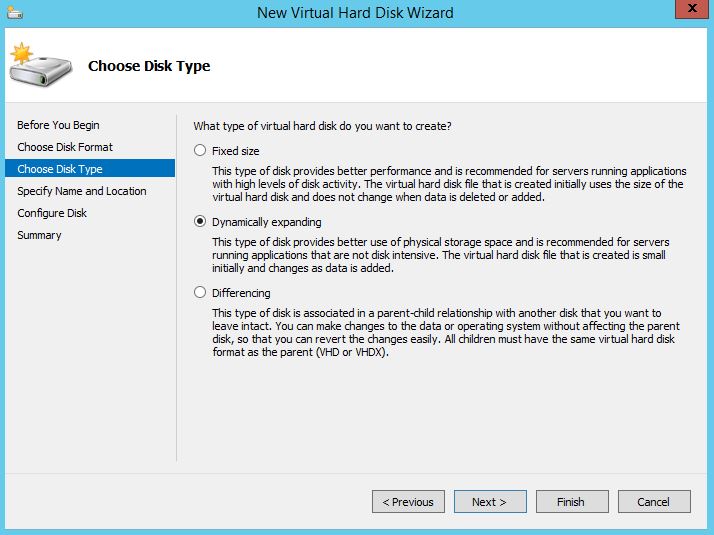
 Specify Dynamically expanding. Click Next.
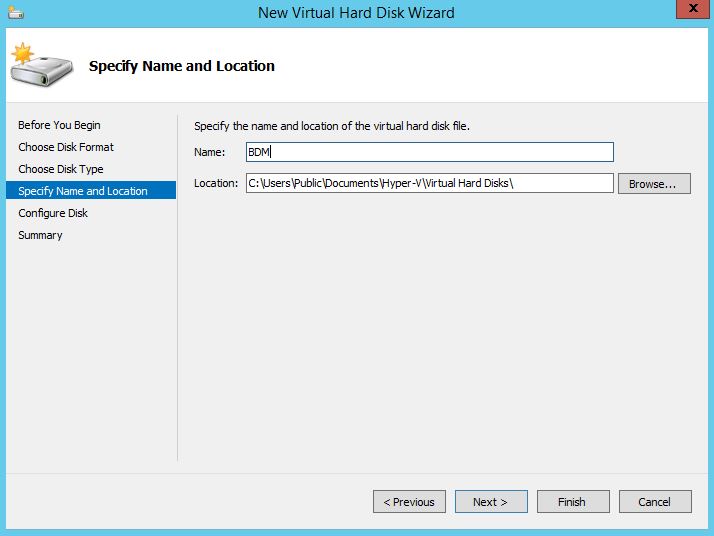
  Specify a name and location.
  Choose a file size. The size Citrix actually set is 100MB as the BDM media is very small. Some customers have been known to add the 100MB partition on to existing drives such as the Write Cache drive.
 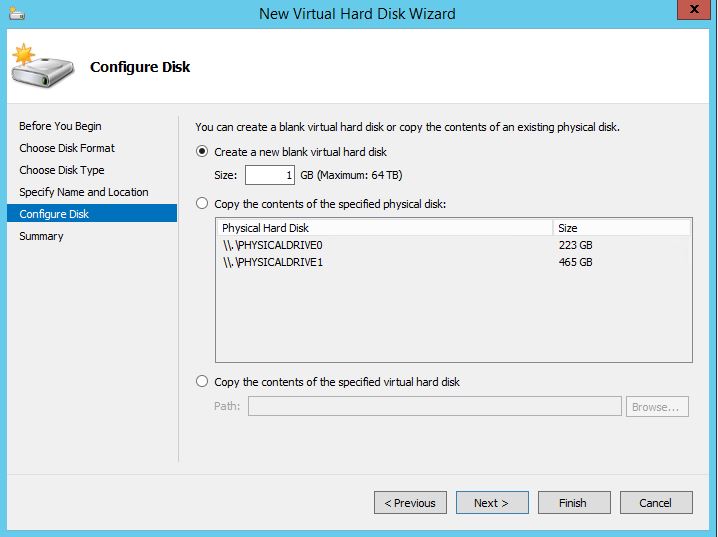 Click Finish.
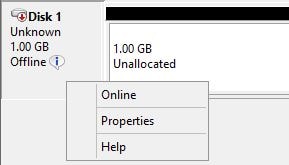
  Run diskmgmt.msc within the server that has the BDM disk attached. Right-click the new disk and click Online.
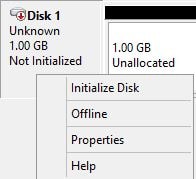
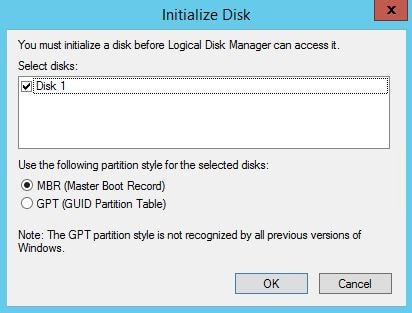
  Right-click again and choose Initialize Disk.
  Click OK.
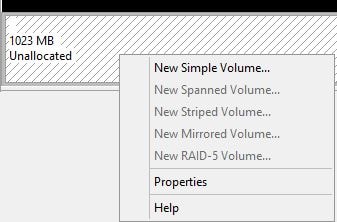
  Now right-click the unallocated space -> New Simple Volume…
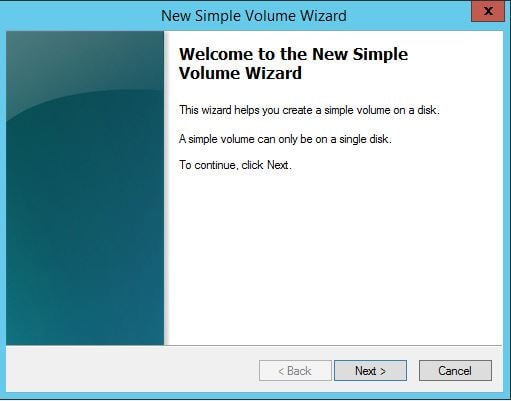
  Click Next.
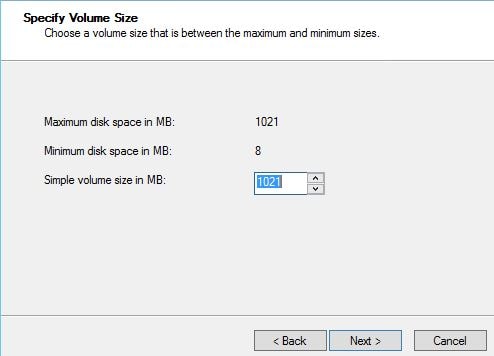
  Click Next.
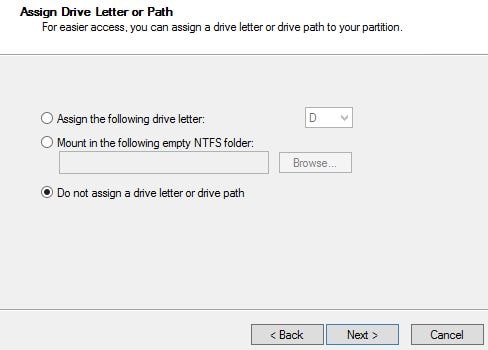
  Choose Do not assign a drive letter or drive path followed by Next.
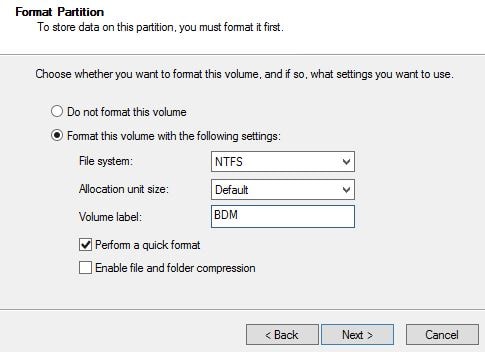
  Specify a volume name. Click Next.
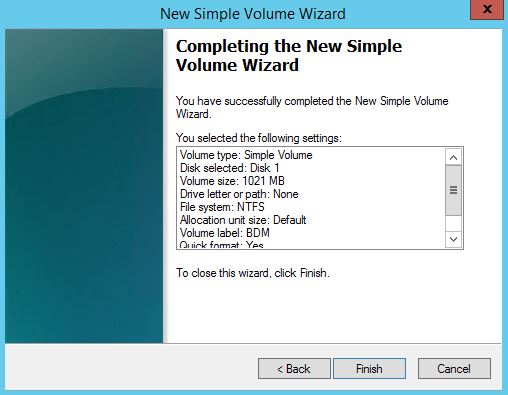
 Click Finish.
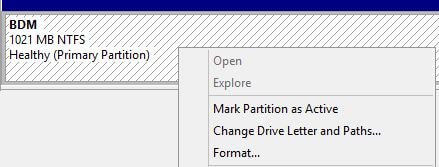
  Now right-click the BDM partition and select Mark Partition as Active. This will tell any device that this is a bootable partition.
  Open the Boot Device Management tool on your PVS server.
 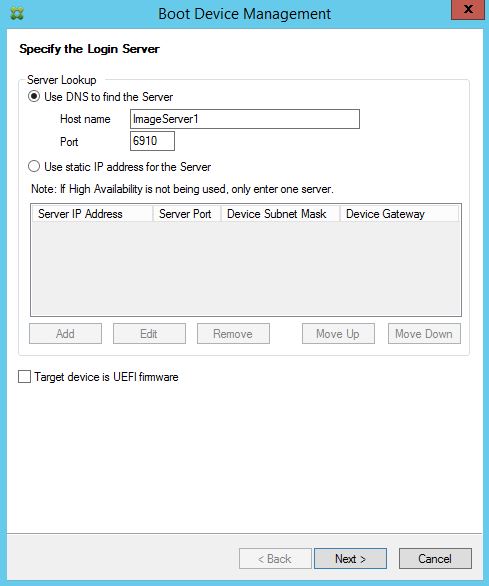 You can also copy the BDM.exe application from a PVS server allowing you to run the tool anywhere. Since the PVS server is likely to be 64bit you will need to run BDM.exe also from a 64bit computer or you can install the PVS Console from PVS install media to obtain BDM.exe regardless of processor architecture.
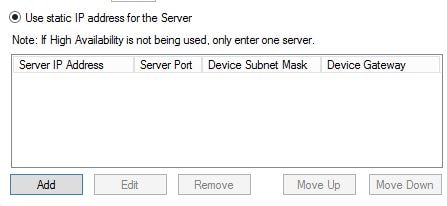
  Choose Use static IP address for the Server. Click Add.
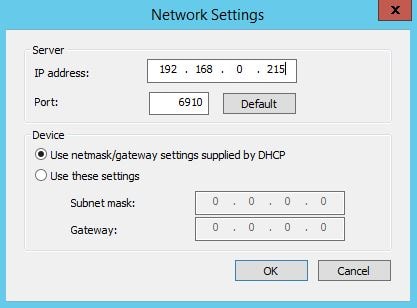
  Enter your PVS server IP address.
  You can add a maximum of 4 servers. Click Next.
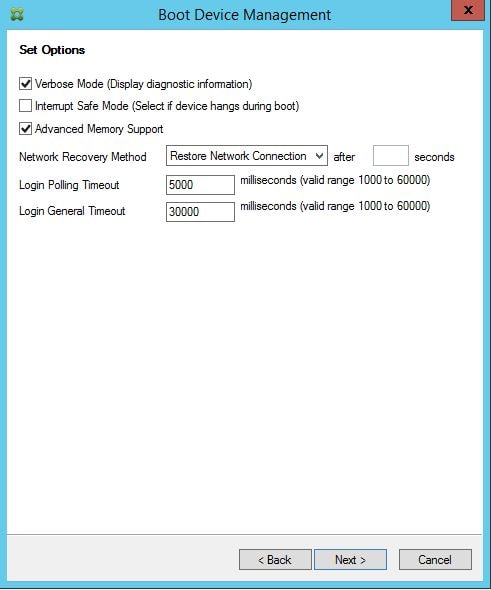
 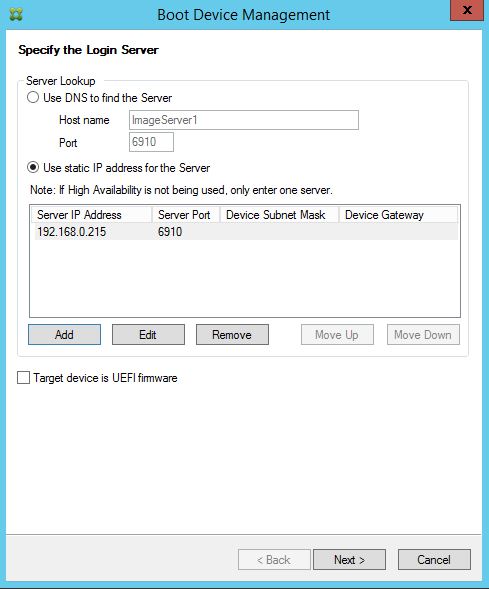 Enable Verbose Mode (optional).
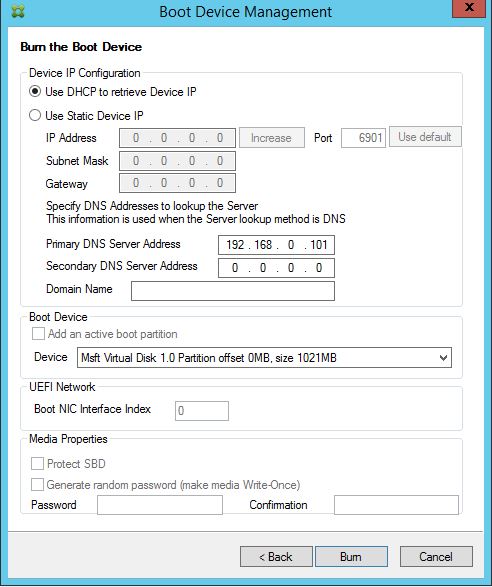
  Under Boot Device choose the small partition we have provisioned to be the BDM partition. Click Burn.
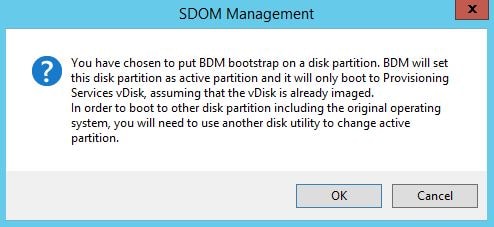
  Click OK.
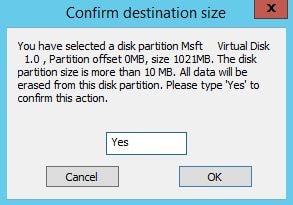
 Enter Yes and click OK.
  Click OK.
  Now we need to detach the virtual disk. Edit the properties of the appropriate server and click Remove on the BDM drive. At this stage you can make use of scripts to copy and mount the VHD file to multiple Target VMs. You will also attach the disk to any Virtual Machine Templates so that new VMs receive the BDM partition.
  With a device now using the BDM partition the boot information will look similar to below.
  To skip the manual creation of a BDM partition and instead have PVS create one automatically during machine creation you can make use of the XenDesktop Setup wizard as previously mentioned. Starting PVS 7.9+ this partition can also be updated on the fly if a PVS IP address changes or PVS servers are removed/added to the bootstrap. Previously such a change meant the BDM partition needing recreated.
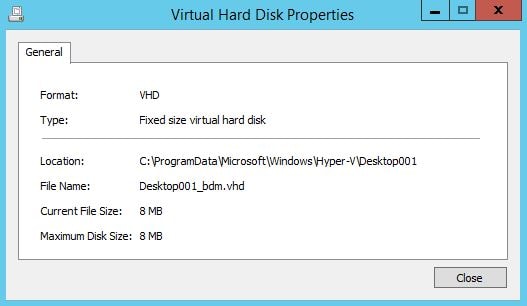
 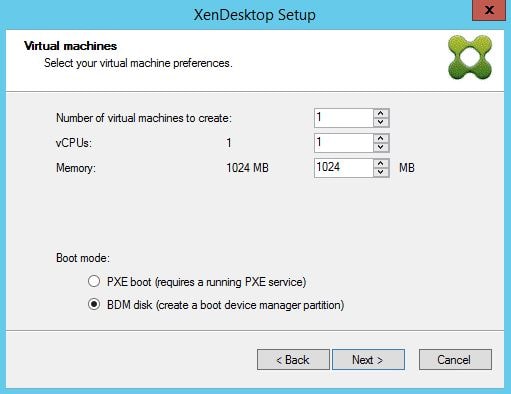 After using the XenDesktop setup wizard the Target Device VM has a 8MB VHD file containing the bootstrap.
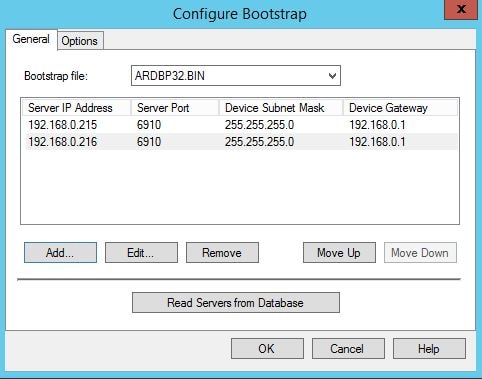
  If you need to make a change to the bootstrap right-click a PVS server and click Configure Bootstrap.
 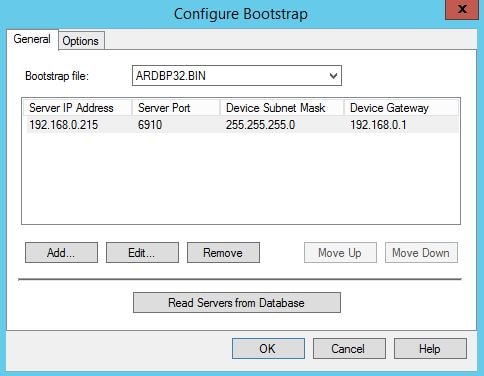 You can add or remove servers from the list and change IPs. Click OK.
  Make sure the desktops are turned off before they receive a BDM update.
 ![]() Right-click the Target Device and select Update BDM Partitions. You can select multiple Target Devices or select entire collections.
Right-click the Target Device and select Update BDM Partitions. You can select multiple Target Devices or select entire collections. 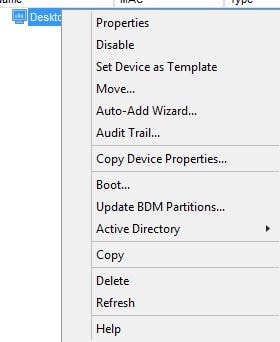 Click Update Devices.
 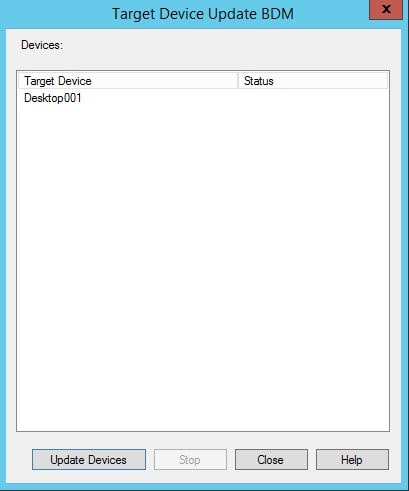 A Success message should appear and the updated VMs will start using the new bootstrap file.
Per-Ole
September 20, 2016How can you apply the BDM iso to all VMS with out using xencenter? I have 600 vdi i want to use BDM. Been trying with powershell but having problems getting to mount iso with it.
George Spiers
September 21, 2016Create a TXT file with a list of your VDI VMs (one per line).
Use PowerCLI, connect to a VMware Host (Connect-VIServer).
$vmlist = “c:\temp\vms.txt”
$vms = Get-Content $vmlist
New-CDDrive -VM $vms -ISOPath “[datastore] ISO\bdmiso.iso”
Where datastore = your datastore that holds the BDM ISO and where bdmiso.iso = your BDM ISO name.
cassandra
January 8, 2021George, i know this is not related but what has your luck been with using EFI instead of bios with pvs golden images? Do you have any documentation? Not had much luck.
V@12345
July 17, 2017Very Helpful…
Kumar
September 27, 2017Hi George,
Thanks for great article.
I want to ask few questions related to PVS just in one place :-
Q1: How does offline DB support actually works in PVS as, LHC in XenApp & where this DB is stored locally on PVS server & how often it got refresed periodically & can we change settings in PVS console when DB is offline?
Q2: Why does licensing is required in PVS & what will happen if we don’t have proper PVS licence in place, will target device boot from V-Disk or not & what error will be received?
Q3: As far as my understanding there are three ways to provide PVS login information to target device while PVS boot these are DHCP (option 66,67), PXE (option 60), BDM. Is that correct? & what is BOOTP, Is this different from these three?
Q4: As you told we can burn BDM ISO in VHD attached to PVS server and then take this VHD from this PVS server & attaching this to VM template so that all VM deployed from this template gets this VHD how can this be possible to attach same VHD to multiple VM’s?
Q5: IN BDM there is two options interrupt safe mode (select if device hang during boot) & Advance memory support, what does this functions & when it to be used?
Q6: If we select BDM to provide bootstrap file to target device instead of DHCP & PXE, what is tsbbdm.bin file which can be seen during device boot, which is noot seen if DHCP is selected as in that case ardbp32.bin is seen?
Q7: What is target UEFI firmware option & why it is used, which comes in BDM during specify login server & UEFI N/W option boot NIC interface index which comes during burm the boot device?
George Spiers
September 27, 2017Hi Kumar
1. Snapshot of DB is taken to make sure Target Devices can continue to function whilst you restore the database. The Stream Process is what continually updates the snapshot in the background. I am not sure there is a way to update the frequency, and may not be supported.
2. Each Target Device checks out a license on boot. If license server is down, you enter the 30 day grace period that allows you to restore the license server. After this time no license server is contactable, Target Devices will shut down.
3. Correct, TFTP provides the boot information either via PXE or DHCP options 66, 67. You also have BDM boot. BootP was an older boot method that is pretty much not supported these days.
4. The same VHD isn’t attached, it’s copied as you create multiple VMs. Using the XenDesktop Setup Wizard in PVS, it can also create BDM partitions for you, which is a more automated method.
5. Advanced Memory Support allows the bootstrap to work with newer OS. It’s enabled by default. Safe Mode enabled debugging to help with boot problems but should be left disabled if you don’t have any problems.
6. tsbbdm.bin is the BDM specific bootstrap file which contains information that Target Devices need to boot. It essentially provides the same information as ardbp32.bin, just different names.
7. UEFI is the replacement for BIOS. If you have machines built with UEFI (for example, Generation 2 VMs using Hyper-V), you need to tell BDM this is the case, so that those VMs can boot.
Kumar
September 27, 2017Hi George,
Thanks for your feedback, but I am not clear with the answers 5 & 7.
Thanks.
George Spiers
September 27, 20175. Advanced Memory Support when enabled allows the bootstrap file that is delivered to Target Devices when they boot to work with newer Operating Systems. It’s enabled by default. Safe Mode when enabled, enables debugging to help with boot problems but should be left disabled unless you have boot problems.
7. UEFI is the replacement for BIOS (Basic Input Output System) – See https://www.howtogeek.com/56958/htg-explains-how-uefi-will-replace-the-bios/
simon
March 3, 2020Hi George , Great article – just to clarify PVS licence grace period is not 90 days its in hours – 48 from memory – then the machines shut down
George Spiers
May 19, 2020Thanks yes 30 days / 720 hours.
Arun kumar
December 11, 2017Thanks for your article.
Anonymous
January 10, 2018Hi George,
please explain what kind of role for subnet affinity in pvs?
George Spiers
January 10, 2018Subnet Affinity lets you control the behaviour of load balancing of a PVS vDisk stream. For example, setting this to “None” uses the least busy server for streaming whilst “Fixed” keeps load balancing within the same subnet, if PVS servers are spread between different vLANs. A good explanation is here -> https://support.citrix.com/article/CTX138933
Anonymous
January 25, 2018Hi,
Can you tell me about
the citrix,
how to create BDM and WriteCache Disk
and how to initialize them.
Thanhs a lot
Anonymous
January 25, 2018Sorry,I just want to know how to do this using PowerShell. Thanks
George Spiers
January 25, 2018If you use the XenDesktop Setup Wizard, it can attach a BDM ISO/VHD and the WriteCache disk to all the VMs it creates. I don’t think there is a cmdlet to specifically create BDM media.
Anonymous
January 26, 2018I try to new a VDI ,then attach it to a VM .I have no choice but to manually initialize this disk .
So,I want to know how the Citrix did it.
Anonymous
February 7, 2018Hi George,
I was plagued by a problem for a few days.
I want to create an application delivery group but I have no way to get the applications from a server which was created from XenDesktop Setup Wizard.
The SDK of XenAppAndXenDesktop 7.6(I am using it) have no command like ‘Get-XAApplication’ which is in XenApp 6.5 SDK.
Now,There was no IMA Service and the port 2513 also is not exist.
Maybe,this old sdk is out of date, but I still want to know how to list the applications with powershell.
Hope.
George Spiers
February 7, 2018Hi – If I understand you correctly: Get-BrokerApplication | select Name
Anonymous
February 8, 2018Thank you for your reply,but that is not right.
Only the applications that was created by stodio can be find with the command ‘Get-BrokerApplication’.
My problem is what methods can be used to scan the application from the server machine.
Ken H
February 27, 2018Is there a way to attach the BDM partition to already existing targets? Or is it required to use the XenDesktop Setup Wizard? Thank you for this article.
George Spiers
February 27, 2018For sure you can attach it manually or script it for multiple VMs, or redeploy the VMs via PVS.
Akhilesh
April 9, 2018Hi All
when i am validating pvs_vdisk path it’s showing error no creation permision plz help..
Thanks..
Rocky
June 12, 2024We are planning to upgrade OS with target devices booting from BDM iso. Do we need to do reverse imaging like we do for the network boot
Anonymous
April 20, 2018The XenDesktop Setup Wizard can always initialize the disks.
When I manually add disk or increase disk capacity for a vm ,the results were different.
So, is there any way to solve it.
Or, How did the PVS do it?
Pingback: Citrix XenDesktop 7.x VDI deployment with PowerShell using vSphere, local storage and PVS - IT Store Guru
Ray
July 5, 2018George,
Dude you are a Citrix master lol. Thanks for all your help you give us.
Its amazing how well you go into detail to help out others.
George Spiers
July 5, 2018Thanks Ray! Glad it helps 🙂
Balamurali
August 12, 2018Hi George, Good day!
Thanks a lot for your great article which clarified my doubt on BDM.
Kindly let me know if you have PowerShell script to attach ISO file to 1000VMs instead of PowerCli.
I am sorry to say this as I could not understand the below point.
Could you explain me “Once we boot the VM it has contacted PVS01 to download the bin file and PVS02 to launch the vDisk”
As per my understanding VM will get ARDBP32.BIN file from PVS01 and VDisk too. Kindly clarify if I am wrong.
George Spiers
August 13, 2018Hi Balamurali, I don’t have a script for that but the PVS XenDesktop Setup Wizard does that for you when creating VMs. Also in regards to which server the vDisk launches from, that all depends on load balancing. Contacting PVS01 for the bin file doesn’t necessarily mean it will boot from the same.
Balamurali
August 13, 2018Thank you very much George.
Balamurali
September 19, 2018Hi George,
Good day!
Could you kindly provide me if you have any document or useful URL for DNS Round Robin method.
Regards,
Balamurali Chemirthi
George Spiers
September 19, 2018Do you want to use Round Robin? I would suggest you don’t, unless you are Load Balancing via Citrix ADC for example.
Balamurali
September 30, 2018Dear George,
Thank you very much for your reply.
No George..Don’t want to use RR method. Just for my knowledge pupose I have asked . Kindly share me if you have any sample document.
Regards,
Balamurali Chemirthi.
Junaid Yaseen
October 26, 2018Hi George,
Does citrix (PVS 7.15 LTSR CU2) support booting Win10 (UEFI BIOS) image from BDM ISO..
Regards,
Junaid Yaseen
Jimish Thosani
March 19, 2019Hello George,
I have one doubt, If we are using BDM instead of DHCP options 66 & 67,what should be the bootstrap file name ardbp32.bin or tsbbdm.bin in “configure bootstrap” wizard?
George Spiers
March 19, 2019When using BDM you don’t have to touch the Configure Bootstrap wizard. Just go ahead and use the Boot Device Management wizard and specify your PVS servers there.
Anonymous
March 20, 2019Thanks George!!
So in BDM scenario ardbp32.bin is working?
Also in which scenario, we use tsbbdm.bin?
Jimish Thosani
March 20, 2019Thanks George!!
So in BDM scenario ardbp32.bin is working?
Also in which scenario, we use tsbbdm.bin?
George Spiers
March 20, 2019Hi Jimish, tsbbdm.bin is used by BDM, not ardbp32.bin.
Sean
May 2, 2019Hi George,
Recently i’ve written a PVS BDM automation script using powershell. When i try to run it error prompted with following statement:
Exception calling “Burn” with “2” argument(s): “Failed to re-program Boot Device”
i found no way to fix this code as the resource on the internet is limited pertaining this issue. Hope that you can assist to look into this issue. Looking forward to your reply.
Codes look like this:
$bdm = New-BootDeviceManager
$LoginServerList = New-Object ‘System.Collections.Generic.List[System.Collections.Generic.KeyValuePair[string,string]]’
$ls = New-Object ‘System.Collections.Generic.KeyValuePair[string,string]'(“192.168.1.1”, “6910”)
$LoginServerList.Add($ls)
$ls = New-Object ‘System.Collections.Generic.KeyValuePair[string,string]'(“192.168.1.2”, “6910”)
$LoginServerList.Add($ls)
$bdm.LoginServers = $LoginServerList
$bdm.SetOptions($true, $false, $true, 5000, 30000, $false, 0)
$bdm.DeviceIpDHCP = $True
$bdm.DiskString = “Citrix ISO Image Recorder”
$bdm.ISOFileName = “C:\test.iso”
$bdm.Burn($false, $false)
whitney
May 22, 2019anyone update on this? I am getting the same error, but I am trying to burn to the partition
jonder
September 24, 2019Hello everybody, I need help please. I have PVS, everything ready configured and set up. I have created an image, which also works and works. Now I wanted to make a small change to the image, done everything. Then I have the new version Promoted and put on “test”. Now when I select PXE Boot on my device to start PVS streaming, I come to the boot menu to! [Test] to select, if I do that happens the following:
Boot menu: from vdisk
LoadImage error: Not Found
Streaming Aborted
Does anyone have any idea where to look for the bug? Before I launch the new version Promote the device without problems on the vDisk, only after the promote in test anymore.
George Spiers
September 29, 2019Do you have multiple PVS servers load balancing? If so, can you make sure the vDisk/test version is replicated to each PVS server
Ken Avram
January 30, 2020Great work on explaining this but I would like to clarify one item that was very unclear elsewhere and you did really good with explaining how to create a BDM partition on disk and when you mentioned the write cache disk it got me wanting to try it. I tried using the BDM.exe but just copying it over to the vm and running it gave an error BMDWorker.dll missing. I copied that over and it worked but I could not get it to boot, always came back with missing operating system. Someone else mentioned that you have to copy over the whole provisioning services directory from the provisioning server rather than having to go through the whole console install and that did the trick. Running just BDM says it was successful but apparently there are some other files it needs to write and I really hate programs that just assumes it all “worked”, bad programming. Another issue I found out there is that using the streamed VM wizard will mess up the hard disk boot in the bios as it changes it to network boot and whats worse is when you go to change it manually in bios setup it will not let you change it. There is an article here https://discussions.citrix.com/topic/378272-does-the-streamed-vm-setup-wizard-change-the-boot-order/ that lets you override it. The reason I thought that this was a novel approach was that it did not rely on PXE, TFTP or DHCP and still provided a level of fault tolerance without having to load balance it in Netscaler. I had a client who did an upgrade on their DHCP and it wiped out the options 66 and 67 so this may provide a better fault tolerant boot system. Although the BDM ISO is a good solution it would not allow you to vmotion the vm around until you disconnected and reconnected the ISO and I didn’t want to rely on a tech to re-attach it when deciding to install some sort of software that used the CD device.
George Spiers
February 17, 2020I ran BDM.exe from my PVS server, and have also run it direct from the PVS console. Can you try that? Agree that the ISO method is not the easiest way to go.
Anonymous
February 17, 2020George,
Yes, that will work. Also copying the whole provisioning services directory works and I delete it afterwords. I was just trying to make it so that I didn’t have to move partitions around in VMWare, can be a little tricker than in XenServer. Plus you really have to pay attention so that you don’t zap the wrong partition. This has been working well since I am upgrading a client and they already have the DHCP option on an existing farm. I was using ISO as a temporary measure but wanted to fall back to the old system quickly if needed and they do not have a full time Citrix admin. Keep up the great work, awesome
Rob
August 26, 2021What was the reason you were getting this error?
“invalid boot sector”