In this post I will show you how to load balance two StoreFront 3.0 servers through NetScaler 11. In this demo I am using two StoreFront servers named StoreFront1 and StoreFront2.
- StoreFront1:
- IP – 192.168.0.104
- Protocol – HTTPS
- StoreFront2:
- IP – 192.168.0.105
- Protocol – HTTPS
- LB vServer:
- VIP – 192.168.0.242
- Protocol – SSL
To configure StoreFront load balancing we need the following:
- Two or more StoreFront servers
- An SSL certificate used to secure communication if StoreFront is using HTTPS. This will be installed on your NetScaler. My StoreFront servers are using HTTPS so certificates apply in this case.
- StoreFront server objects, service objects and monitors.
- A Load Balanced vServer that users will connect to when accessing StoreFront.
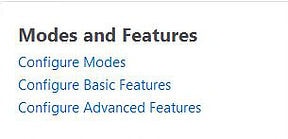
Enable Load Balancing by navigating to Configuration -> System -> Settings -> Configure Basic Features.
Tick the box next to Load Balancing and click OK.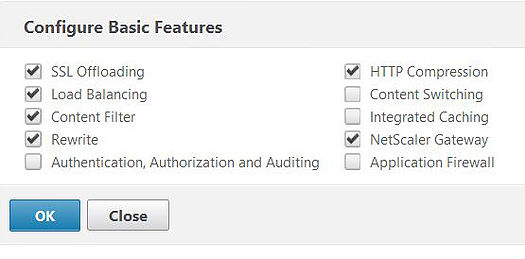
Time to add objects for each of your StoreFront servers that you want to load balance. Navigate to Traffic Management -> Load Balancing -> Servers -> Add.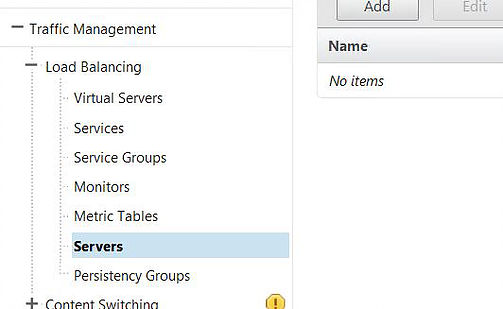
Enter your first StoreFront servers information: Name, IP Address, Create.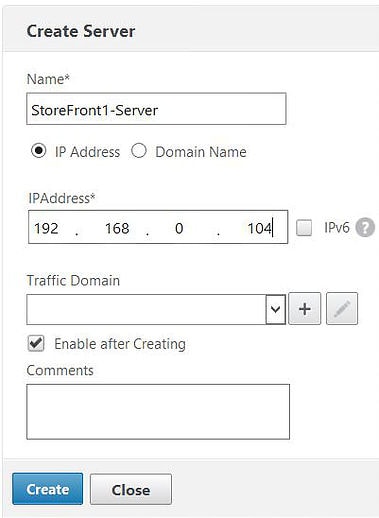
Repeat the process for your remaining StoreFront servers.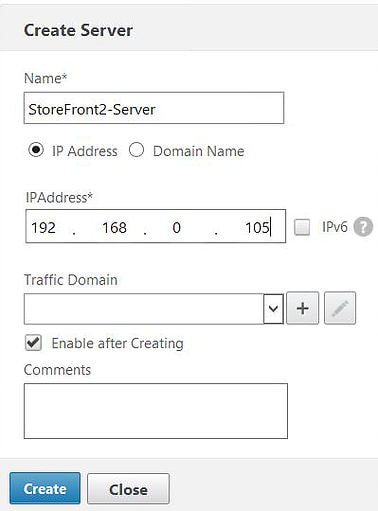
Once done two server objects that I have just created now show as below and are enabled.
Navigate to Traffic Management -> Load Balancing -> Monitors -> Add. We need a way of monitoring the two StoreFront servers so that in the event one goes down users are not routed to that failed server. Citrix have a created StoreFront monitor built in to NetScaler which we will use. The monitor is named STOREFRONT.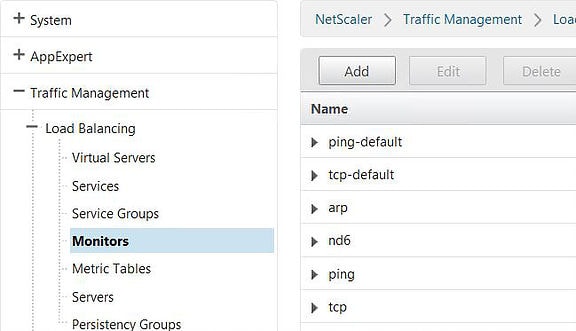
We will be creating a seperate monitor for each StoreFront server. Within the Standard Parameters tab, enter a name referencing your first StoreFront server. Click the type drop-down box and select STOREFRONT. Enter the Destination IP (your StoreFront servers IP) and the port StoreFront is configured to listen on. My StoreFront servers have been configured to use HTTPS/TCP 443.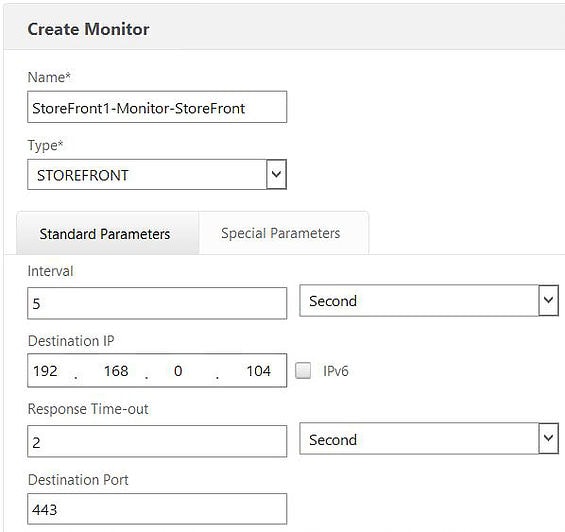
Check the Secure check box since these StoreFront servers are configured with HTTPS..![]()
On the Special Parameters tab, enter the name of your Citrix Store and check the boxes for StoreFront Account Service and Check Backend Services.
What the monitor does here is probe the account service, authentication service and the discovery document (in that order), to determine the state of the CitrixPro store.
Click OK.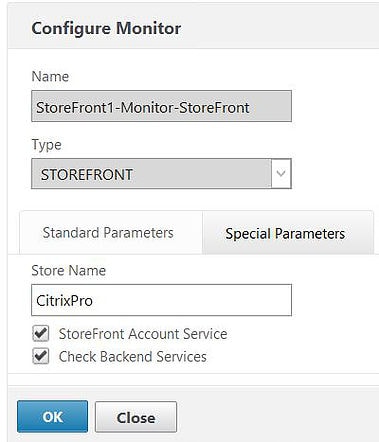
Repeat the same process for your remaining StoreFront servers.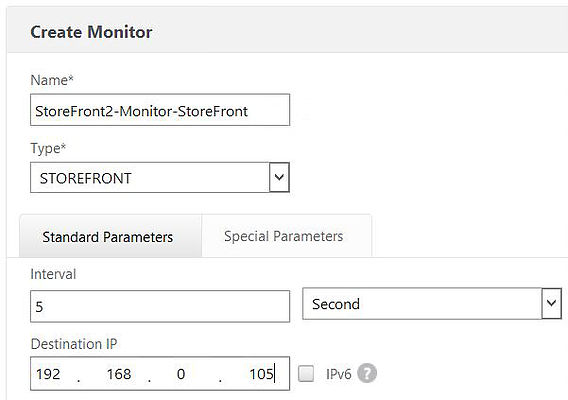
Once done, the two StoreFront monitors are created and ready to be attached to service objects.
![]()
Now we need to create those service objects. Navigate to Traffic Management -> Load Balancing -> Services -> Add.
Normally you would instead create a Service Group.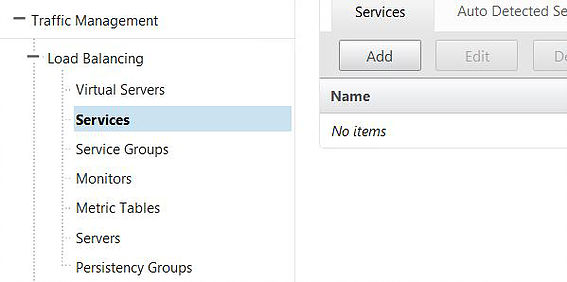
Enter a name for your service, and attach an existing server object that you created earlier. StoreFront1 will be the first server attached to this service. Click OK.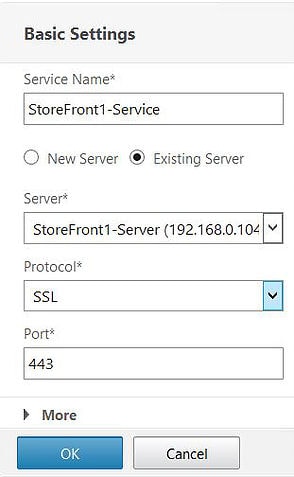
We need to add the STOREFRONT monitor to the service we are creating. Click underneath Monitors to add the monitor we created for StoreFront1.
Click Add Binding.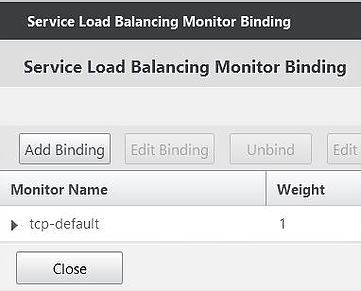
Click on Click to select beneath Select Monitor*.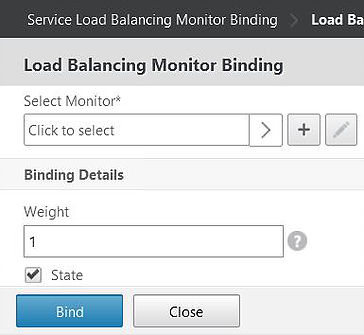
Select the monitor previously created and then click Select.![]()

Click on Bind.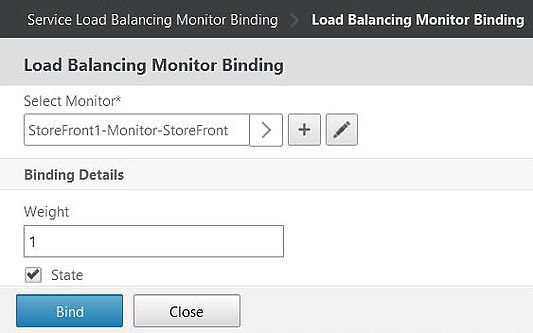
Click Close.
Repeat the same steps to create a service for your remaining StoreFront servers and attach a monitor. Click OK.
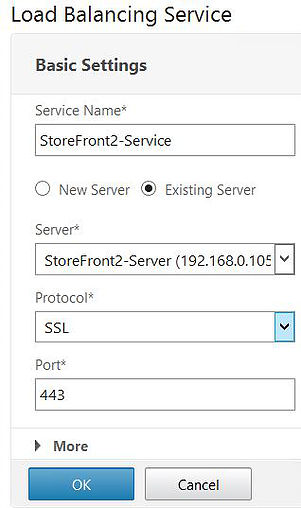
Click Close.
Notice both services that I created are in the down state. This is because when configuring the StoreFront monitors I asked the monitor to Check backend services. This is OK and StoreFront monitoring is built in to StoreFront v3.0 by default but only via HTTP. My StoreFront servers are using HTTPS so the monitor I created earlier is trying to probe the backend services of our server through HTTPS. StoreFront prior to v2.6 needed an additional add-on installed to support NetScaler -> StoreFront monitoring however 3.0 and above can be configured using PowerShell.
The monitoring service is accessible on each StoreFront server over port 8000, by default, as shown below.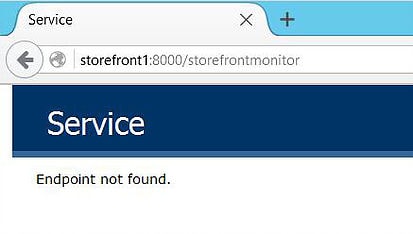
To change this to HTTPS. We need to configure the monitor service to use HTTPS instead. On all the StoreFront 3.0 servers perform the following steps.
Run PowerShell as an administrator.
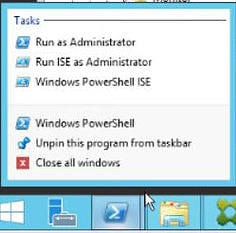
Change directory to the Scripts folder. The location may be different for you depending on your install.
Execute the ImportModules.ps1 PowerShell script.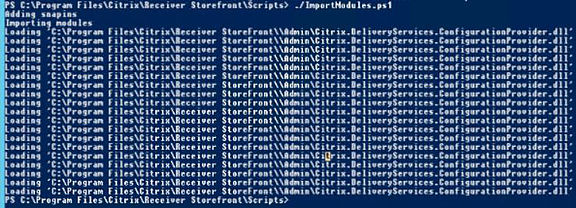
After the modules have been imported, running the Get-DSServiceMonitorFeature command will confirm the current StoreFront monitor URL and that it is using HTTP.![]()
Now run the command Set-DSServiceMonitorFeature -ServiceURL https://localhost/StoreFrontMonitor.![]()
Enter the new HTTPS URL in your web browser to make sure you get a response from the StoreFront monitor service.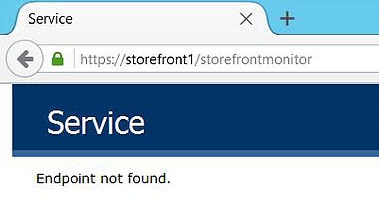
Enter the URL of https://yourstorefrontaddress.domain.com/StorefrontMonitor/GetSFServicesStatus to view the services monitored and their status.
Now back on the NetScaler the StoreFront1 service is now up. This is because NetScaler’s monitor can now probe the StoreFront monitoring service via HTTPS.

Both services are up.
So, as a summary we have server objects created which we then attached to services. These services also have monitors bound against them. The remaning piece we need is a Load Balanced vServer. Browse to Traffic Management -> Load Balancing -> Virtual Servers -> Add.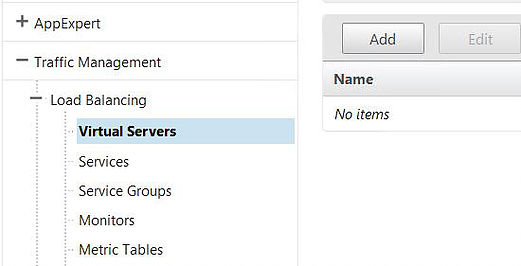
Enter a name, protocol, IP address, and port for your vServer. Click OK.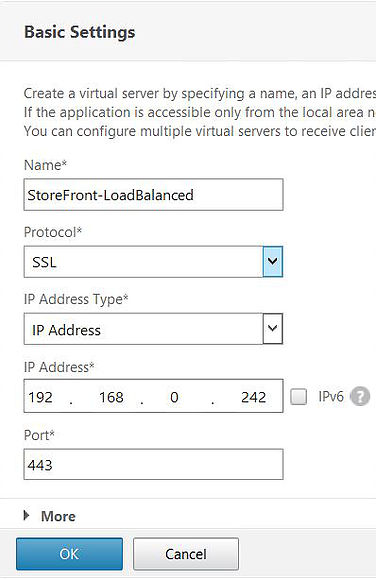
Click on No Load Balancing Virtual Server Service Binding.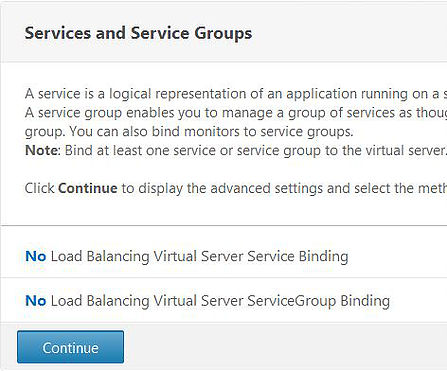
Click Click to select.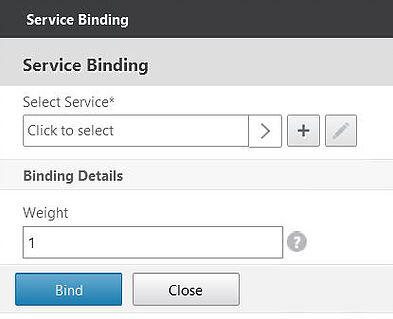
Select the two services created earlier for each StoreFront server. Click Select.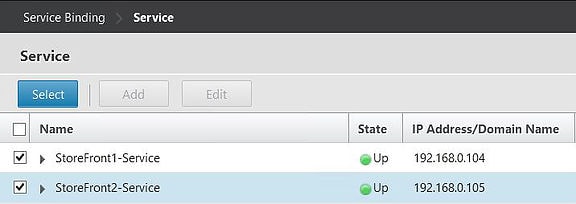
Click Bind.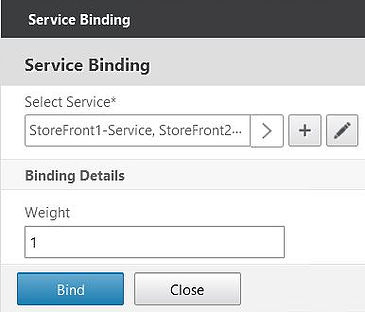
The service members are now bound to the vServer. Click Continue.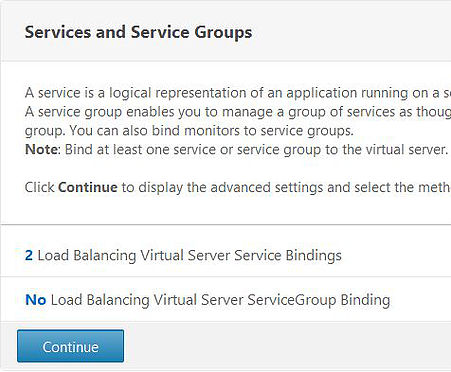
Cick on No Server Certificate. We need to bind a certificate that matches the hostname we will use for our vServer, which resolves to the VIP of the vServer.
Click on Click to select.
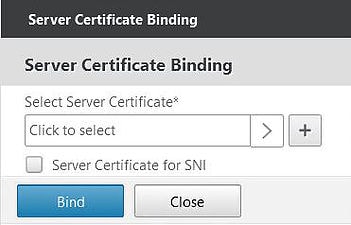
Click on StoreFrontCertificate. Obviously here your certificate will be called something different. Click Select.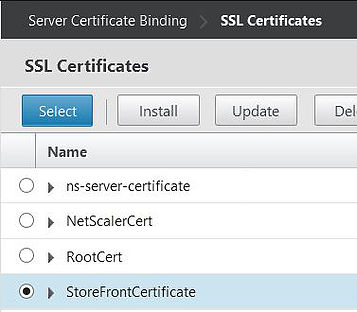
Click Bind.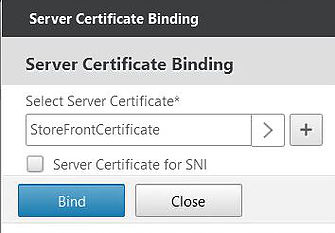
The StoreFront certificate has now been attached to the vServer. Click Continue.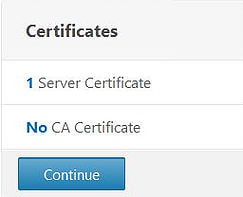
Expand Method and Persistence. A load balancing method and persistence type must be defined.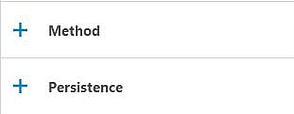
Under method select ROUNDROBIN. You can also choose other methods such as LEASTCONNECTION which would normally be my preferred choice however for this demo I am selecting ROUNDROBIN. I’ll be able to test the Round Robin feature later to make sure load balancing is working as expected. Click OK.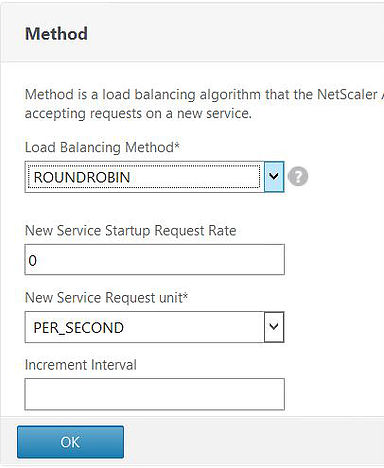
Under Persistence choose SOURCEIP.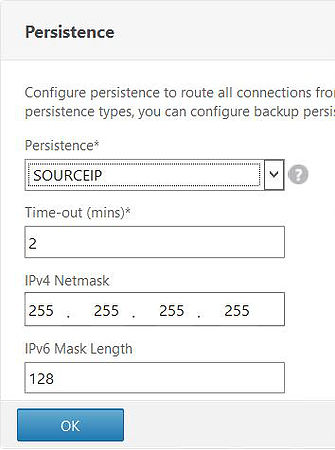
Click Done.![]()
The new StoreFront vServer is up and online.
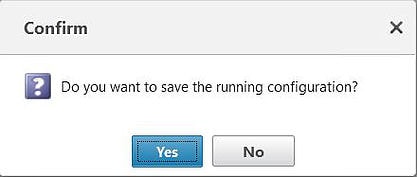
Save your running configuration.![]()
Ensure you have an internal DNS A record pointing to the StoreFront Load Balanced vServer VIP. This is part of the URL that users will use to connect to StoreFront/Receiver for Web. This hostname A record must match the subject name of the certificate attached to the Load Balanced vServer.![]()
Now with DNS resolution in place enter the Receiver for Web address in to your web browser. Your connection request will be load balanced through NetScaler and Receiver for Web will display.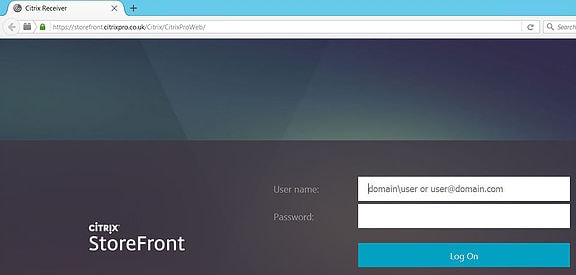
Once authenticated you can now access your published applications and desktops.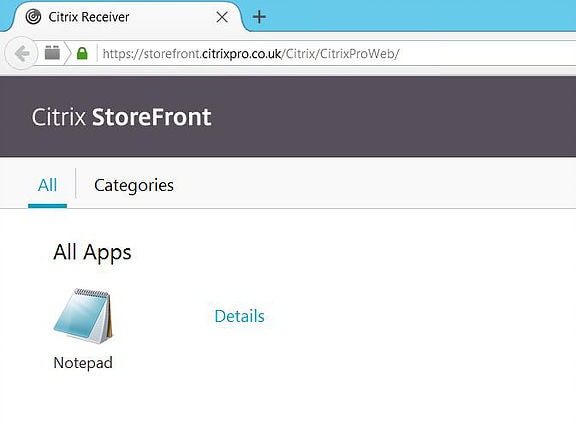
To test that the ROUNDROBIN load balancing method is working, you can enter the https://storefront.domain.com URL which shoud resolve to the default IIS web page by default hosted by either of your StoreFront servers. The first request sent me to StoreFront2. I edited the iis-85.png image file and wrote StoreFront2 on the image using paint and did the same over on StoreFront1. This made it easy to identify which server I was being directed to.
The next request directed me to StoreFront1 as expected.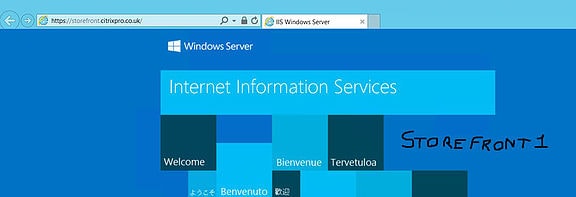
Alternatively on the NetScaler you can look at the statistics of your Load Balanced vServer and services. Keeping an eye on the Service Hits, Requests, and Responses will indicate which StoreFront server is taking the hit. Here you can see the difference between service hits on StoreFront 1 to StoreFront2, which is a result of persistency. If no persistency was set against general web servers for example, the service hits would in most cases be the same.
Anonymous
May 20, 2016thank you
VanT
February 23, 2017This is by far the most detailed Load Balancing guide! Thanks for your work mate!
Saaj
October 20, 2017I have configured storefront load balancing as described here and all services are up (green). However, my storefront does not load balance to the other server when one of the back end servers are down. My VIP will show as down with both back end servers in a down state. I have load balancing method configured as LEASTCONNECTION. I have the correct license with LB enabled and I am able to access storefront using the VIP.
George Spiers
October 20, 2017So you have two backend services and if one goes down it brings the entire LB vServer down? Are you using the default-tcp monitors or specific ones?
Saaj
October 21, 2017Thanks for responding George. We are not using the TCP monitors just the storefront monitors.
George Spiers
October 21, 2017When one service goes down, it brings the other service down too?
Saaj
October 23, 2017Yes, the entire VIP is showing as down and users are unable to access storefront via VIP. They can however still access via direct SF IP (once I change DNS).
George Spiers
October 23, 2017Go to System -> Licenses. Is there a green tick beside Load Balancing?
If yes, go to System -> Settings -> Configure Basic Features. Make sure Load Balancing is checked.
If yes, disable Service 1. Does it bring down Service 2? And vice-versa, does disabling Service 2 bring down Service 1? Also I mean disable the service at NetScaler level. Don’t actually bring the back-end server down.
Saaj
October 25, 2017The load balancing licenses are active and the feature is enabled.
Below are some interesting findings:
When I disable service group member 1 on NS, the VIP is shown as PARTIAL-UP and I am able to access SF and vice-versa. When I disable one of the servers on NS, the VIP is shown as UP and I can access SF. When I take one of the back-end servers down, the VIP is shown as DOWN and I am unable to access SF. I have created a HTTP monitor as well which shows as PARTIAL-UP when the back-end server is down but the storefront monitor is coming up as fully down.
Thanks.
George Spiers
October 25, 2017Do you only have one StoreFront monitor for both backend StoreFront services and if so, have you entered an IP under “Destination IP”? If so, remove it.
Saaj
October 25, 2017If IIS is stopped on either server, the VIP is still UP. However I was unable to access SF using VIP when IIS was stopped on one of the servers. I could access with IIS off on the other server.
I have configured individual SF monitors for each server with their IP address in destination IP and port 443. Both servers are in the same service group and both monitors are up when VIP is up.
George Spiers
October 25, 2017You only need one monitor assigned to the Service Group. Create one single StoreFront monitor and do not include anything within Destination IP. Since the monitor is assigned to the Service Group, it knows which back-end services it should be probing. This should resolve your issue.
Saaj
October 25, 2017In fact I had just tried doing this after I sent my previous message. I have created a single SF monitor and assigned it to the service group but the issue still remains. The service, VIP all are up but still can’t access SF using VIP when one of the servers is down. All my monitors have the secure option selected and the name of the store specified under special parameters with check back end services option selected.
George Spiers
October 25, 2017Time to run through a process of elimination. Create a new LB vServer and bind the existing services to this and see if the new vServer also goes down when one service goes down. Also build two additional testing IIS servers, services and a new LB vServer for example and see if they experience the same issue.
George Spiers
October 25, 2017If you have two StoreFront servers in a Server Group, you create an LB vServer, Service Group and single StoreFront monitor attached to the Service Group. You do not experience this behaviour, it is not normal without extra configurations. I suggest you review your complete setup and possibly start again from scratch.
Mike
June 5, 2018Hi George,
I am having an issue with making XenApp Services URL / PNAgent Services to work with Netscaler load balancing. I have receiver installed in the published desktops and it is used for launching published apps and shortcuts are pushed to Desktops and Start Menu.
When I configure LB using HTTP, the receiver within the published desktop does not seem to want to connect to the XenApp Site.
Are you able to shed any light on the above.
George Spiers
June 5, 2018Hi Mike
What error do you get and why are you using PNAgent?
What URL are you entering in to Receiver? (state full URL)
Mike
June 6, 2018Hi George,
The error I am getting is Could not Start App There was problem connecting to the “Store”
It is not actually PNAgent, but the storefront XenApp Services support.
I configured a LB VIP and it is working fine for launching the apps and published XenApp desktop. In the published desktop we have receiver installed and configured for HTTP to prompt for username and password (not SSON). I have the receiver GPO configured with the (http:///citrix/store/discovery).
George Spiers
June 6, 2018Receiver doesn’t trust HTTP stores by default. On the published desktops, have you set ConnectionSecurityMode (REG_SZ) to Any via Registry?
Mike
June 7, 2018Yes, that is what I thought too. Someone else before me has configured the environment. I will check the setting, but it has been working so it must have been set.
Mike
June 8, 2018The problem was due to a mistake in the physical NSG box which has trunked VLANs and the traffic domain was not assigned to the LB Configuration settings. Previously, it was pointing to a NS Express appliance.
Max
January 7, 2020Hi George!
Why do you create 1 monitor for each storefront?
1 for both is not ok?
George Spiers
February 17, 2020I created individual services for each server but it is actually better to create a Service Group, and one monitor attached to the SG.
Pingback: Création du Monitor Storefront – Netscaler Master
Anonymous
May 19, 2020I appreciate your article. I used it as a supplement to the Citrix docs. It was the only article I found that outlined how to change the default monitor on the storefront servers from 8000 to 443. Thank you for your post George.
CS
May 31, 2021Hi George, i understand this post was created long ago. But i encountered “Cannot complete your request” error when accessing the storefront-LB URL after following your configuration steps above.
I have the server certificate created and installed in Netscaler’s Server Certificates using the storefront-LB URL that match the Based URL in my Storefront. Everything works ok but encounter “Cannot complete your request” error when trying to access the storefront-LB URL.
Did i missed out any configurations that i need to configure in my storefront servers?
Thanks in advance!