MFA/Azure Multi Factor Authentication (previously PhoneFactor) is a multi-factor authentication technology that can be used with IIS, VPNs, OWA, ADFS, Office 365 and NetScaler to name a few using either the LDAP or RADIUS protocols from Azure cloud or on-premise. MFA has the ability to verify a users identity by calling their phone, texting their phone or using an app for verification. Using a phone for the second factor allows you to make use of something everyone will likely already have without additional bits of hardware whilst making it a great deal harder for attackers to break into accounts.
MFA can be deployed on-permise using the cloud service for second factor authentication which I will show today or fully served from the Azure public cloud. Azure Multi-Factor Authentication is available free of charge for Office 365 users and Azure administrators to protect log ons to the Azure management portal. MFA itself can be purchased as a standalone license which contains the most features and is bundled with Azure Active Directory Premium or the Enterprise Mobility Suite.
Two deployment methods for MFA:
- On premise – Use on-premise if your users are located on-permise in Active Directory and you want to use MFA for on-permise VPN, NetScaler Gateway, Remote Desktop Gateway etc.
- Azure cloud – Use cloud if your users are in Azure Active Directory and only have to protect services in the cloud.
MFA System Requirements:
- 200MB hard disk space.
- 1GB RAM or more.
- Windows Server 2008 or greater server OS
- Windows 7 or greater client OS
- .NET 4.0.
- IIS 7.0 or greater if installing MFA User Portal or web service SDK.
- ASP.NET & IIS 6 metabase compatibility IIS 7.0+ features if installing MFA User Portal.
- Port 443 outbound to https://pfd.phonefactor.net, https://pfd2.phonefactor.net and https://css.phonefactor.net.
♣ Download MFA
♣ Install MFA
♣ Configure MFA for two-factor with NetScaler
♣ Configure NetScaler for two-factor with MFA
♣ MFA Secure LDAP
♣ Add Second MFA Server
♣ NetScaler MFA vServer Configuration
♣ Deploying the MFA User Portal
♣ One Time Bypass
♣ Deploying the MFA Mobile App
Downloading MFA
You can download the MFA software for an on-premise install either via service settings or by clicking manage on an MFA Authentication Provider. To download via service settings in the Azure portal you can navigate to your Active Directory instance and click on Try it now under Get Azure AD Premium if you do not already have a license and want to trial the software.
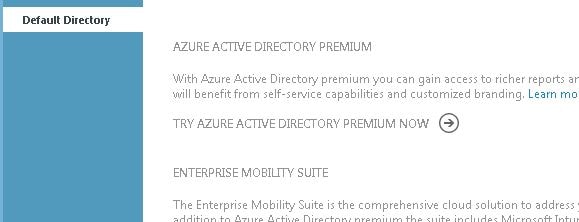
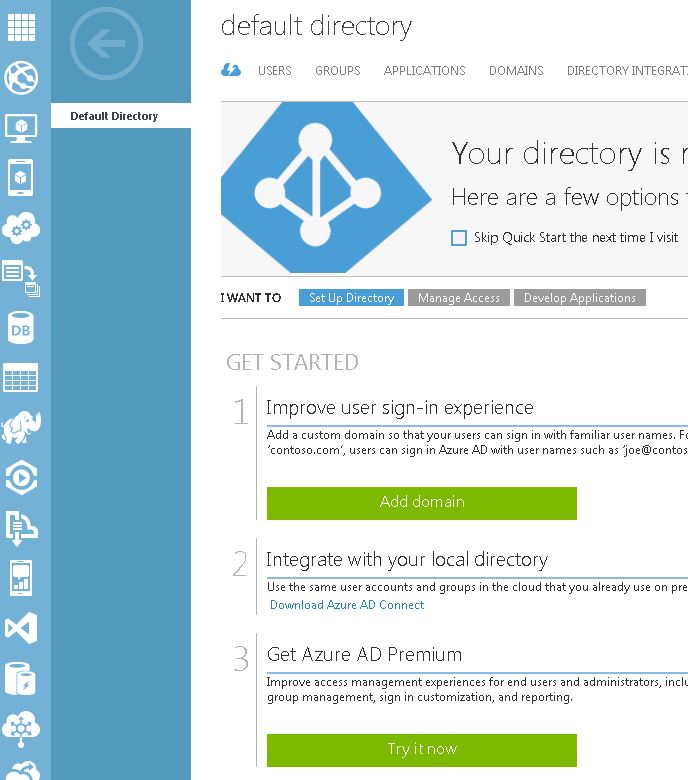 Click Try Azure Active Directory Premium Now.
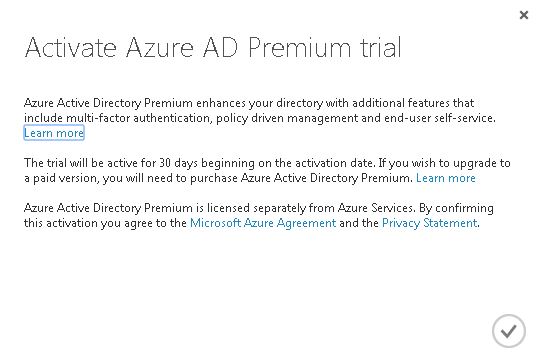
  Click the tick icon.
  Now click on Microsoft Azure Active Directory Premium.
  Click Enable directory features.
 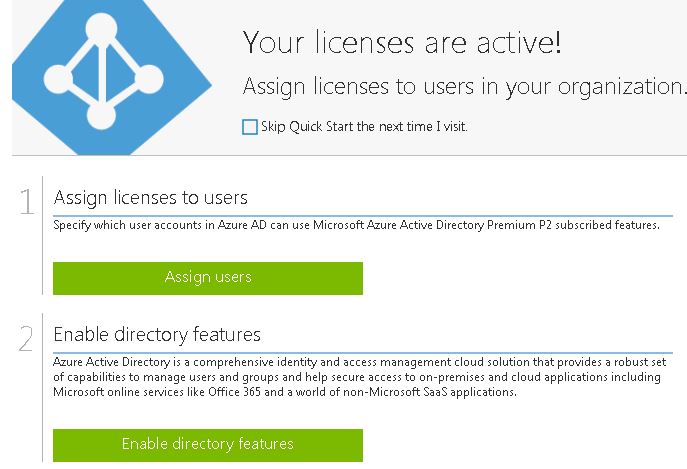 Click Manage service settings.
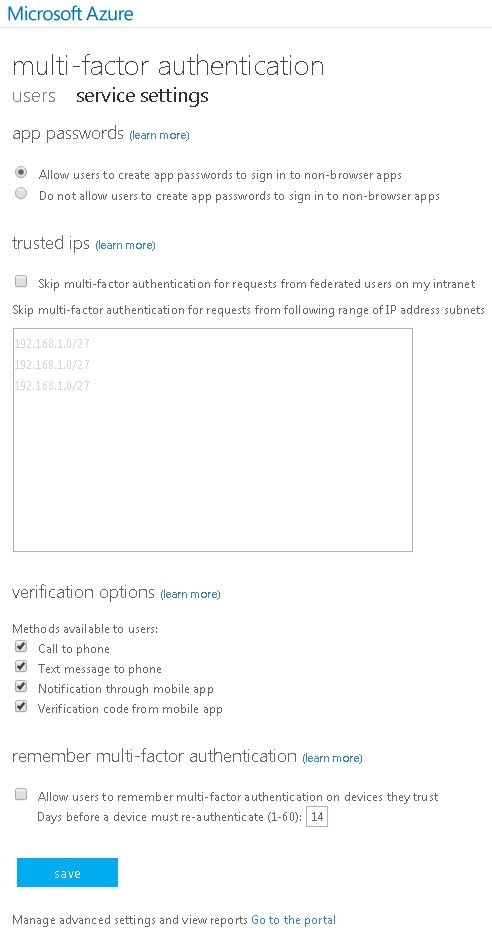
 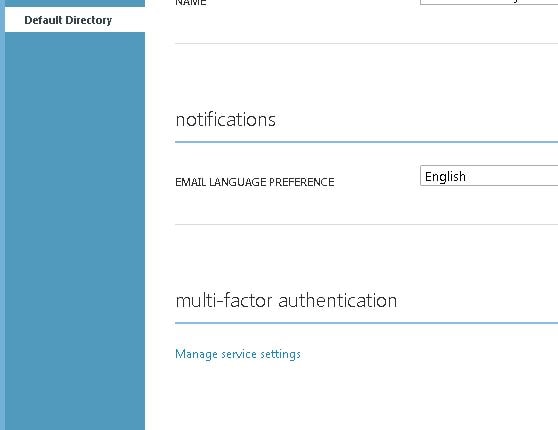 Click Go to the portal.
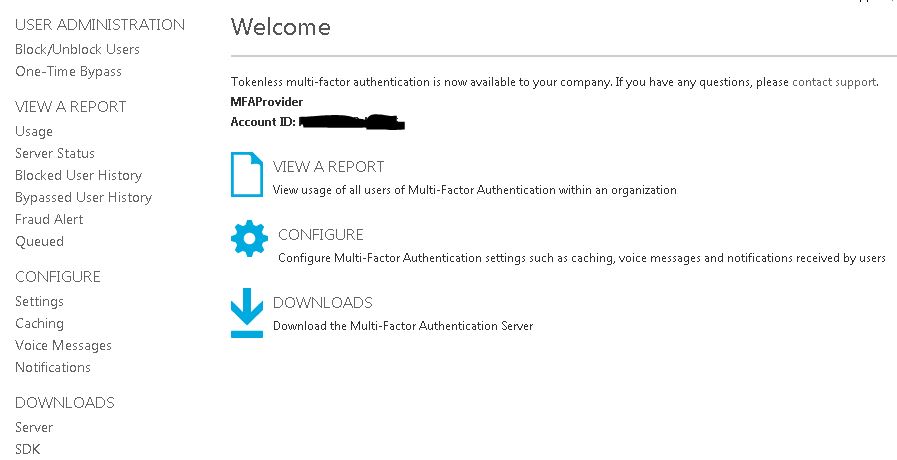
  Click Downloads.
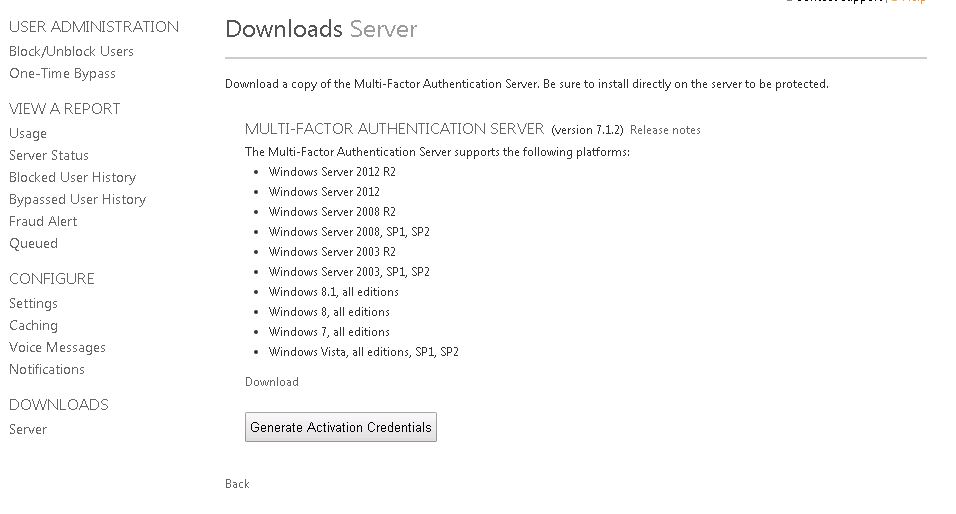
  Click Download.
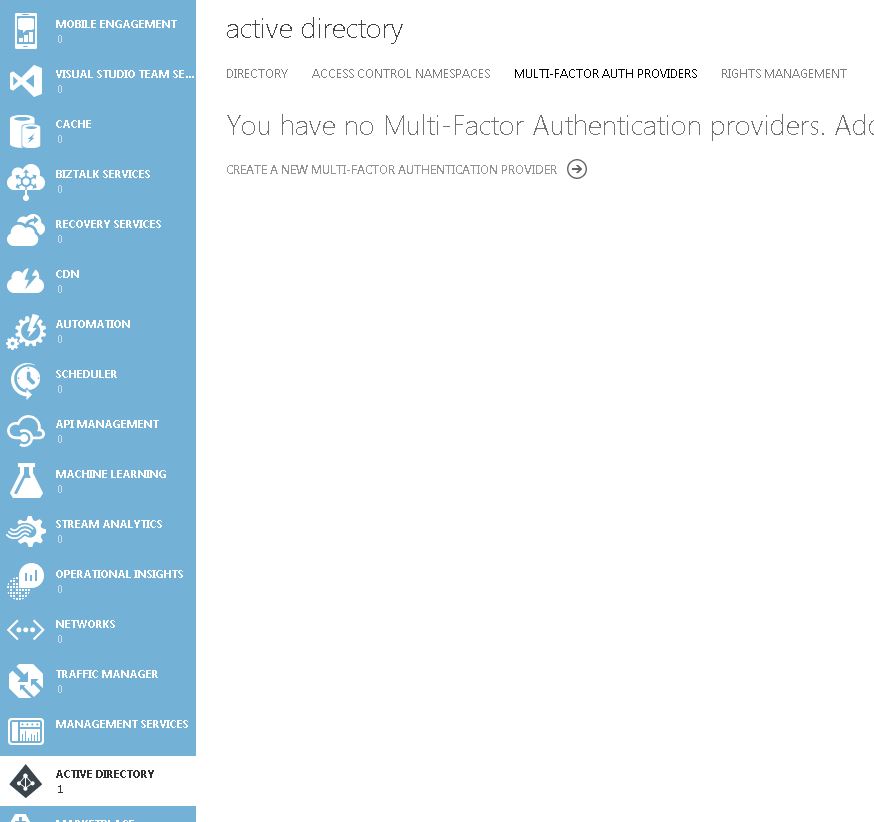
  Alternatively to download MFA by managing an Azure MFA Authentication Provider navigate to Active Directory -> Multi-Factor Auth Providers -> Create a new multi-factor authentication provider if you do not currently have one created.
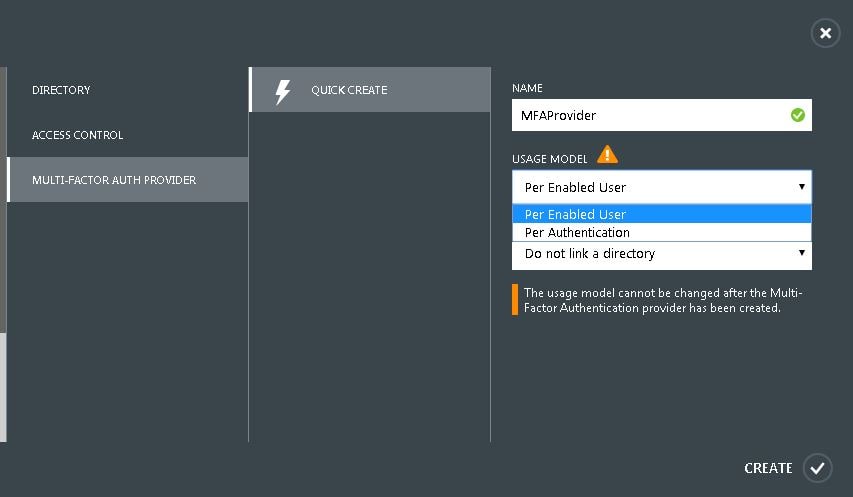
 Enter a name and choose your usage model. License usage can be either per enabled user or per authentication.
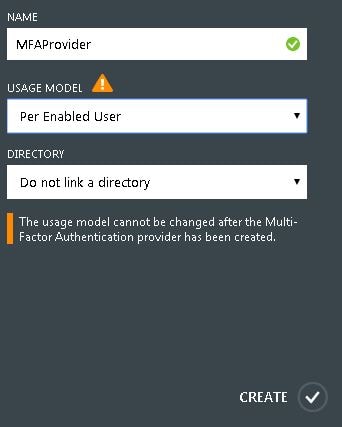
  Link the Authentication Provider to a directory if you use Azure to manage user accounts. Otherwise, select Do not link a directory -> Create.
  Now click Manage.
 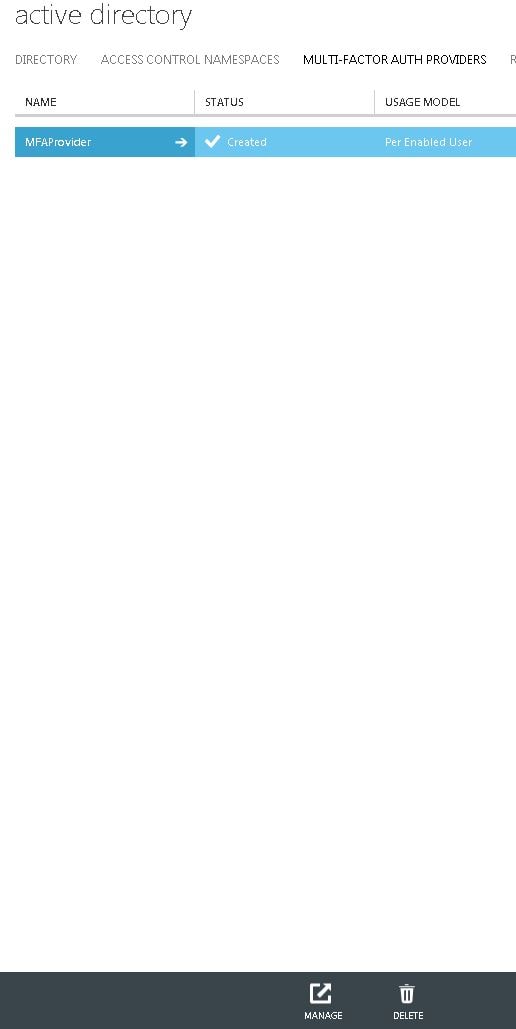 Click Downloads.
  The installation media is 121MB in size.
 ![]() On the MFA designated on-premise server launch the installation media.
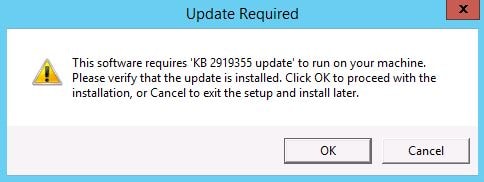
On the MFA designated on-premise server launch the installation media.  For Server 2012 R2 KB2919355 is a prerequisite. KB2919442 should be installed before installing KB2919355. Once installed click OK.
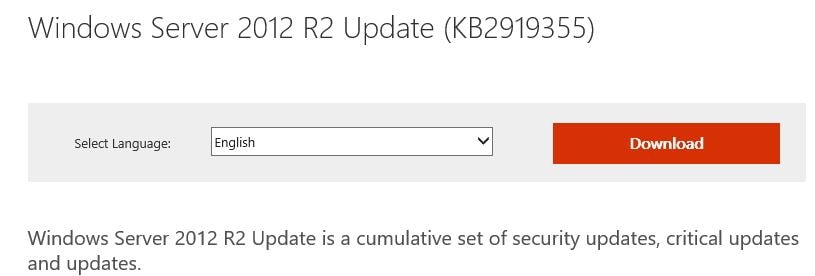
 Download update KB2919355 if required.
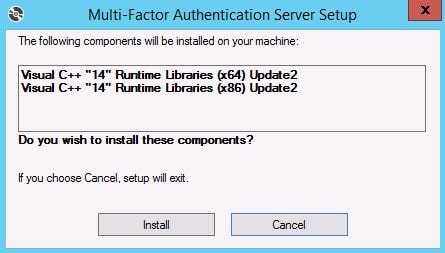
  Back over on the install wizard click Install to install Visual C++ software.
  Agree to the license terms and click Install.
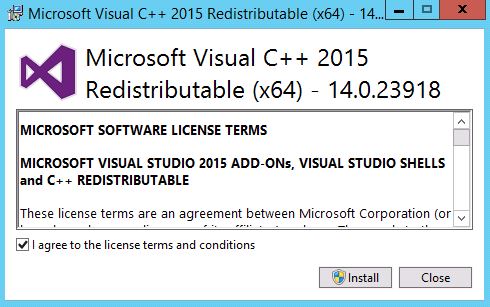 Click Close.
  Agree to the license terms and click Install.
 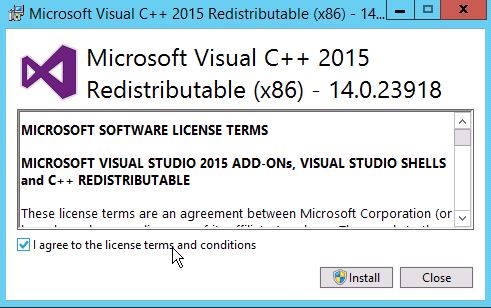 Click Close.
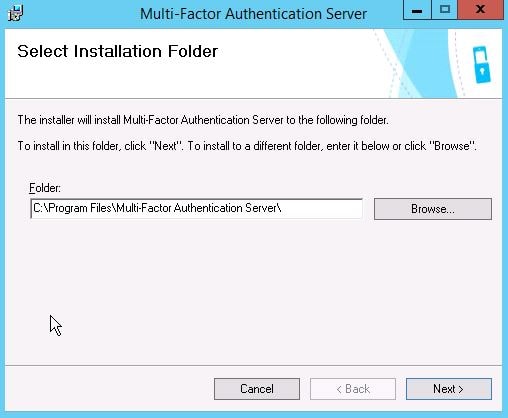
  Specify an installation folder for MFA or accept the default location. Click Next.
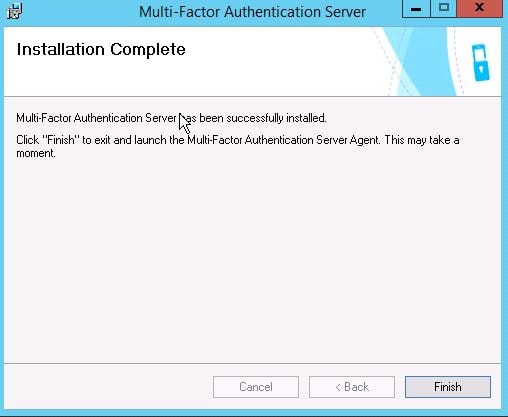
  Click Finish.
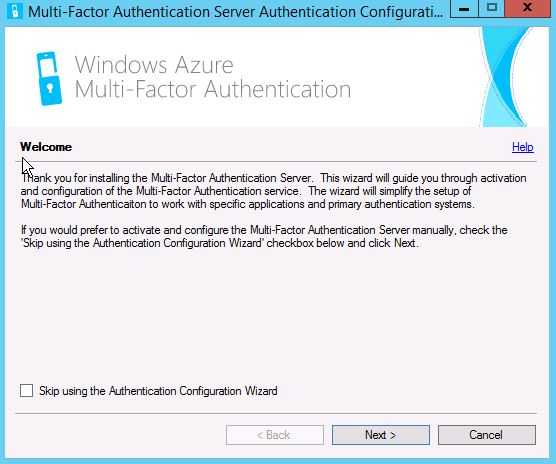
  Shortly after clicking finish the MFA configuration wizard appears. Click Next.
  Now to subscribe to MFA you need to enter activation credentials that can be generated from the Azure MFA portal.
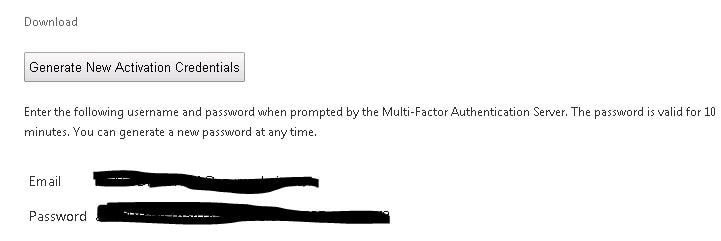
 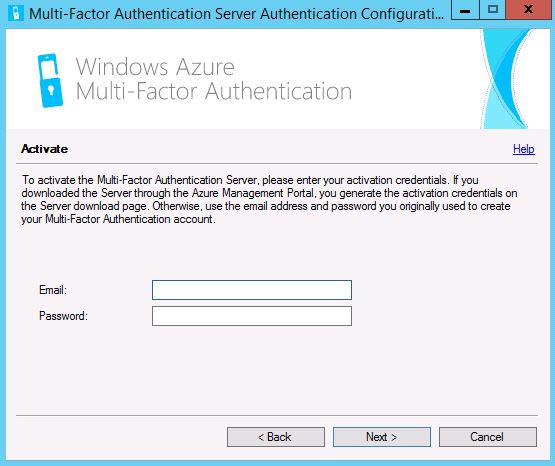 Navigate back to the downloads section for MFA and click Generate New Activation Credentials. Take a copy of the email and password. Passwords expire after 10 minutes however new credentials can be generated. Enter the credentials (email/password) in to the MFA configuration wizard and click Next.
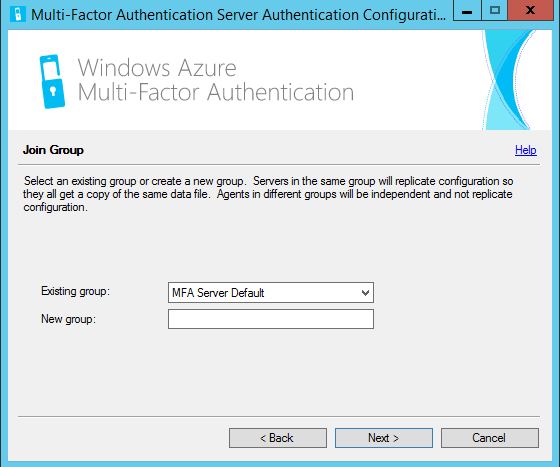
  Use the existing default group or create a new one. Servers in the same group replicate and peform failover which I will show later. Click Next.
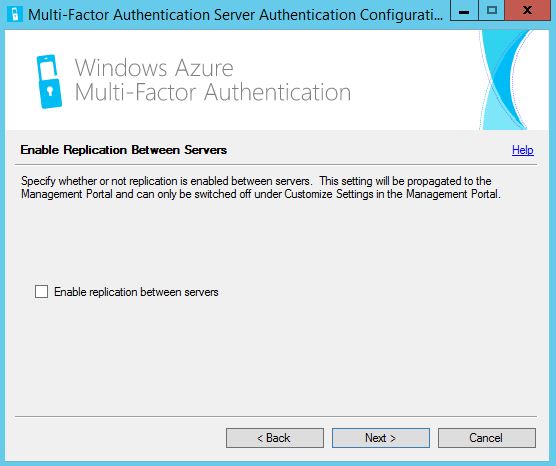
  Select Enable replication between servers if you are going to have multiple MFA on-premise servers for redundancy which I will.
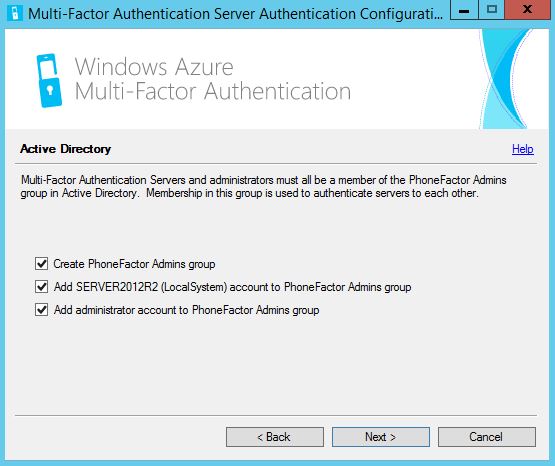
  Keep the default boxes checked to enable secure communications between MFA servers and click Next. Now for replication the requirements will be that MFA Servers are placed in a PhoneFactor Admins Active Directory Security Group and certificates are present on the boxes.
 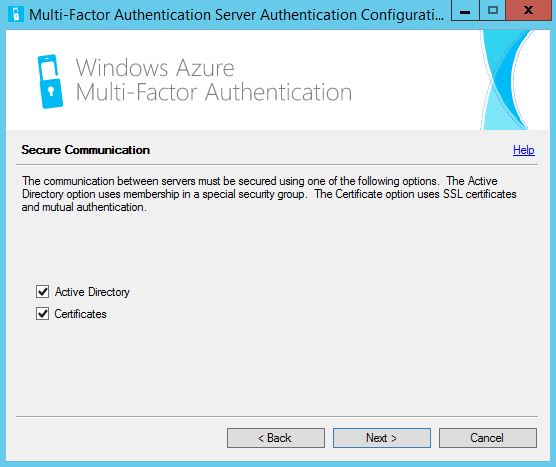 Keep the default boxes checked and click Next.
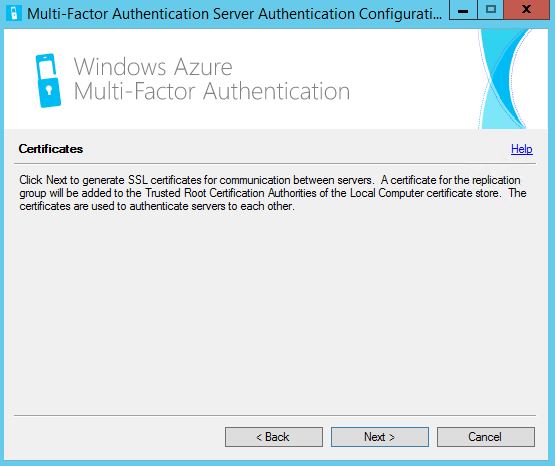
  Click Next. Certificates will be generated for secure communication between MFA servers.
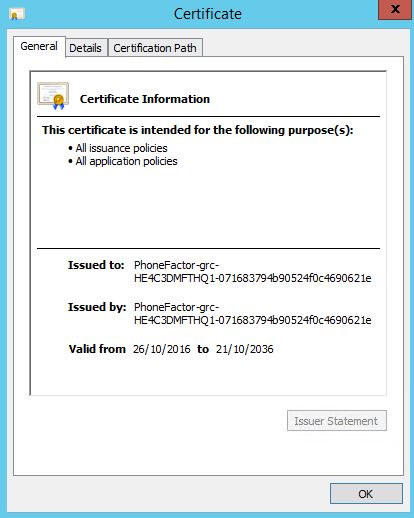
  This is an example of the certificate created on one of the servers.
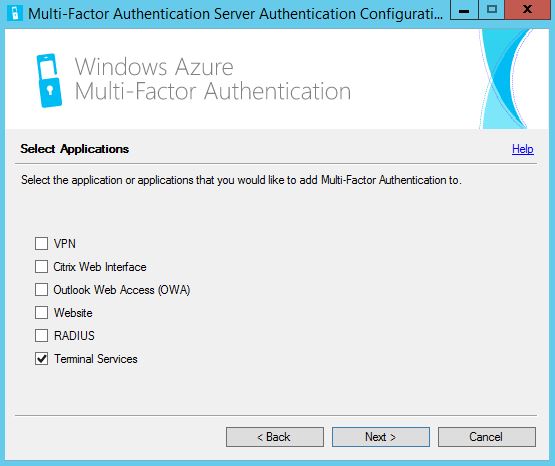
  Since NetScaler is not in the list we have to select some sort of deployment option to continue. Select Terminal Services -> Next.
 Click Next.
 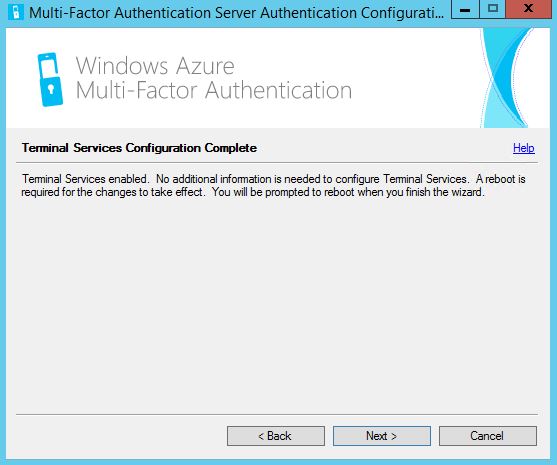 Click Finish. The MFA server will now restart.
 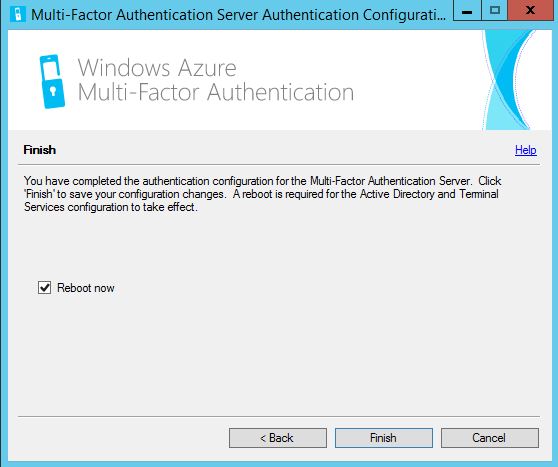 Once the MFA server has restarted launch the MFA administration console.
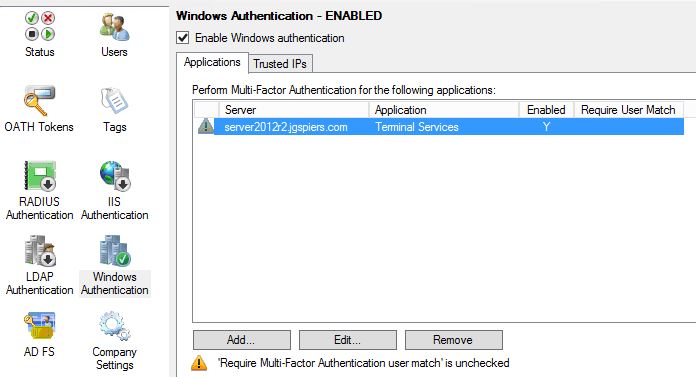
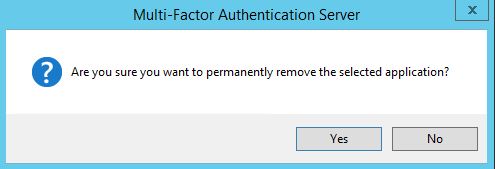
  Navigate to Windows Authentication and delete the terminal services server we added since we don’t actually need it.
 Click Yes.
  Navigate to LDAP Authentication, click Add. Enter your NetScaler NSIP (NetScaler IP) and a name. When performing load balancing through NetScaler we insert the SNIP here. By default Require Multi-Factor Authentication user match is checked and for security reasons should be left enabled. If you disable this any user not configured within MFA can potentially authenticate to NetScaler without providing two-factor authentication. If you leave this enabled, users must be imported in to MFA so the user match check can pass.
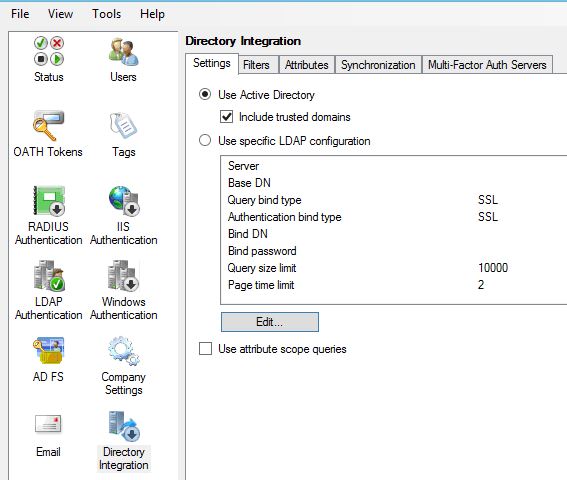
 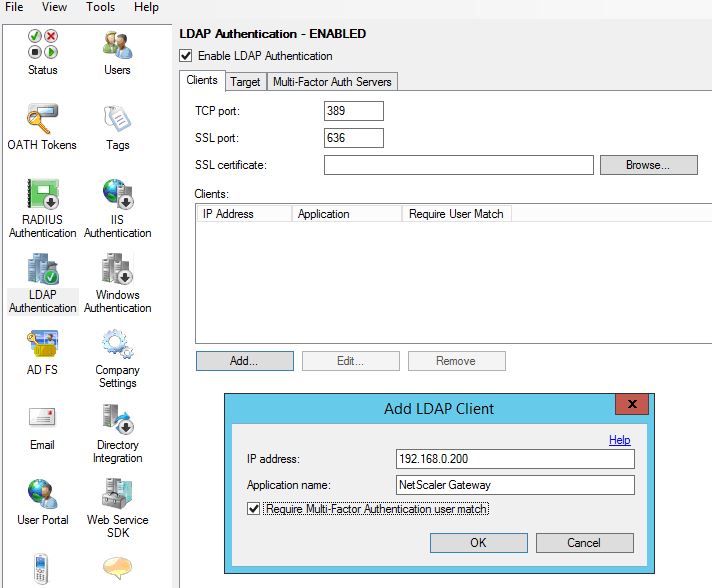 Next browse to Directory Integration. Uncheck Include trusted domains to increase performance if you have multiple domain trusts but won’t be importing users from those domains. For LDAP we must specify a specific LDAP configuration. Click on Edit.
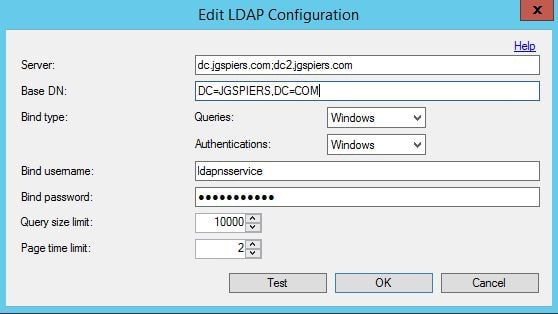
  Enter details as below. The Bind username should match the account used in your NetScaler Gateway LDAP authentication policy. Multiple Active Directory servers can be specified by making use of semicolons. Once the required information is entered click on Test.
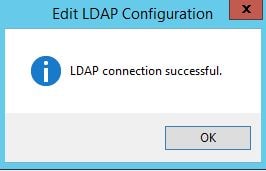
  You should get a success message. Click OK.
  Click on the Synchronization tab. Click to enable synchronization with Active Directory. You can click Add to add items you want to keep synchronized for example a Security Group. As members are added to the Security Group they are added as an MFA user providing automation or if their mobile phone number changes or user account details change those details are updated on the MFA database. You can also choose the Remove users no longer in Active Directory which is a good idea to keep the MFA users list clean.
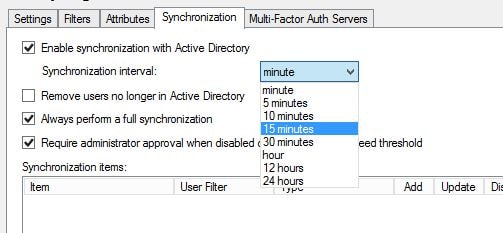
 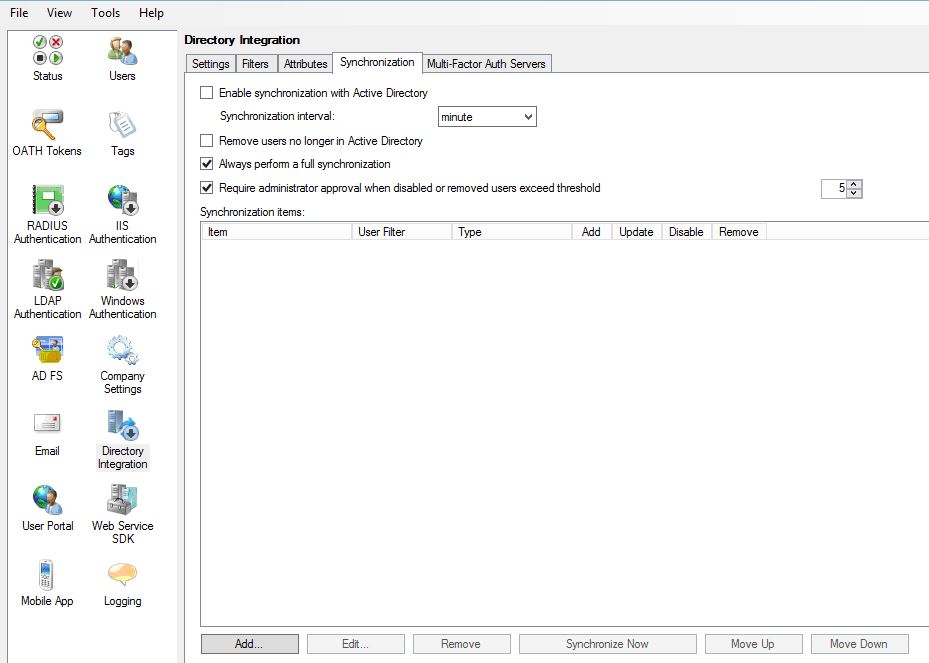 You can specify the synchronization interval as below.
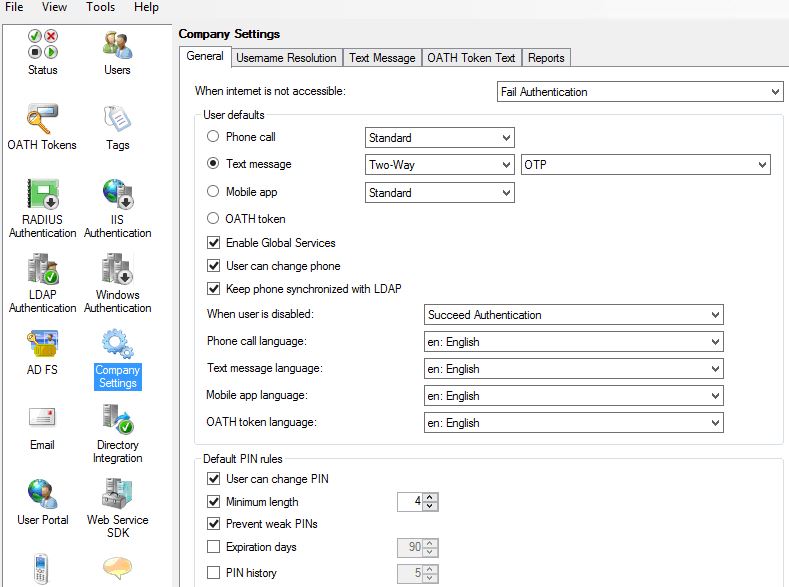
  Click on Company Settings. Here we can specify which type of secondary factor to use. For now I will select text message so that when users successfully enter LDAP credentials to the NetScaler they will need to respond to a one time password text message. Secondary factors can be changed for individual or groups of users so even though you are selecting the second factor here this doesn’t mean one setting for all.
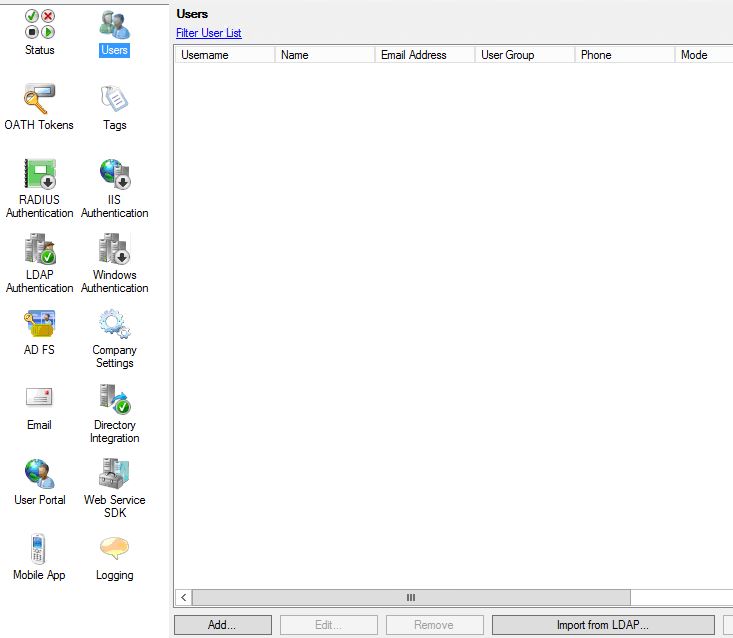
 Click on Users. We need to add users to MFA so that the can use multi-factor authentication. It is also required to add the service account used in your NetScaler LDAP policy to make bind connections to LDAP. Click on Import from LDAP.
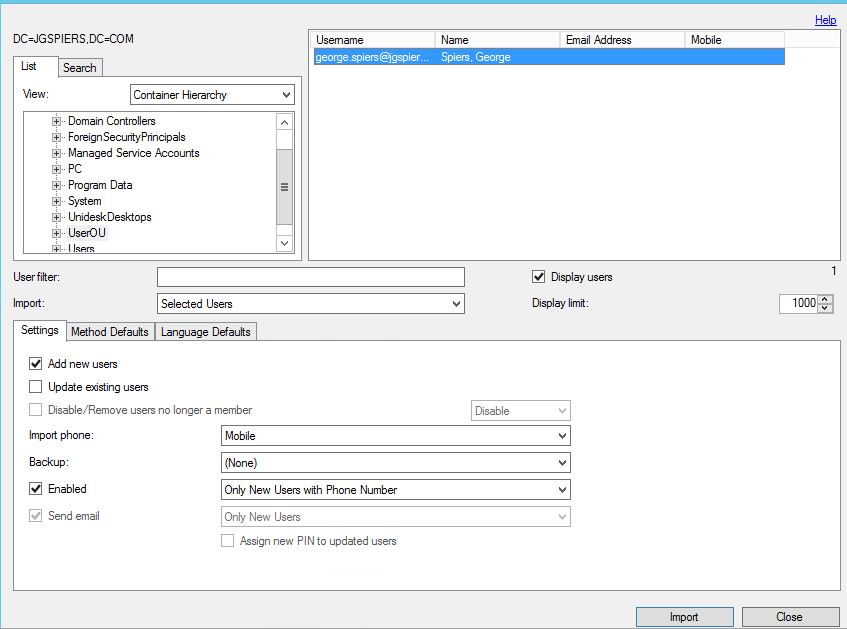
  Here you can browse the directory structure and select multiple users to import. I am going to import one user account by highlighting the user and clicking Import. If you click on the Method Defaults tab you can choose which second factor of authentication that user should be prompted for, otherwise the default factor you choose earlier applies.
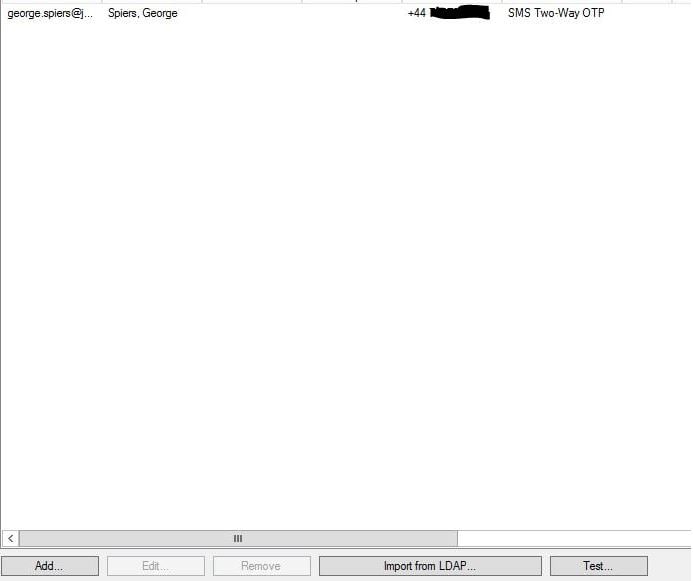
  The mobile numer from Active Directory is read and displayed in MFA. Note that in Active Directory you must specify +44 in the mobile attribute for MFA to select the correct country code. Otherwise, the default United States +1 country code will be used.
 To test multi-factor authentication click on the Test button.
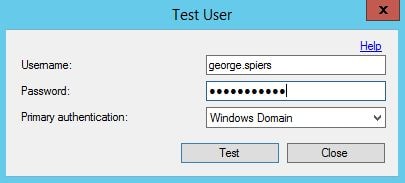
  Enter an MFA username and password. Click Test. You should receive a text message, reply with the OTP.
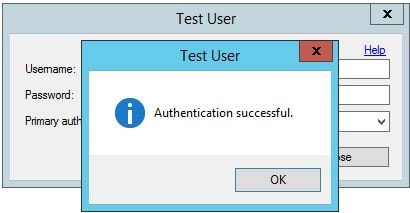
  If all is good you will receive a success message.
  Now because NetScaler (the LDAP client) uses a bind account for LDAP we need to import it to MFA. You can use the search function, another way to locate and import users in to MFA.
 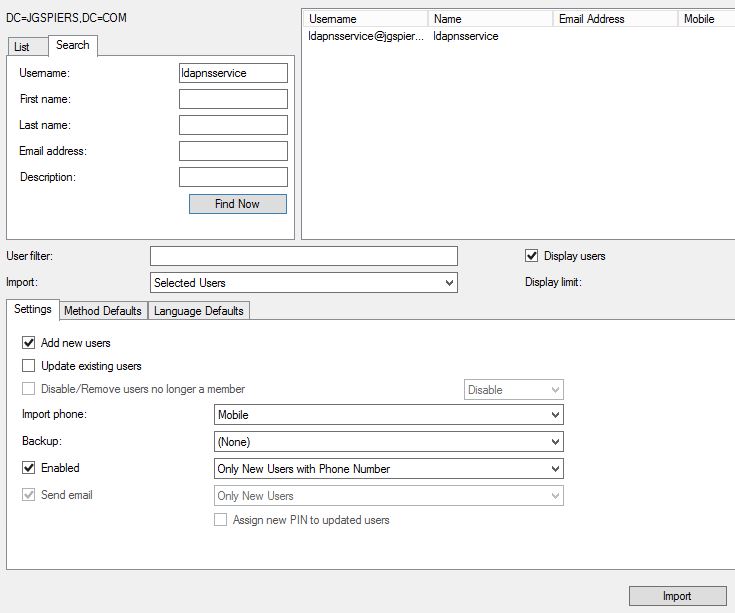 Notice that this bind account is disabled and must remain disabled.
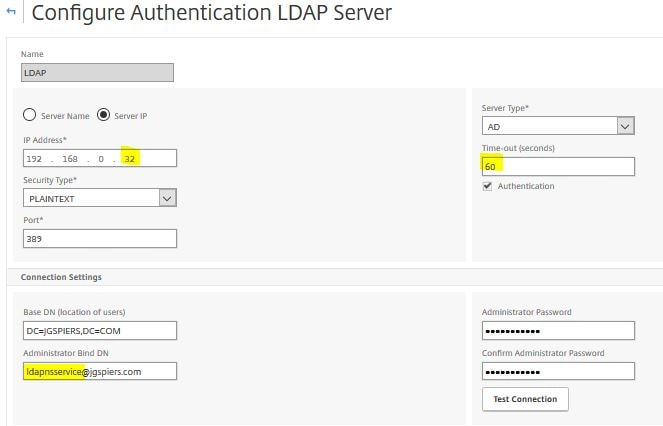
 The NetScaler needs some configuration before multi-factor authentication will work. Modify the existing LDAP authentication policy. Enter the MFA server IP address (or load balanced address) and increase the time-out to something reasonable giving users time to reply to the text message or other form of authentication. Make sure the LDAP bind DN matches the user account specified within MFA and the LDAP configuration.
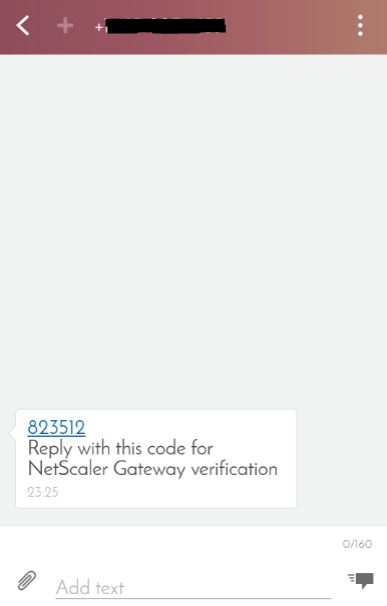
  The next time you authenticate to NetScaler Gateway using an MFA configured user account you will receive a text message like below, respond and shortly after you should gain access to NetScaler Gateway.
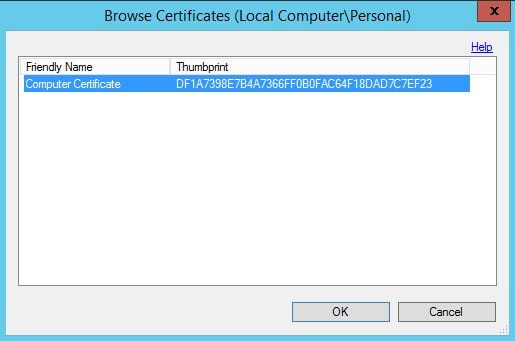
  To enable Secure LDAP you need to import a certificate on all MFA servers and select that certificate through the MFA console. The NetScaler also has to trust the certificate. I am going to use a self-signed certificate generated from ADCS. Navigate to LDAP Authentication and click Browse beside SSL certificate.
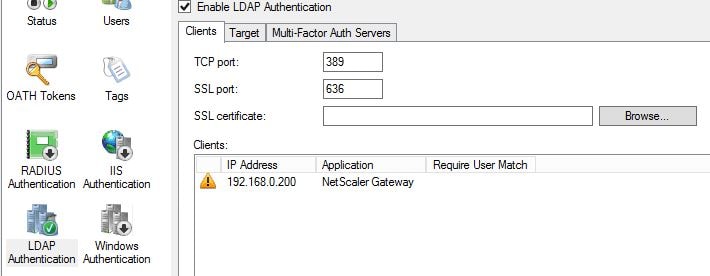 Select the computer certificate that matches the MFA server FQDN. Click OK.
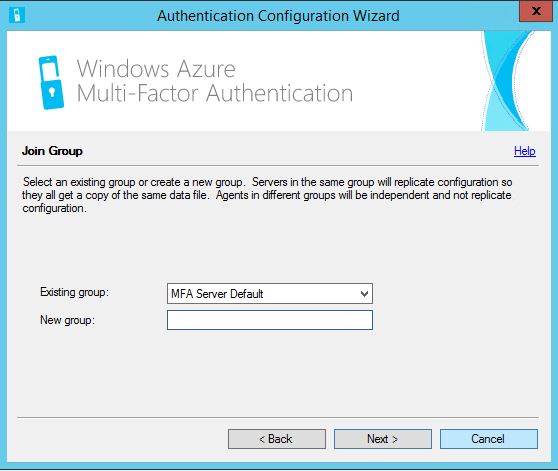
  To add a second MFA server to an MFA server group launch the installation media on the second MFA server, run through the configuration and join to an existing group as below.
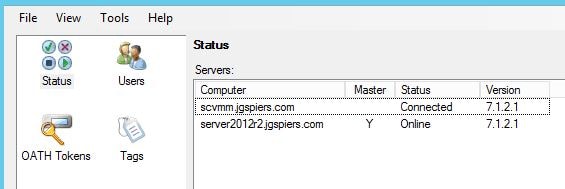
  Once complete all configuration should replicate to the second MFA server. You can now see both servers as below including which server is the master and which one is slave. Keep in mind that servers participating in replication must either have a certificate generated for replication and/or be members of the PhoneFactor Admins Active Directory group.
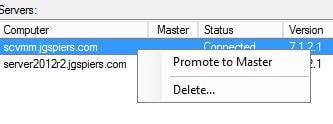
 To promote a slave server to master simply right-click the slave and select Promote to Master.
  If an MFA server goes offline your slave server will still accept LDAP authentication requests so authentication will not be affected. If you need to use the MFA administration console you launch the console via the slave MFA server. The slave server tries to contact the master (now offline) MFA server. After realising that contact cannot be made to the master you are presented with the option of promoting the slave to master. Keep in mind the warning that comes with promoting a slave to master. Click Yes.
 Click Yes again.
  Now the slave server has been promoted to master. MF01 shows as Not Connected as it is offline.
  Authentication requests should be directed fully to MF02. You can use a Load Balanced vServer on NetScaler to load balance authentication across both MFA servers and provide high availability with back-end service monitoring. When using Load Balancing add the SNIP address of the NetScaler to the MFA Console as a client under LDAP Authentication.
 As you can see MF01 is marked as down because the TCP 636 probes are failing since the server is offline.
  Once MF01 is back online the probes succeed and the service state is marked UP.
  You can deploy an MFA User Portal allowing users to enroll for MFA themselves and manage aspects of their account. The portal runs on IIS within a Windows Server OS and is configurable within the MFA administration console. Review the software pre-requisites for the MFA User Portal at the top of this guide. The MFA User Portal can be installed on an MFA server itself or on separate server(s).
To deploy the MFA User Portal on an existing MFA server simply launch the console, navigate to User Portal and click Install User Portal…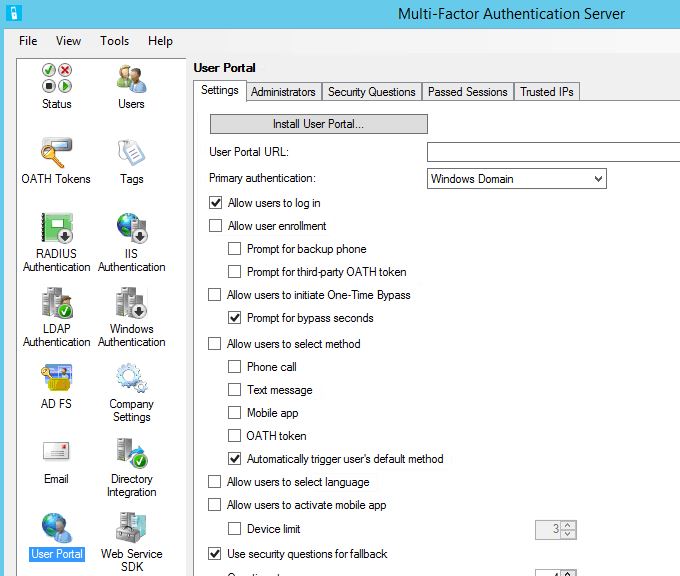 Click Next. If you do not have IIS installed, you will be prompted to do so before continuing.
 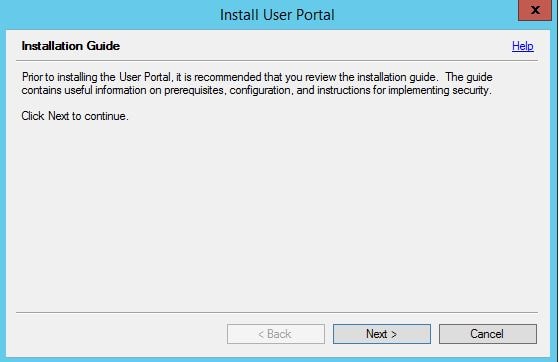 Click Next. This step creates an Active Directory user account and adds that acount to the PhoneFactor Admins group.
 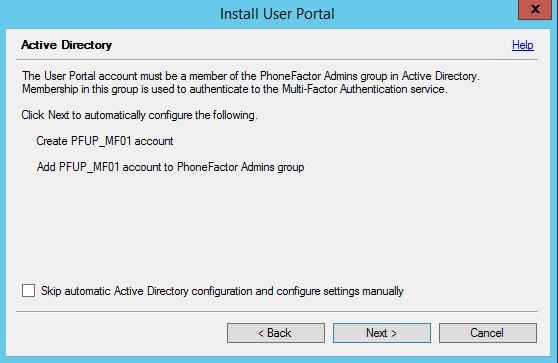 Click Next.
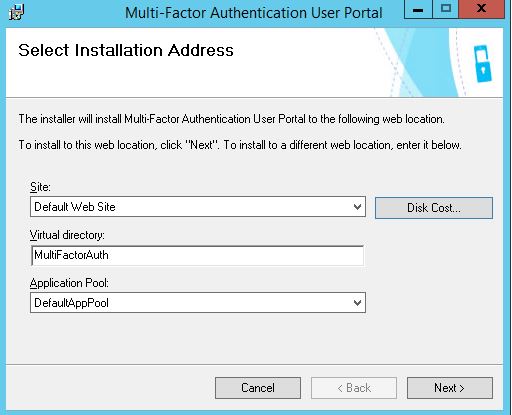
 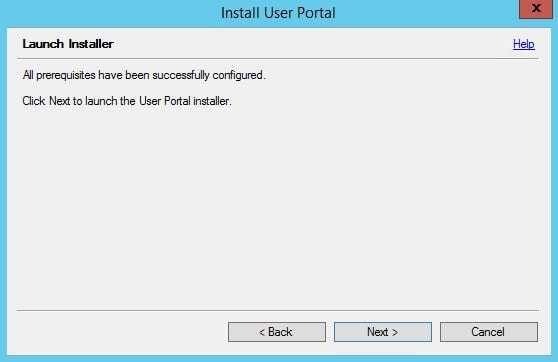 Choose the default Site, Virtual Directory name and Application Pool or choose your own. Click Next.
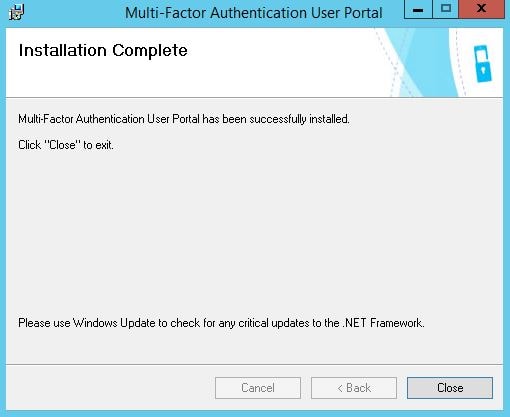
  Click Close.
  Launching the User Portal with HTTP gives the following 403.4 – Forbidden error because we need to configure and enable an HTTPS binding against the site.
  Make sure an HTTPS binding exists for the site and a certificate is installed that will match the MFA User Portal URL.
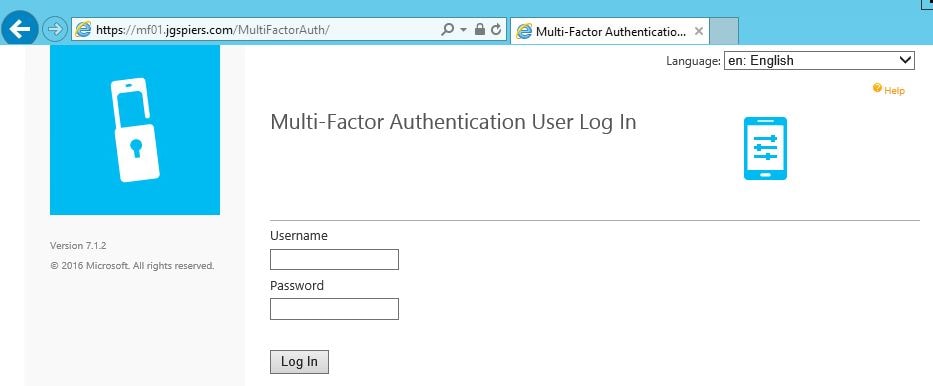
  Now we can browse to the MFA User Portal over HTTPS.
  Navigate back to the MFA Administration Console. There are a number of different options you can configure such as allowing users to select a method of secondary authentication when they log on to the User Portal. By default, Automatically trigger user’s default method is selected which will result in the user being challenged with the default secondary authentication method when they log on to the User Portal. In our case, this is text message verification. You can allow users to select their own method of secondary authentication so that when they log on to the User Portal options are given based on allowed authentication methods.
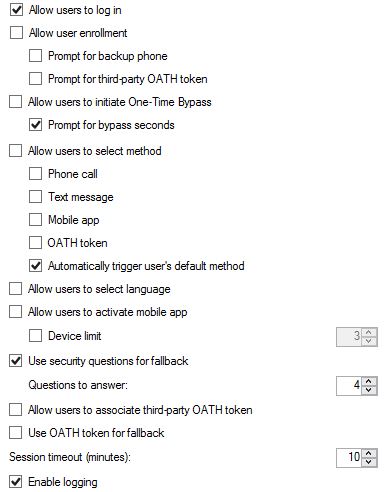 Tick Allow user enrollment so that users can log on to the User Portal and enrol themselves for muti-factor authentication.
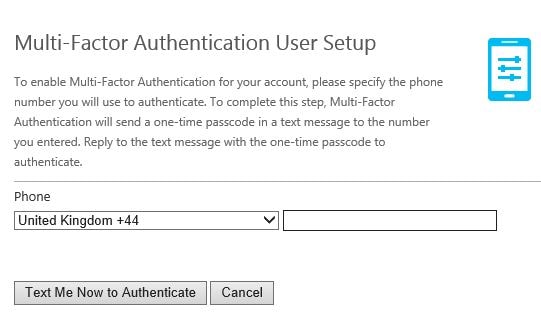
  As a user logs on to the User Portal for the first time with text message verification selected as default and they do not have a phone number associated with their account they are prompted to specify one and to authenticate using a text message to confirm the phone number they enter is owned by them. Enter a phone number and click Text Me Now to Authenticate.
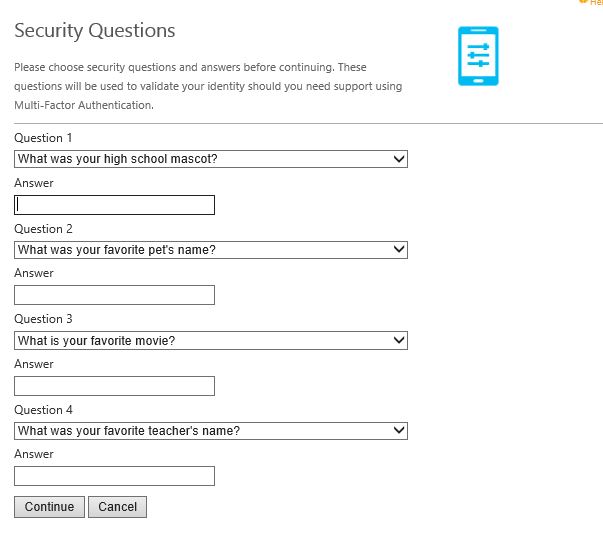
  Next you will be asked for a number of security questions. Security questions are used as a fallback if you fail authentication to the User Portal. Again security questions can be turned on or off. The user must specify answers to four security questions by default. Click Continue when ready.
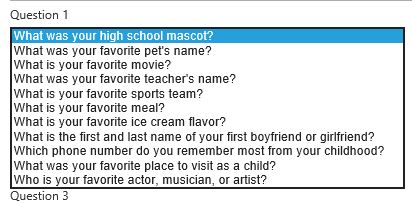
 You can use the drop down on any of the four questions to change them.
  Once security questions have been answered you are brought to the welcome screen. Your account is now configured to use multi-factor authentication. The below message can change based on what multi-factor authentication method the user is using e i.e. text message/phone call. Click on the Change Phone icon if you want to change your mobile number.
 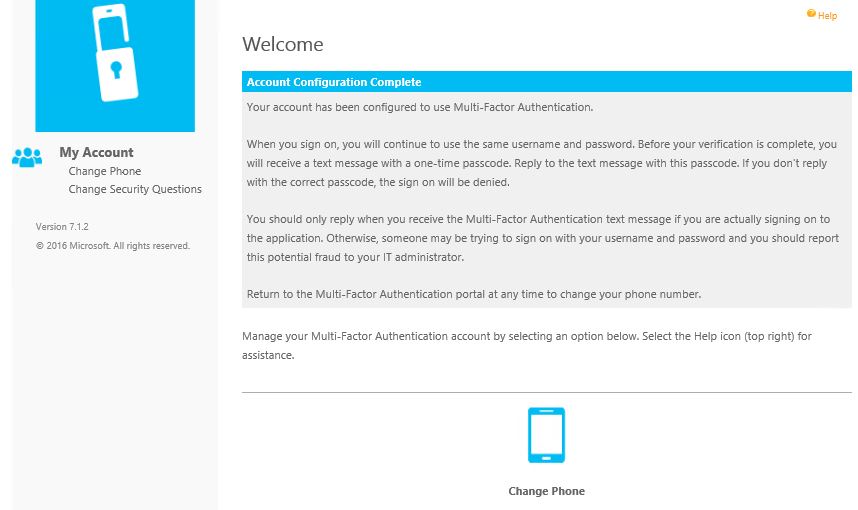 Click on Change Security Questions if you want to change any of your security questions.
  If you fail secondary authentication when logging on to the User Portal you are given the choice to log on by correctly answering your security questions.
 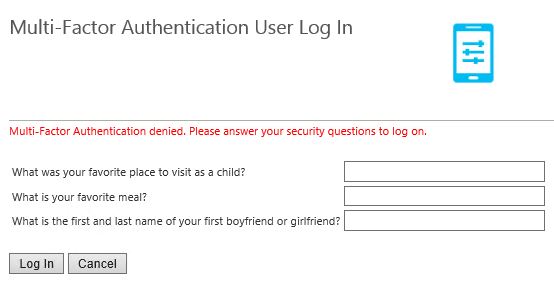 This can be turned off by unticking Use security questions for fallback in the MFA console. You can also specify how many questions a user must correctly answer (minimum 1, maximum 4).
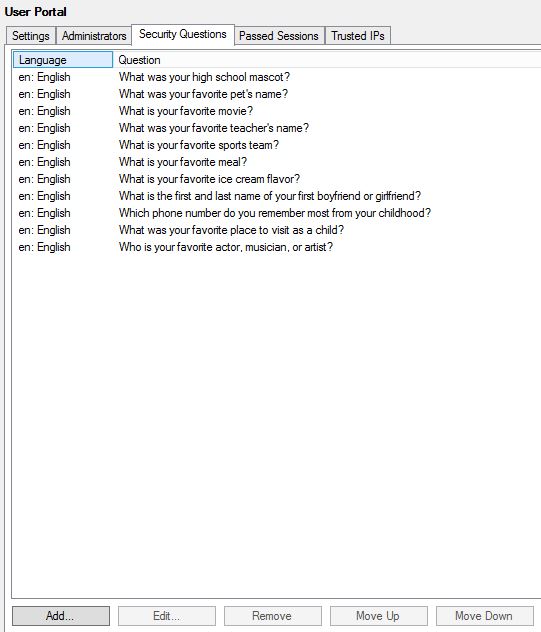
  You can add, edit, remove and change the order of questions by using the Security Questions tab within the MFA console.
  On the Trusted IPs tab click Add.
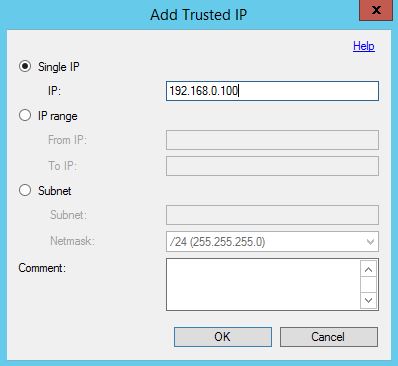
 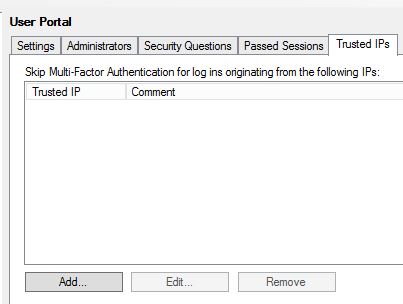 You can add single IPs, ranges or subnets meaning that IPs connecting to the User Portal are not challenged by a secondary authentication method as they are trusted. Instead these users only need to enter their Active Directory credentials.
  You can allow users to initiate One-Time Bypass by checking Allow users to initiate One-Time Bypass.
 Now users, within the User Portal, can initiate a one-time multi-factor authentication bypass and specify the number of seconds the bypass it valid for. If the user signs in to NetScaler Gateway for example within the next 300 seconds they will not be challenged with a second factor for authentication.
  Another authentication method which I have not talked about is achieved by using the MFA mobile app. Using the app you can simply tap an authenticate button or enter a pin along with tapping the button.
MFA mobile app system requirements:
- MFA v6.0+ used in your environment.
- MFA Mobile App web service installed on IIS 7 or higher and internet facing.
- ASP.NET v4.0.30319 installed, registered and set to allowed.
- IIS6 Metabase Compatibility IIS feature installed.
- MFA Mobile App web service accessible via public URL and secured with SSL certificate.
- The Mobile App portal must be able to communicate with the web service SDK using SSL meaning it must trust the certificate issued to the SDK server.
The MFA web service SDK must also be installed on your MFA server(s) to ensure communication between MFA servers and the Mobile Web app service is possible.
MFA web service SDK system requirements:
- Basic Authentication for Web Service SDK
- IIS6 Metabase Compatibility IIS feature installed.
- Web service SDK must be installed on IIS 7+ and secured with SSL certificate.
To get started install the Web Service SDK on all participating MFA servers. Launch the MFA console, navigate to Web Service SDK -> Install Web Service SDK.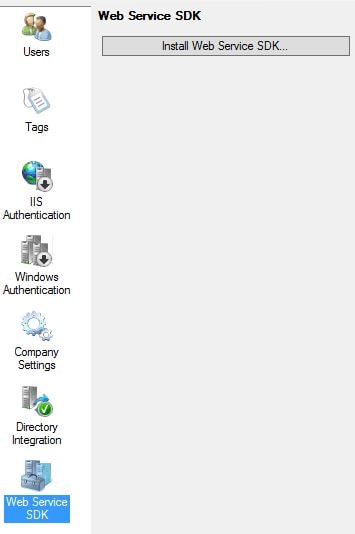 Click Next if you are happy with the default settings.
 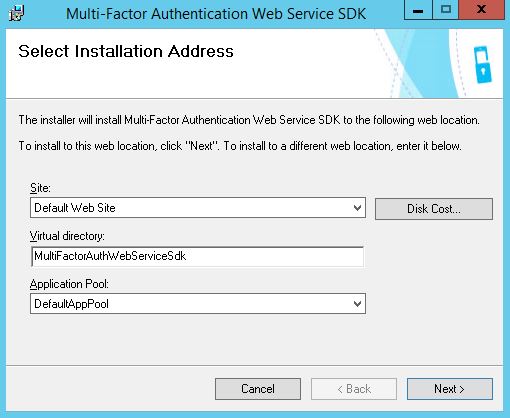 Click Close.
You must secure the SDK Web Service with an SSL certificate. This can be an internally issued certificate. The Web Portal front-end server must trust this certificate as both services will communicate over HTTPS. Both of my MFA servers that have the SDK Web Service installed will use an existing computer certificate, matching the FQDN of each respective server name.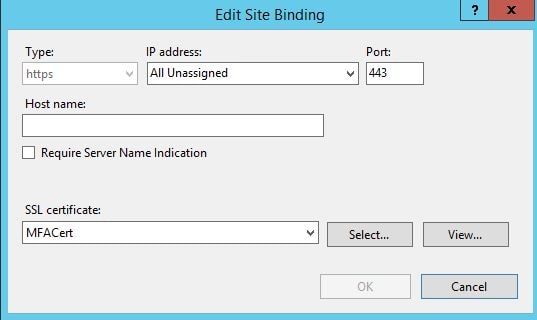 On one of the MFA servers navigate to C:\Program Files\Multi-Factor Authentication Server and copy MultiFactorAuthenticationMobileAppWebServiceSetup64.msi. This file must be copied to your Mobile App Web Service server.
 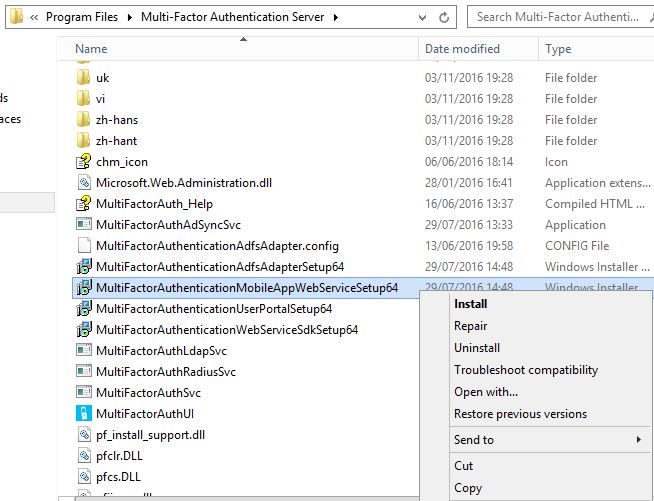 Launch the Mobile App installation media from the Mobile App Web Service server.
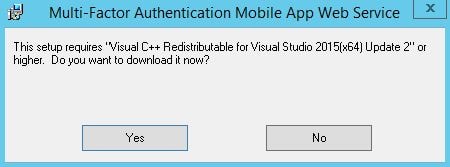
  Click Yes to download Visual C++ 64bit media. Download and run the installer.
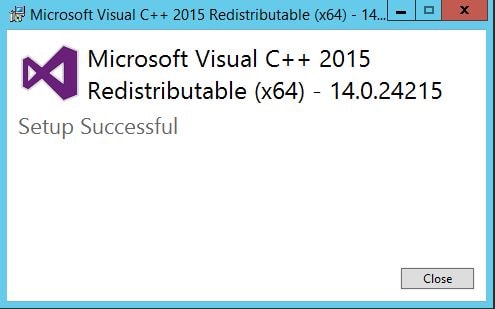
  Click Close. You will have to run the Mobile Web App installer again.
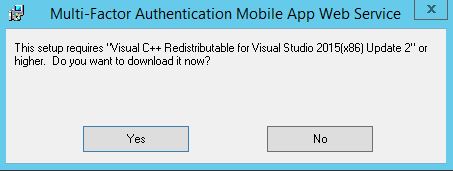
  Click Yes to download the Visual C++ 32bit media.
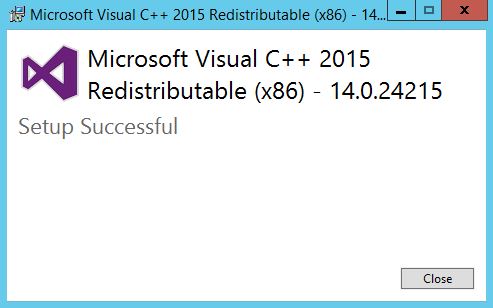
  Click Close.
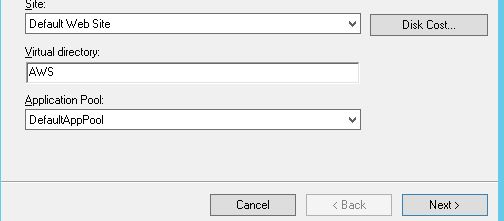
  Now the installation wizard allows you to configure IIS settings. You will want to trim the virtual directory name as potentially users may have to type this in as part of the URL when configuring the Microsoft Authenticator app.
 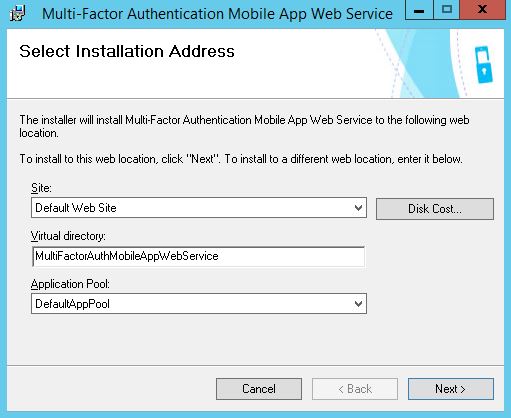 Trim the Virtual Directory to something simple. Click Next.
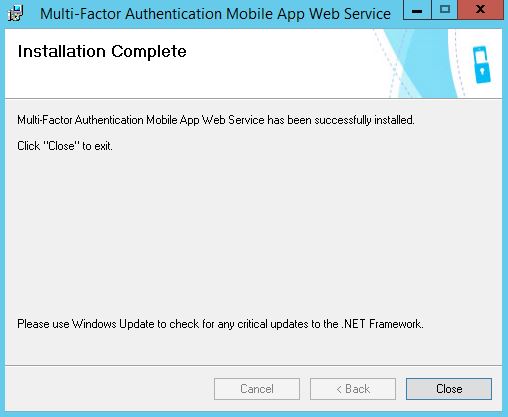
  Click Close.
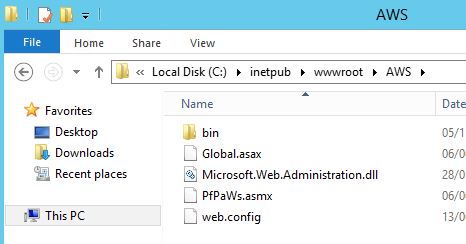
  On the Web App Service server, navigate to C:\inetpub\wwwroot\AWS and edit web.config.
  Look for the section containing SDK_AUTHENTICATION_USERNAME and SDK_AUTHENTICATION_PASSWORD. These fields should be completed to include the username and password of an Active Directory service account used to communicate back to the SDK web service.
  Insert DOMAIN\username and password as below inside the quotation marks.
  Next find the section containing PfWsSdk.
  Remove https://www.contoso.com/ replacing it with the server name hosting your Web Service SDK. This may be a load balanced address if you have this configuration. Now save web.config.
  Secure the Web App Service with a public certificate.
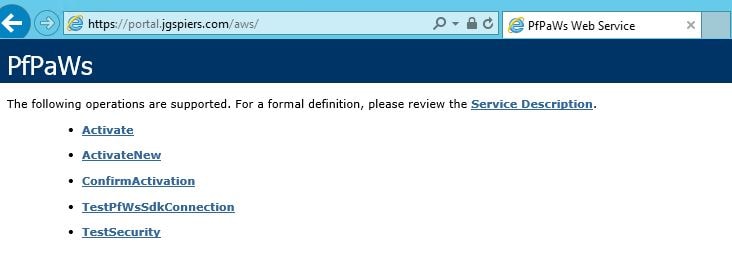
  Make sure you can browse to the publicly accessible URL without any certificate warnings.
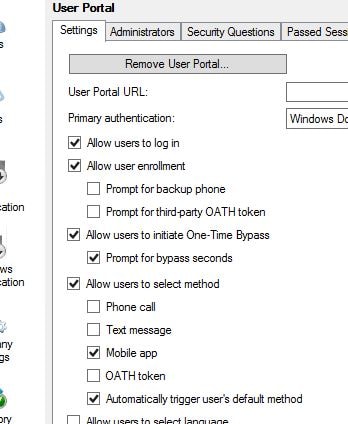
  Now on your MFA server navigate to the MFA console and under User Portal -> Allow users to select method you can select Mobile app which allows users to enrol their mobile phone for mobile app authentication. The mobile app authentication can also be a mandatory authentication method by changing the secondary authentication default in Company Settings or within the users own properties. Users can also select their own authentication method within the User Portal.
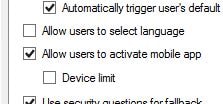
  Select Allow users to activate mobile app. You can limit the amount of devices a user can activate using Device limit.
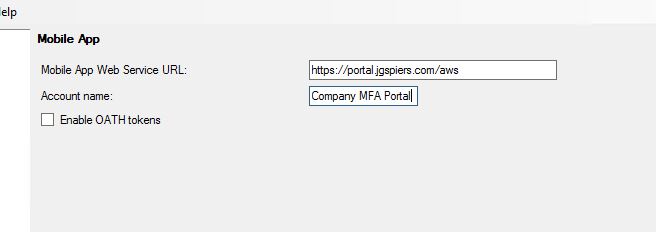
  In the MFA console, navigate to Mobile App. Complete the Mobile App Web Service URL and specify an Account Name. Account Names are those that appear within the users Authenticator application to make identification between different accounts easier.
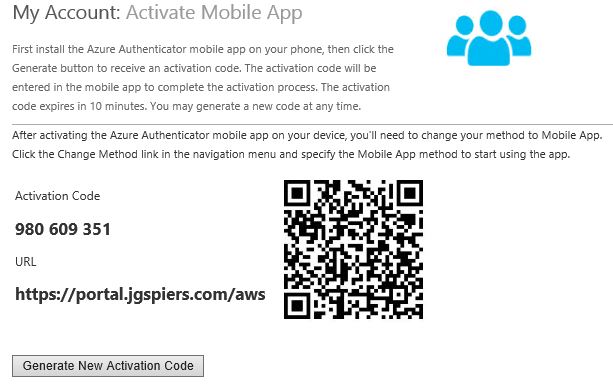
  The next time a user logs on to the User Portal they can activate their own mobile app. Navigate to Activate Mobile App -> Generate Activation Code.
  You can now add the MFA account to your mobile either by manually typing the activation code and URL (notice why it was important to shorten the virtual directory name) or by scanning the QR code. Activation codes expire after 10 minutes.
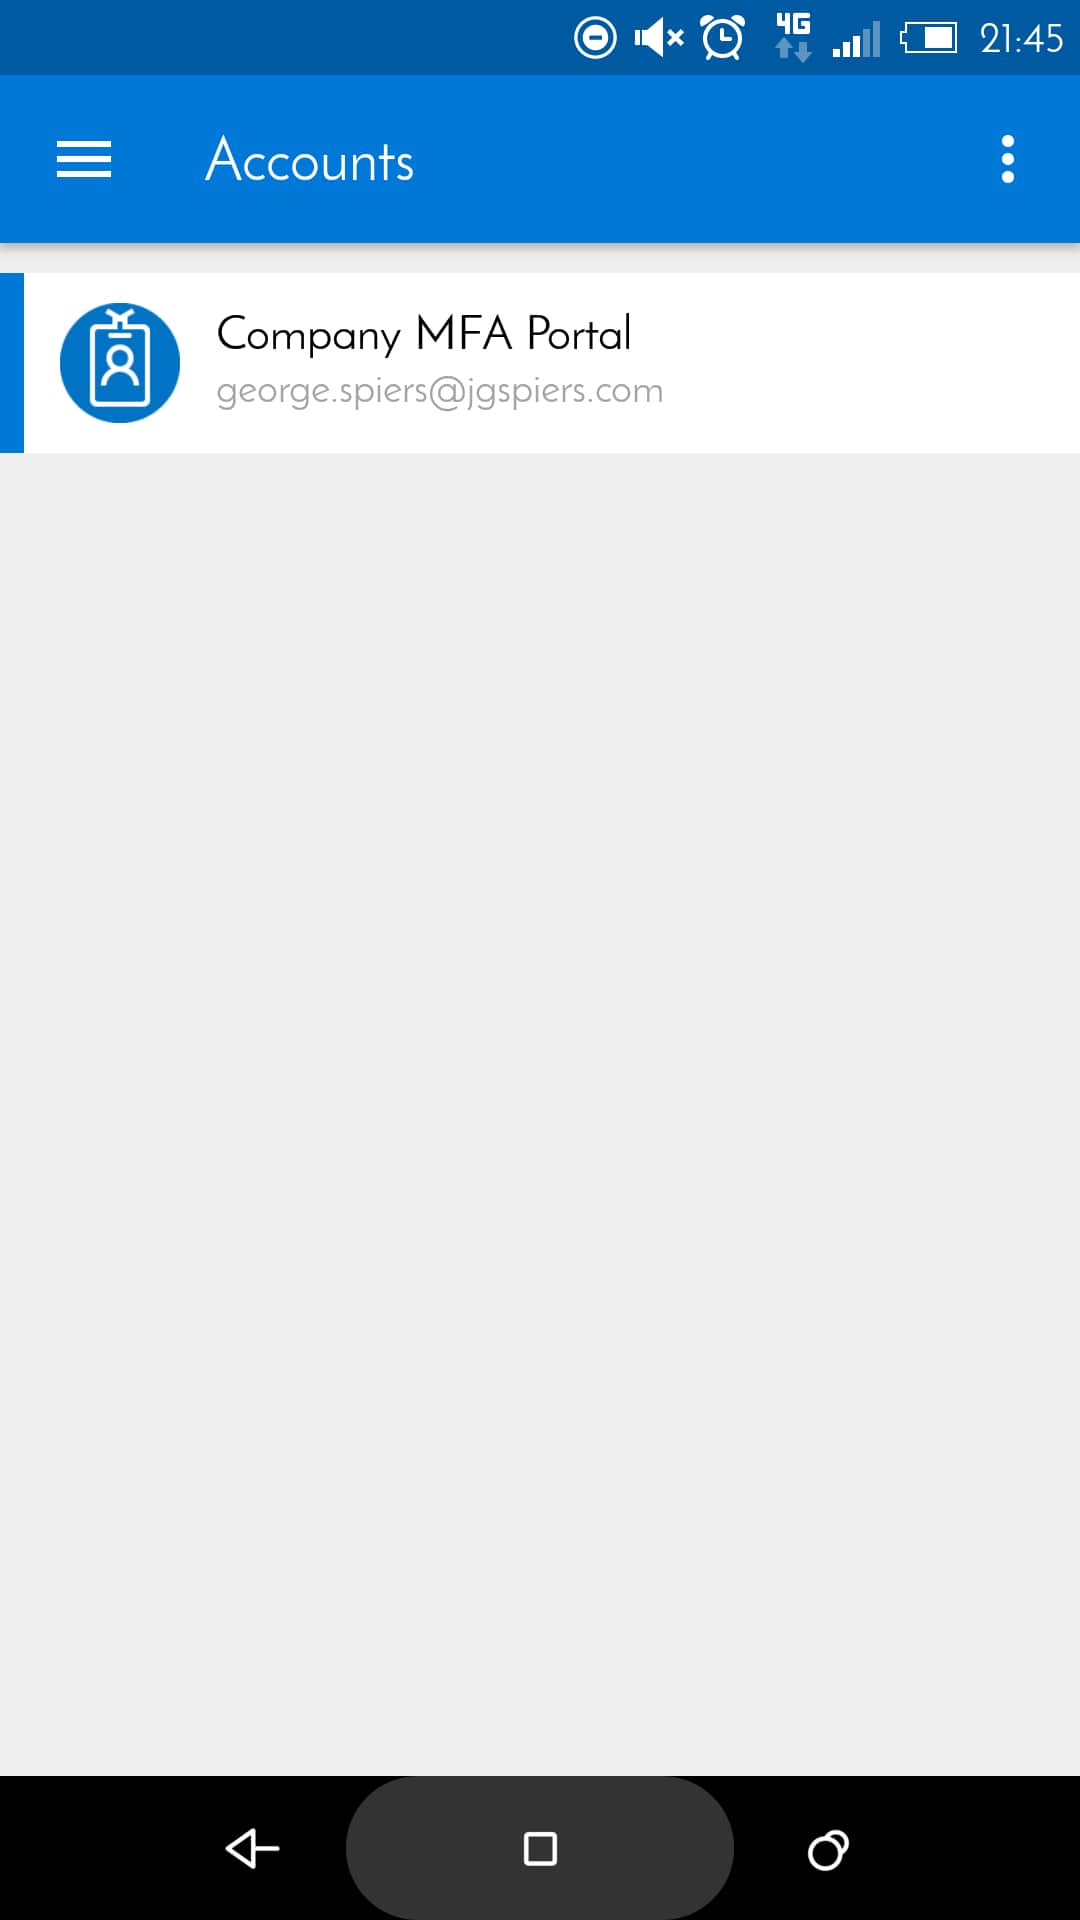
  Completing either method adds the company MFA account to your app.
  Next time you sign in to NetScaler Gateway and your method is mobile app authentication, the Authenticator app pushes a notification to your phone asking you to approve or deny sign-in. Click approve and authentication to NetScaler Gateway will be granted. Note that push notifications should be allowed on your phone.
  As previously mentioned you can also secure mobile app authentication with a PIN. Edit a users account using the MFA console, and select PIN using the dropdown box.
  Clicking Generate provides you with a 4-digit PIN. Select User must change PIN and click Apply. You can generate your own PIN for users. You can also generate and assign PINs to multiple user accounts at once.
  Now as the user logs in and clicks Approve they must enter the 4 digit PIN.
 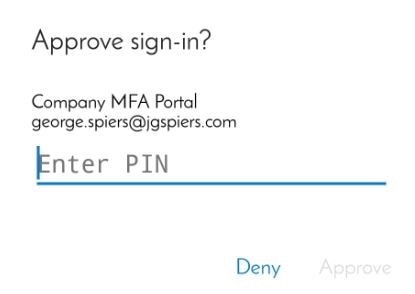 Once that PIN is entered correctly you are prompted to change your PIN to something different. Going forward this will be the PIN you use for authentication.
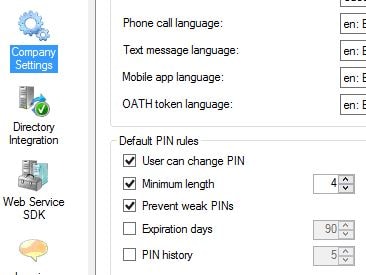
 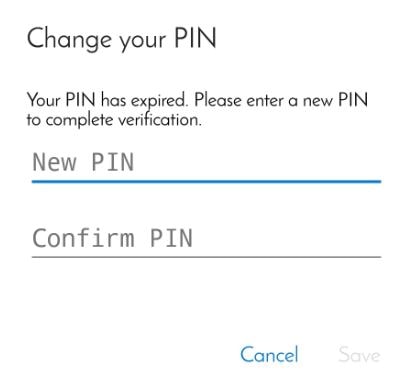 PIN settings including minimum length can be changed in the MFA console by navigating to Company Settings.
Sam
December 21, 2016Thanks for such a great write up. I am struggling to get the mobile app web url working. so lets say I have a server name server1.domain.com with an internal CA ssl issued to server1.domain.com. I can browse to this server1.domain.com/aws with no issues. How do create an external url like you have e.g porta.domain.com/aws . I have a public CA ssl cert issued to portal.domain.com. Do I need to do anything within DNS?
I have a couple of questions. How did you create the external url for the mobile app web https://portal.jgspiers.com/aws. since the initial server name was https://mfa01.jgspiers.com. Did you have do anything within Dns?. I am assuming your public ssl cert is issued to portal.jgspiers.com, if that is the case wouldn’t you be having a certificate mismatch since the mobile app web was installed on mfa01.jpspiers.com?
George Spiers
December 21, 2016Hi Sam
You create an external DNS record for portal.domain.com and then configure routing so that HTTPS to that URL can reach the server1.domain.com server. You also replace the internal CA SSL on server1.domain.com with your public SSL certificate issued to portal.domain.com
There is no certificate mismatch because when I browse to https://portal.jgspiers.com I receive the public CA certificate from the mfa01.jgspiers.com server. This confirms the server I am connecting to is authentic.
Mike
March 13, 2017Great Article! Do you know if there is an options for people without a phone?
Perhaps a way to send the PIN to a personal email address?
George Spiers
March 13, 2017An option to auhenticate via NetScaler? You must use a phone to authenticate. Regarding the PIN that is an optional authentication step, you would generate a PIN for the user and then set the option that they must change the PIN to something of their choice.
Mike
March 13, 2017I think I found what I was looking for. The situation I am faced with was for users who need citrix access but do not have a phone. Looks like there is a 3rd Party OATH token which should address my issues by providing those users with a key fob. I was wondering if there was a way to email the activation code and save on having to use a key fob.
http://portal.sivarajan.com/2016/06/azure-mfa-server-authentication-type.html
http://portal.sivarajan.com/2016/06/configuring-yubikey-yubico-oath-token.html
http://portal.sivarajan.com/2016/07/configuring-deepnet-security-safeid.html
http://wiki.deepnetsecurity.com/display/KB/How+to+Import+SafeID+Token+into+Azure+MFA+Server
George Spiers
March 13, 2017I see what you mean now. I’m sure there will be a few OATH MFA compliant soft-token solutions out there so you do not need to use a physical keyfob.
Adi
September 7, 2017Really a Great Article.
In current environment we have NetScaler 10.5 with two factor authentication ( AD + C-Pass tokent). Client wants to remove C-Pass authentication and implement MFA as secondary authentication (Phone Call)
Now my client implemented on-premise MFA.
What are all the details I need to collect from MFA team to configure MFA on NetScaler so that I can remove C-Pass tokent authentication.
Thanks in Advance.
Regards
Aditya Kumara
George Spiers
September 7, 2017First ask the team if they are using RADIUS or LDAP for MFA authentication. Taking LDAP for example, you would need to obtain the MFA server IP from them and port (389/636 if secure). You’ll also need a service account which is referenced in the NetScaler LDAP profile and on the MFA server as a user (disabled) which performs the LDAP bind and lookups. You’ll need to provide the MFA team with your NetScaler SNIP so that they can add it to the MFA configuration as an LDAP client.
Ray
October 10, 2017does Citrix Receiver for Windows (External users) able to use this MFA?
I see it working for Reciver for web.
George Spiers
October 10, 2017Yes it can work, so long as you are not using nFactor authentication to power MFA. Just use MFA in your primary LDAP policy attached to NetScaler.
Hugo Pecora
March 28, 2018Hi George, great article, thanks for that!
I have azure mfa configured with nps servers and i am using netscaler gateway for users, the solution works great with no issues for receiver for web, however receiver for windows or mac won’t take it.
I tried mfa primary and ldap secondary and the other way round but no luck.
Have you got this to work for say an iPad or Receiver for Windows? if so, what are the mfa and ldap policies you used?
George Spiers
March 28, 2018Hey – If you are using nFactor authentication, that does not work with native Receiver (yet). If you aren’t using nFactor and just a standard LDAP/RADIUS policy then I don’t see any reason why it would not work with native Receivers. You just have an LDAP profile bound to the NSG vServer (if using LDAP to MFA) or else a RADIUS policy (set as secondary authentication) pointing to the NPS servers.
Any special LDAP/RADIUS policy expressions being used that may not evaluate native Receivers? Have you tried running an aaad.debug?
Rob Joyner
July 18, 2018Can you configure the NS Unified Gateway to work with MS MFA on premise with ONE WAY SMS OTP? so the user has to enter that on the NS login screen as a second step after entering their username and password ?
George Spiers
July 19, 2018Yes that should work with an extra field on NetScaler to accept the OTP and a RADIUS policy sending the code to the MFA server. Keep in mind that text messages will incur a roaming fee as they originate from the US. The Mobile App push notification is much better, OAUTH is another option. Citrix also do have their own built-in OTP solution if you have NetScaler Enterprise or above licensing. https://jgspiers.com/netscaler-native-otp/
Rob Joyner
July 19, 2018Would you happen to know where there is a guide to set this up. I can add the OTP field when you setup secondary auth as RADIUS but that just adds a field to the login screen. At which point the user will not yet have the SMS code. We need the first screen to take username and password that triggers the SMS from the MFA server then either a popup or second login screen where the user enters the received code. I really cannot find any clear guidance on how to make this work as required.
George Spiers
July 20, 2018Try just creating a RADIUS policy on NetScaler pointing to MFA, bind the RADIUS authentication policy to your NSG vServer as the primary authentication method. Remove any other authentication policy.
Also make sure you increase your RADIUS policy timeout value so that you have enough time to perform the SMS auth.
srinivas_n@hotmail.com
November 5, 2018Hi George,
If we have 2 production citrix sites, 1 in Azure and 1 is in on-prem ,if we want to use Azure MFA as a two factor , how many MFA servers we need to setup? each MFA for every site or we can leverage TWO HA MFA servers for all of them.
Thanks,
George Spiers
November 5, 2018I assume they are in the same domain? You should be able to leverage two MFA servers for both sites.
Sri
November 5, 2018ok, so need to add all the users from both sites who wants MFA in the users list correct?
George Spiers
November 6, 2018Yes, any user who needs to use the solution must be synchronised to the MFA server.
Sri
November 6, 2018Thank you! if they have 5 sites , if we setup 2 MFA in HA pair (lets say US East Region), will there be any latency for other sites i.e sites(on prem and cloud) in London or Asia .
George Spiers
November 6, 2018Ideally you want MFA servers close to NetScaler, just like you would a domain controller. It is NetScaler that communicates with MFA for authentication. On the other hand for registration you will want to provide users with a low latency connection to the registration portal. You should also consider using Azure MFA cloud, rather than the on-premises version.
Sri
November 13, 2018Hi George,
If users are in Azure Active directory, can we integrate netscaler as Enterprise application in Azure portal and configure MFA, without FAS?
Thanks,
Srinivas
George Spiers
November 14, 2018You will need to use SAML, which will end up requiring FAS.
Citrix2019
January 17, 2019Hey, any specific configuration required if the netscalers are in GSLB to use azure MFA?
George Spiers
January 25, 2019Just make sure the MFA server is aware of the two ADC appliances that could potentially send traffic to it. See the “Add LDAP Client” section of the guide where I add in the ADC SNIP as an LDAP client.
Kedar
July 9, 2019Hi George,
Am trying to configure my MFA Onpremise in H/A mode via VIP through Netscalar, what are the default ports that needs to be allowed while doing this configuration
Thanks
Kedar
George Spiers
July 14, 2019Some listed here: https://docs.microsoft.com/en-us/azure/active-directory/authentication/howto-mfaserver-deploy
NetScaler SNIP should be allowed to contact MFA servers over secure LDAP, 636. If using RADIUS instead, open the RADIUS ports.