Remove orphaned, deleted, failed Delivery Controller from a XenApp or XenDesktop site.
If one of your Delivery Controllers has completely failed and you deleted it’s computer object from Active Directory, you may then attempt to gracefully remove the Delivery Controller via Citrix Studio however it will fail. This happens because the SQL stored procedure fails to generate a necessary part of the T-SQL script which removes all references of the Controller from the database. Instead, you must run a manual eviction script to complete the removal.
To show you what happens, I’ve built a Delivery Controller (SF.jgspiers.com), added to my existing Citrix site. Next I deleted the virtual machine and computer object from Active Directory. When I launch Studio, to perform a graceful remove navigate to Configuration -> Controllers. Click SF.jgspiers.com -> Remove Delivery Controller.

Click Yes. 
Click Yes. 
You will receive the below unexpected error. Click View details. 
The details pane shows information we expect to see such as ActiveDirectoryObjectNotFoundException. 
From a healthy Delivery Controller, launch PowerShell and run commands asnp citrix.* & Get-BrokerController -DNSName yourcontrollername
What you are interested in here is the SID of the orphaned controller. Take a copy of the SID. This SID will be referenced in the eviction script we run next.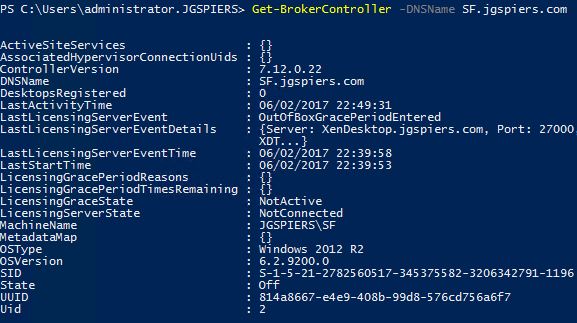
Create a PowerShell script by copying the following lines, changing $DBName and $EvictedSID values to your database name and orphaned controller name.
$DBName = "CitrixJGSPIERSSite"
$EvictedSID = "S-1-5-21-2782560517-345375582-3206342791-1196"

#
# Generate Database 'Evict' Scripts for XenDesktop DataStore
#
#
Get-ConfigServiceStatus

Get-LogSite

Get-BrokerController   -Filter {(SID -eq $EvictedSID)} -MaxRecordCount 2147483647

Add-Content "$PWD\evict_$sid.txt" (Get-AcctDBSchema  -DatabaseName $DBName -ScriptType 'Evict' -Sid $EvictedSID)

Add-Content "$PWD\evict_$sid.txt" (Get-HypDBSchema -DatabaseName $DBName -ScriptType 'Evict' -Sid $EvictedSID)

Add-Content "$PWD\evict_$sid.txt" (Get-ProvDBSchema -DatabaseName $DBName -ScriptType 'Evict' -Sid $EvictedSID)

Add-Content "$PWD\evict_$sid.txt" (Get-BrokerDBSchema -DatabaseName $DBName -ScriptType 'Evict' -SID $EvictedSID)

Add-Content "$PWD\evict_$sid.txt" (Get-MonitorDBSchema -DatabaseName $DBName -DataStore 'Site' -ScriptType 'Evict' -Sid $EvictedSID)

Add-Content "$PWD\evict_$sid.txt" (Get-SfDBSchema -DatabaseName $DBName -ScriptType 'Evict' -Sid $EvictedSID)

Add-Content "$PWD\evict_$sid.txt" (Get-EnvTestDBSchema -DatabaseName $DBName -ScriptType 'Evict' -Sid $EvictedSID)

Add-Content "$PWD\evict_$sid.txt" (Get-ConfigDBSchema -DatabaseName $DBName -ScriptType 'Evict' -Sid $EvictedSID)

Add-Content "$PWD\evict_$sid.txt" (Get-LogDBSchema -DatabaseName $DBName -DataStore 'Site' -ScriptType 'Evict' -Sid $EvictedSID)

Add-Content "$PWD\evict_$sid.txt" (Get-AdminDBSchema -DatabaseName $DBName -ScriptType 'Evict' -Sid $EvictedSID)

Add-Content "$PWD\evict_$sid.txt" (Get-AnalyticsDBSchema -DatabaseName $DBName -ScriptType 'Evict' -Sid $EvictedSID)

# Script completed successfully

# Generate Database 'Evict' Scripts for 'Logging' DataStore

#
#
Get-ConfigServiceStatus

Get-LogSite

Get-BrokerController   -Filter {(SID -eq $EvictedSID)} -MaxRecordCount 2147483647

Add-Content "$PWD\evict_$sid.txt" (Get-LogDBSchema -DatabaseName $DBName -DataStore 'Logging' -ScriptType 'Evict' -Sid $EvictedSID)

# Script completed successfully

# Generate Database 'Evict' Scripts for 'Monitor' DataStore

#
#
Get-ConfigServiceStatus

Get-LogSite

Get-BrokerController   -Filter {(SID -eq $EvictedSID)} -MaxRecordCount 2147483647

Add-Content "$PWD\evict_$sid.txt" (Get-MonitorDBSchema -DatabaseName $DBName -DataStore 'Monitor' -ScriptType 'Evict' -Sid $EvictedSID)

# Script completed successfully
The script should be imported to a PowerShell script.

Launch PowerShell from a Delivery Controller, load the Citrix snapins and then run the eviction script. ![]()
An evict_.txt script will be created in your user profile folder %userprofile%. Open the text file. 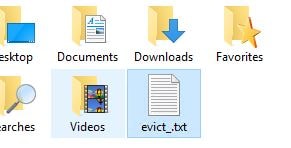
The text file contains a SQL script which now must be run against the site database. Copy the file to your SQL server. 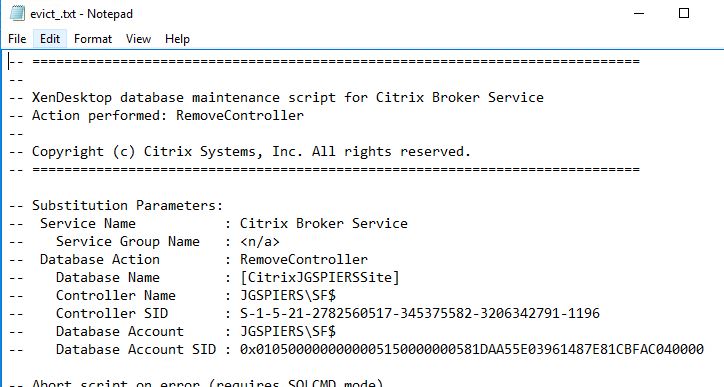
Firstly take a backup of your Citrix Site database. Paste the script in to a SQL Query and then execute. You should receive notification that the controller has been removed from the Citrix site. If you receive any messages about failing to remove services from the controller, run the relevant SQL stored procedure to remove the service references manually.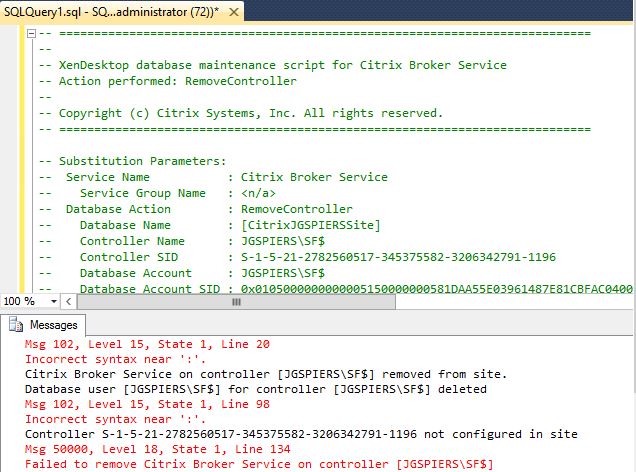
Now when browsing Citrix Studio, the controller no longer appears. 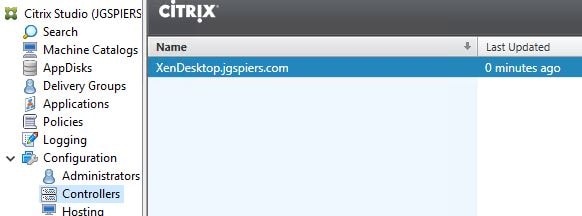
John
November 3, 2017Excellent article, worked a treat!
Pingback: Supprimer un controler récalcitrant de la Database
John Carmody
March 8, 2018is there any extra config if you have split out your XD DB into site/logging/monitoring ?? also in a mirror configuration does this have to be run on principle/mirror ?
George Spiers
March 8, 2018Hi John this should be run on the principal.
The DDC information should only be held in your Site database so reference that name in the script.
Anonymous
May 17, 2018Thanks a lot for the article.
Stefan
June 8, 2018Thank you very much for this Script. Works fine with XenApp 7.15 CU2.
Samaan Bagheriasl
July 4, 2018Hi George
Thanks for this article.
In my cased the Delivery Controller is not orphaned, however I do need to add it back in to the site. When I launch Studio to do so I get the following message
Re-enter the Controller address or enter a new address
When I run the Get-BrokerController from anther DDC I don’t see the old DDC listed there.
Do you know a way to remove this DDC from the database another way?
George Spiers
July 4, 2018Have you tried this?
https://support.citrix.com/article/CTX212941
Anonymous
April 25, 2019This script saved my ass twice and I really want to thank you for it. It work fine with a 7.15 CU4 and a 7.12 .
George Spiers
April 26, 2019You’re welcome.
NIRMAL THANGARASU
January 6, 2020George, i have problem with 7.15 CU2 joining new DDC to existing Site. Since we dotn get SysAdmin role in SQL server, we use SecurityAdmin and generate SQL script for adding DDC to site. Generated SQL script has DDC SID information. SID value is different from actual server SID. (used psgetsid.exe sysintral utility). Actul server SID and SID present in the SQL script has to match. Am I correct?
Divya Dutta
November 23, 2020This is the citrix source:
https://support.citrix.com/article/CTX232985
Thanh Nguyen
June 24, 2021Thank you so much for the step – saved my butt today.
Make sure you run the evit_.txt in SQLCMD mode else you will encounter some error like I did.
In event that you need to re-add machine with same name back into the farm as another DDC, then make sure you
1. Logon the Citrix database using SQL Studio
– Remove the old DDC name from each database instance (site, logging, monitor)
-Remove old DDC name from Security-logins.
2. Login AD console
– Delete AD computer object and recreate so you have a new SID, rejoin new DDC to the domain.
If this isn’t done, when joining a new machine into the farm as DDC with same server name it will fail.
Hopefully those additional steps will help the next poor sod that made the same mistake as I did 🙂
Kind Regards
Dimitri
August 31, 2021Hello Thanh Nguyen, I’m very grateful about your comment but I’m still struggling when I need to reuse the same hostname for a new DDC.
did you use CTX213386 ? because i have an issue with the step3 :
Register-ConfigServiceInstance : The operation could not be performed because of a configuration logging error.
Anonymous
November 9, 2021Hello, thank you for your script Georges !
Pingback: Citrix修复和已知问题– XenApp和XenDesktop /虚拟应用程序和桌面(不包括机器创建服务)-Citrix虚拟化
Jimish Thosani
February 17, 2023when we run the evict script on SQL management studio , do we need to run on all 3 database (Site Database, Monitor Database, Configuration Logging Database) one by one ?