StoreFront self-service password reset was first introduced with XenApp/XenDesktop FMA version 7.8. This feature grants users the ability to reset their own Active Directory passwords from the Receiver for Web or Receiver client and/or unlock their account.
Note: In the Virtual Apps and Desktops 7 2003 release, Citrix announced that SSPR is deprecated.
- Reduces the possibility of helpdesk calls being logged to unlock accounts or reset passwords
- Increases user productivity by enabling users to reset their own password, unlock their account and ultimately get logged on and where they want to be quicker
- Frees up IT time to concentrate on other things
As mentioned, this Platinum feature was introduced to FMA in v7.8 with StoreFront 3.5 but did basically require all the XenApp 6.5 components (apart from Web Interface) such as AppCenter, the SSPR Agent and Service. Since customers would have stayed on Web Interface to continue using this feature, introducing SSPR with StoreFront provides a reason for more customers to move away from Web Interface.
Now, StoreFront 3.7, released with XenApp/XenDesktop 7.11 provides SSPR fully integrated with no additional/legacy components required. Citrix have called this SSPR 1.0. SSPR 1.1 was released in December 2016.
SSPR with the 6.5 components can be used from Receiver for Web, Receiver for Mac, Linux, Chrome and Windows. Allowing users to reset their passwords in the move convenient way to them.
SSPR 1.0 and 1.1 with StoreFront 3.7+ can be used with Receiver for Web, Receiver for Linux and Windows. Receiver for Mac is supported with SSPR 1.1 and StoreFront 3.8+. Receiver for Chome is not supported.
Mobile Devices that use Receiver for Web are also unsupported.
Using SSPR via Citrix Gateway is supported with version 12.1.50.x.
What’s new in Self-Service Password Reset 1.1:
- Ability to blacklist users and groups so that they cannot use any of the SSPR features.
- Support for Simplified Chinese when defining security questions.
What do you need?
A user account for Data Proxy Access and a user account for Self Service (Active Directory accounts).
Note: The Self Service account needs to be able to reset passwords and unlock user accounts.
The SSPR software installed on a server. An SSPR server can hold thousands of enrollents quite easily as each user enrollment only consumes around 50KB disk space. This replaced AppCenter. This software provides a management console you use to configure SSPR. (2008R2, 2012 R2 and 2016 supported). This software also installs the SSPR Service which is used to communicate with StoreFront and the SSPR Management Console.
- Note: SSPR that comes with XenApp/XenDesktop 7.18 media cannot be instaleld on Windows Server 2008 R2 or Windows Server 2012.
Hardware and Software Requirements
- Windows Server 2008 R2, Windows Server 2012 R2, Windows Server 2016.
- Note: SSPR that comes with XenApp/XenDesktop 7.18 media cannot be instaleld on Windows Server 2008 R2 or Windows Server 2012.
- .NET Framework 3.5.1 (2008 R2), .NET Framework 4.5.2 (2012 R2), .NET Framework 4.6.x (2016).
- IIS
- SSL certificate for communication between Self-Service and StoreFront.
- Citrix License server 11.13.1.2 and above with Platinum license (SSPR periodically checks for Platinum licenses).
- SMB share (for the Data Store) which holds user enrollment data and KBA information. Citrix recommend you place the share on the SSPR server.
- StoreFront 3.7+ configured for HTTPS access.
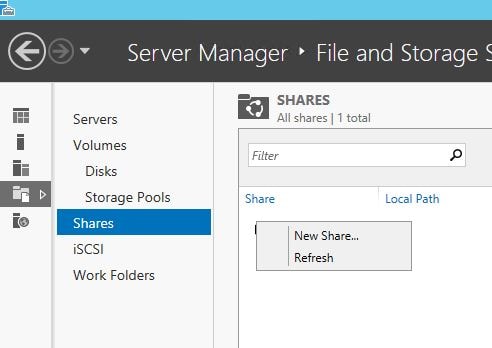
First we must create a Data Store (Windows share). Citrix have published a script over at https://support.citrix.com/article/CTX217143 which can assist with the store creation. I’m going to use my existing StoreFront server however you can use a dedicated server unless you want to secure the implementation in which case Citrix also recommend using the StoreFront server. On a Windows 2012 R2 server, open Server Manager, navigate to File and Storage Services, right-click on your server name and click New Share…
Select SMB Share – Quick -> Next.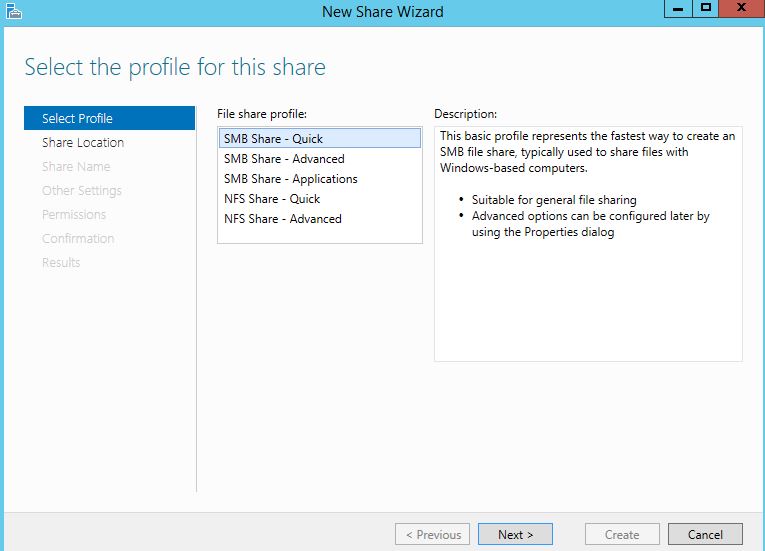
Select a volume to host the share and click Next.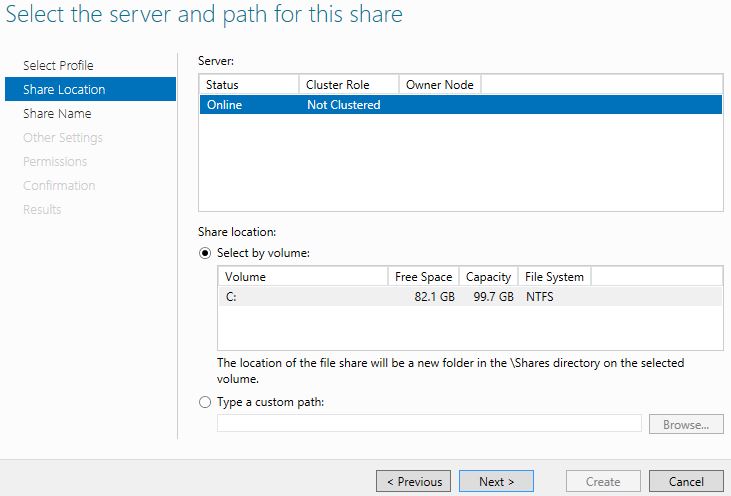
Type in a share name. Use the $ sign to hide the share. Click Next.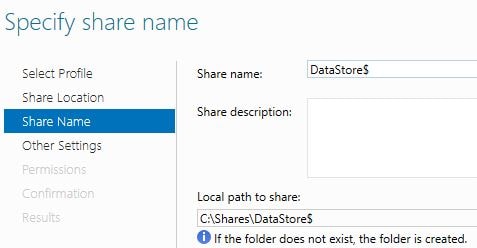
Uncheck Allow caching of share and check Encrypt data access. Click Next.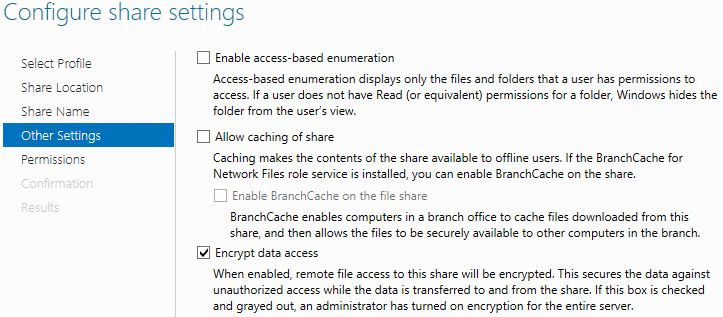
Click Customize Permisions -> Share. Configure permissions as below. You will notice the DataProxyAcc account. This account is an Active Directory standard user we will be using to access the share and write information to the Data Store. Create a standard user for the Data Proxy Account in Active Directory then assign full control to this share.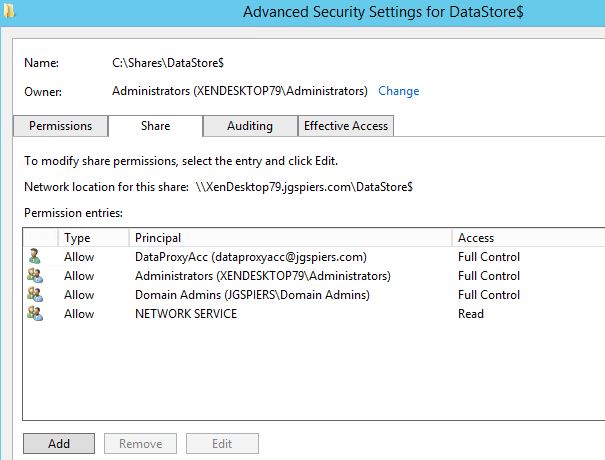
On the NTFS permissions tab the permissions show as follows. Click Disable inheritance.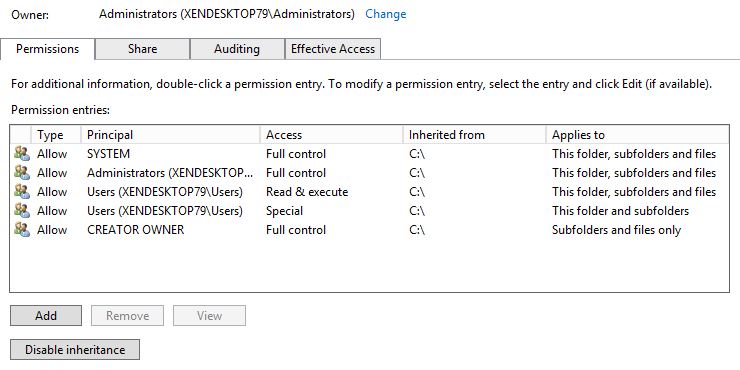
Click Convert inherited permissions into explicit permissions on this object.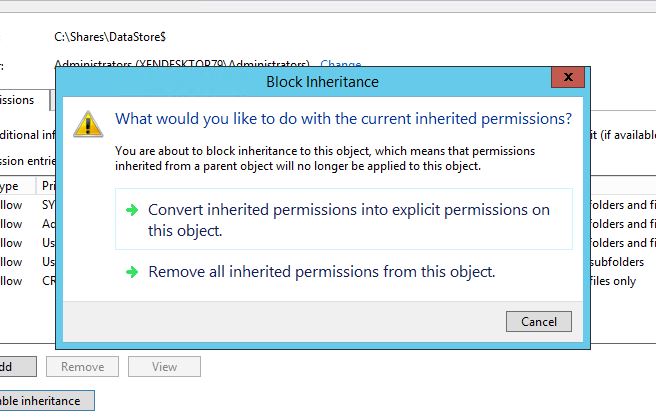
Remove any entry apart from the below three of SYSTEM, Administrators (local) and CREATOR OWNER. Double-click CREATOR OWNER.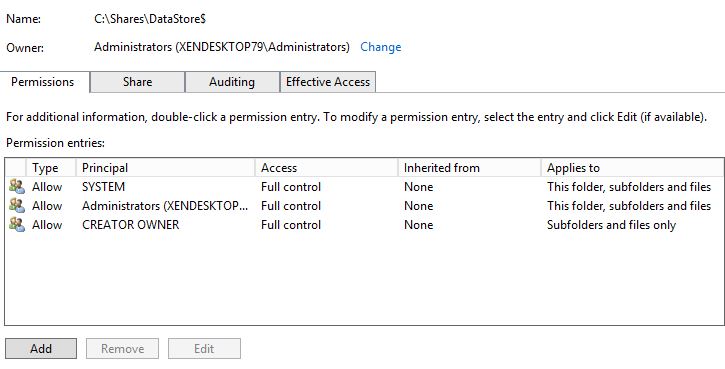
Click Show advanced permissions. Uncheck Full Control, Delete subfolders and file, Change permissions and Take ownership. Click OK.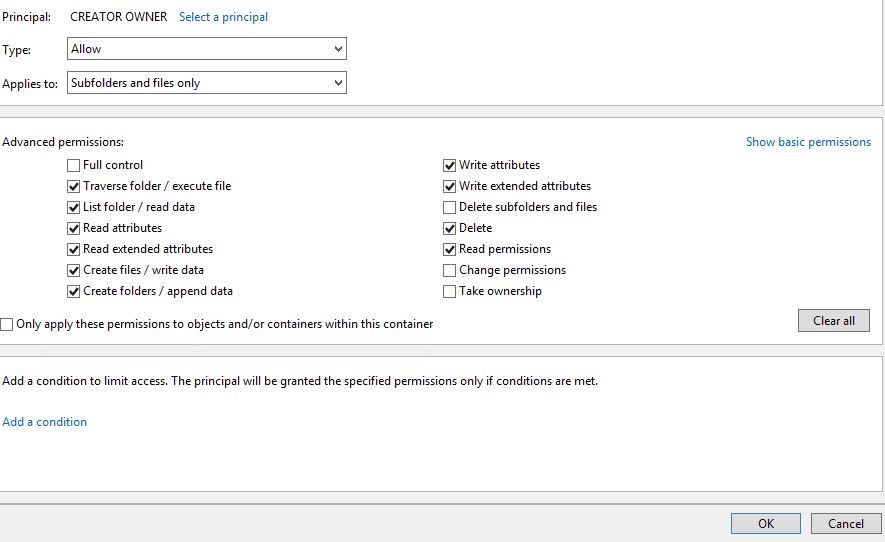
Add the Data Proxy Account with full control to this flder, subfolders and files.
Add NETWORK SERVICE with Read permissions if using SSPR 1.0. (No longer a requirement in SSPR 1.1).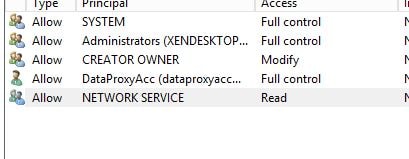
Complete the wizard and the share will be created.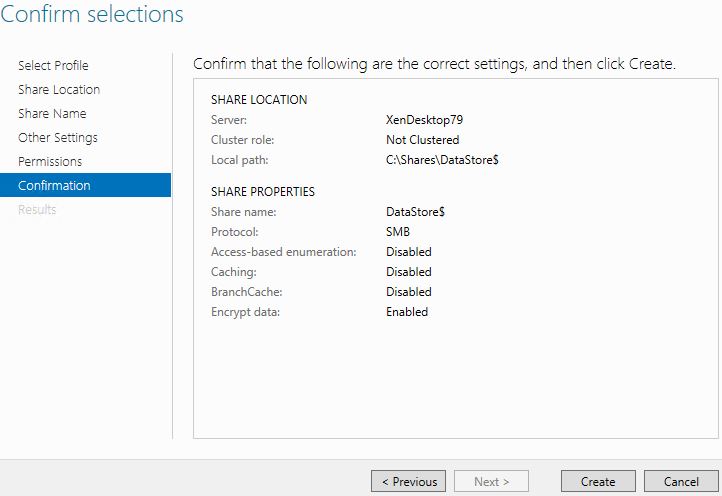
The share has now been created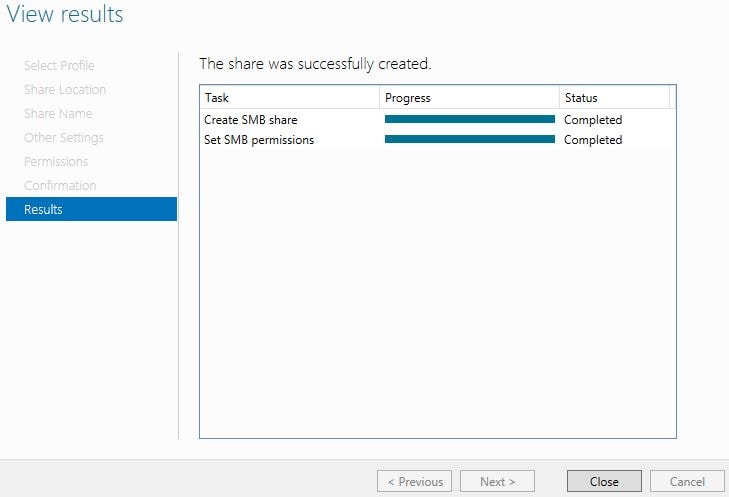
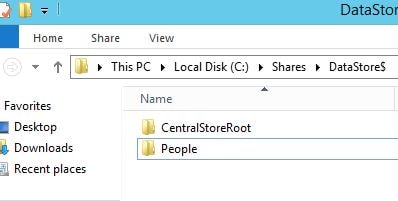
Now navigate to the share and create two folders. CentralStoreRoot and People. It is important to check these folders have inherited permissions from the DataStore root folder. Doing so provides the Data Proxy Account with full control over the folders.
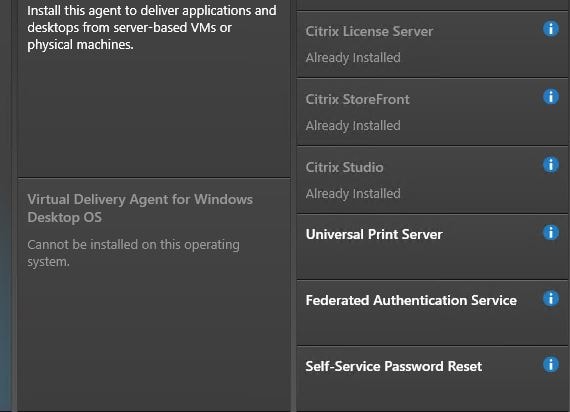
Next we need to install the Self-Service Password Reset software again either on a dedicated server or an existing StoreFront server. Launch the XenApp/XenDesktop 7.11 media and click Self-Service Password Reset.
Agree to the Licence Agreement, click Next.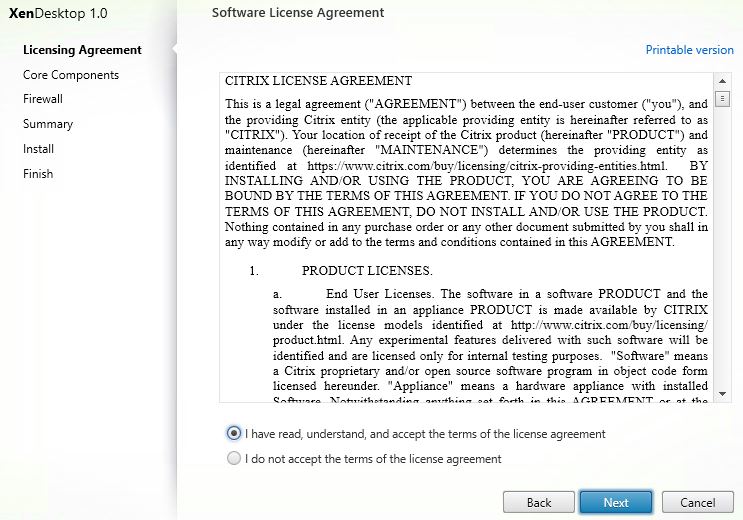
Specify the install path, click Next.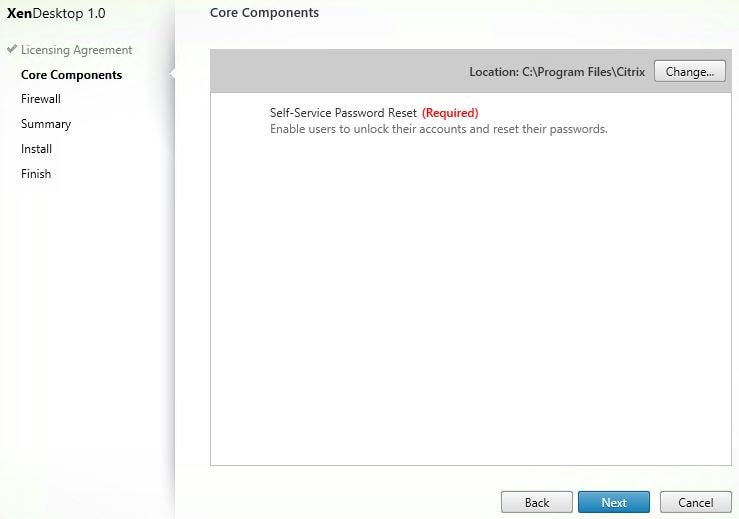
Click Next to configure firewall rules automatically. By default Self-Service uses TCP 443 however this can be changed using IIS and the Self-Service console.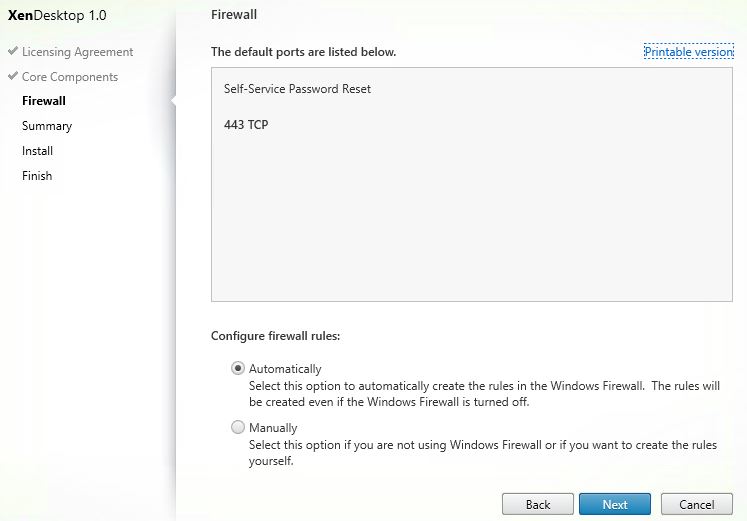
Click Install.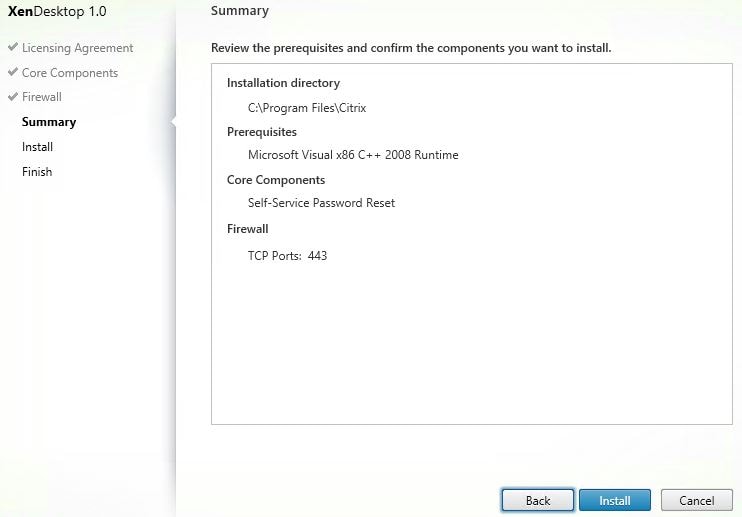
Self-Service Password Reset is installing.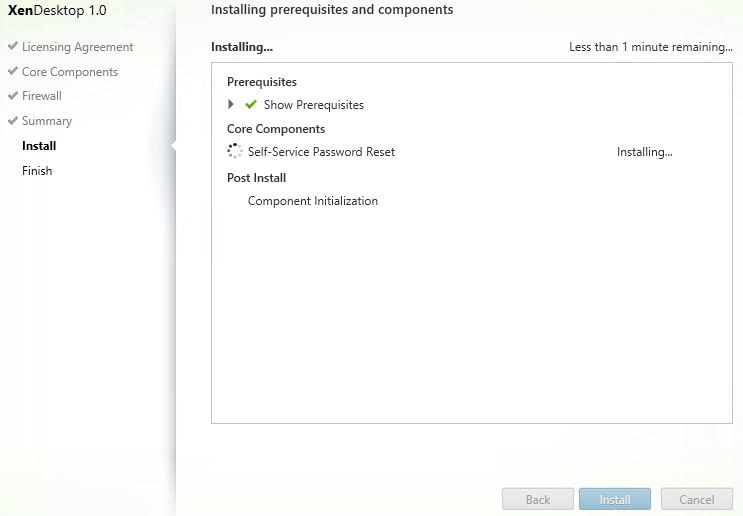
Now that the install is complete, click Finish.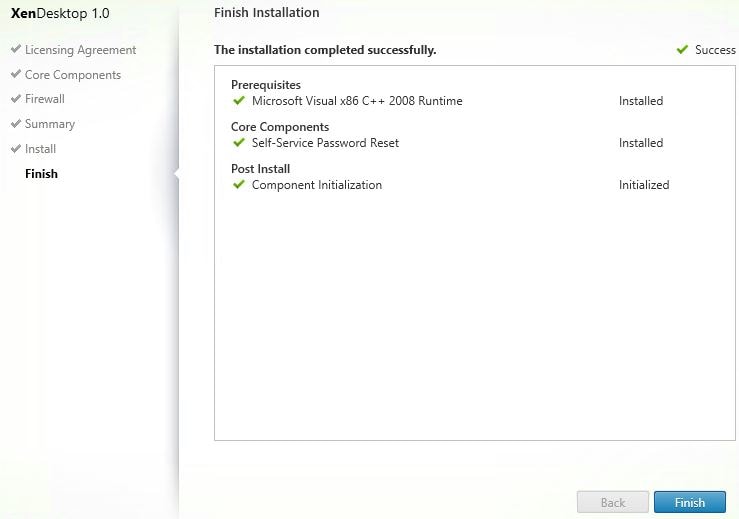
Open Start, search for and launch Citrix Self-Service Password Reset Configuration.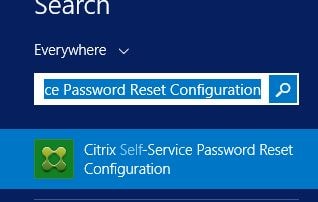
There are three modules that we need to configure. Service Configuration, User Configuration and Identity Verification. Click on Service Configuration.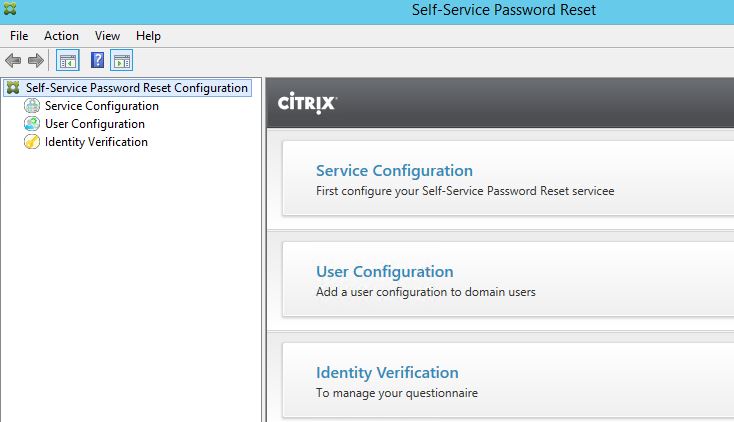
Click New Service Configuration.
Make sure you have an SSL certificate installed which will represent the Self-Service hostname URL. Click Next.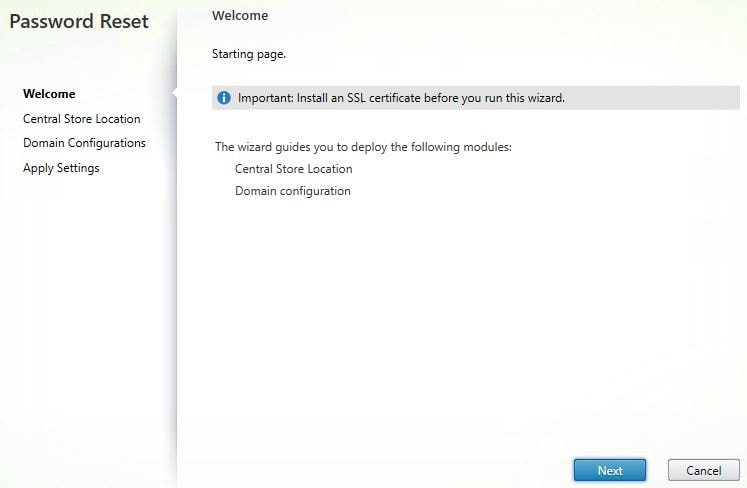
Enter the SMB Data Store share as shown below. Click Next.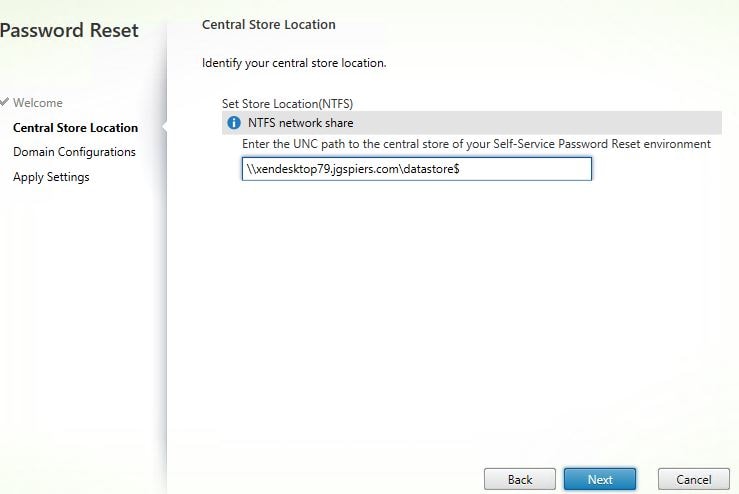
If you missed a permissions or configuration step during share creation you will get an error. If you have got everything right, you will reach the below screen Domain Configurations. Tick your domain and click Properties.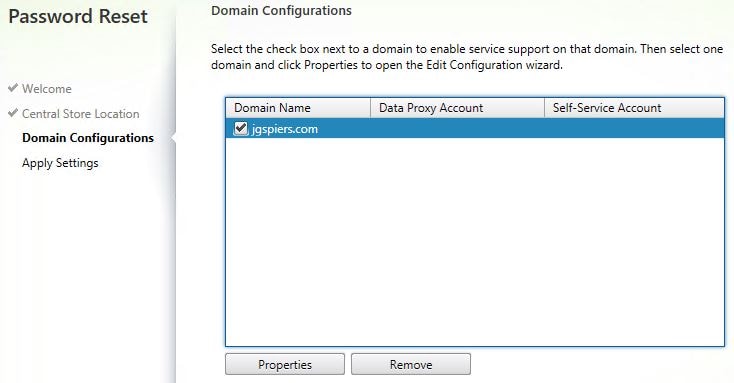
Enter the user account details for Data Proxy Account and the Self-Service Account. Click OK.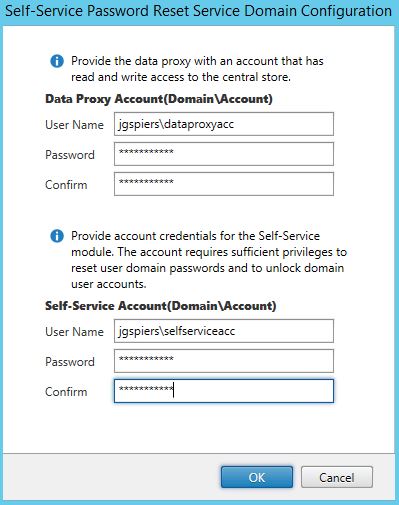
Click Next.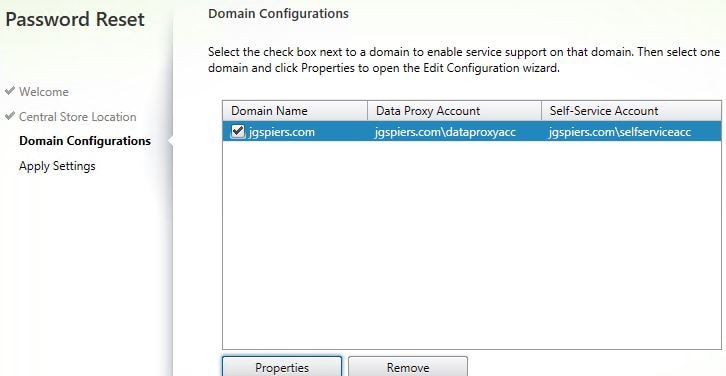
The Finish once you see the message Processing finished successfully.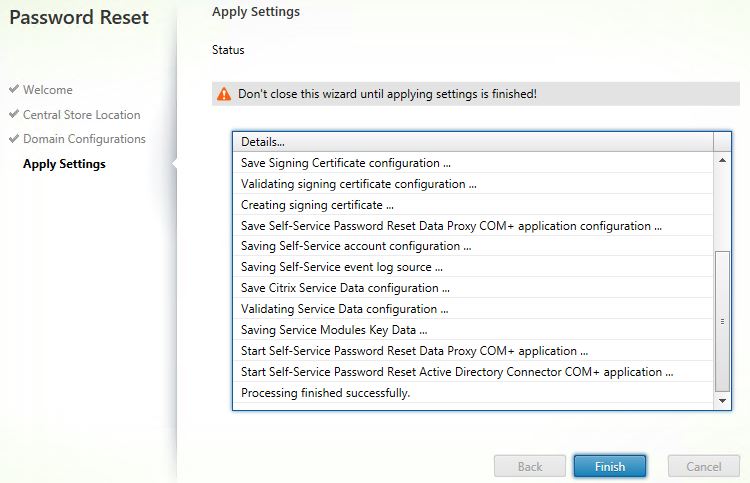
The Service Configuration will now look similar to below.
Navigate to User Configuration -> New User Configuration.
Note: In SSPR 1.1, there is a Blacklist Configuration option in the right pane which allows you to define users or groups of users that are not allowed to use SSPR features.
Here you can add Active Directory Groups, Users or OU’s to be used with Self Service. I am going to use an OU (the Users OU). Click Browse.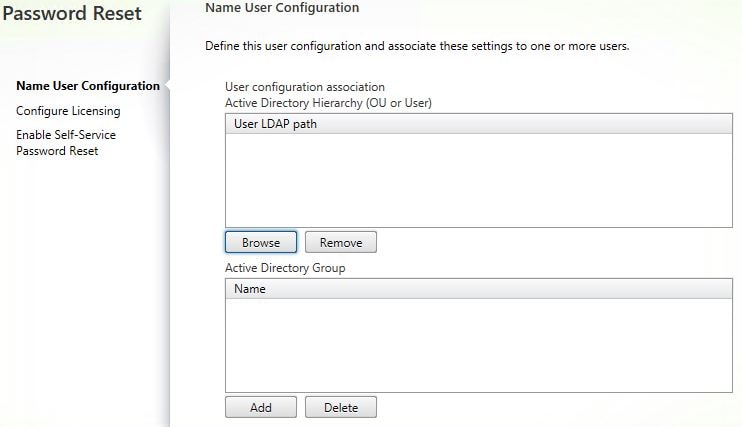
Select the Users OU. Click OK. It is recommended that you do not include any OUs that contain privileged accounts i.e. Domain Admins.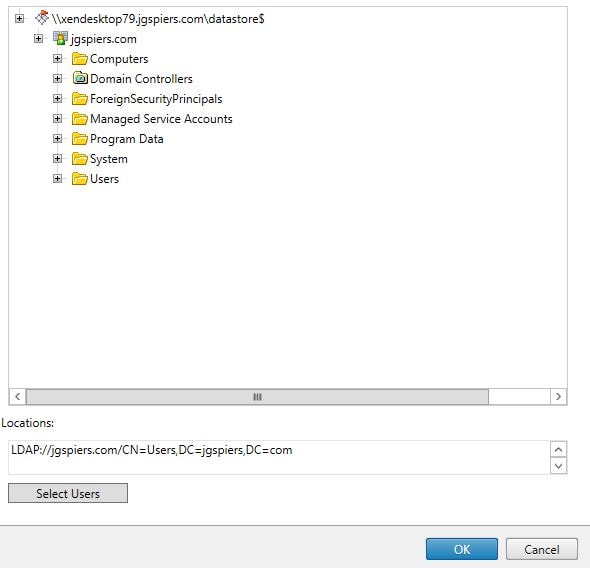
Now click Next.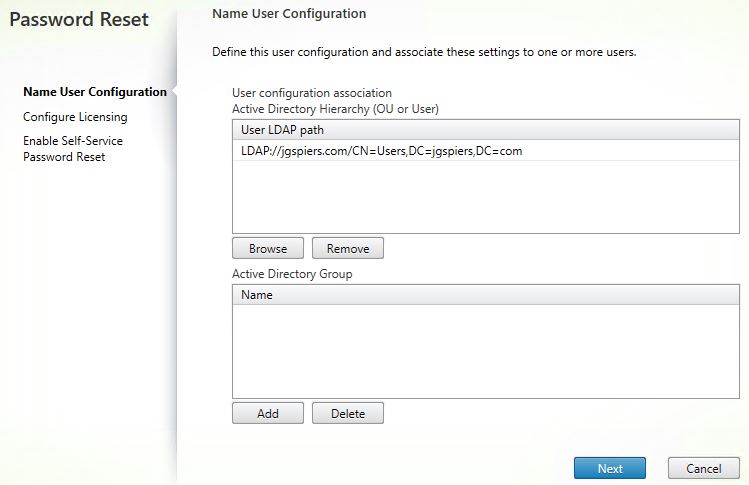
Enter your license server name and port. Remember the license server must have Platinum XenApp or XenDesktop licenses. Click Next.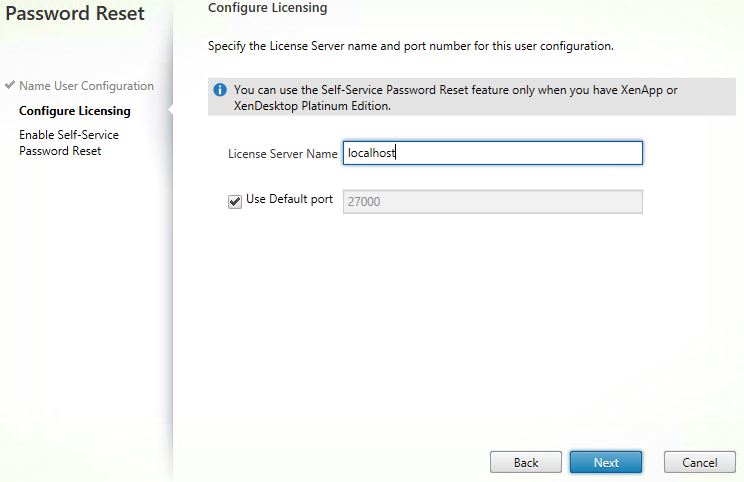
Tick the boxes below to allow users to reset their primary domain password and unlock their accounts. If you do not want one of these features to be available, simply untick it. Enter a service port (default 443) and the Self-Service URL. Click Create.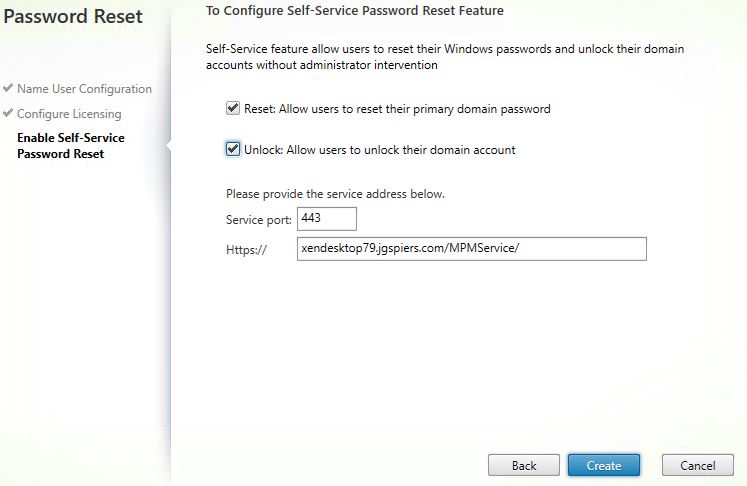
The User Configuration should look similar to below.
Finally navigate to Identity Verification. This is where you can add, remove, group Security Questions etc. Notice you can also export and import security questions and revoke registration to a user. By default SSPR comes with 4 pre-made questions. Click Manage Questions.
You will be presented with the below screen.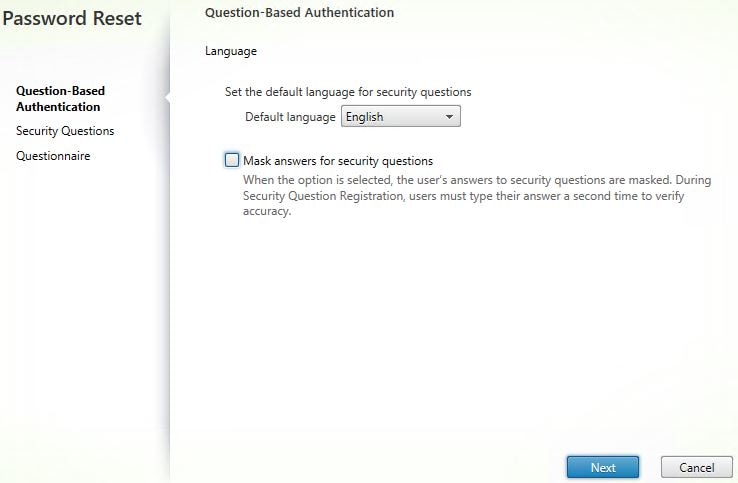 Tick to Mask answers for security questions if you want to do so. This is a good security practice. Click Next.
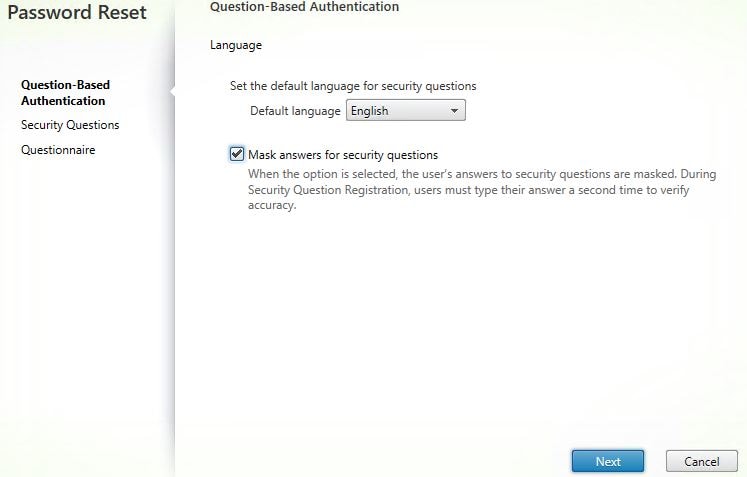
Here you can create a group of questions that users must answer, edit existing questions or create new questions. Click Add Question.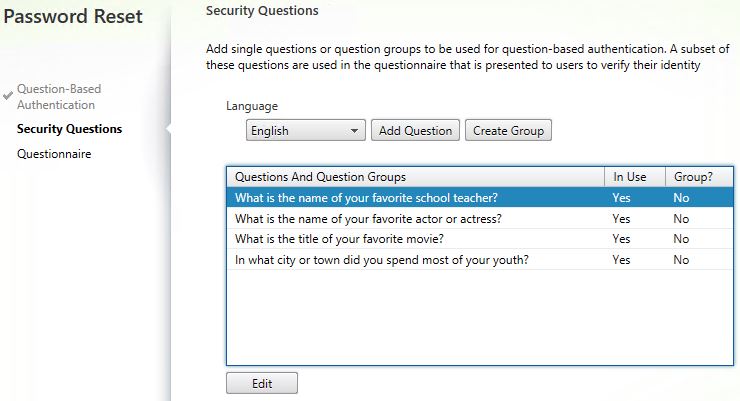
Enter a question, specify the minimum number of characters, specify if the answer is case sensitive. Click OK. In this example, I will create two new questions. The first one being What is the name of your favourite school teacher?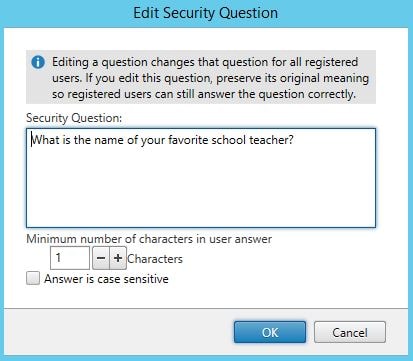
The second being What is your favourite holiday destination?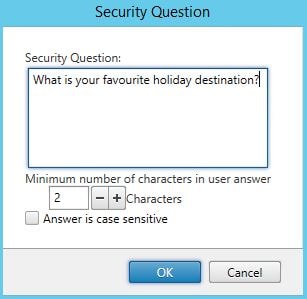
Click Next.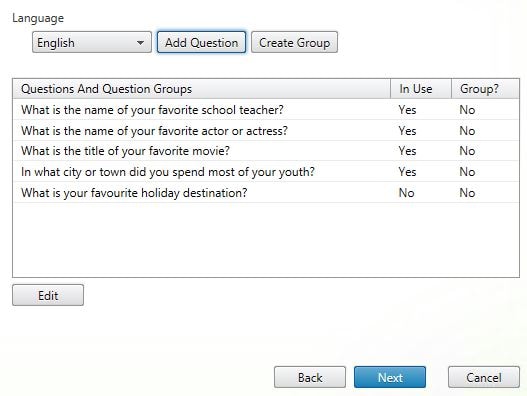
On the Questionnaire screen you can remove questions, add them and move questions up and down to dictate in which order questions are presented to enrolling users. Click Add.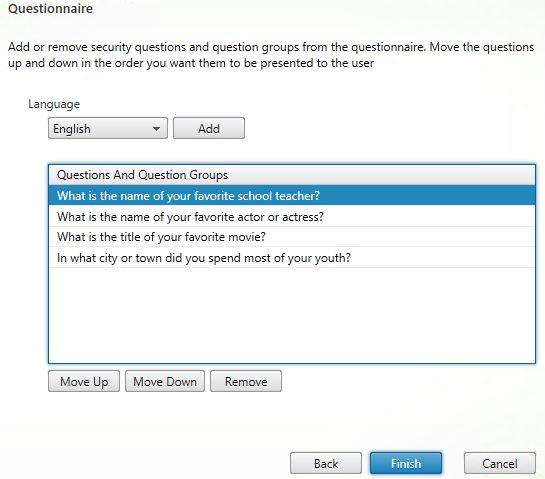
Tick the questions you want to add, click OK.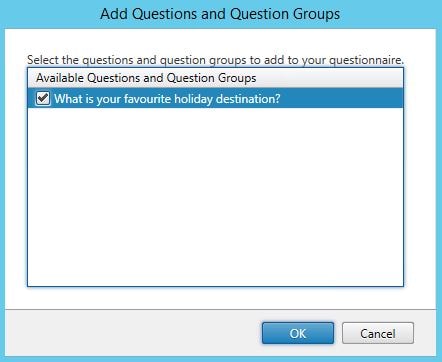
Remove any unwanted questions by highlighting a question and clicking Remove.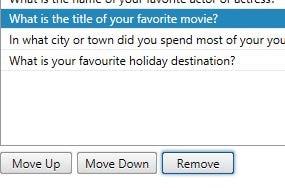
Click OK.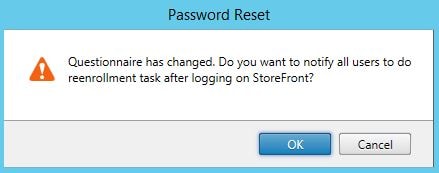
Once you are happy with how the questionnaire looks, click Finish.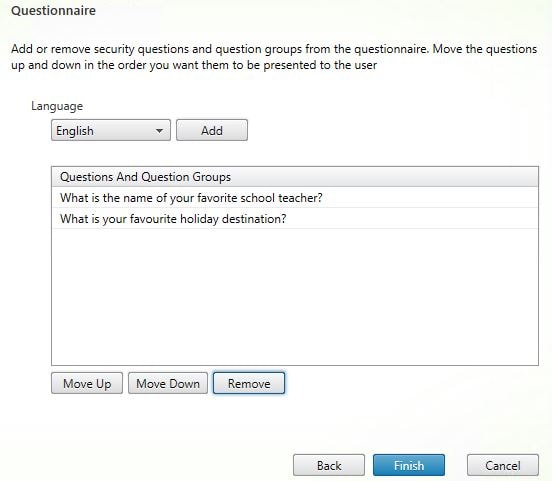
Click OK.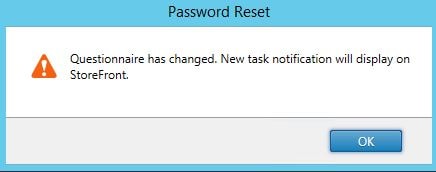
Notice Identity Verification now displays the new questions and which ones are in use (2).
The next part is to tell configure StoreFront with SSPR. Remember you need atleast StoreFront 3.7. Within the StoreFront console, choose a store and click Manage Authentication Methods.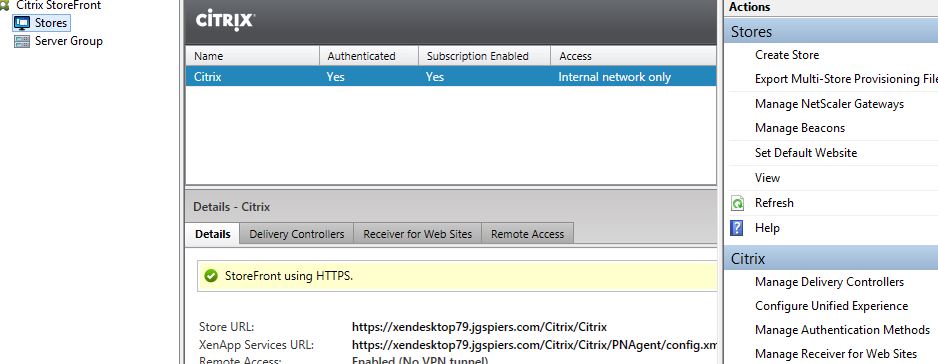
You must also specify that password changes are allowed at any time on Receiver for Web. Click the settings icon -> Manage Password Options.
Tick Allow users to change passwords and select At any time. Click OK.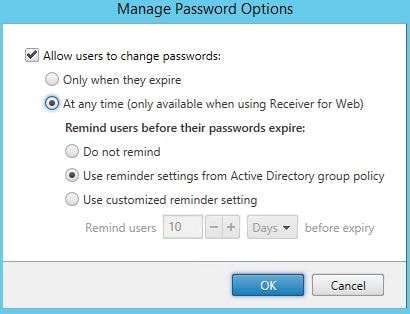
Click the settings icon again followed by Configure Account Self-Service.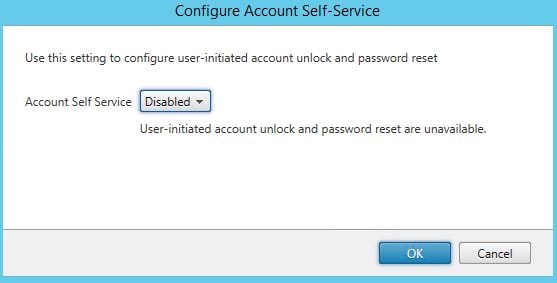
Click on the drop-down beside Account Self Service and choose Citrix SSPR. Click Configure.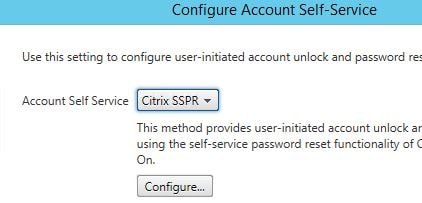
Specify to enable password reset and account unlock. Enter the SSPR Account Service URL which you had configured using the SSPR Console. Click OK.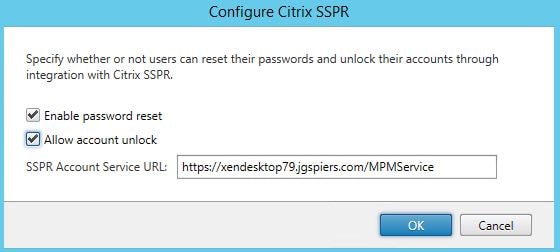
Click OK.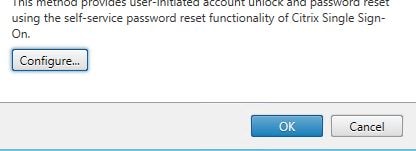
Click OK.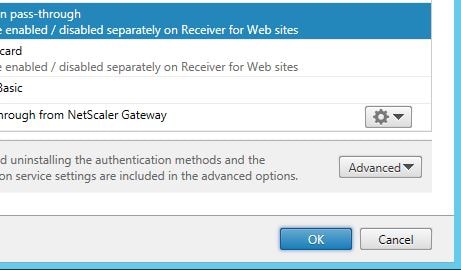
Log on to Receiver for Web using an account residing in the Users OU. Click Tasks.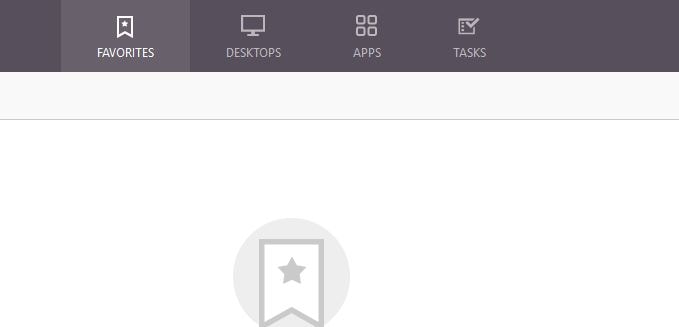
Click Start beside Manage Security Questions. This is how a user enrolls for self-service.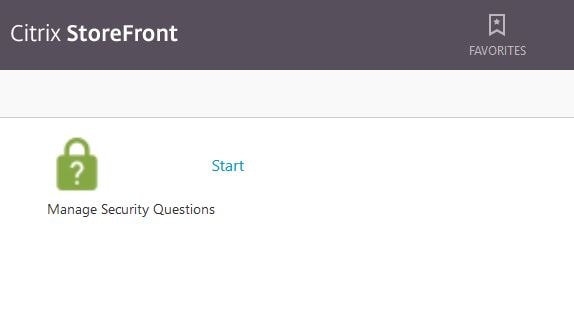
For security reasons, you must enter your domain credentials. Click Next.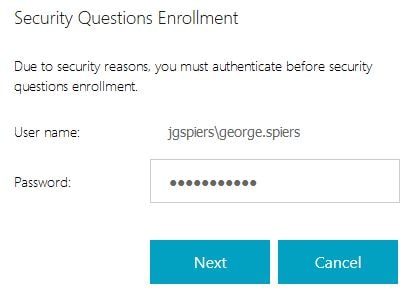
As shown, you will see the first security question that I had added to the questionnaire using the SSPR console. Enter an answer (which is masked) and click Next. Because answers are masked, you are required to confirm your answer.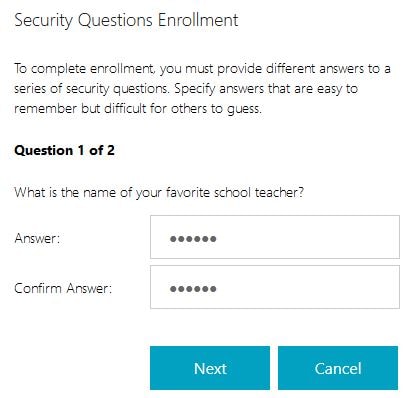
Enter your answer for question two and click Next.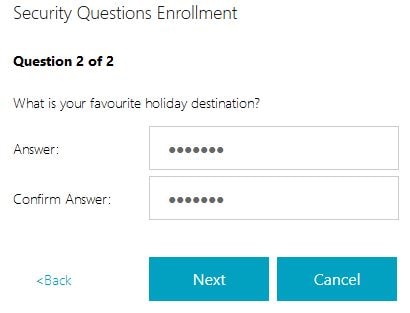
You will then be presented with a message that your answers to the security questions are registered. Click OK.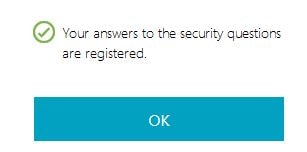
When we navigate back to Receiver for Web, notice the Account Self-Service text below Log On. This is the link you use to reset or unlock your account. Click this.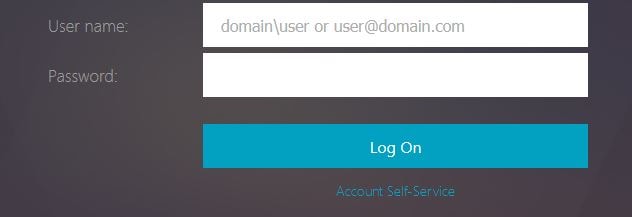
Specify a unlock your account. Click Next.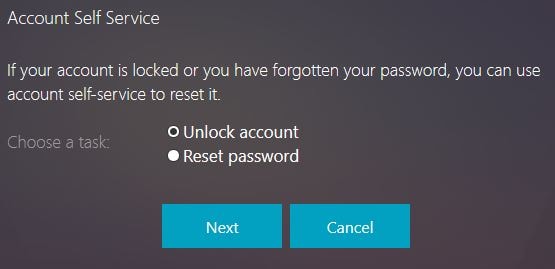
Enter the answer to the first question, the answer is the one you specified during enrollment. Click Next.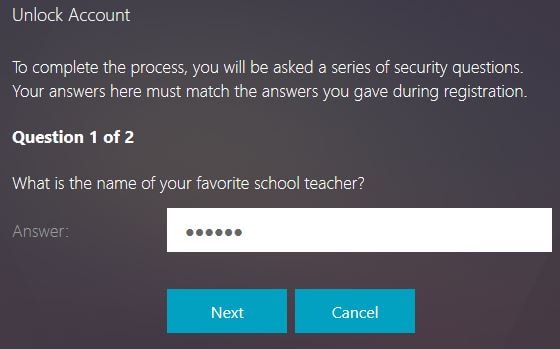
Enter the second answer. Click Next.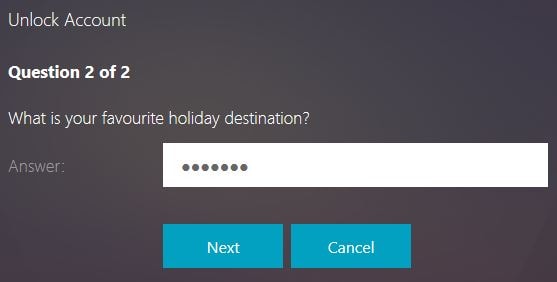
Success! Your account has now been unlocked. Click OK.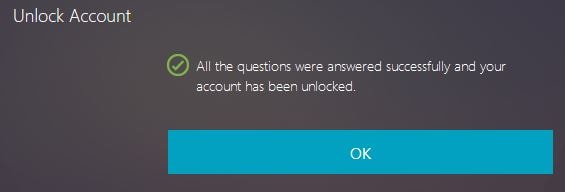
And here is a snip from the reset password function, showing that the password has been reset.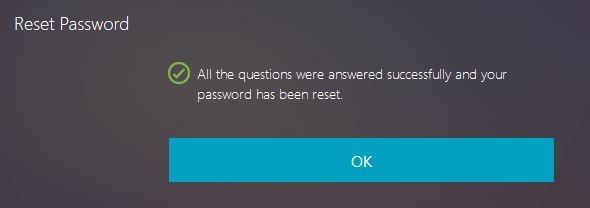
Here you can see Citrix Receiver for Windows client with the self-service section.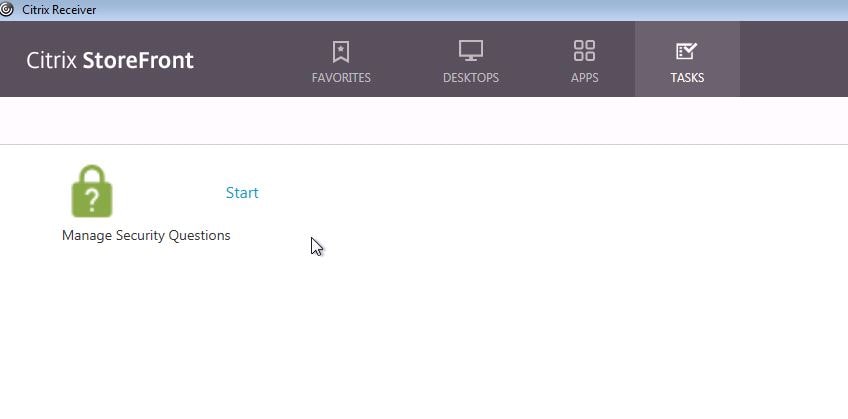 When logging on with Receiver client, the Account Self-Service link appears. Click it.
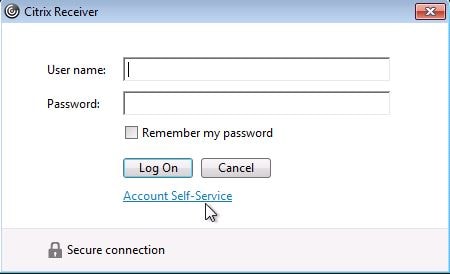
Select Unlock Account just like you did using Receiver for Web.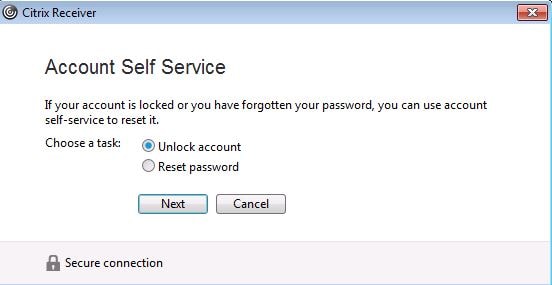
After entering the security questions, your account will become unlocked.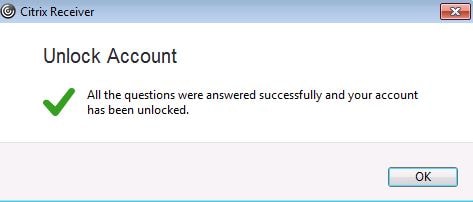
Now what if we want to revoke the security questions for a user in a scenario where they cannot remember their password or you suspect an account has been compromised. Within the SSPR console, navigate to Identity Verification -> Revoke security question registration to a user.
Click Select User and find the user using Active Directory.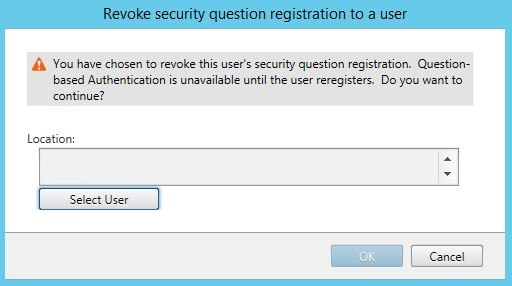
Click OK to continue with the revoke. Now the affected user will have to reregister before they are able to use the self-service functions again.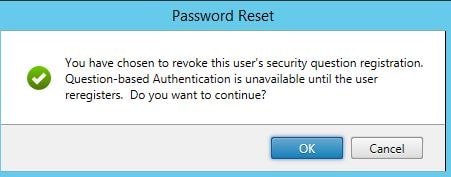
Using Securiy Question Groups allows you to group together a mixture of questions and give the end-user the ability to answer only a select few of their choice. Within Identity Verification -> Manage questions create a selection of questions of your choice then click on Create Group.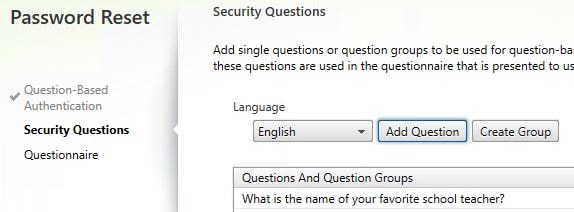
Enter a name, tick the questions you want to be part of the group and the important part is to specify the number of questions from the group that users must answer. In this scenario, the SQGroup will contain four questions but users will only need to select two. Click OK.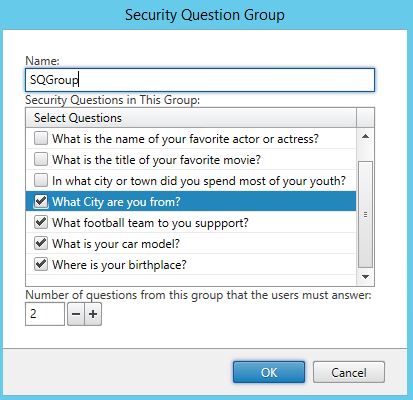
Click Next.
You cannot add a Group if there are group question members added individually to the Questions And Question Groups section. If there are any members explicitly added, remove them first. I am keeping two individual questions in the list, these questions are not part of my questions group. This means these two questions will be asked first followed by the group questions. Click Add.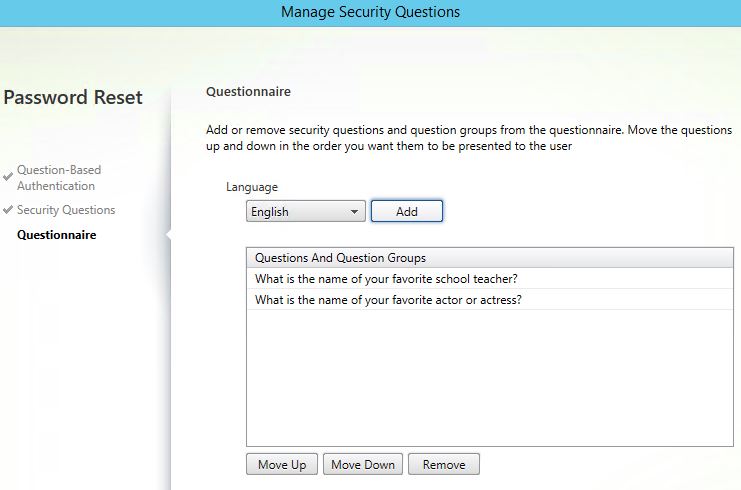
Select the Group and click Add then complete the wizard.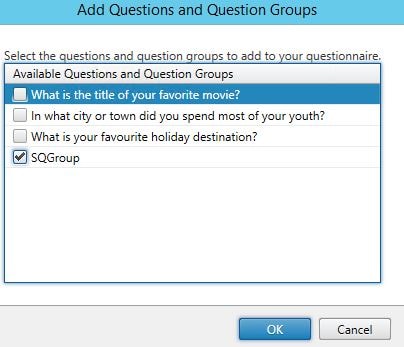
First up is the first question I left in the list. Enter an answer and click Next.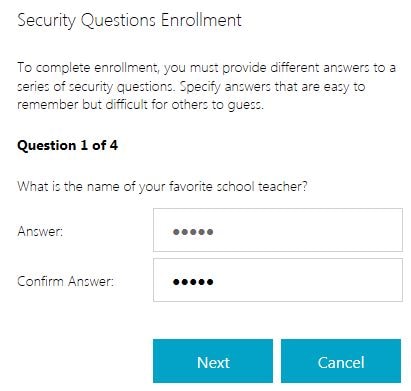
The second answer appears. Again, enter and answer and click Next.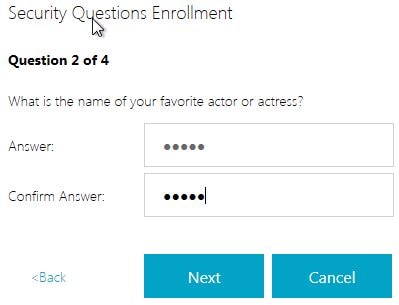
Now the Group questions appear. Users will notice a drop-down box allowing you to select one of the four questions to answer for their third question.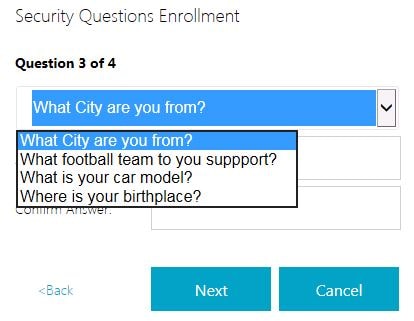
On the fourth question, the final group required question must be answered. Again this is pickable by the user. Notice there are only three left to choose from after already answering one in the previous step. If you only had a group defined within the Manage Questions wizard, only the group answers would appear. I had also left some specific mandatory single questions in the list to show you the sort options available for presenting questions to end-users.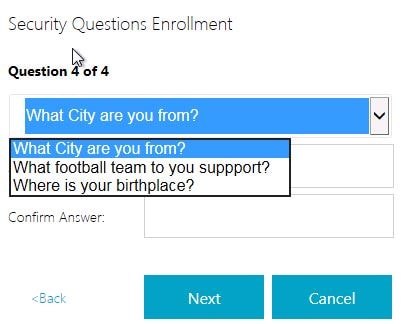
Additional notes:
- Editing a question after users have registered their answers does not force re-enrollment. However it may (depending on the edit) cause confusion to users and cause users to enter the wrong answers.
- Adding, replacing and deleting security questions does mean users are required to re-enroll before they can make use of self-service functions.
- To secure the SSPR environment communications, including Self-Service account delegation for password reset/unlock, see https://docs.citrix.com/en-us/self-service-password-reset/1-1/secure.html
- Installing SSPR 1.0 on Director (7.11) seems to break director. See https://discussions.citrix.com/topic/381184-installing-sspr-10-appears-to-have-broken-director-711-on-same-server/#entry1942081 for a workaround.
Matt
October 22, 2016I noticed SSPR does not work with UPN names. Even though it is v1.0 I am disappointed such things are not encountered by Citrix from the initial design.
Following error occurred while logging into domain :
No credentials exist to logon to ” domain.
Please check the credential provided for this domain and make sure logon user has sufficient permissions.
George Spiers
October 23, 2016Correct UPN names are not supported at this time.
Pingback: Director 7.12 – Carl Stalhood
Shane Sorensen
December 7, 2016Excellent article, great detail. Thanks for sharing this knowledge.
Pingback: Director 7.13 – Carl Stalhood
Pingback: Director 7.14 – Carl Stalhood
Pingback: Citrix Director – Digital Cloud Zone
Pingback: Director 7.15 – Carl Stalhood
Tony
November 10, 2017Great article by the way really helped me. We are having an issue however when we connect via thin OS Wyse terminal. It can take over 2 minutes to show the question when we click to reset user passwords. Have you ever seen the issue before.
thanks
George Spiers
November 10, 2017No can’t say I have. If you use a normal PC I assume it doesn’t have the delay?
Anonymous
July 26, 2018Tony,
I’m experiencing the exact same issue. I’ve done tons of captures, but can not find the problem. Were you able to resolve it? If so, how, please?
Michael
December 19, 2017Hi, is there a guide to build an HA environment, or is this not required?
George Spiers
December 19, 2017You could build a second SSPR server, and copy the Enrollment Data/Security Questions from the first SSPR server to the second. The second SSPR server is configured similar to the first, but points to its own central store. If the primary SSPR server was to fail, you could re-configure StoreFront to point towards SSPR server two.
You could probably also configure this in an Active/Active scenario using DFS to replicate the Central Store and NetScaler to load balance the SSPR URL although I’ve not tried it.
Björn
January 12, 2018Hi George, thank’s for that great posting! Do you know if there’s any possibility to remove a security question? I couldn’t find any option in console and it seems that no PoSH-CmdLets are available.
George Spiers
January 12, 2018Yes under “Identity Verification” you can manage questions and pick the questions you do or don’t want users to have to answer.
Andrew
February 1, 2018Is it possible to set a default domain so that only a username need be entered on the unlock account wizard, as opposed to domain\username. Or is it possible to edit the HTML for that page to add custom text explaining the relevant domain and format for users? Thanks
George Spiers
February 2, 2018Yes if you have just the one domain then open StoreFront, highlight your Store -> Manage Authentication Methods -> User name and Password -> click cog drop-down -> Configure Trusted Domains -> enter a Trusted Domain. If you have multiple domains, you can add a default.
David
February 14, 2018I have the my single, Trusted domain added under Auth Methods for the Store I’d like to use Account Self Service. The SSPR v1.1 still will not work unless the user enters domain\username. There are no options to configure this in the configuration console for SSPR either. Has anyone found a solution so users can simply enter their username?
Andrew
February 15, 2018Thanks George sorry I didn’t spot your reply earlier. David – your issue is the same as mine, I resolved it last night by visiting the options George mentions, we already had the single trusted domain specified but hadn’t ticked the option to show domain. Ticking that option (and propagating changes if you have 2 SF servers) shows and pre-populates the single domain field in Storefront and also in the SSPR account unlock / password reset dialogue. It doesn’t allow the user to change or remove it, so it looks idiot proof to me. We’ve made the change in production today and no issues reported.
George Spiers
February 15, 2018Thanks for the update Andrew!
Ted
February 21, 2018Thanks George it’s good article even though we want this for users who word from. does citrix stil doesn’t support a connection through Netscaler?
thx
George Spiers
February 22, 2018Hi Ted there is no support for NetScaler Gateway yet but Citrix do plan to make it available at some point.
Rupesh
April 10, 2018George, thanks for the great article. I have one doubt. So, does it mean it is not supported in 3.12.1000 version StoreFront Servers for the external users? It could be done only for the internal users?
George Spiers
April 10, 2018SSPR is not supported through NetScaler Gateway at present, so you won’t be able to use it for external users who use NS Gateway (if you use that).
Pingback: Director 7.17 – Carl Stalhood
Anonymous
March 5, 2018Our users don’t identify with “Account Self-Service,” so aren’t being attracted to the feature.
Is there a way to change the link verbiage and color? Example: “Click here to Reset/Unlock Password” and change it to the typical blue hyperlink color with an underline?
Rachel
March 5, 2018Can the verbiage and color of the Account Self Service link be changed?
George Spiers
March 9, 2018You can edit file “ExplicitFormsCommon.en.resx” under “\inetpub\wwwroot\Citrix\Authentication\App_Data\resources” replacing “Account Self-Service ” with your desired message but be careful when performing upgrades as this customisation will likely be lost.
To change the colour and font edit “style.css” under the “\custom” folder of your StoreWeb and append the following to the end of the file:
#link_selfServiceAccountManagementBtn {
color: green;
font-size:30px;
}
Eduardo
March 8, 2018Hello George, great article. I have a question, would external use be supported by Citrix NetScaler Gateway?
Thank you. regards
George Spiers
March 8, 2018Hi there is no support yet but Citrix are working on it.
Pingback: Director 7.18 – Carl Stalhood
Ryan C Deschaine
June 27, 2018Great Article!
***One thing to note is that this requires Platinum Licenses, in order to use this feature.***
Hope this helps
George Spiers
June 27, 2018Thanks Ryan, this is mentioned in the article but useful to have it in comments section too!
Anonymous
October 8, 2018Hello George, Great post and Thanks. One question though please. Are the security questions needed? My company is requesting not to configure the security questions. Thank You.
George Spiers
October 11, 2018Yes it is required. Users need to have a way of resetting their password if they forget the original password or unlocking their account.
Daniel
November 19, 2018Hello George,
do you know if there is a possibility to check which users already answered the questions ?
Thanks
Best Regards
Daniel
George Spiers
November 20, 2018Yes, if users have registered questions then a folder will be created for them under the SSPR share -> People folder.
Anonymous
November 21, 2018Hello George,
folder seems to be created also, when any other users tries to use the service.
I made a recurse search for citrix-ssosecretData-file inside the people directory.
I think in this file the answers of each user are getting saved.
Thanks for your help.
Regards
Daniel
Rudy
November 28, 2018I can’t seem to select the trusted domains. My SSPR server is in a resource domain and there is a two-way forest trust with two other domains. In user configuration association I can only browse the resource domain.
Anonymous
November 28, 2018I can’t seem to select the trusted domains. My SSPR server is in a resource domain and there is a two-way forest trust with two other domains. In user configuration I can only select the resource domain
Pingback: EUC Weekly Digest – September 24, 2016 – Carl Stalhood
daemien
December 17, 2018Hi George
Do you know if this SSPR is supported through NetScaler Gateway yet? or any time frames?
Cheers,
George Spiers
December 17, 2018Yes it supported in version 12.1.50.28+
Bob
January 14, 2019Hi George
Is there any guide to implement SSPR through NetScaler Gateway?
thx in advance…
George Spiers
January 23, 2019Sure – https://jgspiers.com/citrix-adc-self-service-password-reset/
Anurag
January 17, 2019any idea when start manage security question by user, he could not login and get error supplied password not correct even though password correct and same with which he login to Store front page.
Any idea..
George Spiers
January 25, 2019Only one user affected? Is this during question enrolment or during a password reset attempt?
german fidalgo
February 6, 2019Hi, i followed the guide but found following error prompt on the service configuration
Citrix Self-Service Password Reset
An unexpected exception was encountered:Exception:System.Security.PrincipalidentityNotMappedExc eptionMessageSome or all identity references could not be translated.Stack Trace at System.Security.Principal.NTAccount.Translate(IdentityReferenceCollect ion sourceAccounts, Type targetType, Boolean forceSuccess) at System.Security.Principal.NTAccount.Translate(Type targetType) at Citrix.PasswordManager.Service.ConfigurationLogic.CentralStoreProxyC onfig.Save() at Citrix.PasswordManager.Service.ConfigurationLogic.ServiceConfiguratio n.Save(ReportStepDelegate reportStatus) at SSPRCommonInterface.Data.Service.ServiceConfig.Save(ReportStepDele gate reportStatus) at Citrix.DeliveryServicesAdmin.SSPFtService.NewSSPRService.Model.Wizar dConfirmStatusViewMode.Save(ReportStepDelegate
George Spiers
February 7, 2019At what step does this happen, or does it happen as soon as you click “Service Configuration”?
german
February 6, 2019Hi, i followed the guide but got stuck on service configuration. I get the following error prompt when applying the settings
Citrix Self-Service Password Reset
0 An unexpected exception was encountered:Exception:System.Security.PrincipalidentityNotMappedExc eptionMessageSome or all identity references could not be translated.Stack Trace at System.Security.Principal.NTAccount.Translate(IdentityReferenceCollect ion sourceAccounts, Type targetType, Boolean forceSuccess) at System.Security.Principal.NTAccount.Translate(Type targetType) at Citrix.PasswordManager.Service.ConfigurationLogic.CentralStoreProxyC onfig.Save() at Citrix.PasswordManager.Service.ConfigurationLogic.ServiceConfiguratio n.Save(ReportStepDelegate reportStatus) at SSPRCommonInterface.Data.Service.ServiceConfig.Save(ReportStepDele gate reportStatus) at Citrix.DeliveryServicesAdmin.SSPFtService.NewSSPRService.Model.Wizar dConfirmStatusViewMode.Save(ReportStepDelegate reportStep)
OK
Michael
February 12, 2019Hi, can anyone tell me about the data volume which is expected to be used in a domain with about 2000 Users? Do I need 2 GB storage or 20 GB or much more / less?
Thanks
Michael
Loïc
June 5, 2019Hello, can I use a GMSA (Group Managed Service Account) for the self-service account ?
George Spiers
June 5, 2019Yes that should work fine.
Loïc
June 14, 2019Unfortunately this is not possible. Bellow the support team’s response
Please be informed that we cannot use a Managed Service Account as per the article you shared as either the Data Proxy Account or the Self-Service Account while configuring Self Service Password Reset. Unfortunately , the requirement is to have a domain user account for both purposes and this is by design.
George Spiers
June 16, 2019Hmmm, interesting. I’ll ask if they can include it in their documentation.
Niall Kavanagh
October 15, 2019Hi George,
Do you know of a good link that would explain how to set this up for Wyse thin clients and how they communicate with Storefront?
Thanks
Niall
George Spiers
October 15, 2019Hello.
SSPR Client support:
Citrix Workspace app for Web
Citrix Workspace app for Windows
Citrix Workspace app for Linux
If the Wyse client can utilise one of these then you should be good.
Anonymous
October 16, 2019Hi George,
Thanks for the reply. Looks like it’ll work. Wyse thin clients support SSPR:
https://www.dell.com/support/manuals/ie/en/iebsdt1/wyse-z90d7/thinos_8.6_ag/ica-self-service-password-reset?guid=guid-8cc12da8-a117-46e0-b1d5-fb7cd73e6e73&lang=en-us
Will give it a go….
Rgds,
Niall
Pingback: Director 7.16 – Carl Stalhood
Anonymous
January 29, 2021Can I install SSPR on Windows 2019 or not?
Pingback: Citrix Self Service Portal - Find Official Portal
Tee
August 16, 2021Citrix SSPR works perfectly fine, except the Font Size of “Start” while registering for Security Questions is Extra Small.